The Nexus needs a resource-producing outpost, but Eos is the only planet in range. As the only Pathfinder, you have been asked to achieve the impossible: find a way to settle Eos and give the Initiative the foothold it needs. Director Tann has committed the resources for a last-ditch effort, including a ship and support team for the Pathfinder. This is the fourth primary ops mission in Mass Effect: Andromeda.
Acquisition
This mission is acquired immediately upon completion of Nexus Reunion.
Walkthrough
Speak with SAM on the Hyperion
Use the tram to return to the habitation deck of the Hyperion and head to the SAM Node. Activate the terminal in the SAM node to learn more about Ryder's connection to SAM and the modifications that Alec Ryder made to SAM to enhance his own abilities. The allies and relationships mission Ryder Family Secrets is automatically started, speak to SAM again to learn more.
Go to Your Ship
Feel free to explore Alec's former quarters, now your own personal room, as SAM suggested. The first memory trigger for the recently started relationship mission can be found here, as well as a model of the SSV Normandy SR-2. Access audio logs for insight into the Initiative and a few words from Liara T'Soni. You can also make a quick stop at the Cryo Bay to check on your sibling and pick up a side mission, Task: Lost Brother. Return to the tram to reach your new scout ship, the Tempest (+270XP)

Ryder and Cora enjoy a breathtaking view of the their new ship. Vetra Nyx, one of your new crew, will help acquaint Ryder with all the sections of the ship. Once the cutscene has ended, your objective is to head to the bridge to begin your trip. Feel free to explore the ship a bit before heading out, though most of the crew are too busy readying the ship to talk to Ryder.
Tip: Ryder should check in with all of the crew throughout the priority ops missions. Crew members will usually have new conversation options after the completion of a priority op.
Go to the Bridge
Upon entering the bridge Ryder meets Kallo Jath, the ship's pilot, who will explain the navigational controls and make ready for departure from the Nexus. Give a short speech and Kallo will take the ship out.
Go to Eos
Use the Galaxy Map to travel to Eos. Landing on Eos will gain you 2 ![]() .
.
Tip: This is a good opportunity to familiarize yourself with planet scanning and begin working towards completing Task: The Model of the Spheres.
Clear Atmospheric Radiation
Previous attempts to colonize Eos failed due to the high radiation levels. However, the crew recognizes a signal like that found on Habitat 7; if similar alien technology exists on Eos, Ryder may be able to use it to improve the planet's conditions and make it viable for settlement.
Warning: Many exploration opportunities are omitted in this walkthrough. Refer to the main Eos article for specific locations of minerals, research data, datapads, etc.
- Main article: Eos

Search Site 1's Main Control Building
The first step is restoring power to the abandoned outpost so that a thorough scan of the area can be completed and the source of the atmospheric disturbance can be located. Head towards the objective marker; the door to the control center is receiving emergency power, but it requires a code to open.
Find a Code
The codes are located on a datapad in a nearby structure marked by an objective marker. Retrieve them and return to the control center door. Returning to the control center, Ryder finds that there is a manual override at a nearby relay station that is preventing the power from coming online.
Investigate the Power Relay Station
Follow the objective marker to the power relay on the eastern ridge. Upon using the console beside the door on the second floor, you will be "greeted" by Clancy Arquist, a salvager who has taken up temporary residence there. It appears that Clancy is responsible for the signs of recent illicit activity at the site. He won't let you into the relay station just yet, but he agrees to let you turn on some of the generators to get the antenna online to locate the source of the remnant signal. He warns Ryder, however, that doing so will attract the attention of kett patrols.
Activate the Generators
When you attempt to activate the first pylon, you will discover that it requires a bit of repair. Scan it (20 ![]() ) to determine an interface location, then use that to get it activated. Repeat the process for the second pylon.
) to determine an interface location, then use that to get it activated. Repeat the process for the second pylon.
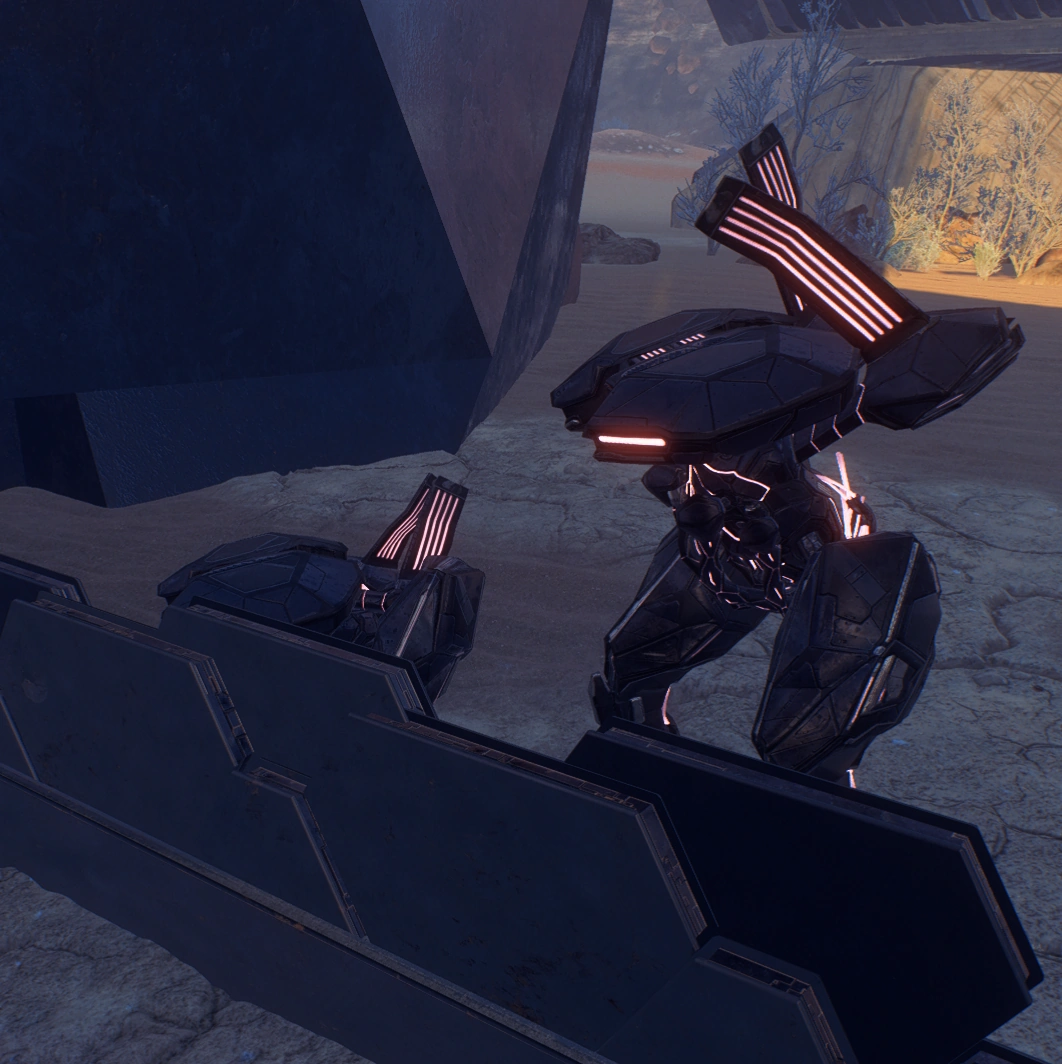
Defeat the Kett
Upon fixing the second pylon, a drop ship will deliver group of up to six kett Chosen. Defeating them shouldn't pose much of a challenge (+69XP).
Activate the Relay Station
Return to Clancy and speak to him to get information about where to find a vehicle. After he leaves, use the console at the back of the room to reactive the power relay station (73 ![]() and +5% Eos viability). Once power is restored, you will be able to access the surrounding buildings. In some of the now unlocked buildings, SAM is able to reconstruct a recorded conversation from the former human settler inhabitants revealed by scanning, each conversation revealed gives +270 XP. Additionally, a now unlocked building nearby the next objective marker is a research center. Investigate the research center to begin, Task: Research Center Development.
and +5% Eos viability). Once power is restored, you will be able to access the surrounding buildings. In some of the now unlocked buildings, SAM is able to reconstruct a recorded conversation from the former human settler inhabitants revealed by scanning, each conversation revealed gives +270 XP. Additionally, a now unlocked building nearby the next objective marker is a research center. Investigate the research center to begin, Task: Research Center Development.
Tip: When returning to Clancy, asking him if he trades salvage will give you access to some supplies; advising him to "get to a safe location" will not allow you to trade immediately, although he can later be found next to a shuttle in Site 1: Promise as a merchant.
Find a Vehicle
Follow the objective marker to a large container with a small access panel. Scan the container to discover that it contains the Nomad, but must be opened with a code from a Forward Station. Approach the new objective marker and the Forward Station will automatically descend. After SAM has automatically downloaded the access code, head back to the panel on the container to get access to your new vehicle.
Investigate Strange Signal
Once you're acquainted with the Nomad's controls, follow the path toward the new objective marker. Ryder will likely find some small hostile creatures while traveling to the objective, these can mostly be ignored and can be killed by driving over them with the Nomad. Just before entering the radiation shield on the north side of the road is a deposit of element zero.
Tip: Enroute to the objective you will pass a memory trigger, part of the mission Ryder Family Secrets.
You will arrive at an unusual structure. Once you're past the radiation shield, you can exit the Nomad and roam about on foot. A nearby platinum deposit (10 ![]() ), a scattering of remnant coolant tanks (10
), a scattering of remnant coolant tanks (10 ![]() ), a Nexus shuttle (10
), a Nexus shuttle (10 ![]() ), and a scourge tendril (10
), and a scourge tendril (10![]() ) that can be scanned. At the center, you will find a console, but attempting to interface will introduce a key mechanic: you must use your scanner to follow hidden cables radiating from the console. In this case, there is only one cable, so follow it with your scanner. Climb up the structure with the cable, then use your scanner again to read a glyph at the top. There are two Initiative scanners on top of the structure as well; scanning them will give 10
) that can be scanned. At the center, you will find a console, but attempting to interface will introduce a key mechanic: you must use your scanner to follow hidden cables radiating from the console. In this case, there is only one cable, so follow it with your scanner. Climb up the structure with the cable, then use your scanner again to read a glyph at the top. There are two Initiative scanners on top of the structure as well; scanning them will give 10 ![]() . Once it is scanned, you may return to the central console and interface to trigger a cutscene, wherein you meet Peebee. After the cutscene, your group is attacked by a group of assemblers and an observer.
. Once it is scanned, you may return to the central console and interface to trigger a cutscene, wherein you meet Peebee. After the cutscene, your group is attacked by a group of assemblers and an observer.
Note: There is a colonist's body for Task: Naming the Dead located along the Nomad path nearby.
Activate Remnant Monoliths
Next, you must travel in the Nomad to the two other monoliths, in whichever order you choose, where you will need to perform a similar routine.
Western Monolith
Upon arrival, you will be greeted by a small platoon of remnant bots; defeat them to proceed. This time, there are two cables, use your scanner to follow them. Each one will pass by a smaller remnant console; use it to raise several pillars and provide a method of reaching the glyph at the end of the cable.
Once both glyphs are scanned, return to the central console to interface. However, this time, additional encryption will require you to solve a Sudoku-like puzzle in order to activate the monolith. If you found a Remnant Decryption Key on your travels, you may use it to bypass the puzzle, but it might be worth holding onto instead, until you can sell it to a merchant -- they are quite valuable. Complete the puzzle for +270XP.
Somehow, the kett are following your every move, and as soon as you activate the monolith, they send a few kett Anointed and squad of Chosen to attack you. Fight them off (+244XP), explore if you wish, and climb back into the car. There are a few remnant scannable items in the area (20 ![]() ). There's also a datapad with a voice recording of the former settlers' plans to use the remnant technology.
). There's also a datapad with a voice recording of the former settlers' plans to use the remnant technology.
Note: Check just south of the control panel for a group of bodies, one is a body of a colonist needed to complete Task: Naming the Dead.
Southern Monolith
This monolith is heavily guarded by kett. Battle your way through them and the two sets of reinforcements (total of +366XP when all kett are defeated), then follow the objective marker to a power generator. Deactivating the generator will disable the shield and trigger a cutscene in which you meet Drack, an old krogan with an apparent penchant for dramatic entrances. Be sure to check the whole base for loot and scannable items; there are a couple of kett core encryption tech that award 100 ![]() each.
each.
Inspect the room Drack came from for some disturbing intel and a body for Task: Naming the Dead. Scan the two artifact crates for 10 ![]() each, then go on to the objective marker, where two more glyphs await you. There isn't much of a trick to this one, nobody ambushes you afterwards and you're awarded +270 XP and 73
each, then go on to the objective marker, where two more glyphs await you. There isn't much of a trick to this one, nobody ambushes you afterwards and you're awarded +270 XP and 73 ![]() .
.
Investigate the Entrance
Activating the triad of monoliths will reveal a secret Remnant Vault for you to explore, as well as establish a common pattern throughout the game. Follow the new navpoint to an island in the middle of the lake. Climb out of the Nomad and activate a console near the shore, which will conjure a magical bridge. You may cross to the island by foot or car, but you'll need to walk into the Vault.
Tip: Boldly leaping across the lake without a bridge may be heroic, but will not trigger the Vault's opening protocol, so stick to using the magical bridge.
Explore the Remnant Vault
- Main article: Remnant Vault: Eos
Note: Once a Vault is activated, you cannot return later to collect missed resources. The following describes the most direct route, but omits valuable opportunities; refer to the main article for a detailed walkthrough.
Peebee will be waiting for you outside the Vault, insistent on joining you for the adventure. Open the door to trigger a cutscene and send you into the Vault's mysterious depths.
After jumping into the gravity well, follow the navpoint to the power console. This will open up a door to a passageway with another console. Wait for the dialogue to finish before attempting to open the next door. At this point, Peebee will decide to split up: you fix the vault; she'll investigate the relic. The Task: Remnant Data Cores will be automatically given after the cutscene. Fight your way through some remnant forces to reach the objective marker in the last room, where you will need to interface with two consoles to activate a gravity well. Take the gravity well down to the second level of the Vault.
You will arrive in a room with a broken console. Scan the console to identify a leak, then wait for a discussion over the comms, whereafter Peebee enables your omni-tool to repair it. Interact with the leak to fix it, then interface with the console to open the door. In the next room, use the first console to get across to the tree. Use the console on that platform, then jump to the area on your left. Defeat the remnant and activate the console there. Return to the tree, and the pathway to the right should now be accessible. Head over there, use the next console to get to the next platform, defeat the remnant forces, and use yet another console to activate a bridge. Cross the bridge and head into the door on your right to get to the heart of the vault. From there, activate the final console and escape the purification field. After escaping the vault you will receive +1330 XP, 1150 ![]() , and +50% Eos viability.
, and +50% Eos viability.
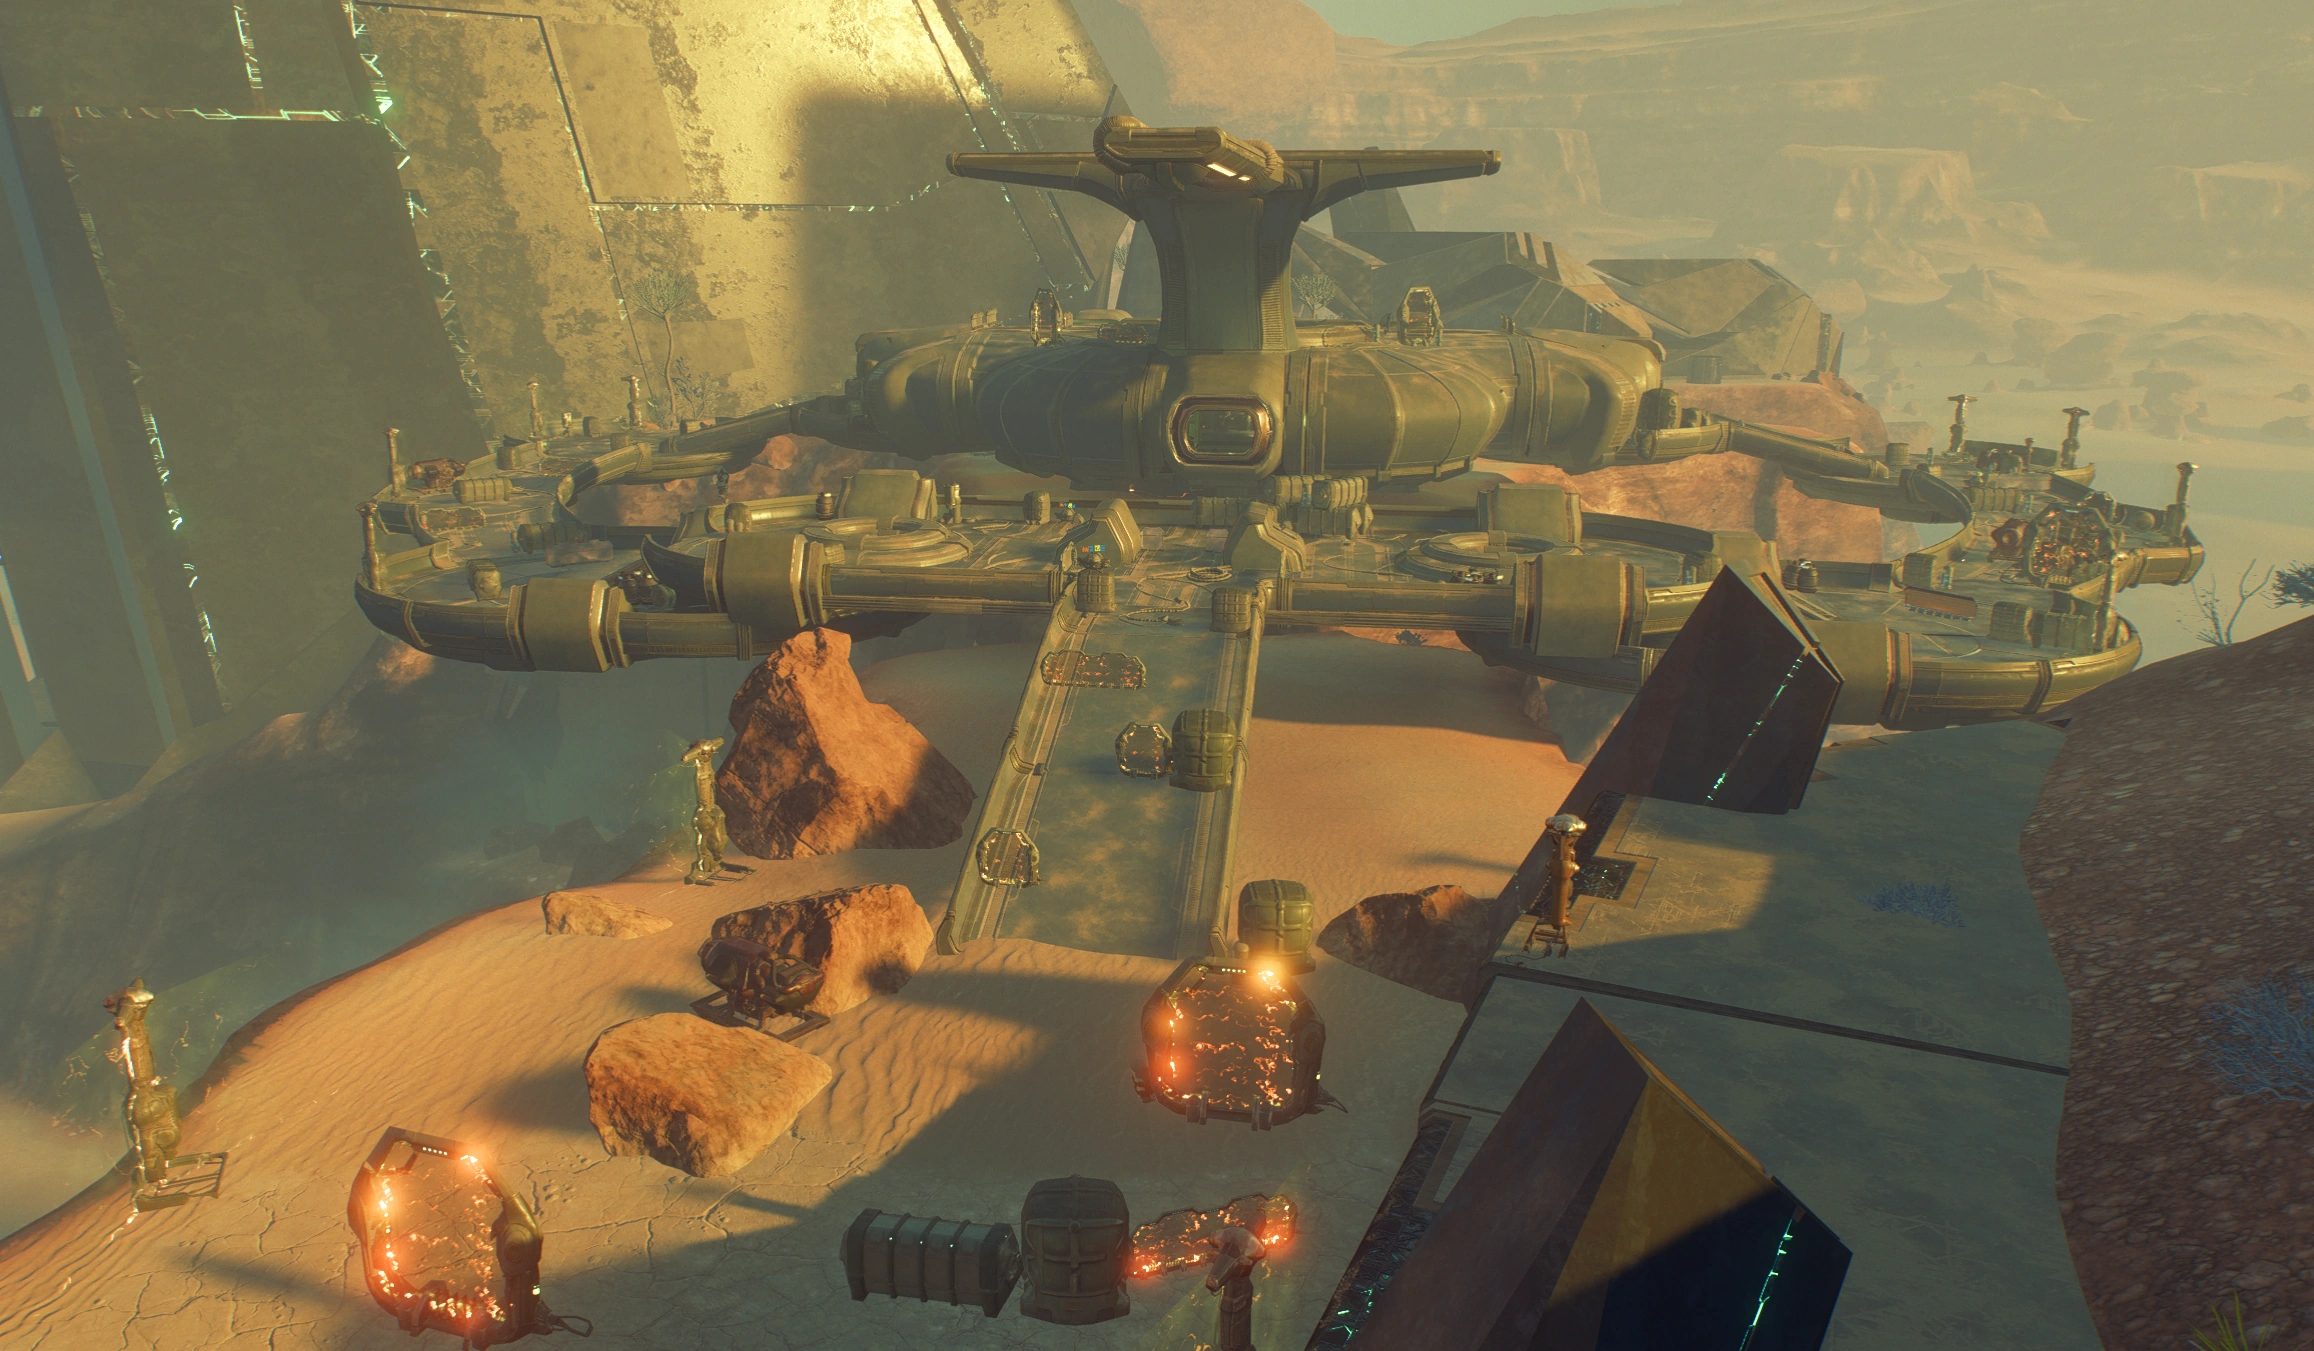
Establish an Outpost
Use the Nomad to travel to the objective location. If you activated the forward station near the southern monolith, you can use it to fast travel very near to the site. Upon approach, Ryder spots Drack in battle against a kett platoon. Drive over and exit the vehicle to help him fight them off (+520XP). Drack revises his opinion of Ryder after being impressed by their combat abilities, and decides to join the crew.
After talking to Drack, interact with the outpost beacon to initiate the settlement procedure. You will be faced with an important decision about the nature of the new outpost: should it have a scientific or a military focus? Note that you do not make this decision for each individual outpost, only this one. Whatever you choose will become the focus of all future outposts. Either decision will please some and upset others.
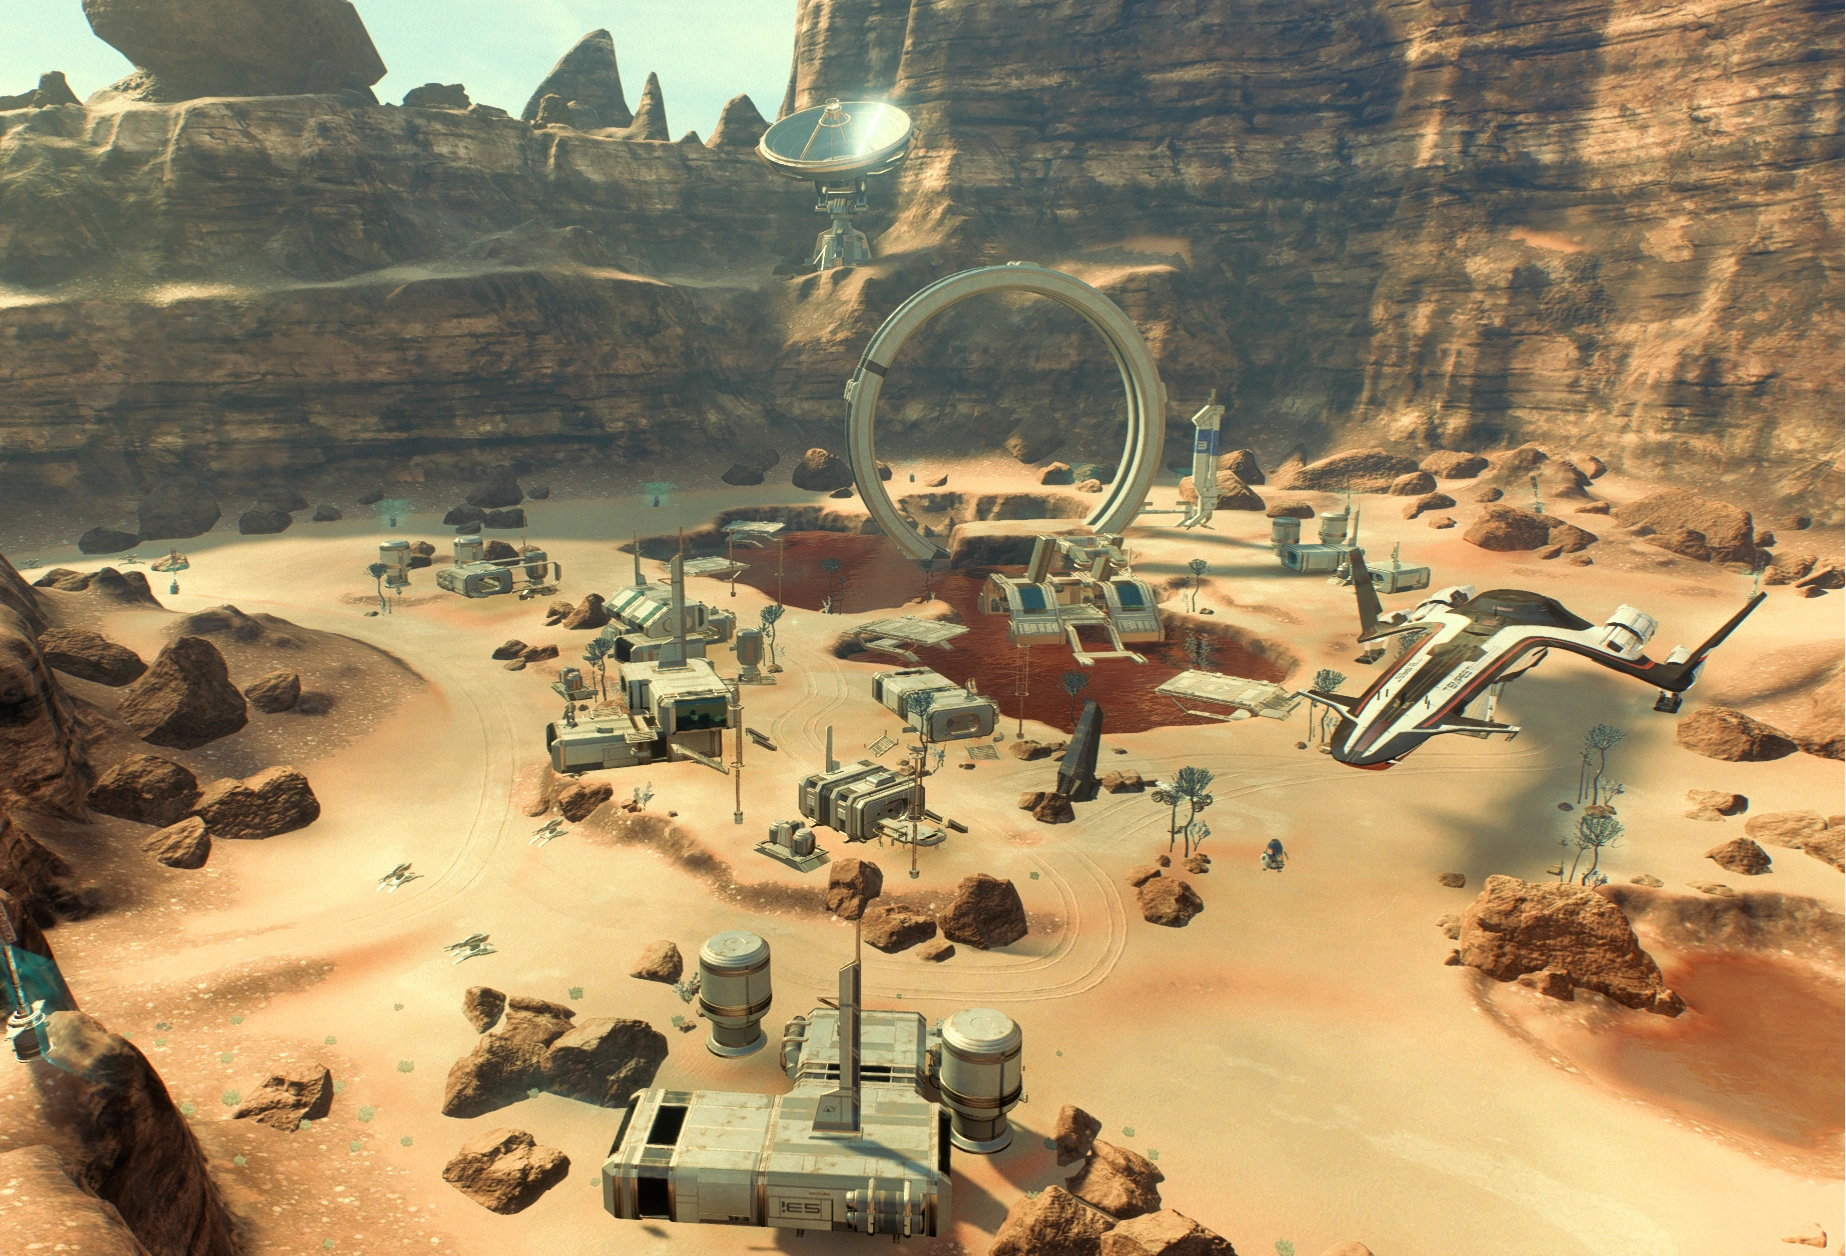
Once you decide, shuttles begin bringing colonists down to the surface, and many prefab buildings are deployed. August Bradley is assigned as the mayor of the new settlement, which the inhabitants call Prodromos, meaning "Forerunner". Addison promptly takes you aside to discuss the situation. After a few ambiguous compliments and reprimands, she departs for the Nexus, leaving you overlooking the home you just made possible. Feel free to head down to explore and socialize. When you're ready, return to the Tempest. Setting up the outpost will award 300 ![]() and +10% Eos viability.
and +10% Eos viability.
Tip: Even though you can drive around Eos, many areas are inaccessible due to lethal radiation levels. It is recommended that you rather return once the radiation has cleared. Eos is cleared and the radiation gone after you have visited Aya for the first time during A Trail of Hope. Just go to Aya directly after "A Better Beginning" has completed, and then return to Eos (verified after the release of patch 1.10).
Speak with Tann
On the Tempest, after a quick introductory meeting for your two new members, you'll have free reign of the ship. Take the opportunity to get to know your crew, who are no longer too busy to talk. Use the email terminal to pick up some side missions. When you're ready, use the Galaxy Map to travel back to the Nexus, greet the welcoming committee, then take a tram from the Docking Bay to Operations.
Enter the door to the Pathfinder HQ to discover that it has been transformed from a storage closet into a large office and meeting room. A discussion with Tann and other Nexus leaders will automatically ensue; whether you navigate the politically charged conversation carefully or not, in either case Tann will send Ryder out to continue along the lead discovered in the first vault.
Aftermath
Ryder has taken command of the Tempest and is falling into the role of Pathfinder. Eos, after two failed former attempts at settlement, has finally been deemed viable, and Ryder has founded the Prodromos colony, governed by Mayor August Bradley. The colony's focus was determined by the Pathfinder, and the standard has been set for the whole Initiative going forward.
The consequences of your decision between a scientific or military focus for the first colony has minor effects on dialogue and which members of the Nexus leadership are supportive, there are no major plot changes because of this choice however.
If you choose for a Military Focus, a squad from Prodromos will help in the final battle.
- New squad members
Next Steps
- Finishing the meeting will complete this mission, and automatically lead to the next priority op, A Trail of Hope.
- You can now optionally visit your sibling in the Cryo Bay for the mission Ryder Family Secrets if you haven't already started it.
- You can now find Keri T'Vessa outside the Pathfinder HQ, an asari journalist, and potential love interest, linked to Task: Path of a Hero.
- Ryder will remind you to speak to Addison about mission AVP Cryo Deployment Perks, even if it has already been completed.
Mission Rewards
- 1400 XP
- Earned for activating the vault: +1330 XP, 1150
 , and +50% Eos viability.
 - Earned for establishing the outpost: 300 and +10% Eos viability.
Enemies
Wildlife
Kett
Remnant
| ← Previous Mission | Mission Index | Next Mission → |
|---|---|---|
| Nexus Reunion | Missions (Mass Effect: Andromeda) | A Trail of Hope |