m (formatting; carriage returns to break up wall of text into paragraphs, moved Death Choir image again) |
No edit summary |
||
| (72 intermediate revisions by 6 users not shown) | |||
| Line 1: | Line 1: | ||
| − | [[File:ME2 plot - collector ship.png|340px|right|Collector ship innards]] |
+ | [[File:ME2 plot - collector ship.png|340px|right|Collector ship innards]] |
| + | A [[Collector]] vessel has been found floating adrift, evidently damaged by a turian patrol. This is a rare chance to examine Collector technology. |
||
| − | {{see|Stop the Collectors}} |
||
== Acquisition == |
== Acquisition == |
||
The true nature of the trigger for this mission is not fully understood, as there are a few reports of players completing more than five missions before triggering this mission, but it usually works like this: |
The true nature of the trigger for this mission is not fully understood, as there are a few reports of players completing more than five missions before triggering this mission, but it usually works like this: |
||
| − | * |
+ | *After the [[Horizon (mission)|mission on Horizon]], a five-mission countdown begins, after which Shepard will be unable to access the Galaxy Map and instead must report to the briefing room to speak with the [[Illusive Man]], who will dispatch Shepard to investigate a disabled [[Collector Cruiser]]. At that point completing the mission becomes the only way forward. |
| − | * |
+ | *Even N7 assignments (e.g. "anomalies") count as a mission, so pick your five missions carefully. |
| − | * |
+ | *If the fifth mission is one of the two [[Missions#Loyalty missions|loyalty missions]] on [[Tuchanka]] or the [[Citadel]], you can complete the other one before returning to the [[Normandy SR-2]]. Because of the order and tempo with which loyalty missions are acquired, the second Citadel mission will only become available in time if you leave Grunt in his tank. |
| − | * |
+ | *Finally, it is possible to complete Miranda's loyalty mission fifth and then recruit Thane or Samara or complete [[Lair of the Shadow Broker (mission)|Lair of the Shadow Broker]] as an extra mission, but only if Jack's loyalty mission has not yet been completed (because while Miranda's mission normally ends back on Ilium, if Jack is loyal then Shepard returns immediately to the Normandy for their argument). |
| − | * |
+ | *This mission will not trigger until eight [[Squad Members Guide (Mass Effect 2)|squad members]] have been recruited, and indeed the official Prima Publishing Collector's Edition guide states explicitly (p. 114) that the story will not advance without eight squad members. Grunt does not count as a squad member until he is awakened from his tank. The addition of Kasumi and Zaeed in DLC packs, along with the ease of recruiting them, tends to make this condition moot for many players unless they delay waking Grunt. |
{{Note}} Though you'll have no choice but to complete this mission once it appears, any other missions that you didn't get to by this point can still be done afterwards. |
{{Note}} Though you'll have no choice but to complete this mission once it appears, any other missions that you didn't get to by this point can still be done afterwards. |
||
== Preparation == |
== Preparation == |
||
| + | [[File:TIM the nicotine addict.png|340px|right|Must be nice living in a future where lung cancer is a joke]] |
||
| ⚫ | If you have a hard time with this mission, arguably the most difficult in the game for the level you are when you reach it, one strategic way to prepare for it is to do as many missions as possible before undertaking it, and you must plan for this well before [[Horizon (mission)#Acquisition|Horizon]]: do as many side assignments as possible, and all of the available DLC missions before completing the recruitment of all four of Mordin, Jack, Grunt, and Garrus. Then, following Horizon do four missions |
||
| + | This is the next major step of the overarching [[Stop the Collectors]] mission, and is also unavoidable like the Horizon mission once the requisite triggers above have been fulfilled. Most preparation should therefore be done in anticipation at least one mission/assignment before this one as you will transport directly to the mission level after the mission briefing with the Illusive Man. |
||
| + | |||
| ⚫ | If you have a hard time with this mission, arguably the most difficult in the game for the level you are when you reach it, one strategic way to prepare for it is to do as many missions as possible before undertaking it, and you must plan for this well before [[Horizon (mission)#Acquisition|Horizon]]: do as many side assignments as possible, and all of the available DLC missions before completing the recruitment of all four of [[Mordin]], [[Jack]], [[Grunt]], and [[Garrus]]. Then, following Horizon do four missions, perhaps including [[Lair of the Shadow Broker (mission)|Lair of the Shadow Broker]] for its substantial rewards, and then go to [[Tuchanka]] and stay for both Mordin and Grunt's loyalty missions without returning to the Normandy thus getting an extra mission on the clock. Planning this way ensures that you reach this mission at the highest possible level with the most possible abilities and upgrades. |
||
| + | |||
| ⚫ | However, there is a countervailing approach: the special weapon or extra weapon training you get at the beginning of this mission can be a huge power spike especially for the [[Classes|classes]] normally limited to only pistols and SMGs, so you may want to consider rushing to the Collector ship to unlock the new weapon training as soon as possible. This can be accomplished in the following way: |
||
| ⚫ | However, there is a countervailing approach: the special weapon or extra weapon training you get at the beginning of this mission can be a huge power spike especially for the [[Classes|classes]] normally limited to only pistols and SMGs, so you may want to consider |
||
*Recruit all four of Mordin, Jack, Grunt and Garrus as soon as the recruitment missions become available without completing any other missions. |
*Recruit all four of Mordin, Jack, Grunt and Garrus as soon as the recruitment missions become available without completing any other missions. |
||
*Complete the [[Horizon (mission)|mission on Horizon]]. |
*Complete the [[Horizon (mission)|mission on Horizon]]. |
||
*Complete 5 of the missions within the [[Firewalker Pack]] and/or [[Normandy Crash Site]] free DLC, which involve virtually no infantry combat. |
*Complete 5 of the missions within the [[Firewalker Pack]] and/or [[Normandy Crash Site]] free DLC, which involve virtually no infantry combat. |
||
| − | The above will get you to the Collector ship to get the special weapon or training and have it available for as many other missions as possible. Choosing this path will make this |
+ | The above will get you to the Collector ship to get the special weapon or training and have it available for as many other missions as possible. Choosing this path will make this challenging mission even harder, but the weapon training is unlocked prior to the combat sections so you will at least gain its benefit for the fight. |
| − | One research upgrade in particular deserves special recommendation to obtain prior to this mission as it only becomes available post-Horizon: the Hard Shields [[Research#Shield Upgrades|research]]. |
+ | One research upgrade in particular deserves special recommendation to obtain prior to this mission as it only becomes available post-Horizon: the Hard Shields [[Research#Shield Upgrades|research]]. Unlocked only after obtaining three [[Upgrade Guide#Shield Upgrades|Damage Protection]] upgrades, Hard Shields will reduce damage to your shield/barrier by 20% which makes a very noticeable difference in your toughness during this mission. |
| + | [[File:CollectorShipApproachLE2.png|340px|right|Alliance frigate shown for scale]] |
||
| − | You will be facing a lot of barriers and armor, making [[Warp Ammo]] the most effective ammo ability in general, with [[Armor-Piercing Ammo]] and [[Incendiary Ammo]] as good followup choices both of which are more damaging to armor and health but not barriers. Incendiary Ammo can be particularly useful for its crowd control properties as most enemies will flail around briefly when ignited preventing them from attacking you. Bringing a loyal [[Jack]] as a squadmate with her Warp Ammo upgraded to be shared with the squad is one of only two ways to obtain Warp Ammo, the other is to train it as a bonus power for Shepard. In terms of damage powers, [[Warp]] is effective against both barriers and armor, as is [[Reave]]. The abundance of "bottomless" pits in the mission architecture makes physics-based attacks useful: [[Throw]], [[Concussive Shot]] etc. can dispatch clumps of enemies with minimal ammo use given a nudge in the right direction. The [[M-100 Grenade Launcher]] also has a large force component to its shots that is capable of blasting enemies to their deaths. [[Flashbang Grenade]] is an invaluable power to have available for this mission for the same reason as on Horizon: it can disable the attacks of a [[Harbinger (Collector)|familiar foe]]. It can be obtained either as a bonus power or by bringing along a loyal [[Kasumi Goto|Kasumi]]. Either way, having it at a high level for a long duration of effect is advisable. |
||
| + | You will be facing a lot of barriers and armor, making [[Warp Ammo]] ([[Jack]]) the most effective ammo ability in general, with [[Armor-Piercing Ammo]] ([[Garrus Vakarian|Garrus]]) and [[Incendiary Ammo]] ([[Grunt]] or [[Jacob]]) as good follow-up choices both of which are more damaging to armor and health but not barriers. Incendiary Ammo can be particularly useful for its crowd-control properties as most enemies will flail around briefly when ignited preventing them from attacking you. |
||
| − | In terms of |
+ | In terms of damage powers, [[Warp]] ([[Miranda]] or [[Thane]]) is effective against both barriers and armor, as is [[Reave]] ([[Samara]]). If you want to have Reave available from Samara, you must have already [[Samara: The Ardat-Yakshi|gained her loyalty]] to unlock it, and this is only possible if you '''both''' (1) [[Dossier: The Justicar|recruited her]] prior to this mission '''and''' (2) you left Grunt sealed in his tank. |
| + | The abundance of "bottomless" pits in the mission architecture makes physics-based attacks such as [[Throw]] (Thane and Samara), [[Concussive Shot]] (Garrus, Grunt and [[Zaeed Massani|Zaeed]]) useful as they can dispatch clumps of enemies with minimal ammo use if given a nudge in the right direction. [[Flashbang Grenade]] ([[Kasumi Goto|Kasumi]]) is an invaluable power to have available for this mission for the same reason as on Horizon: it can disable attacks by [[Harbinger (Collector)|a Harbinger-possessed Collector]]. |
||
| − | In terms of heavy weapons, the [[M-622 Avalanche]] is recommended as it can inflict high damage in a large area, possesses generous ammo capacity, and has long-lasting disabling effects. The [[M-100 Grenade Launcher|Grenade Launcher]] and the [[Arc Projector]] are passable alternatives. |
||
| + | |||
| + | In terms of bonus powers for Shepard, choosing [[Barrier]] or one of its [[Geth Shield Boost|sister]] [[Fortification|powers]] will increase your ability to absorb hits and allow you to instantly re-raise your shields when they go down, both of which are invaluable in key encounters. [[Stasis]] can be useful because there will be at least one opportunity to "one shot" a heavy hitter with it during a key battle, though be forewarned it does '''not work''' on Harbinger. |
||
| + | |||
| + | In terms of [[heavy weapons]], the [[M-622 Avalanche]] is recommended as it can inflict high damage in a large area, possesses generous ammo capacity, and has long-lasting disabling effects. The [[M-490 Blackstorm]] can also be quite effective as the projectiles can stun enemies repeatedly in a large area and both the damage and crowd-control effects penetrate cover, perfect for the irregular terrain you'll be facing in some fights. The [[M-100 Grenade Launcher]] has a large force component to its shots that is capable of blasting enemies to their deaths. The [[Arc Projector]] is useful for stunning and damaging clustered enemies. |
||
== Walkthrough == |
== Walkthrough == |
||
=== Cruiser Entrance === |
=== Cruiser Entrance === |
||
| + | [[File:EDIGeneticAnalysisLE2.png|left|340px|EDI reports results of the Collectors' experiments]] |
||
| − | + | This mission is one of the most linear in the entire game. Start moving down the open hallway, and EDI will comment that the ship's signatures match those of the Collector Vessel that attacked Horizon. There is no need to worry about any enemies for a while yet so just keep moving forward. Upon arriving at a bend in the passage you encounter a pod where your squadmates will make some comments. Keep moving down the hall until you reach a pile of dead bodies where you can earn some morality points depending on your dialogue choice. Continue down the tunnel until you reach some salvageable Collector Technology (+7500 credits) on the right. Salvage it and move up to get the med-kit with [[medi-gel]]. Up ahead is a Control Terminal next to the body of a dead Collector in a pod. {{note|Caution:}} A close approach will select the Control Terminal automatically. |
|
| + | {{note|Tip:}} It is '''strongly''' recommended that you create a save point here that you don't overwrite before selecting the terminal as immediately afterwards you will be given a choice that can have permanent effects on Shepard throughout both your current game and any subsequent playthroughs. If you make a choice you end up not being happy with reloading this save can give you the option of doing things differently. |
||
| ⚫ | When you access the terminal a squadmate makes a comment while Shepard contacts [[EDI]], who will tell you about the experiments. Apparently, the Collectors were making fundamental "genetic comparisons between their species and humanity." |
||
| + | |||
| ⚫ | When you access the terminal a squadmate makes a comment while Shepard contacts [[EDI]], who will tell you about the experiments. Apparently, the Collectors were making fundamental "genetic comparisons between their species and humanity." Shepard can ask a question, and the conversation shifts to the Normandy's bridge where a holographic display and EDI's analysis reveals something shocking. The Collectors' DNA matches that of the [[Protheans]]! Respond to this however you choose. You can ask questions until you are satisfied, then end the conversation; you then reach down toward a pile of weapons. |
||
=== Advanced Weapon Training === |
=== Advanced Weapon Training === |
||
| − | After the conversation, a menu will appear allowing you to choose one of three weapon-training options, which enables |
+ | After the conversation, a menu will appear allowing you to choose one of three weapon-training options, which enables you to use the weapon in combat. If your character already has that weapon proficiency, you instead have the option of choosing a powerful, unique weapon of that class. For example, an Infiltrator will have the option to take the unique sniper rifle, or gain access to either the common assault rifles or the common shotguns. Adepts, Sentinels, and Engineers will only have options to train in the common weapons, and not the unique ones. |
* Shotgun Training: Soldiers and Vanguards can choose the [[M-300 Claymore Heavy Shotgun]] instead. |
* Shotgun Training: Soldiers and Vanguards can choose the [[M-300 Claymore Heavy Shotgun]] instead. |
||
* Assault Rifle Training: Soldiers can choose the [[M-76 Revenant|M-76 Revenant Light Machine Gun]] instead. |
* Assault Rifle Training: Soldiers can choose the [[M-76 Revenant|M-76 Revenant Light Machine Gun]] instead. |
||
* Sniper Rifle Training: Soldiers and Infiltrators can choose the [[Widow Anti-Material Rifle]] instead. |
* Sniper Rifle Training: Soldiers and Infiltrators can choose the [[Widow Anti-Material Rifle]] instead. |
||
| ⚫ | |||
| − | + | Both the training and new weapon only apply to you, not to any other member of the squad. The best choice will depend on your character class and playstyle. Each unique weapon is generally considered the strongest of its class in the game; however, you may want instead to balance your weaknesses with a new weapon type. |
|
{{Warning}} The training carries through for each new game: you do not get to pick another weapon or additional training on subsequent playthroughs with the same character, so choose wisely. New characters on their first playthrough will always be able to pick a new option. |
{{Warning}} The training carries through for each new game: you do not get to pick another weapon or additional training on subsequent playthroughs with the same character, so choose wisely. New characters on their first playthrough will always be able to pick a new option. |
||
| + | {{note|Caution:}} The special weapon training can also change the equipped weapons of squadmates. Use the nearby [[weapons locker]] to make sure everyone is carrying what you want before proceeding. |
||
| − | A nearby weapons locker allows you to change the squad's weapon loadouts. It is highly advised that you save your game at this point and do not overwrite it until you finish the mission. Grab the crate of refined [[element zero]] (+250 eezo) and the power cells before you continue on. |
||
| + | |||
| + | Grab the crate of refined [[element zero]] (+250 eezo) and the [[power cells]] before you continue on. |
||
=== Into the Belly of the Beast === |
=== Into the Belly of the Beast === |
||
| + | [[File:Collector ship hold.png|340px|left|Massive indeed]] |
||
| − | From here continue moving. |
+ | From here continue moving. You soon enter a larger room to see many pods—some still occupied—above and ahead of you, which evokes some comments from the entire squad as well as EDI, who detects no life signs in the pods (if that offers any relief). Move up some inclines and veer to the right, where you'll find some another salvageable Collector Technology (+15000 credits). Also, a Control Terminal at the end of this path will give a Damage Protection upgrade. Continue moving through the oddly deserted ship. As you walk up a long ramp, [[Joker]] comes over the comm and tells you that he and EDI discovered that this is the same Collector ship which attacked the [[SSV Normandy]]. Shepard makes the comment that this is too much of a coincidence. |
| − | + | As you round the corner at the top you enter into a massive open area of the ship which apparently holds countless pods. Your squadmates will comment that the Collectors could harvest every human in the [[Terminus Systems]] and still not have enough captives to fill all the pods; the Collectors must have one ultimate target: [[Earth]]. Now you have yet another reason to stop them, if you didn't have enough already. Move along until you approach an apparent dead end, where one squadmate will take note of a Command Console and the other will ominously wonder about the absence of Collectors. {{warning|SAVE}} before you access the console. |
|
| + | [[File:CollectorHaxxLE2.png|340px|right|Hello there.]] |
||
| − | === Alert === |
||
| − | + | Accessing the console sets up a link between EDI and the Collector Ship. EDI begins mining data, and for a few seconds everything seems to be going well, but not for long. In the Normandy's cockpit, Joker's holo-displays begin going blank, followed by the [[Collector General]] briefly appearing in the form of a red hologram, causing Joker to respond uneasily. Aboard the Collectors' vessel everything starts to shake as strange things begin happening around your team, prompting the Commander to radio for a status report. Joker responds that there was a power surge, and EDI says that she managed to divert the overload to non-critical systems. Worse, she informs Shepard that this was not a malfunction: it was a trap. The platform the team is standing on suddenly launches into the air, and EDI reports that she's having difficulty maintaining the connection due to "someone else" in the system. |
|
| + | When the platform stops in midair, everyone loses their balance and one member of the squad is knocked down. Your squad recovers as EDI says that she has reestablished connection and needs to finish the download before she can override any systems. She will keep you updated on the progress, but in reality the squad will only be safe after defeating the Collector forces rapidly approaching your position on flying platforms of their own. So take cover and prepare for a hard fight. |
||
| ⚫ | |||
| ⚫ | |||
| ⚫ | |||
| ⚫ | |||
| − | {{note|Insanity Combat Strategies:}} On lower difficulty settings many play styles will work here, but of all the Mass Effect 2 missions, it is perhaps the first battle of this mission that strikes the most fear in the hearts of Insanity level players. Fear not, however, as there are some straightforward methods for dealing with it. The following list is intended to help players having a hard time getting through this on Insanity, but many will of course work on lower settings as well. |
||
| ⚫ | |||
| − | * Taking cover with your squad in the center of the three segment crescent-shaped cover on your starting platform might seem like the best option but in fact it's a death trap. A far safer strategy is to place your squad in cover here (placing both squad members in the center segment is best) while you take cover at the forward edge or lip of the platform away from the squad. Being in front of your squad in this way will cause the Scions to focus their attacks on you more often than on your squad which will drastically increase your squad's longevity (though stray Scion shots may still hit them occasionally due to their large area of effect). This cover position is also completely safe from Scion fire for Shepard as long as you are crouched down and sometimes even when you aren't. Huddling up shoulder to shoulder with your squad on the other hand is ''strongly'' discouraged as it maximizes the chances of everyone getting leveled by the Scion's attacks. |
||
| + | The platform you are on provides some cover and a good position to combat the enemy. Two [[Collector Drone]]s and a [[Collector Guardian]] are the first to drop in; if you can, take them out as fast as possible to prevent [[Harbinger (Collector)|Harbinger]] from possessing them, but this can be difficult on higher difficulties. A platform with a [[Scion]] stationed on it will arrive in the first wave and slowly orbit the main platform cluster while you combat the other Collectors, continuously firing its signature shockwave attack that can devastate you and your squad. |
||
| ⚫ | * |
||
| − | * Heavy weapons exist for tough battles and it's tough to find a battle harder than this one. If you've done a good job of saving your heavy weapon ammo and upgrading its capacity prior to this mission, there is absolutely no reason you should hold back here; pull out the big guns and go to town on the Collectors with extreme prejudice! The [[Arc Projector]], [[M-622 Avalanche|Avalanche]], and [[M-100 Grenade Launcher|Grenade Launcher]] are all fairly easy to aim, hit in a large area, and disrupt/disable as well as damage targets, making them ideal here. The other advantage of heavy weapon spamming in this way is that it keeps your squadmates alive more effectively. Also, it's possible for Harbinger to spawn from a Collector that is knocked down or frozen, which can also mean he will be stunned or even frozen for the duration too, even though normally Harbinger is immune to such effects. |
||
| − | * You can avoid having to fight Harbinger at all in the first wave if you can kill all the Collectors before he spawns from one. Heavy weapon spam is the most effective way to do this on higher difficulties as the Collector's barriers are too tough to get through quickly enough otherwise; once their barriers are down using force-based powers to fling them off the platform to their deaths is your best bet. |
||
| ⚫ | |||
| ⚫ | * |
||
| − | * Having [[Flashbang Grenade]] available as a bonus power or by having a loyal Kasumi in the squad can ''drastically'' reduce the difficulty of this mission and the opening platform fight in particular as it disables all of Harbinger's attacks for the duration of its effect. It's possible to keep Harbinger disabled indefinitely with a high enough level Flashbang, turning arguably the greatest threat to you into a non-factor. Keep in mind that Kasumi's Flashbang can't help you if she herself isn't alive to use it. |
||
| − | * ''Always'' revive your squadmates as soon as they fall or even if they are in the red - they create distractions for the enemy that will keep fire off of Shepard. Don't "conserve" Medigel during the arguably hardest battle of the game. Keep in mind also that Medigel, if sufficiently [[Research#Medical Upgrades|upgraded]], can restore the shields of Shepard and the entire squad making it effective at counteracting the shield recharge delaying effects of Scion attacks on a relatively quick cooldown compared to a bonus power such as [[Barrier]]. |
||
| ⚫ | * |
||
| ⚫ | |||
| − | Once all the Scions and Collectors are down, EDI radios that if you access the panel again she can regain control. |
||
| ⚫ | As the battle progresses, a second Scion will eventually show up on another orbiting platform as well. You will have to fight a total of three waves of Collector troops who each show up on their own platform that docks with your starting platform. Move from cover to cover as needed and don’t forget to manage the health and abilities of your squadmates. Focus on the Collectors before going after the Scions as they are a more immediate threat, and in the case of Harbinger, a mortal threat if not dealt with quickly. It's still important to keep track of the Scions' positions and to take cover from their attacks as much as possible as they deal a large amount of damage, can stagger you out of cover, and can also delay your shields from recharging with direct hits (a bluish residue will cover you if your shields are disabled in this way). |
||
| ⚫ | |||
| + | [[File:CollectorShipPlatformBattleGuide.png|340px|right|Take cover away from your squadmates at (A) while they stay at (B), at least initially]] |
||
| ⚫ | |||
| + | {{note|Combat Strategy:}} This is arguably one of the hardest combat encounters in the entire game, however, certain tactics will drastically reduce its difficulty. As mentioned in the [[#Preparation|preparation]] section above, bringing Kasumi along for her Flashbang power provides you with an easy way of neutralizing Harbinger when he appears by disabling his biotics. Flashbang can also help create valuable gaps in the firing of the other Collector troops. If you don't have Flashbang Grenade available, a [[Combat Drone]] can distract Harbinger fairly well. At the start of combat, it's recommended that you take cover away from your squadmates as the diagram on the right illustrates; this should hopefully keep some heat off your team, and minimizes the danger of Scion shockwaves hitting all of you at once. Don't hesitate to use heavy weapons to quickly take out groups of attacking enemies, and definitely don't hesitate to use [[Unity]] if your squadmates are downed, or if you or they are severely injured. If sufficiently [[Research#Medical Upgrades|upgraded]], medi-gel can restore the shields of the entire party, making it effective at counteracting the shield recharge-delaying effects of Scion attacks on a relatively quick cooldown. |
||
| + | {{note|Additional Notes:}} |
||
| ⚫ | |||
| ⚫ | *An ability that lifts an enemy such as [[Slam]], [[Pull]] or [[Throw]] can be used when the platforms carrying the Collectors are moving in. If a Collector with no barrier is knocked off its feet when the platform is still moving, chances are pretty good that it will plummet to its death when the platform moves away. Crowd-control abilities also reduce incoming enemy fire increasing the longevity of you and your team. |
||
| ⚫ | |||
| ⚫ | *If you have [[Stasis]] as your chosen bonus power you can use it to efficiently dispatch the Scions as with proper timing you can freeze them in place while their platforms continue to move, causing them to fall to their deaths after the freeze wears off. Be aware that killing a Scion triggers one of three total platforms of Collector troops to arrive, however. If you don't have Stasis, then defeating the Scions should take a back seat to keeping Harbinger off your platform and killing the Collector troops attacking your squad. If you have one available, tie up one of the Scions with a Combat Drone; otherwise attend to killing them whenever you have a lull between Collector waves. |
||
| ⚫ | |||
| ⚫ | *If you can't disable or distract him, it's '''critically''' important to prevent Harbinger from closing to point-blank range, so concentrate your fire on him especially when he gets close. You don't want him flanking you on your platform and driving you out to a bad position where the Scions have clear shots at you. The charged shots of the [[Geth Plasma Shotgun]] are one of the fastest ways to eliminate Harbinger's barrier, at which point you should switch to anti-armor weapons and powers to finish him off. |
||
| + | *Your squadmates will be preoccupied with shooting at the Scions until they fall, so if you want their help in attacking Harbinger or anything else, you will have to manually order them to do so. |
||
| + | [[File:Collector ship - harby.png|340px|right|Ideally, get rid of Collectors before Harbinger assumes control, or he'll be making your life more difficult—and shorter.]] |
||
| ⚫ | |||
| ⚫ | |||
| − | {{Warning}} Once you go through the door and drop down, the door slams shut behind you and you are unable to go back. |
||
| ⚫ | After hitting the panel, there is a brief cutscene during which EDI explains that the distress signal which originated from the Collector ship contains an error that clearly identifies it as a non-turian signal. She further explains that it is not possible that the Illusive Man would have been fooled by it, since she discovered the error using Cerberus detection protocols which he wrote. The only conclusion is that he knowingly sent you into this trap. Respond to that in any way you wish; one or both of your squadmates will also share their own opinions. Joker will then interrupt to tell you to hurry up because the cruiser is powering up its weapons. He will keep you updated over the course of the rest of the mission about this development, but you shouldn't worry too much as you're not under any real time pressure. |
||
| ⚫ | Soon you come to a close encounter on level terrain, just beyond some salvageable Collector Technology. Slam into cover at the first chance and shoot out the Collector drones that fly in; one of these will be quickly possessed by Harbinger. Focus on taking out Harbinger then focus on the other fodder in the room to prevent it from doing it again, or, if you wish, command your squadmates to attack the [[Harbinger (Collector)|Harbinger]] while you kill the remaining |
||
| ⚫ | |||
| ⚫ | {{note|Combat Strategy:}} Place your squadmates into cover |
||
| + | [[File:Collector ship - flying bugs packing heat.png|340px|left|Bug spray's not enough to deal with these pests]] |
||
| ⚫ | |||
| ⚫ | As you land get off the platform and move. You'll enter a small room with closed doors, one of which EDI will open for you; grab the med-kit with medi-gel, and head through the open door. {{Warning}} Once you go through the door and drop down, the door slams shut behind you and you are unable to go back. |
||
| − | {{note|Alternate Strategy:}} As mentioned previously, having a high level Flashbang Grenade power available (usually by having a loyal Kasumi in your squad) makes this fight a cinch as you can disable Harbinger's attacks continuously with it, rendering him harmless. Focus on the other Collectors while he is disabled and then take him out last. |
||
| ⚫ | Soon you come to a close encounter on level terrain, just beyond some salvageable Collector Technology. Slam into cover at the first chance and shoot out the Collector drones that fly in; one of these will be quickly possessed by Harbinger. Focus on taking out Harbinger then focus on the other fodder in the room to prevent it from doing it again, or, if you wish, command your squadmates to attack the [[Harbinger (Collector)|Harbinger]] while you kill the remaining Collectors. That way the Collectors should all die right about the time your squadmates polish off [[Harbinger (Collector)|Harbinger]]. |
||
| ⚫ | |||
| ⚫ | {{note|Combat Strategy:}} Place your squadmates into cover kneeling down high up on the ramp near the door that just closed behind you. Move down to the flat area to trigger the Collectors. Quickly back up and get into cover behind the pillar against the left wall that contains the salvageable Collector Technology (+7500 credits). From this cover, [[Harbinger (Collector)|Harbinger]] and Collector Drones will not move forward beyond their starting positions and won't shoot at you. {{Warning|Be warned}}, there is some sort of invisible barrier around the pillar and your own shots will hit that wonky map architecture. You will have trouble using powers from this cover as well. Use your squadmates up on the ramp to throw powers to chip away at the Collectors until they drop. |
||
| ⚫ | In this next area you really have a fight on your hands; however, there is a lot of cover to take advantage of. Note the ramp on your left |
||
| + | {{note|Alternative Strategy:}} If you have Flashbang Grenade available or another means of distracting Harbinger such as a Combat Drone, this fight becomes a cinch. Focus on the other Collectors while he is disabled to deny him any further hosts, and then take him out last. |
||
| ⚫ | |||
| ⚫ | |||
| ⚫ | {{note|Combat Strategy:}} When you first enter this area, you will notice two ammo clips next to an unusual piece of cover shaped like part of a hexagon |
||
| ⚫ | In this next area you really have a fight on your hands; however, there is a lot of cover to take advantage of. Note the ramp on your left as you enter, which leads to an elevated section stretching the length of the room; this section is accessible on the far side of the room as well. The first wave of Collectors will arrive as you enter, more or less in front of you, but keep an eye on them because they may use the high ground to flank you. As usual, Harbinger will also make at least one appearance. |
||
| − | On lower difficulty levels it is often possible to kill Guardians before they land, thus preventing them from setting up shields. On Insanity though this is harder to do and ill-advised as it's usually better to drop the Collector Drones first - that way Harbinger will often "kill" the tougher Guardians for you by taking them over. |
||
| ⚫ | |||
| − | {{note|Combat Tips:}} |
||
| ⚫ | {{note|Combat Strategy:}} When you first enter this area, you will notice two ammo clips next to an unusual piece of cover shaped like part of a hexagon. This is the safest place to take cover and remain for most of the battle, as it not only prevents enemies from flanking you but also shields you from enemies up the ramp on the upper level. You can also keep your squadmates back in cover on the ramp you entered from so that they are safely out of the way for this battle. Keep [[Harbinger (Collector)|Harbinger]] away from you of course, but if he's not an immediate threat prioritize picking off the Drones and Guardians, usually in that order. After you eliminate several of the attackers, a group of [[Abomination]]s will approach from a distance and should always be priority targets because of their explosive suicide attack. Burn their armor away if they have any, disable them with powers, and finish them off if they don't spontaneously explode. |
||
| − | * As mentioned before, the Flashbang Grenade power can make this fight much easier as it can prevent Harbinger from attacking you. Use Flashbang to suppress him when you pop out of cover to attack the other Collector troops otherwise his attacks can stagger you and leave you easy prey. |
||
| ⚫ | * |
||
| ⚫ | * |
||
| ⚫ | * |
||
| + | {{note|Additional Notes:}} |
||
| − | After a couple of waves, a group of [[Abomination]]s will appear and should always be the first priority because of their explosive suicide attack. Burn their armor away and then throw them around with biotics. On Insanity it is not recommended to send your squad forward during this section, as they will tend to get flanked and fried. At lower difficulty levels if you allow a squadmate to move forward on the lower level, these new arrivals may attack the squadmate from their elevated position, allowing ''you'' to flank ''them''. |
||
| + | *Flashbang Grenade not only disables Harbinger, it's quite useful against Guardians as it will disable their shields and stun anything in the vicinity. |
||
| ⚫ | *Having a sniper rifle can definitely make eliminating the Collector troops much easier in this fight as many of them are at long range and stubbornly cling to cover. If you don't have a sniper rifle then any other accurate weapon like the [[M-12 Locust]] is your next best bet. Patiently wear down the Collectors one by one. |
||
| ⚫ | *To make it easier to land shots and powers on the Collectors ducking in and out of cover, consider using a squadmate power to briefly stun them while you line up your shot or launch your own power; even if the Collector still has a barrier, using a power like Throw or Flashbang on it will still stagger it momentarily. |
||
| ⚫ | *Having Barrier, Geth Shield Boost, or Fortification as a bonus power can really help on higher difficulties as you will probably be losing your shield ''a lot'' while trading shots with the Collectors and Harbinger. Having a tougher shield lets you trade damage more efficiently and gives you a "panic button" to instantly restore your shields if you come under more fire than you expected. |
||
| + | *There is some more glitchy map architecture here that can prevent your squadmates' powers from landing on enemies on the high ground. You'll either have to use your own projectile powers and weapon fire to take them down from where you enter, or take the braver step of moving your party forward to get unobstructed angles. |
||
| − | + | Once you eliminate all the enemies (you'll face 4-5 waves), head to the other end of the room and pick up the power cells, a med-kit with medi-gel, and another crate of refined [[element zero]] (+250 eezo). |
|
{{Warning}} Save your game here before the drop down into the next area. |
{{Warning}} Save your game here before the drop down into the next area. |
||
| + | === Praetorian: The Sequel === |
||
| ⚫ | |||
| ⚫ | |||
| − | |||
| ⚫ | After you drop down into the next room and proceed inside a short distance, EDI will come over the comm telling you that she has opened a door at the other end of the room. There are two problems: first, Collectors and [[Husk (enemy)#Mass Effect 2|Husks]] enter the area to block your path; second, and more alarmingly, there is a [[Praetorian]] flying at you as well. Once the Husks are eliminated, two Collector Drones will fly in near the far end of the chamber. This Praetorian duel will be more difficult than [[Horizon (mission)#The Praetorian|the one on Horizon]] due to the presence of other opponents, but the same principles for fighting it still apply, you just need to eliminate the other threats as fast as possible so that you can then devote all your attention to the hovering monstrosity. |
||
| − | The general strategy recommended here is intended to work for all classes even on Insanity difficulty but feel free to experiment and come up with your own methods: |
||
| − | |||
| ⚫ | |||
| + | [[File:CollectorShipPraetorianBattleGuide.png|340px|left|There are many ways to approach this fight, but ordering your squadmates to (A) while leading the Praetorian in circles around the pillar at (B) works well once all extraneous threats have been eliminated.]] |
||
| − | + | After you drop down into the area but ''before'' you move forward to trigger the fight (you'll know you've triggered it if EDI comes over the comm) make final preparations. Order your squad to move into the area and take cover where you want them; this will '''not''' trigger the fight. If your squad doesn't move when you order them to (they can sometimes get stuck in the elevated area before the drop down) reload your save and try again until they follow your orders properly. One of the better locations for your squad is in cover near the center of the lower area away from the left wall. This location is best as they will be close enough to the Collectors and husks that will spawn to draw their attention away from you while being far enough from where you'll be fighting the Praetorian not to get hit and killed by its slamming Death Choir attacks. |
|
| − | + | Along the left wall of the area there is a large, roughly conical pillar with a wide base that twists and tapers towards the ceiling. This is the best place to play "Ring Around the Rosie" with the impending Praetorian; there is even a respawning thermal clip nearby that you use use to continually top off your weapons. Once you're ready to begin the fight, advance down towards the pillar hugging the left wall, but don't head for the pillar just yet. First, focus on the advancing husks and the Collector drones that fly in after the husks are dead, and once the Praetorian reaches you, start leading it in circles around the pillar while continuing to focus on the other enemies until they are neutralized. Using a heavy weapon is perfectly acceptable here to make killing the husks and Collectors less of a headache. |
|
| + | [[File:Praetorian Death Choir.png|right|340px|Careful not to get caught in the blast; hiding behind cover is no protection]] |
||
| − | + | {{note|Combat Strategy:}} Always be aware of where the Praetorian is relative to you, and don't get caught in the open where its eye beams will fry you in seconds; keep cover between it and you at all times. Once the other enemies are dead, the Praetorian is the only threat and dealing with it is the same as on [[Horizon]]: lead it in circles while chipping away at it patiently with your squad helping. The Praetorian's lethal Death Choir attack triggers when it has taken a significant amount of damage to its armor or when it's close to an enemy. Death Choir's shockwave {{Warning|ignores intervening cover}}, so merely being behind something isn't enough, you also need to be a certain distance away. If you get staggered by the impact of the Praetorian slamming into the ground it might be game over, but you'll still have a small amount of time to scramble away. |
|
| − | {{note| |
+ | {{note|Additional Notes:}} |
| ⚫ | |||
| − | * Be sure to revive your squadmates with [[Medi-gel]] when they fall because their weapons and powers are invaluable against the Praetorian and the other enemies you face. A word of caution: casting [[Unity]] forces you to come to a complete stop for a brief time while the medi-gel deploys and this can be extremely dangerous while being chased by the Praetorian. If you're playing Ring Around the Rosie with it and you need to use Unity make sure to give yourself sufficient lead time. |
||
| + | *While the Praetorian always remains focused on you, the path it takes to chase you can be unpredictable, and there's a risk that it may pass close to where your squadmates are located and kill them with a Death Choir slam. If this happens, '''do not''' revive them immediately, or it will simply happen again—wait for the Praetorian to leave the vicinity first. |
||
| ⚫ | * |
||
| + | *As always, use Unity if you're damaged or you need your squad back in the fight. A word of caution: while Unity will heal both you and your squad to full health and shields with the right upgrades, the effect isn't instant. If the Praetorian is on your heels and you need medi-gel, make sure to give yourself sufficient lead time and stay on the move. |
||
| − | * Disciplined power usage is important in this fight; having an emergency shield restoring power is useless if your powers are still recharging when you need it. It can be best to rely mainly on fast-recharging powers, squad powers, and weapons only until the extra enemies other than the Praetorian are dead. It can also be wise to invest in power recharge time reduction bonuses from armor pieces or class passive skills prior to beginning this mission. |
||
| ⚫ | *The need to stay moving while fighting the Praetorian is just one more reason why having Barrier, Geth Shield Boost, or Fortification as a bonus power can pay huge dividends in this mission; if you're running from the Praetorian and your shields are down while facing additional incoming fire from the Collectors you're likely dead unless you can restore your shields immediately, and medi-gel is a limited resource. The Sentinel has the luxury of [[Tech Armor]] for such a situation. |
||
| − | * |
+ | *As on Horizon, the Praetorian will remain focused on you the whole battle with only two exceptions: activating [[Tactical Cloak]] or summoning a [[Combat Drone]] at the Praetorian will temporarily distract it, and in the case of cloaking, cause the Praetorian to decide to fry one of your squadmates instead. For this reason an Infiltrator should only use the cloak as a last resort. |
| ⚫ | * |
||
| + | *Your squadmates will focus all their fire on the Praetorian, so manually order them to target something else if you need to. |
||
| ⚫ | |||
| ⚫ | *It is possible to stop more than a few Husks from spawning if you run to the other side of the room and reach the open door causing it to close. Once it closes, no more enemies can enter from it allowing you to focus on the Praetorian more quickly. This tactic is '''not''' recommended unless you are an [[Infiltrator]] with Tactical Cloak letting you escape back to cover. An Engineer can also get the door closed sooner by spawning a Combat Drone by an enemy in the doorway. You won't prevent that many enemies from spawning regardless of how you get the door closed so the risk/reward ratio of this tactic makes it of questionable value. |
||
| − | * |
+ | *An [[M-920 Cain]] shot can do significant damage to the Praetorian at the start of the fight as it spawns without its barrier active, but you must begin charging the shot as soon as possible after you hear EDI over the comm as you must get the shot off before anything can shoot you and interrupt the charging of the shot. This will not kill the Praetorian on higher difficulties and is not really recommended as even a Praetorian with weakened armor still has a powerful barrier so it's still generally better to eliminate the lesser enemies first before trying to take it down. Remember also that the Cain does friendly fire so keep your squad out of the blast zone. |
| + | === Almost Home Free === |
||
| − | Once |
+ | Once the area is cleared of hostiles, pick up any ammo in the area including the power cells on the lower level if you hadn't already, and move to the door. The door will close as you approach it and EDI will divert you to a longer path around the obstacle. |
| − | + | The hallway has some salvageable Collector Technology (+7500 credits) and across from the Collector Technology is a Control Terminal with a Tech Damage upgrade. |
|
| − | {{Warning}} Once you go through the door, the door slams shut behind you, you are unable to go back, and the battle starts. |
+ | {{Warning}} Once you go through the next door, the door slams shut behind you, you are unable to go back, and the battle starts. Save your game before you continue. |
| − | + | The next fight can be difficult if you rush in too fast and get overwhelmed, but is relatively easy if you approach it cautiously. The Collectors attack in waves that include everything in their arsenal except another Praetorian (fortunately). |
|
| + | [[File:Collector ship - big flanking room 2 layout.png|340px|right|Again, move around because there's too many flanking opportunities here]] |
||
| − | * Passive Strategy |
||
| − | + | {{note|Combat Strategy:}} Order your squadmates to take cover on the left side of the area while staying outside the entrance, which doesn't trigger the fight until you move inside. There's one Collector pod on the ground and some raised ridges up against the high ground area. It's a good idea for the whole party to remain in this low ground on the left for most of the fight. Move forward to trigger the first wave and get ready—when the Abominations spawn, they need to be killed quickly with weapons or powers. All other Collectors from this point on will not come down the ramp and should have difficulty firing at your squad if it's positioned well. Harbinger will appear and several Collectors spawn in the first wave, but they stay at a distance on the higher ground. Kill the enemies using weapons or powers by moving forward towards the ramp and then running back to recharge shields. Additional waves can be lured out by moving forward carefully, then running back once enemies start flying in. This strategy takes time, but you can use powers and snipe with accurate weapons from a distance and conserve ammo while minimizing the danger. |
|
| + | Once all the Collectors are eliminated, the final hurdle is a lone Scion who lingers by the passageway leading out of the area. It won't move from this location, so you can even conserve ammo and kill it entirely with powers if you don't mind taking the extra time. Once it is down, search the areas where Collector troops died for any thermal clips they may have dropped. |
||
| − | * Active Strategy |
||
| − | While still conservative for battle strategy, the active strategy involves moving up to different places of cover for Shepard and your squadmates. |
||
| ⚫ | |||
| − | Wave 1: Take cover immediately when the first wave appears, and remain in this position until the entire first wave is down. That prevents getting flanked. The first wave includes an Assassin, a Guardian, and some Drones, one of which will rapidly become a Harbinger. One Collector will attack you from the "little window" up above; take him out too. Partway through Wave 1, a group of Abominations will appear - prioritize them for immediate kills so they don't get close enough to explode. Strip their armor and then throw them around with biotics or concussive shots. |
||
| + | The final part of this mission involves a gauntlet of about twenty husks. Head down the lengthy hall until you hear Joker over the comm recommending that you pick up the pace which is your cue the husks are about to appear. |
||
| − | Wave 2: Once the first wave is down, take an immediate sharp right up the side path instead of proceeding "straight" up the hill. Right when you're about to have to turn left, this will trigger a second wave with a Guardian and a couple of Drones but because of your new position it will appear safely in front of you rather than on your flank. Take cover and wipe them out. |
||
| + | [[File:Collector ship - thrilla.png|340px|right|Fight the horde, or try and slip past]] |
||
| − | Wave 3: Once the second wave is down, proceed forward to the place the second wave spawned. This will trigger the third wave, which will again appear right when you need to turn left to keep going, and again they will appear safely in front of you. Behind Wave 3 a Scion will also have appeared, but he will remain where he spawns and will not cause you any problems yet. Wipe out all of Wave 3 before engaging the scion. |
||
| + | {{note|Combat Strategy:}} Keep moving so as not to get cornered while you eliminate the Husks. On higher difficulties shoot off their armor and then use force-based abilities such as biotics or Flashbang Grenade to instantly kill unarmored Husks in groups. If worst comes to worst and conventional weapons and powers aren't cutting it, take out a heavy weapon if you have one with good spread and blast away. Another tactic is to retreat all the way back to the last room where you fought the Collectors and take cover behind some of the low walls which will confuse and slow down the Husks. |
||
| ⚫ | {{note|Alternative Strategy:}} Although it takes some courage to attempt, you can bypass the Husks entirely by sprinting past them to the shuttle which triggers the escape cutscene. Start running the moment you hear Joker over the comm, then stop to catch your breath as you round the corner, then sprint again to get past the majority of the Husks; if you're quick about this you'll see that most of the Husks aren't really aware of you yet and aren't rushing to the attack. To make this easier, a [[Soldier]] can [[Adrenaline Rush]] past the Husks, an [[Infiltrator]] can Tactical Cloak, and a [[Vanguard]] can [[Charge]] at a Husk nearest the exit. If playing as an [[Adept]], [[Sentinel]] or [[Engineer]], then a few shots with the [[M-622 Avalanche|Avalanche]] or the [[M-100 Grenade Launcher|Grenade Launcher]] will clear a path through the bulk of the Husks without a problem. |
||
| − | Scion: Now from the place that Wave 3 spawned, it is safe the engage the lone Scion. He won't move from his spawn location, so you can even conserve ammo and kill him entirely with powers if you wish. |
||
| + | Once the Husks are thinned out or completely eliminated, the way back to the shuttle is clear. Upon reaching it, a cutscene will play that covers your return to the [[Normandy SR-2|Normandy]] and your narrow escape from the fully operational Collector vessel. |
||
| ⚫ | |||
| ⚫ | |||
| − | The final part of this mission involves about twenty husks! Head down the lengthy hall until you hear or see husks charging you. Backpedal to eliminate them—know that there are many. Don't get in cover because you want to stay mobile. Once the Husks are down the way back to the shuttle is clear. A cutscene will play that covers your escape and your return to the [[Normandy SR-2|Normandy]]. |
||
| + | [[File:CollectorShipEscapeLE2.png|340px|left|Déjà vu of the worst kind]] |
||
| + | Following your harrowing ordeal, you find yourself in another conversation with the Illusive Man. Since he knowingly sent you and your crew into a trap, let him have it any way you wish. However, he firmly maintains that he didn’t risk all of your lives unnecessarily and suggests you communicate that to the crew. Most importantly, his gamble paid off. |
||
| + | Thanks to EDI's analysis of Collector data, Cerberus has discovered how the Collectors survive the passage through the [[Omega 4 Relay]]: an advanced form of an [[wikipedia:Identification friend or foe|Identify Friend/Foe]] device, or "IFF". The Illusive Man tells you that any Collector or Reaper ship is likely equipped with such a device, though unfortunately there wasn't enough time to search for and recover one from the vessel you just left. After you respond, he tells you that Cerberus has located a [[Derelict Reaper]] in the [[Thorne]] system of the [[Hawking Eta]] Cluster, in orbit of the brown dwarf [[Mnemosyne]]. The vessel’s still-active mass effect fields keep it aloft and safe, but the Cerberus science team he had dispatched to study it stopped reporting in; you'll have to [[Reaper IFF|investigate the Reaper]] yourself to find out what happened and hopefully obtain an IFF. After you comment on this, the Illusive Man concludes by warning that traveling through the Omega 4 Relay is likely to be a one-way trip, so your team needs to be focused on their tasks to have any chance of surviving. |
||
| ⚫ | |||
| ⚫ | After the meeting [[Jacob Taylor]], [[Miranda Lawson]], and [[Mordin Solus]] join you in the briefing room. You can explain the Illusive Man’s actions any way you want. No matter the conversation, the general consensus is that the mission was a success. EDI comes over the comm and tells you that, based on the Collector ship’s course through the Omega 4 Relay, she can calculate the location of the Collector homeworld. She brings up a display of the [[Milky Way]], and to everyone's shock, the path of the trace ends up in the galactic core. After you comment, Jacob voices his skepticism, arguing that nothing can survive in the core. Mordin theorizes that it would be possible for an artificial installation protected by strong mass effect fields and radiation shielding to operate there. You can point out that the Collectors are merely pawns of the Reapers, and considering the capabilities the Reapers have already demonstrated with feats like constructing the Mass Relays and the [[Citadel]], constructing a base at the heart of the galaxy doesn’t seem all that far-fetched. |
||
| − | {{note|Tip:}} Husks and Abominations cannot leap over obstacles, so you can use that against them. After the first wave appears in your scanner, start to retreat, the husks will take on your squadmates first and you are free to take out as many of them as you can. When your squadmates are down, the husks will target the player. Now it is time to use their weakness. Retreat to the higher ground in the last battlezone, in the middle of it is a wall cover crossing the area. As long as husks have a direct line, they will come straight towards you, but as soon as you leap over, some will take the longer detour around the wall, and some will get confused. That will make lots of easy kills, even on Insanity. |
||
| + | At the end of the conversation, you have dialogue options about whether to go after the [[Reaper IFF]] immediately or build up the team. It is ''strongly'' recommended that you continue to build up the team first, but your answer in the conversation does '''not''' commit you one way or the other. Actually going after the IFF will commence the [[Mass Effect 2 Guide#Act 2 Progression Missions|final chapter]] of the game. |
||
| ⚫ | |||
| − | [[Image:Normandy Dodging Attack.jpg|285px|left|Normandy dodges an attack from the powered-up Collector Cruiser]]Once back on the ship, you are immediately taken into a conversation with the Illusive Man. Since he sent you and your crew into a trap, let him have it any way you wish. However, he manages to get out that he didn’t do it unwillingly and it was necessary, and he wishes that you communicate that to the crew. Cerberus managed to discover information on how the Collectors survive the passage through the [[Omega 4 Relay]], an advanced form of an Identify Friend/Foe device, or IFF. The Illusive Man tells Shepard that each Collector ship is equipped with the device. Make a comment about that. After your conversation decision, he tells Shepard that Cerberus has located a [[Derelict Reaper]] in the [[Thorne]] system of the [[Hawking Eta]] Cluster. It is in orbit of the brown dwarf [[Mnemosyne]]. He says that the vessel’s mass effect fields keep it aloft and safe, and that he has dispatched a team already to study it. You can make a comment about that. To end the conversation, the Illusive Man tells Shepard that a trip through the Omega 4 Relay will likely be a one way trip and that the team needs to be focused on their tasks in order to survive. |
||
| ⚫ | |||
| ⚫ | After the meeting [[Jacob Taylor]], [[Miranda Lawson]], and [[Mordin Solus]] join you in the briefing room. You can explain the Illusive Man’s actions any way you want. No matter the conversation, the general consensus is that the mission was a success. EDI comes over the comm and tells you that, based on the Collector ship’s course through the Omega 4 Relay, she can calculate the location of the Collector homeworld. She brings up a display of the [[Milky Way]] and the path ends up in the galactic core. |
||
| + | Two additional [[Upgrade Guide|upgrades]] become available for purchase on [[Illium]] after completing this mission. |
||
| ⚫ | |||
| − | + | == Enemies == |
|
*[[Abomination]] |
*[[Abomination]] |
||
*[[Collector Assassin]] |
*[[Collector Assassin]] |
||
| Line 188: | Line 205: | ||
**Cerberus Funds: 37,500 |
**Cerberus Funds: 37,500 |
||
**Credits Found: 37,500 |
**Credits Found: 37,500 |
||
| + | *Weapons |
||
| + | **[[M-76 Revenant]] ([[Soldier]] class only) |
||
| + | **[[M-300 Claymore]] (Soldier and [[Vanguard]] classes only) |
||
| + | **[[M-98 Widow]] (Soldier and [[Infiltrator]] classes only) |
||
*Resources: |
*Resources: |
||
**Element Zero: 500 |
**Element Zero: 500 |
||
Latest revision as of 06:02, 11 April 2024
A Collector vessel has been found floating adrift, evidently damaged by a turian patrol. This is a rare chance to examine Collector technology.
Acquisition[]
The true nature of the trigger for this mission is not fully understood, as there are a few reports of players completing more than five missions before triggering this mission, but it usually works like this:
- After the mission on Horizon, a five-mission countdown begins, after which Shepard will be unable to access the Galaxy Map and instead must report to the briefing room to speak with the Illusive Man, who will dispatch Shepard to investigate a disabled Collector Cruiser. At that point completing the mission becomes the only way forward.
- Even N7 assignments (e.g. "anomalies") count as a mission, so pick your five missions carefully.
- If the fifth mission is one of the two loyalty missions on Tuchanka or the Citadel, you can complete the other one before returning to the Normandy SR-2. Because of the order and tempo with which loyalty missions are acquired, the second Citadel mission will only become available in time if you leave Grunt in his tank.
- Finally, it is possible to complete Miranda's loyalty mission fifth and then recruit Thane or Samara or complete Lair of the Shadow Broker as an extra mission, but only if Jack's loyalty mission has not yet been completed (because while Miranda's mission normally ends back on Ilium, if Jack is loyal then Shepard returns immediately to the Normandy for their argument).
- This mission will not trigger until eight squad members have been recruited, and indeed the official Prima Publishing Collector's Edition guide states explicitly (p. 114) that the story will not advance without eight squad members. Grunt does not count as a squad member until he is awakened from his tank. The addition of Kasumi and Zaeed in DLC packs, along with the ease of recruiting them, tends to make this condition moot for many players unless they delay waking Grunt.
Note: Though you'll have no choice but to complete this mission once it appears, any other missions that you didn't get to by this point can still be done afterwards.
Preparation[]

This is the next major step of the overarching Stop the Collectors mission, and is also unavoidable like the Horizon mission once the requisite triggers above have been fulfilled. Most preparation should therefore be done in anticipation at least one mission/assignment before this one as you will transport directly to the mission level after the mission briefing with the Illusive Man.
If you have a hard time with this mission, arguably the most difficult in the game for the level you are when you reach it, one strategic way to prepare for it is to do as many missions as possible before undertaking it, and you must plan for this well before Horizon: do as many side assignments as possible, and all of the available DLC missions before completing the recruitment of all four of Mordin, Jack, Grunt, and Garrus. Then, following Horizon do four missions, perhaps including Lair of the Shadow Broker for its substantial rewards, and then go to Tuchanka and stay for both Mordin and Grunt's loyalty missions without returning to the Normandy thus getting an extra mission on the clock. Planning this way ensures that you reach this mission at the highest possible level with the most possible abilities and upgrades.
However, there is a countervailing approach: the special weapon or extra weapon training you get at the beginning of this mission can be a huge power spike especially for the classes normally limited to only pistols and SMGs, so you may want to consider rushing to the Collector ship to unlock the new weapon training as soon as possible. This can be accomplished in the following way:
- Recruit all four of Mordin, Jack, Grunt and Garrus as soon as the recruitment missions become available without completing any other missions.
- Complete the mission on Horizon.
- Complete 5 of the missions within the Firewalker Pack and/or Normandy Crash Site free DLC, which involve virtually no infantry combat.
The above will get you to the Collector ship to get the special weapon or training and have it available for as many other missions as possible. Choosing this path will make this challenging mission even harder, but the weapon training is unlocked prior to the combat sections so you will at least gain its benefit for the fight.
One research upgrade in particular deserves special recommendation to obtain prior to this mission as it only becomes available post-Horizon: the Hard Shields research. Unlocked only after obtaining three Damage Protection upgrades, Hard Shields will reduce damage to your shield/barrier by 20% which makes a very noticeable difference in your toughness during this mission.
You will be facing a lot of barriers and armor, making Warp Ammo (Jack) the most effective ammo ability in general, with Armor-Piercing Ammo (Garrus) and Incendiary Ammo (Grunt or Jacob) as good follow-up choices both of which are more damaging to armor and health but not barriers. Incendiary Ammo can be particularly useful for its crowd-control properties as most enemies will flail around briefly when ignited preventing them from attacking you.
In terms of damage powers, Warp (Miranda or Thane) is effective against both barriers and armor, as is Reave (Samara). If you want to have Reave available from Samara, you must have already gained her loyalty to unlock it, and this is only possible if you both (1) recruited her prior to this mission and (2) you left Grunt sealed in his tank.
The abundance of "bottomless" pits in the mission architecture makes physics-based attacks such as Throw (Thane and Samara), Concussive Shot (Garrus, Grunt and Zaeed) useful as they can dispatch clumps of enemies with minimal ammo use if given a nudge in the right direction. Flashbang Grenade (Kasumi) is an invaluable power to have available for this mission for the same reason as on Horizon: it can disable attacks by a Harbinger-possessed Collector.
In terms of bonus powers for Shepard, choosing Barrier or one of its sister powers will increase your ability to absorb hits and allow you to instantly re-raise your shields when they go down, both of which are invaluable in key encounters. Stasis can be useful because there will be at least one opportunity to "one shot" a heavy hitter with it during a key battle, though be forewarned it does not work on Harbinger.
In terms of heavy weapons, the M-622 Avalanche is recommended as it can inflict high damage in a large area, possesses generous ammo capacity, and has long-lasting disabling effects. The M-490 Blackstorm can also be quite effective as the projectiles can stun enemies repeatedly in a large area and both the damage and crowd-control effects penetrate cover, perfect for the irregular terrain you'll be facing in some fights. The M-100 Grenade Launcher has a large force component to its shots that is capable of blasting enemies to their deaths. The Arc Projector is useful for stunning and damaging clustered enemies.
Walkthrough[]
Cruiser Entrance[]

This mission is one of the most linear in the entire game. Start moving down the open hallway, and EDI will comment that the ship's signatures match those of the Collector Vessel that attacked Horizon. There is no need to worry about any enemies for a while yet so just keep moving forward. Upon arriving at a bend in the passage you encounter a pod where your squadmates will make some comments. Keep moving down the hall until you reach a pile of dead bodies where you can earn some morality points depending on your dialogue choice. Continue down the tunnel until you reach some salvageable Collector Technology (+7500 credits) on the right. Salvage it and move up to get the med-kit with medi-gel. Up ahead is a Control Terminal next to the body of a dead Collector in a pod. Caution: A close approach will select the Control Terminal automatically.
Tip: It is strongly recommended that you create a save point here that you don't overwrite before selecting the terminal as immediately afterwards you will be given a choice that can have permanent effects on Shepard throughout both your current game and any subsequent playthroughs. If you make a choice you end up not being happy with reloading this save can give you the option of doing things differently.
When you access the terminal a squadmate makes a comment while Shepard contacts EDI, who will tell you about the experiments. Apparently, the Collectors were making fundamental "genetic comparisons between their species and humanity." Shepard can ask a question, and the conversation shifts to the Normandy's bridge where a holographic display and EDI's analysis reveals something shocking. The Collectors' DNA matches that of the Protheans! Respond to this however you choose. You can ask questions until you are satisfied, then end the conversation; you then reach down toward a pile of weapons.
Advanced Weapon Training[]
After the conversation, a menu will appear allowing you to choose one of three weapon-training options, which enables you to use the weapon in combat. If your character already has that weapon proficiency, you instead have the option of choosing a powerful, unique weapon of that class. For example, an Infiltrator will have the option to take the unique sniper rifle, or gain access to either the common assault rifles or the common shotguns. Adepts, Sentinels, and Engineers will only have options to train in the common weapons, and not the unique ones.
- Shotgun Training: Soldiers and Vanguards can choose the M-300 Claymore Heavy Shotgun instead.
- Assault Rifle Training: Soldiers can choose the M-76 Revenant Light Machine Gun instead.
- Sniper Rifle Training: Soldiers and Infiltrators can choose the Widow Anti-Material Rifle instead.
Both the training and new weapon only apply to you, not to any other member of the squad. The best choice will depend on your character class and playstyle. Each unique weapon is generally considered the strongest of its class in the game; however, you may want instead to balance your weaknesses with a new weapon type.
Warning: The training carries through for each new game: you do not get to pick another weapon or additional training on subsequent playthroughs with the same character, so choose wisely. New characters on their first playthrough will always be able to pick a new option.
Caution: The special weapon training can also change the equipped weapons of squadmates. Use the nearby weapons locker to make sure everyone is carrying what you want before proceeding.
Grab the crate of refined element zero (+250 eezo) and the power cells before you continue on.
Into the Belly of the Beast[]
From here continue moving. You soon enter a larger room to see many pods—some still occupied—above and ahead of you, which evokes some comments from the entire squad as well as EDI, who detects no life signs in the pods (if that offers any relief). Move up some inclines and veer to the right, where you'll find some another salvageable Collector Technology (+15000 credits). Also, a Control Terminal at the end of this path will give a Damage Protection upgrade. Continue moving through the oddly deserted ship. As you walk up a long ramp, Joker comes over the comm and tells you that he and EDI discovered that this is the same Collector ship which attacked the SSV Normandy. Shepard makes the comment that this is too much of a coincidence.
As you round the corner at the top you enter into a massive open area of the ship which apparently holds countless pods. Your squadmates will comment that the Collectors could harvest every human in the Terminus Systems and still not have enough captives to fill all the pods; the Collectors must have one ultimate target: Earth. Now you have yet another reason to stop them, if you didn't have enough already. Move along until you approach an apparent dead end, where one squadmate will take note of a Command Console and the other will ominously wonder about the absence of Collectors. SAVE before you access the console.
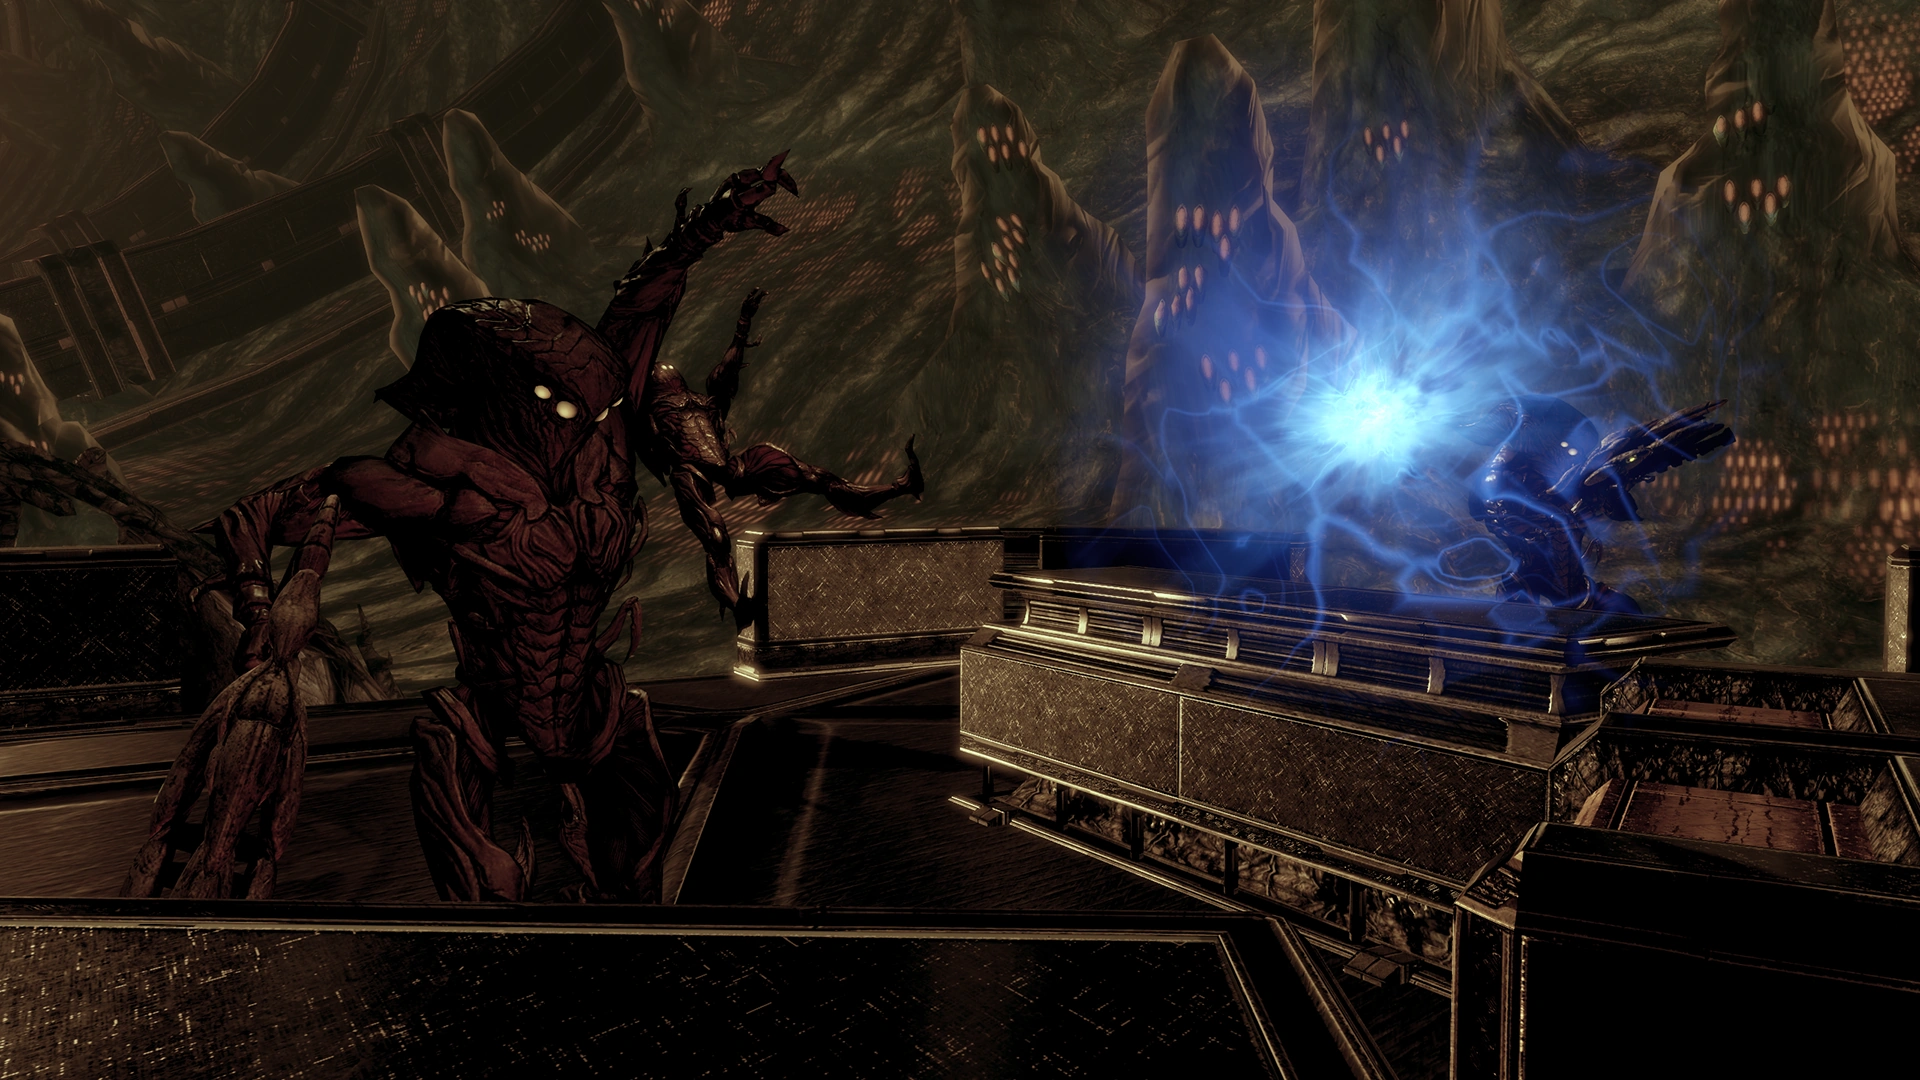
Accessing the console sets up a link between EDI and the Collector Ship. EDI begins mining data, and for a few seconds everything seems to be going well, but not for long. In the Normandy's cockpit, Joker's holo-displays begin going blank, followed by the Collector General briefly appearing in the form of a red hologram, causing Joker to respond uneasily. Aboard the Collectors' vessel everything starts to shake as strange things begin happening around your team, prompting the Commander to radio for a status report. Joker responds that there was a power surge, and EDI says that she managed to divert the overload to non-critical systems. Worse, she informs Shepard that this was not a malfunction: it was a trap. The platform the team is standing on suddenly launches into the air, and EDI reports that she's having difficulty maintaining the connection due to "someone else" in the system.
When the platform stops in midair, everyone loses their balance and one member of the squad is knocked down. Your squad recovers as EDI says that she has reestablished connection and needs to finish the download before she can override any systems. She will keep you updated on the progress, but in reality the squad will only be safe after defeating the Collector forces rapidly approaching your position on flying platforms of their own. So take cover and prepare for a hard fight.
Sky-High Battle[]
The platform you are on provides some cover and a good position to combat the enemy. Two Collector Drones and a Collector Guardian are the first to drop in; if you can, take them out as fast as possible to prevent Harbinger from possessing them, but this can be difficult on higher difficulties. A platform with a Scion stationed on it will arrive in the first wave and slowly orbit the main platform cluster while you combat the other Collectors, continuously firing its signature shockwave attack that can devastate you and your squad.
As the battle progresses, a second Scion will eventually show up on another orbiting platform as well. You will have to fight a total of three waves of Collector troops who each show up on their own platform that docks with your starting platform. Move from cover to cover as needed and don’t forget to manage the health and abilities of your squadmates. Focus on the Collectors before going after the Scions as they are a more immediate threat, and in the case of Harbinger, a mortal threat if not dealt with quickly. It's still important to keep track of the Scions' positions and to take cover from their attacks as much as possible as they deal a large amount of damage, can stagger you out of cover, and can also delay your shields from recharging with direct hits (a bluish residue will cover you if your shields are disabled in this way).
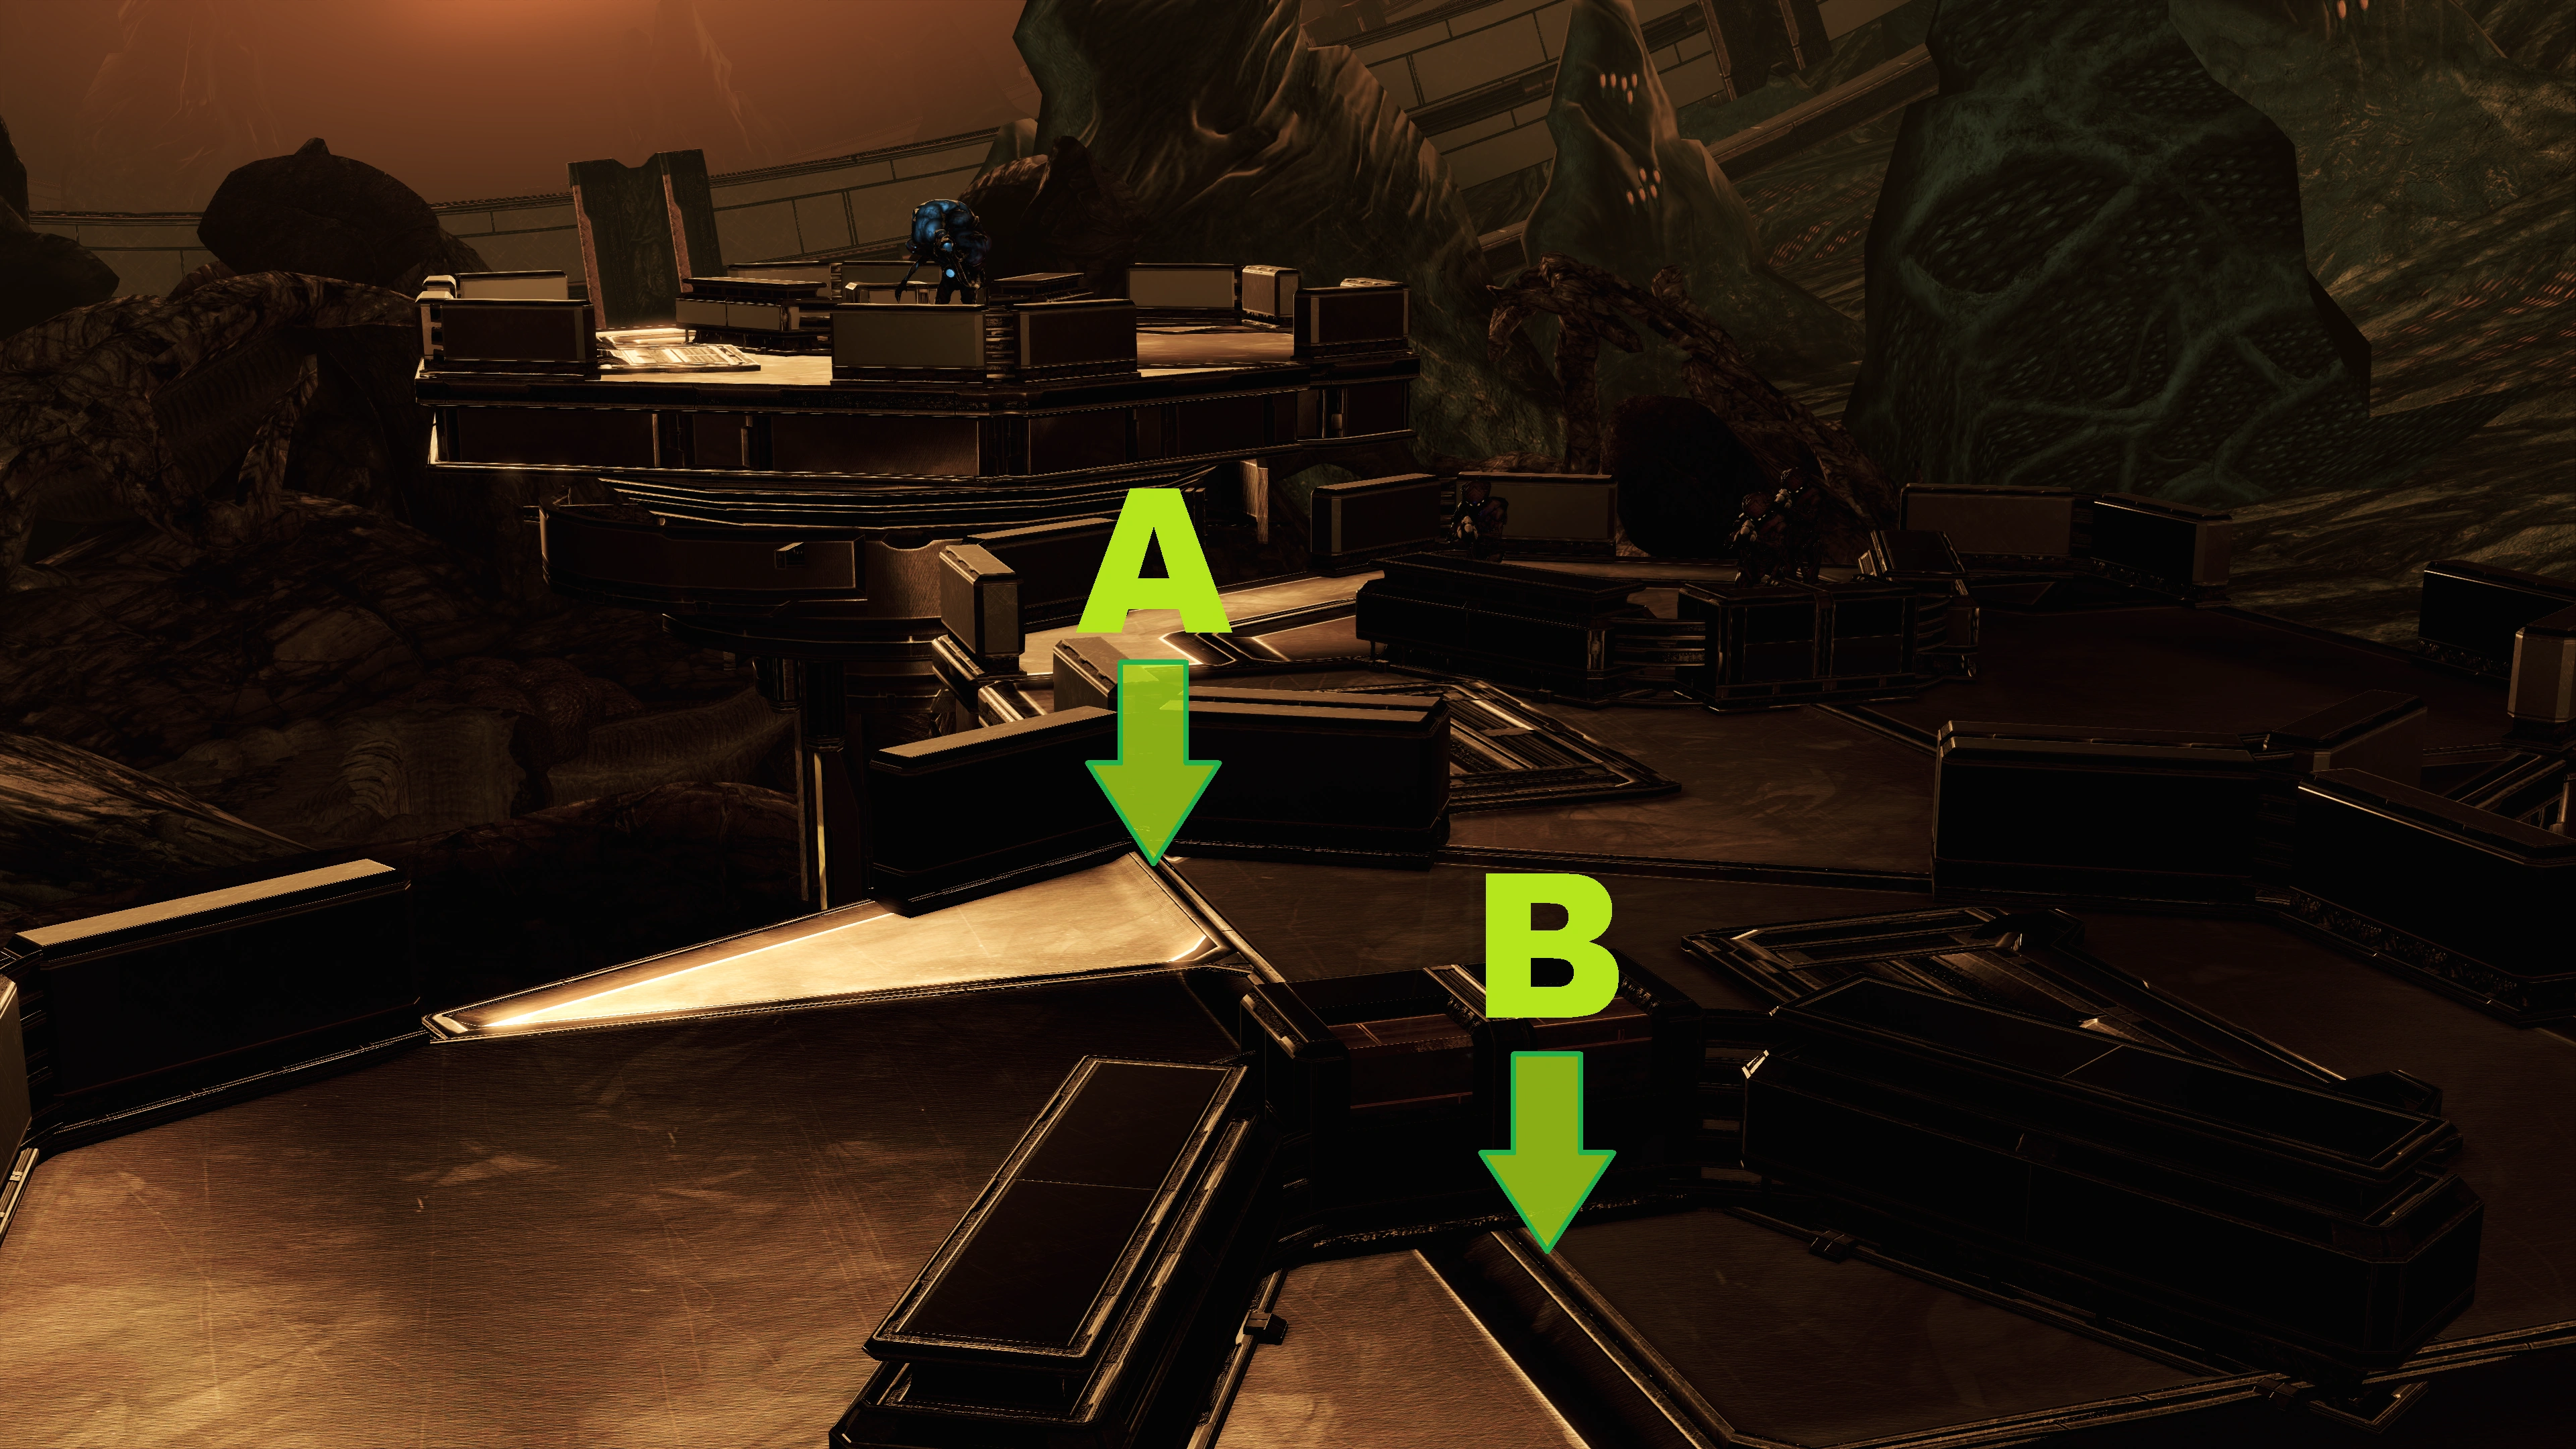
Combat Strategy: This is arguably one of the hardest combat encounters in the entire game, however, certain tactics will drastically reduce its difficulty. As mentioned in the preparation section above, bringing Kasumi along for her Flashbang power provides you with an easy way of neutralizing Harbinger when he appears by disabling his biotics. Flashbang can also help create valuable gaps in the firing of the other Collector troops. If you don't have Flashbang Grenade available, a Combat Drone can distract Harbinger fairly well. At the start of combat, it's recommended that you take cover away from your squadmates as the diagram on the right illustrates; this should hopefully keep some heat off your team, and minimizes the danger of Scion shockwaves hitting all of you at once. Don't hesitate to use heavy weapons to quickly take out groups of attacking enemies, and definitely don't hesitate to use Unity if your squadmates are downed, or if you or they are severely injured. If sufficiently upgraded, medi-gel can restore the shields of the entire party, making it effective at counteracting the shield recharge-delaying effects of Scion attacks on a relatively quick cooldown.
Additional Notes:
- An ability that lifts an enemy such as Slam, Pull or Throw can be used when the platforms carrying the Collectors are moving in. If a Collector with no barrier is knocked off its feet when the platform is still moving, chances are pretty good that it will plummet to its death when the platform moves away. Crowd-control abilities also reduce incoming enemy fire increasing the longevity of you and your team.
- If you have Stasis as your chosen bonus power you can use it to efficiently dispatch the Scions as with proper timing you can freeze them in place while their platforms continue to move, causing them to fall to their deaths after the freeze wears off. Be aware that killing a Scion triggers one of three total platforms of Collector troops to arrive, however. If you don't have Stasis, then defeating the Scions should take a back seat to keeping Harbinger off your platform and killing the Collector troops attacking your squad. If you have one available, tie up one of the Scions with a Combat Drone; otherwise attend to killing them whenever you have a lull between Collector waves.
- When Harbinger throws his slow-moving Singularity-like orb, draw it away from your cover so that it will miss, because if it hits, Shepard will be knocked from behind cover and exposed to potentially deadly fire and that cover position will become temporarily unusable.
- If you can't disable or distract him, it's critically important to prevent Harbinger from closing to point-blank range, so concentrate your fire on him especially when he gets close. You don't want him flanking you on your platform and driving you out to a bad position where the Scions have clear shots at you. The charged shots of the Geth Plasma Shotgun are one of the fastest ways to eliminate Harbinger's barrier, at which point you should switch to anti-armor weapons and powers to finish him off.
- Your squadmates will be preoccupied with shooting at the Scions until they fall, so if you want their help in attacking Harbinger or anything else, you will have to manually order them to do so.
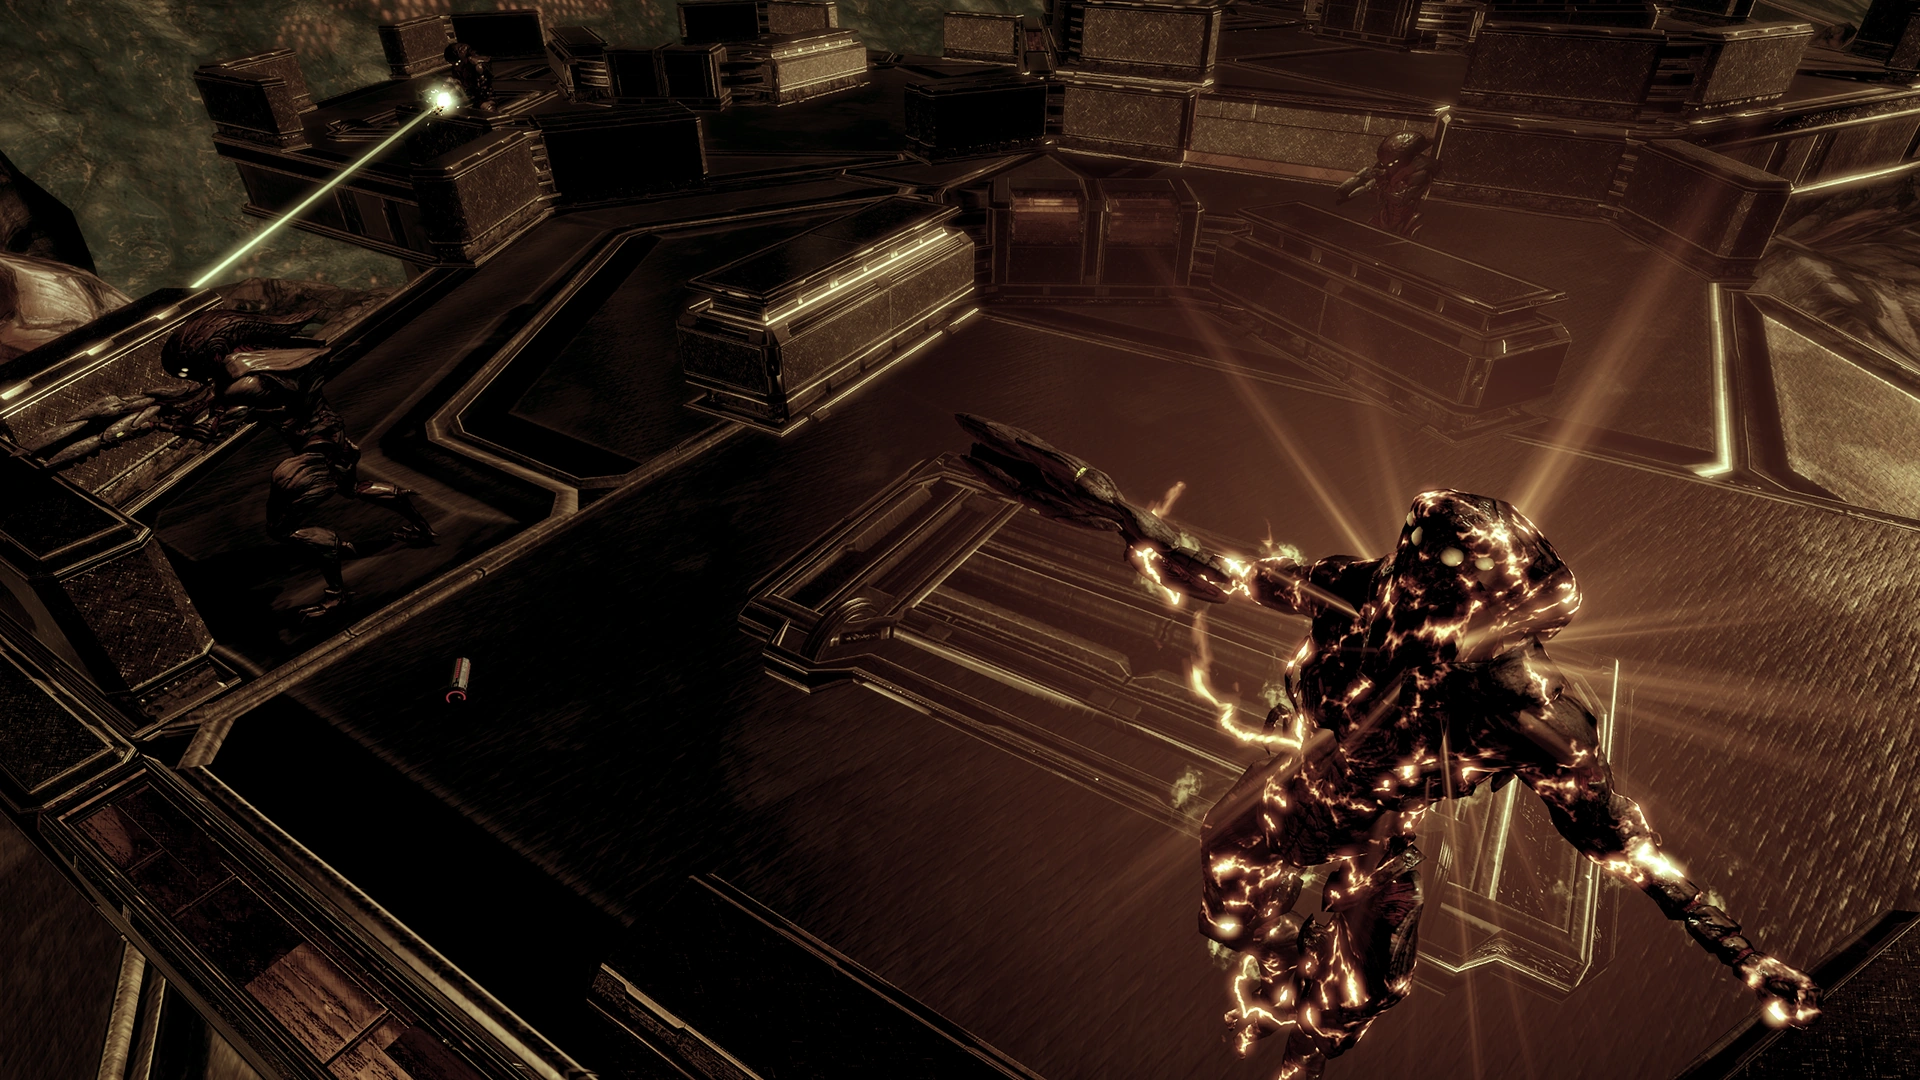
Once all enemies are finally eliminated, EDI radios that if you access the panel again she can regain control. Before accessing the panel, pick up any dropped thermal clips and some power cells located on one of the platforms that flew in during the battle.
After hitting the panel, there is a brief cutscene during which EDI explains that the distress signal which originated from the Collector ship contains an error that clearly identifies it as a non-turian signal. She further explains that it is not possible that the Illusive Man would have been fooled by it, since she discovered the error using Cerberus detection protocols which he wrote. The only conclusion is that he knowingly sent you into this trap. Respond to that in any way you wish; one or both of your squadmates will also share their own opinions. Joker will then interrupt to tell you to hurry up because the cruiser is powering up its weapons. He will keep you updated over the course of the rest of the mission about this development, but you shouldn't worry too much as you're not under any real time pressure.
Fight Your Way Out[]
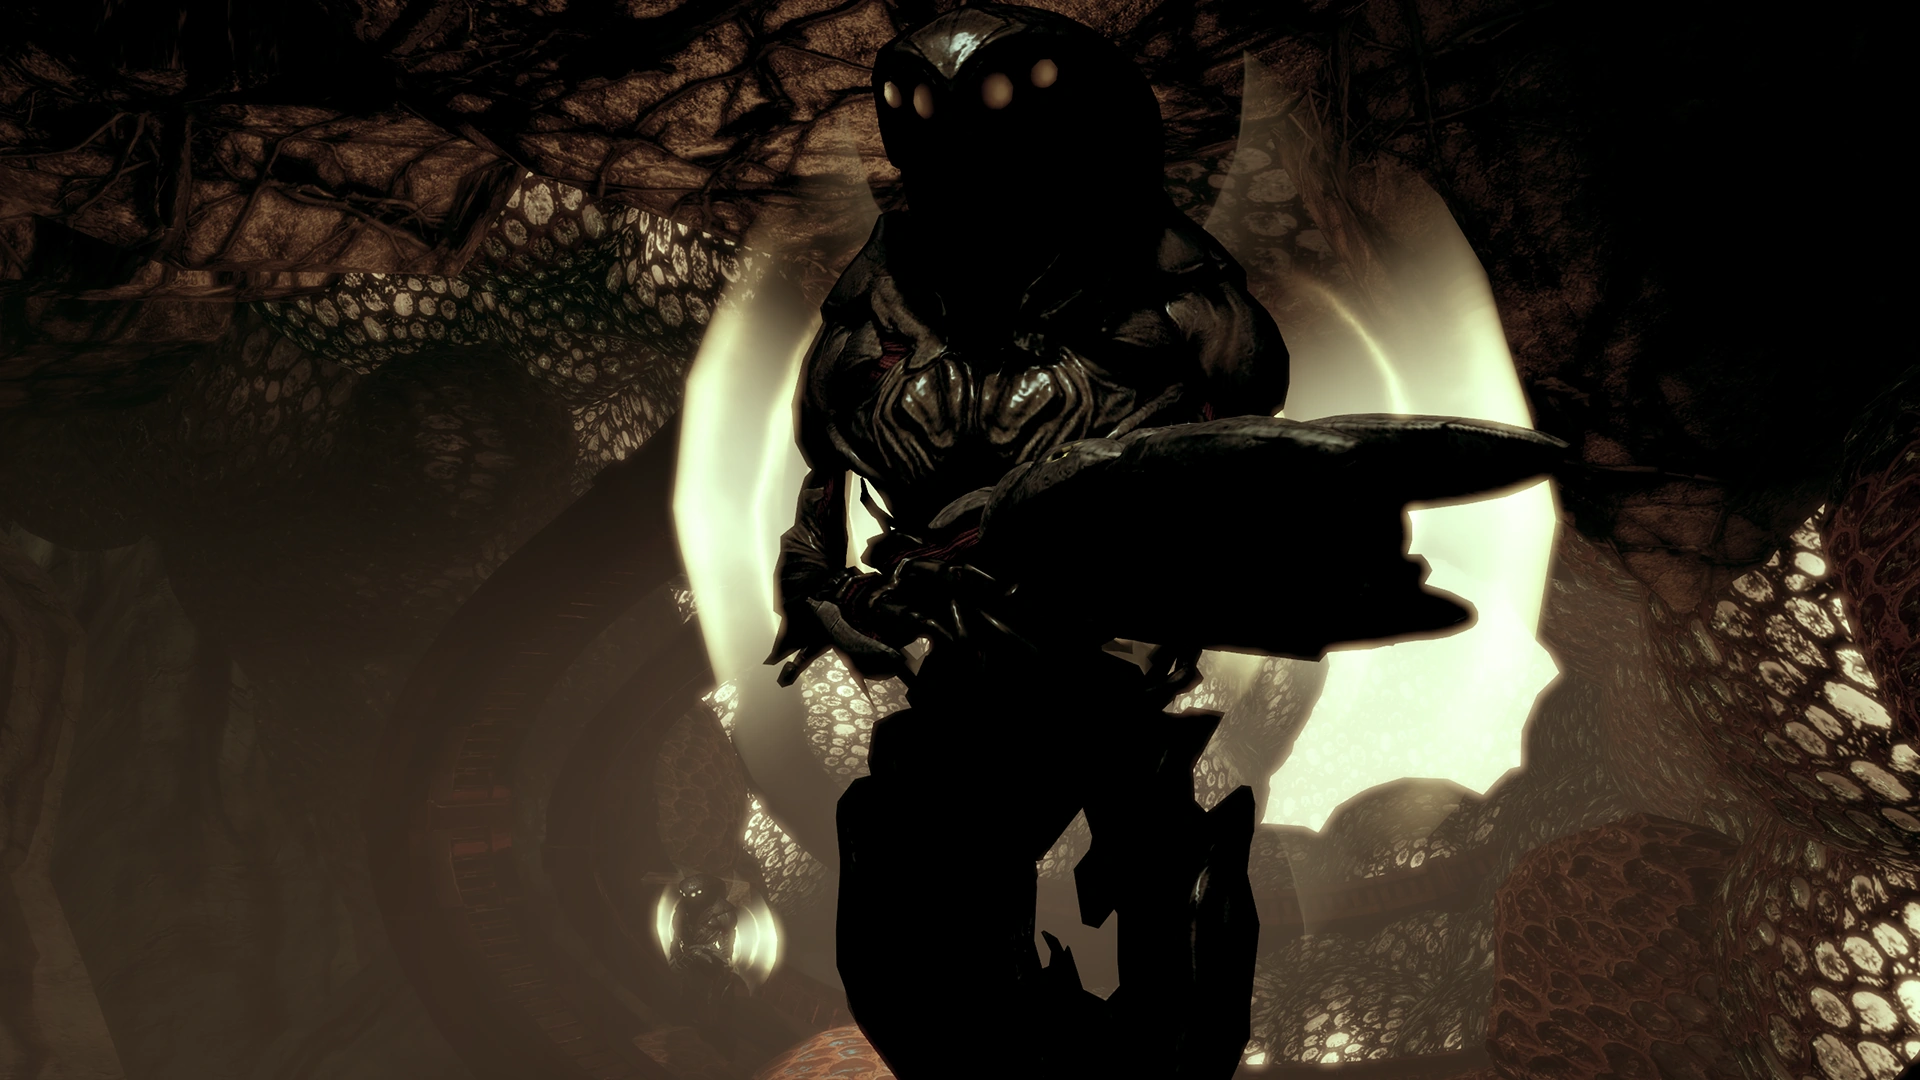
Save as often as you can from here to the end of the mission, especially on Hardcore and Insanity difficulties.
As you land get off the platform and move. You'll enter a small room with closed doors, one of which EDI will open for you; grab the med-kit with medi-gel, and head through the open door. Warning: Once you go through the door and drop down, the door slams shut behind you and you are unable to go back.
Soon you come to a close encounter on level terrain, just beyond some salvageable Collector Technology. Slam into cover at the first chance and shoot out the Collector drones that fly in; one of these will be quickly possessed by Harbinger. Focus on taking out Harbinger then focus on the other fodder in the room to prevent it from doing it again, or, if you wish, command your squadmates to attack the Harbinger while you kill the remaining Collectors. That way the Collectors should all die right about the time your squadmates polish off Harbinger.
Combat Strategy: Place your squadmates into cover kneeling down high up on the ramp near the door that just closed behind you. Move down to the flat area to trigger the Collectors. Quickly back up and get into cover behind the pillar against the left wall that contains the salvageable Collector Technology (+7500 credits). From this cover, Harbinger and Collector Drones will not move forward beyond their starting positions and won't shoot at you. Be warned, there is some sort of invisible barrier around the pillar and your own shots will hit that wonky map architecture. You will have trouble using powers from this cover as well. Use your squadmates up on the ramp to throw powers to chip away at the Collectors until they drop.
Alternative Strategy: If you have Flashbang Grenade available or another means of distracting Harbinger such as a Combat Drone, this fight becomes a cinch. Focus on the other Collectors while he is disabled to deny him any further hosts, and then take him out last.
After you put down these enemies, grab the salvageable Collector Technology if you didn't already, and move down a ramp to a larger and more complicated room for another dangerous encounter.
In this next area you really have a fight on your hands; however, there is a lot of cover to take advantage of. Note the ramp on your left as you enter, which leads to an elevated section stretching the length of the room; this section is accessible on the far side of the room as well. The first wave of Collectors will arrive as you enter, more or less in front of you, but keep an eye on them because they may use the high ground to flank you. As usual, Harbinger will also make at least one appearance.
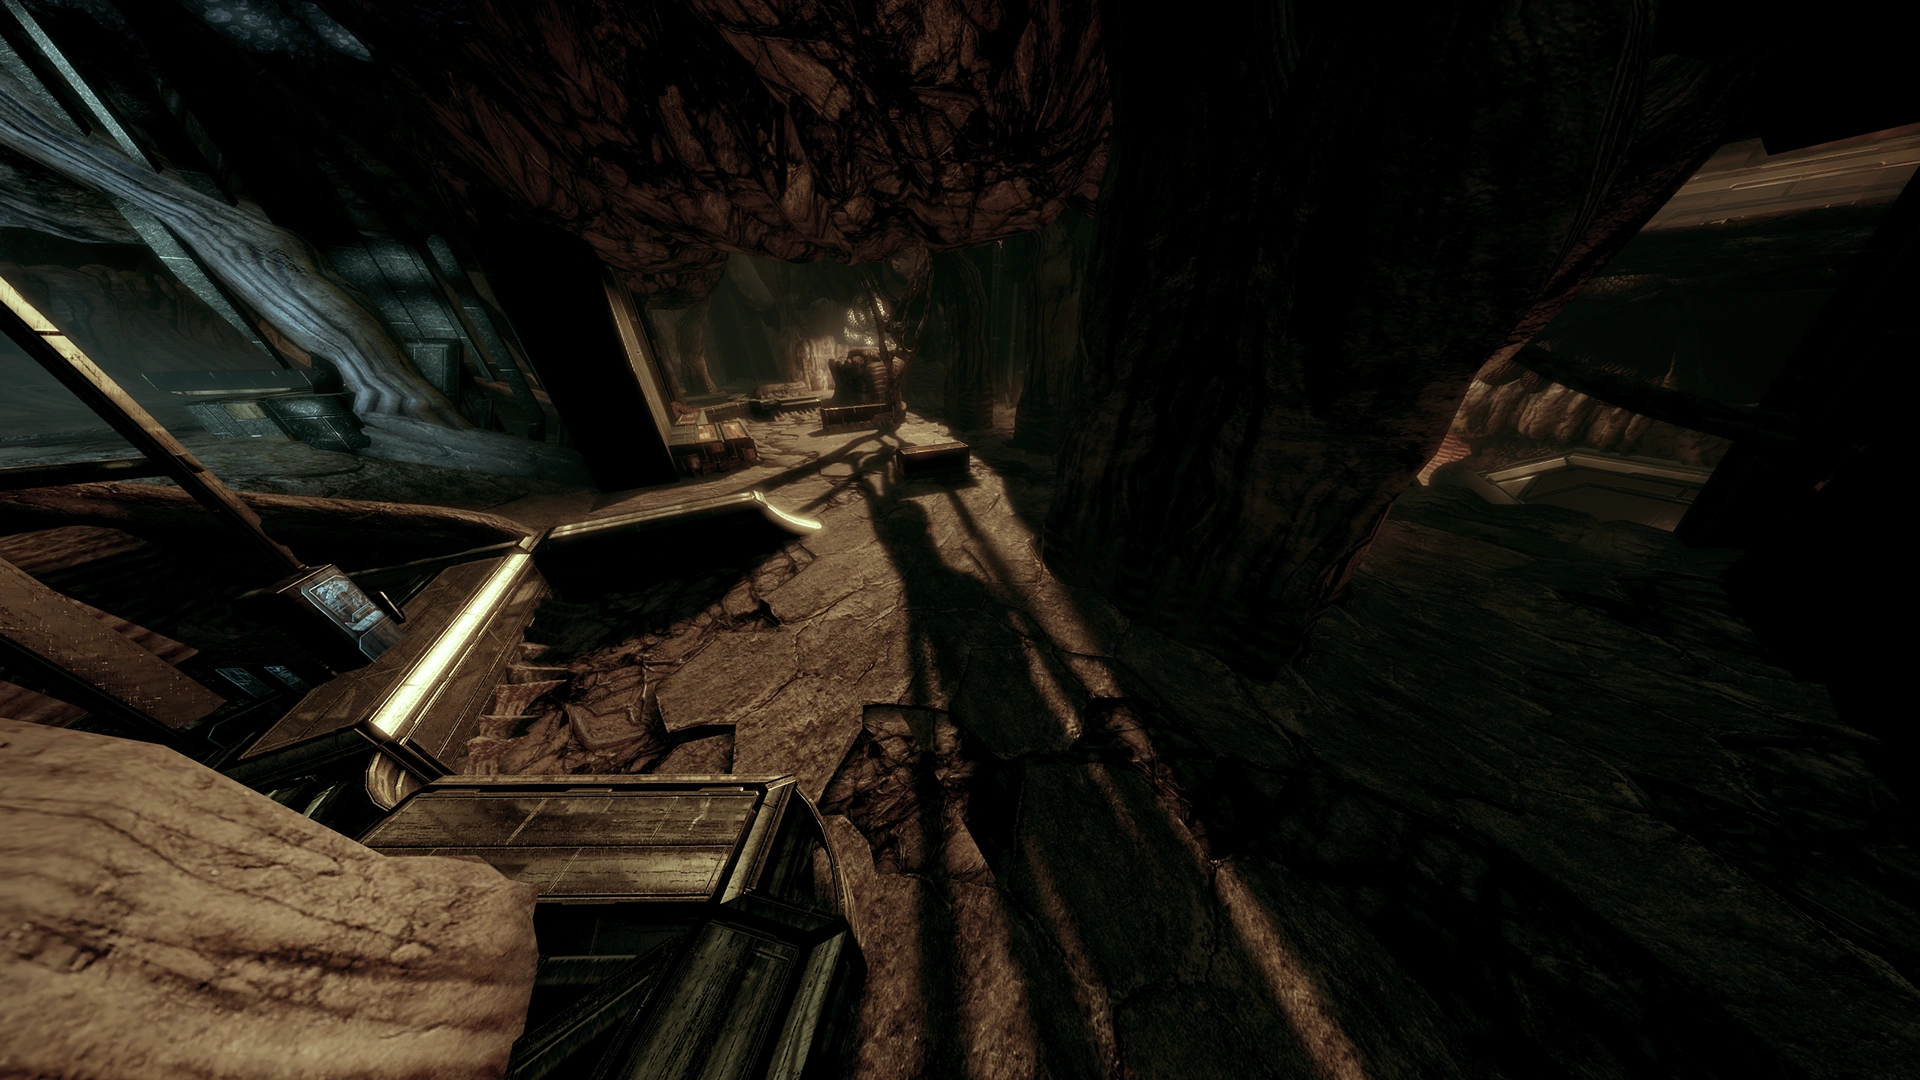
Combat Strategy: When you first enter this area, you will notice two ammo clips next to an unusual piece of cover shaped like part of a hexagon. This is the safest place to take cover and remain for most of the battle, as it not only prevents enemies from flanking you but also shields you from enemies up the ramp on the upper level. You can also keep your squadmates back in cover on the ramp you entered from so that they are safely out of the way for this battle. Keep Harbinger away from you of course, but if he's not an immediate threat prioritize picking off the Drones and Guardians, usually in that order. After you eliminate several of the attackers, a group of Abominations will approach from a distance and should always be priority targets because of their explosive suicide attack. Burn their armor away if they have any, disable them with powers, and finish them off if they don't spontaneously explode.
Additional Notes:
- Flashbang Grenade not only disables Harbinger, it's quite useful against Guardians as it will disable their shields and stun anything in the vicinity.
- Having a sniper rifle can definitely make eliminating the Collector troops much easier in this fight as many of them are at long range and stubbornly cling to cover. If you don't have a sniper rifle then any other accurate weapon like the M-12 Locust is your next best bet. Patiently wear down the Collectors one by one.
- To make it easier to land shots and powers on the Collectors ducking in and out of cover, consider using a squadmate power to briefly stun them while you line up your shot or launch your own power; even if the Collector still has a barrier, using a power like Throw or Flashbang on it will still stagger it momentarily.
- Having Barrier, Geth Shield Boost, or Fortification as a bonus power can really help on higher difficulties as you will probably be losing your shield a lot while trading shots with the Collectors and Harbinger. Having a tougher shield lets you trade damage more efficiently and gives you a "panic button" to instantly restore your shields if you come under more fire than you expected.
- There is some more glitchy map architecture here that can prevent your squadmates' powers from landing on enemies on the high ground. You'll either have to use your own projectile powers and weapon fire to take them down from where you enter, or take the braver step of moving your party forward to get unobstructed angles.
Once you eliminate all the enemies (you'll face 4-5 waves), head to the other end of the room and pick up the power cells, a med-kit with medi-gel, and another crate of refined element zero (+250 eezo).
Warning: Save your game here before the drop down into the next area.
Praetorian: The Sequel[]
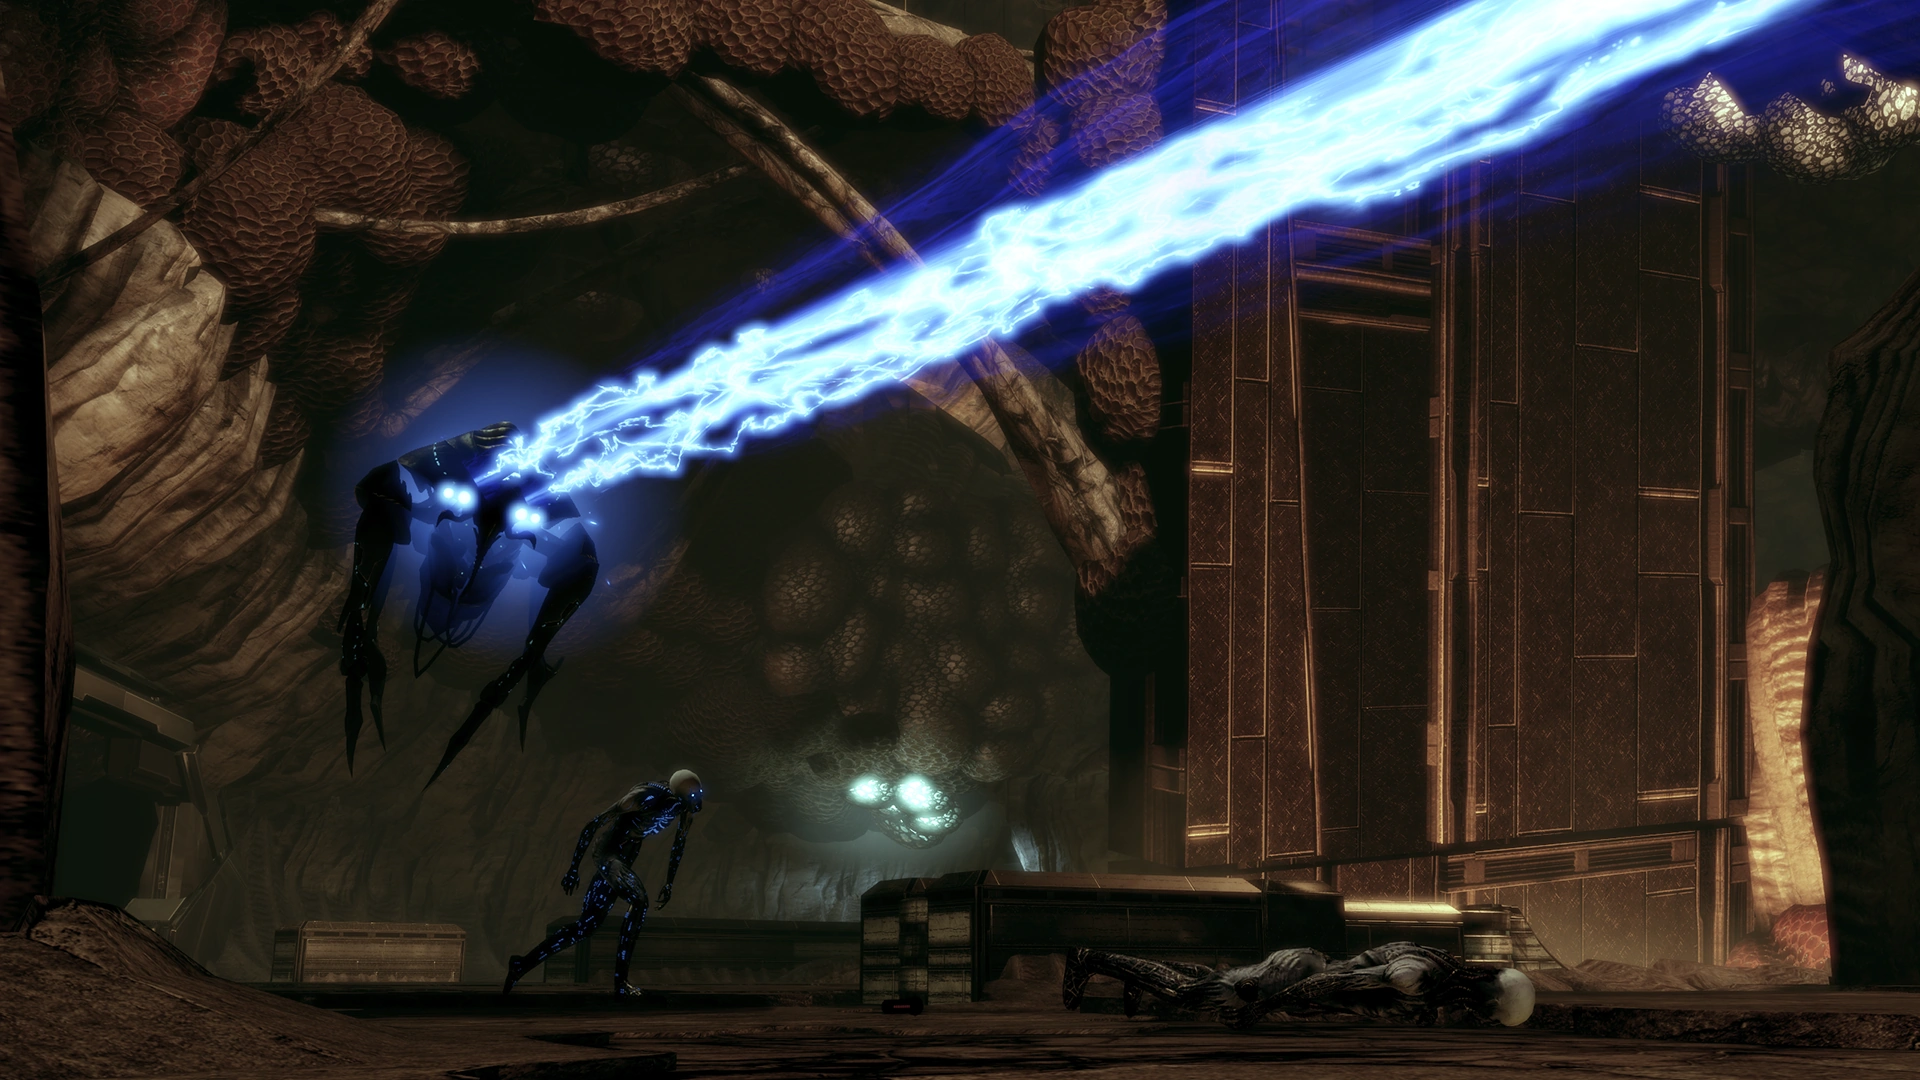
After you drop down into the next room and proceed inside a short distance, EDI will come over the comm telling you that she has opened a door at the other end of the room. There are two problems: first, Collectors and Husks enter the area to block your path; second, and more alarmingly, there is a Praetorian flying at you as well. Once the Husks are eliminated, two Collector Drones will fly in near the far end of the chamber. This Praetorian duel will be more difficult than the one on Horizon due to the presence of other opponents, but the same principles for fighting it still apply, you just need to eliminate the other threats as fast as possible so that you can then devote all your attention to the hovering monstrosity.
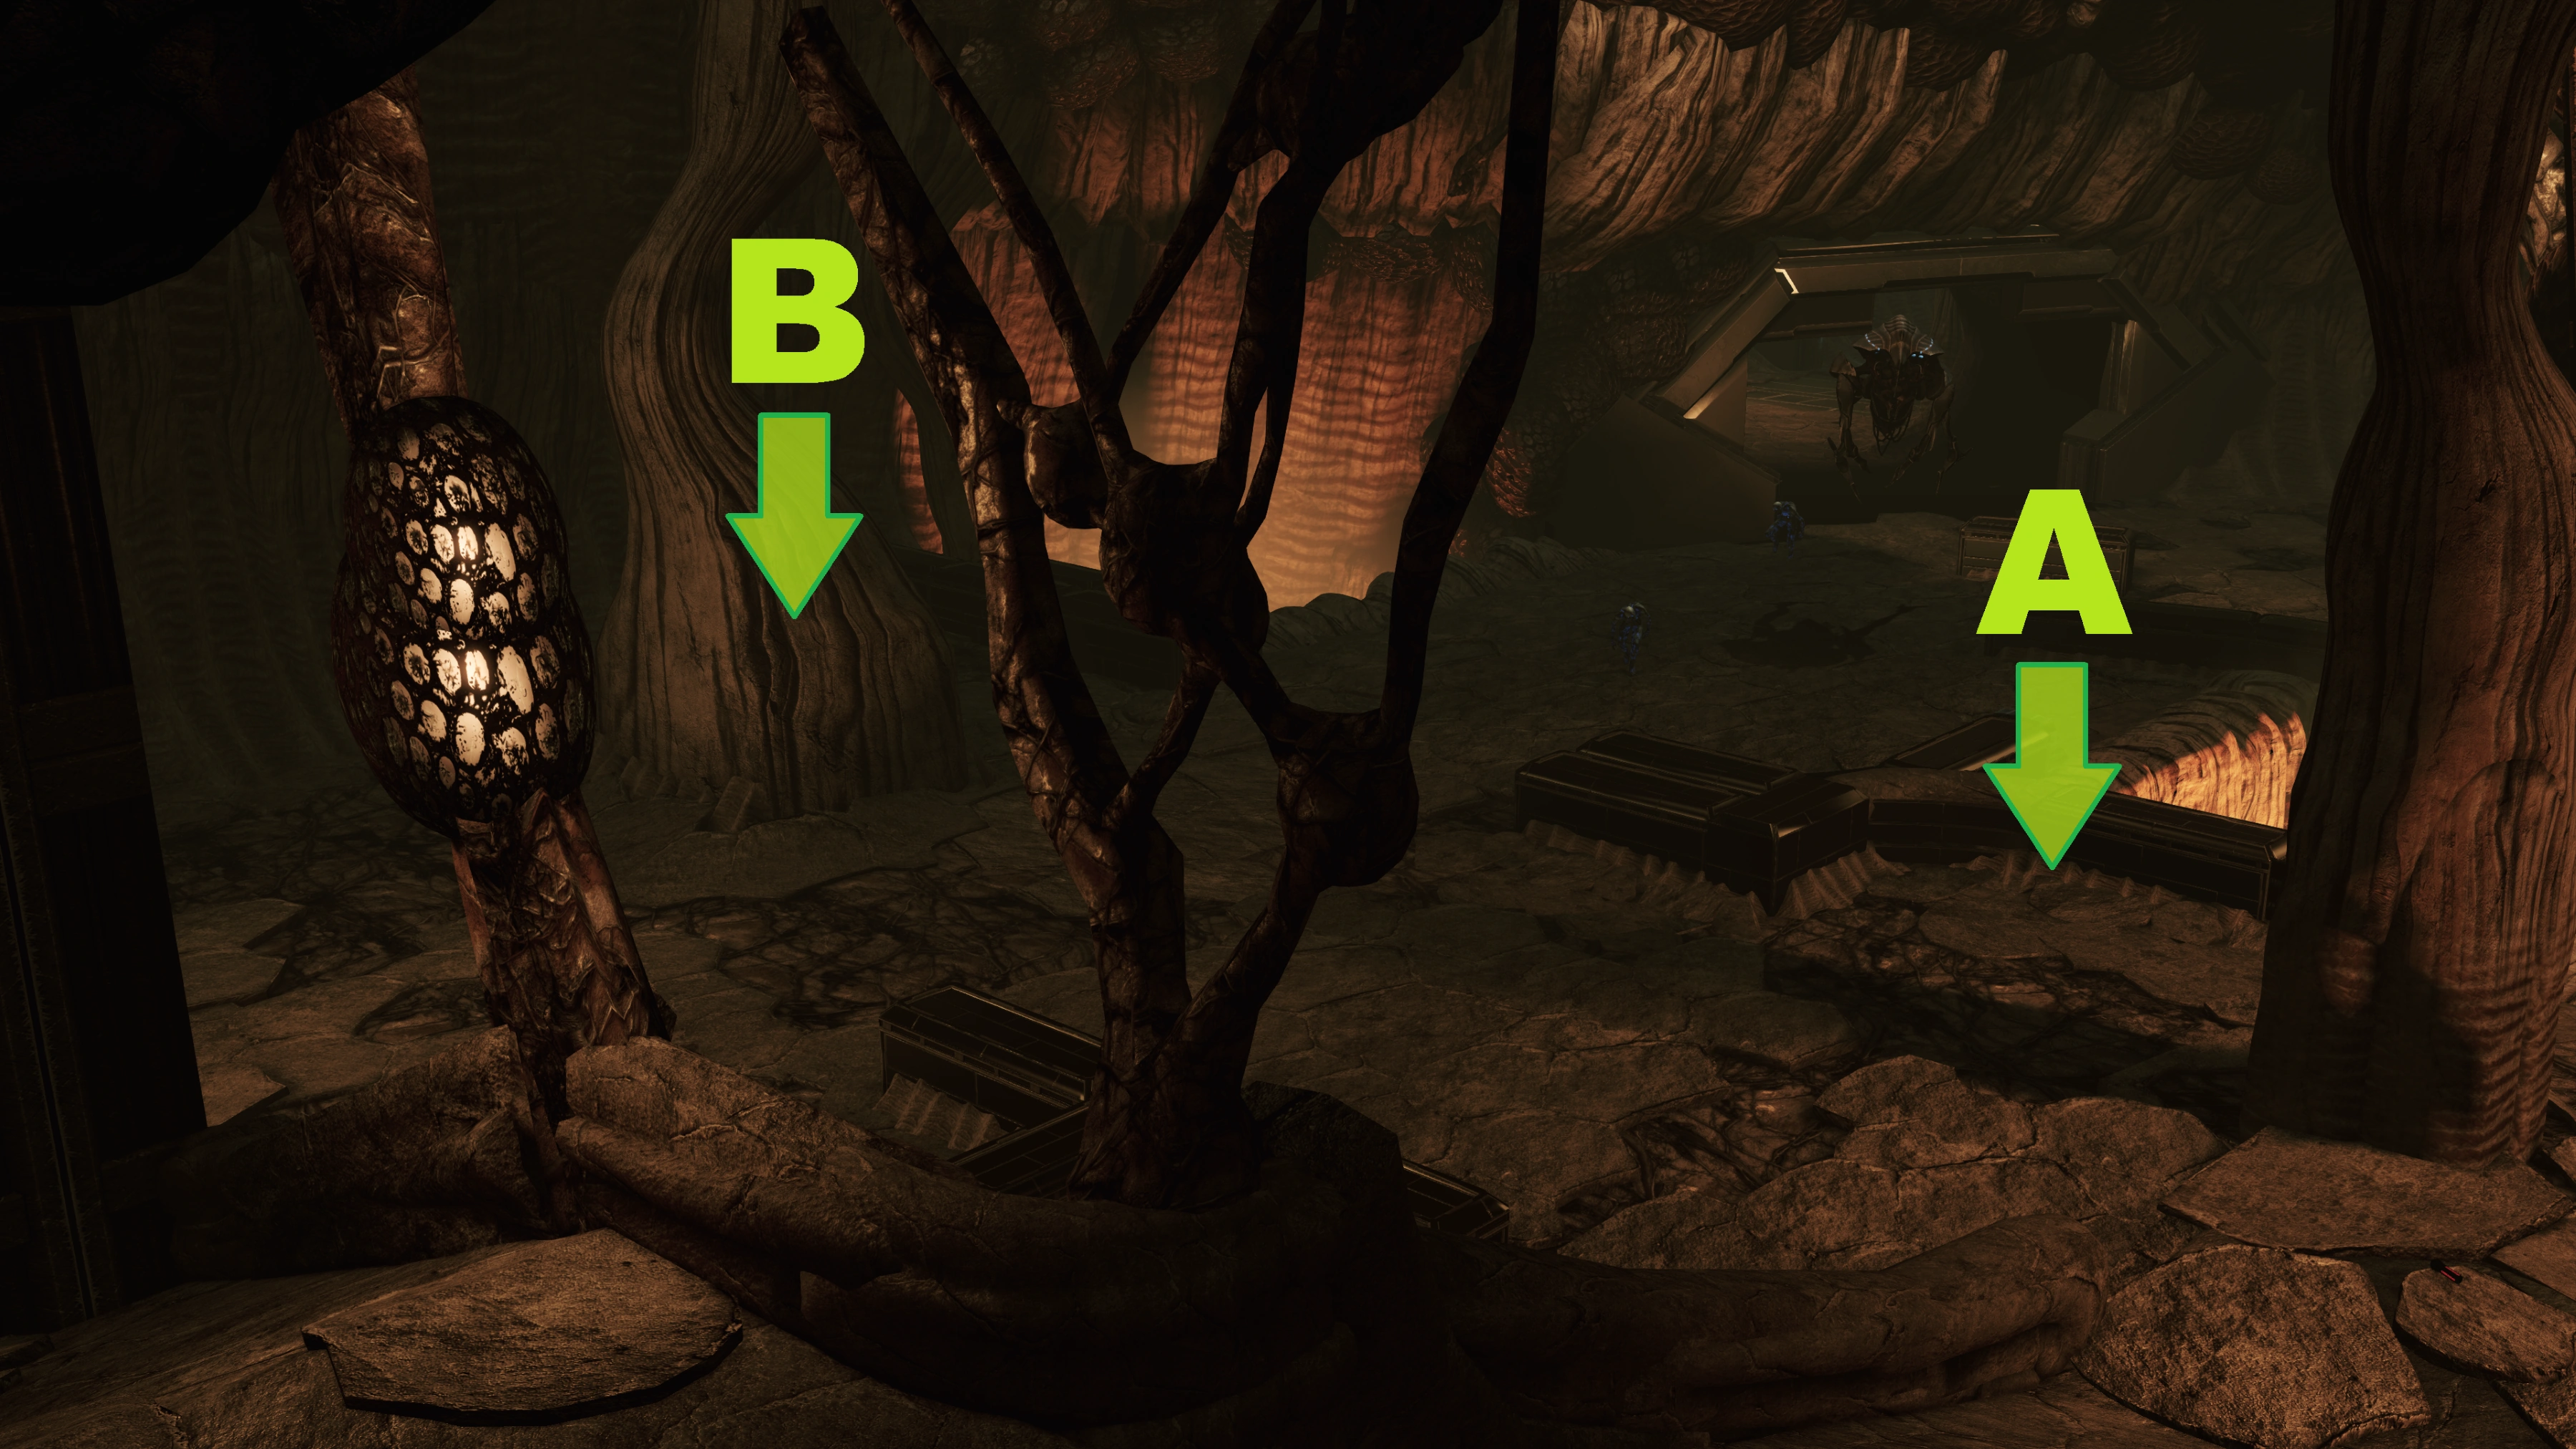
After you drop down into the area but before you move forward to trigger the fight (you'll know you've triggered it if EDI comes over the comm) make final preparations. Order your squad to move into the area and take cover where you want them; this will not trigger the fight. If your squad doesn't move when you order them to (they can sometimes get stuck in the elevated area before the drop down) reload your save and try again until they follow your orders properly. One of the better locations for your squad is in cover near the center of the lower area away from the left wall. This location is best as they will be close enough to the Collectors and husks that will spawn to draw their attention away from you while being far enough from where you'll be fighting the Praetorian not to get hit and killed by its slamming Death Choir attacks.
Along the left wall of the area there is a large, roughly conical pillar with a wide base that twists and tapers towards the ceiling. This is the best place to play "Ring Around the Rosie" with the impending Praetorian; there is even a respawning thermal clip nearby that you use use to continually top off your weapons. Once you're ready to begin the fight, advance down towards the pillar hugging the left wall, but don't head for the pillar just yet. First, focus on the advancing husks and the Collector drones that fly in after the husks are dead, and once the Praetorian reaches you, start leading it in circles around the pillar while continuing to focus on the other enemies until they are neutralized. Using a heavy weapon is perfectly acceptable here to make killing the husks and Collectors less of a headache.
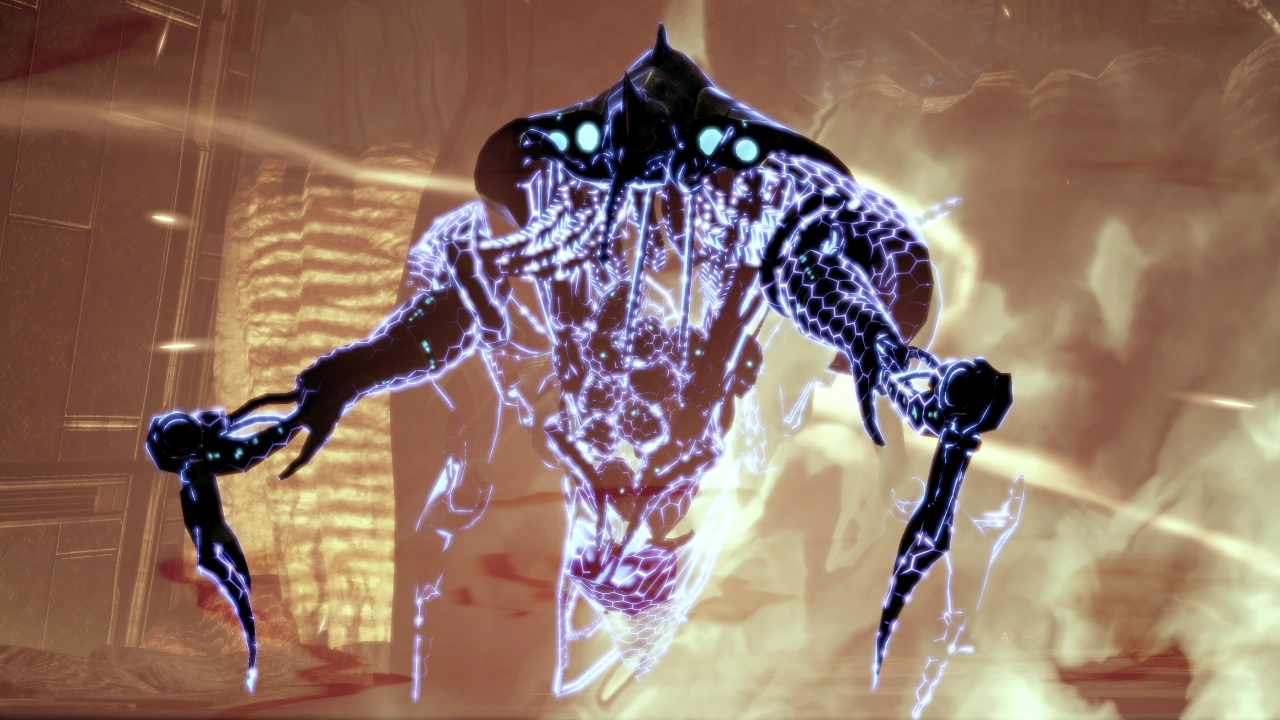
Combat Strategy: Always be aware of where the Praetorian is relative to you, and don't get caught in the open where its eye beams will fry you in seconds; keep cover between it and you at all times. Once the other enemies are dead, the Praetorian is the only threat and dealing with it is the same as on Horizon: lead it in circles while chipping away at it patiently with your squad helping. The Praetorian's lethal Death Choir attack triggers when it has taken a significant amount of damage to its armor or when it's close to an enemy. Death Choir's shockwave ignores intervening cover, so merely being behind something isn't enough, you also need to be a certain distance away. If you get staggered by the impact of the Praetorian slamming into the ground it might be game over, but you'll still have a small amount of time to scramble away.
Additional Notes:
- Fortunately, Harbinger does not spawn from the Collector drones you encounter in this fight, but you should still aim to eliminate them as fast as possible because the Praetorian is constantly flushing you from cover.
- While the Praetorian always remains focused on you, the path it takes to chase you can be unpredictable, and there's a risk that it may pass close to where your squadmates are located and kill them with a Death Choir slam. If this happens, do not revive them immediately, or it will simply happen again—wait for the Praetorian to leave the vicinity first.
- As always, use Unity if you're damaged or you need your squad back in the fight. A word of caution: while Unity will heal both you and your squad to full health and shields with the right upgrades, the effect isn't instant. If the Praetorian is on your heels and you need medi-gel, make sure to give yourself sufficient lead time and stay on the move.
- The need to stay moving while fighting the Praetorian is just one more reason why having Barrier, Geth Shield Boost, or Fortification as a bonus power can pay huge dividends in this mission; if you're running from the Praetorian and your shields are down while facing additional incoming fire from the Collectors you're likely dead unless you can restore your shields immediately, and medi-gel is a limited resource. The Sentinel has the luxury of Tech Armor for such a situation.
- As on Horizon, the Praetorian will remain focused on you the whole battle with only two exceptions: activating Tactical Cloak or summoning a Combat Drone at the Praetorian will temporarily distract it, and in the case of cloaking, cause the Praetorian to decide to fry one of your squadmates instead. For this reason an Infiltrator should only use the cloak as a last resort.
- Your squadmates will focus all their fire on the Praetorian, so manually order them to target something else if you need to.
- It is possible to stop more than a few Husks from spawning if you run to the other side of the room and reach the open door causing it to close. Once it closes, no more enemies can enter from it allowing you to focus on the Praetorian more quickly. This tactic is not recommended unless you are an Infiltrator with Tactical Cloak letting you escape back to cover. An Engineer can also get the door closed sooner by spawning a Combat Drone by an enemy in the doorway. You won't prevent that many enemies from spawning regardless of how you get the door closed so the risk/reward ratio of this tactic makes it of questionable value.
- An M-920 Cain shot can do significant damage to the Praetorian at the start of the fight as it spawns without its barrier active, but you must begin charging the shot as soon as possible after you hear EDI over the comm as you must get the shot off before anything can shoot you and interrupt the charging of the shot. This will not kill the Praetorian on higher difficulties and is not really recommended as even a Praetorian with weakened armor still has a powerful barrier so it's still generally better to eliminate the lesser enemies first before trying to take it down. Remember also that the Cain does friendly fire so keep your squad out of the blast zone.
Almost Home Free[]
Once the area is cleared of hostiles, pick up any ammo in the area including the power cells on the lower level if you hadn't already, and move to the door. The door will close as you approach it and EDI will divert you to a longer path around the obstacle.
The hallway has some salvageable Collector Technology (+7500 credits) and across from the Collector Technology is a Control Terminal with a Tech Damage upgrade.
Warning: Once you go through the next door, the door slams shut behind you, you are unable to go back, and the battle starts. Save your game before you continue.
The next fight can be difficult if you rush in too fast and get overwhelmed, but is relatively easy if you approach it cautiously. The Collectors attack in waves that include everything in their arsenal except another Praetorian (fortunately).
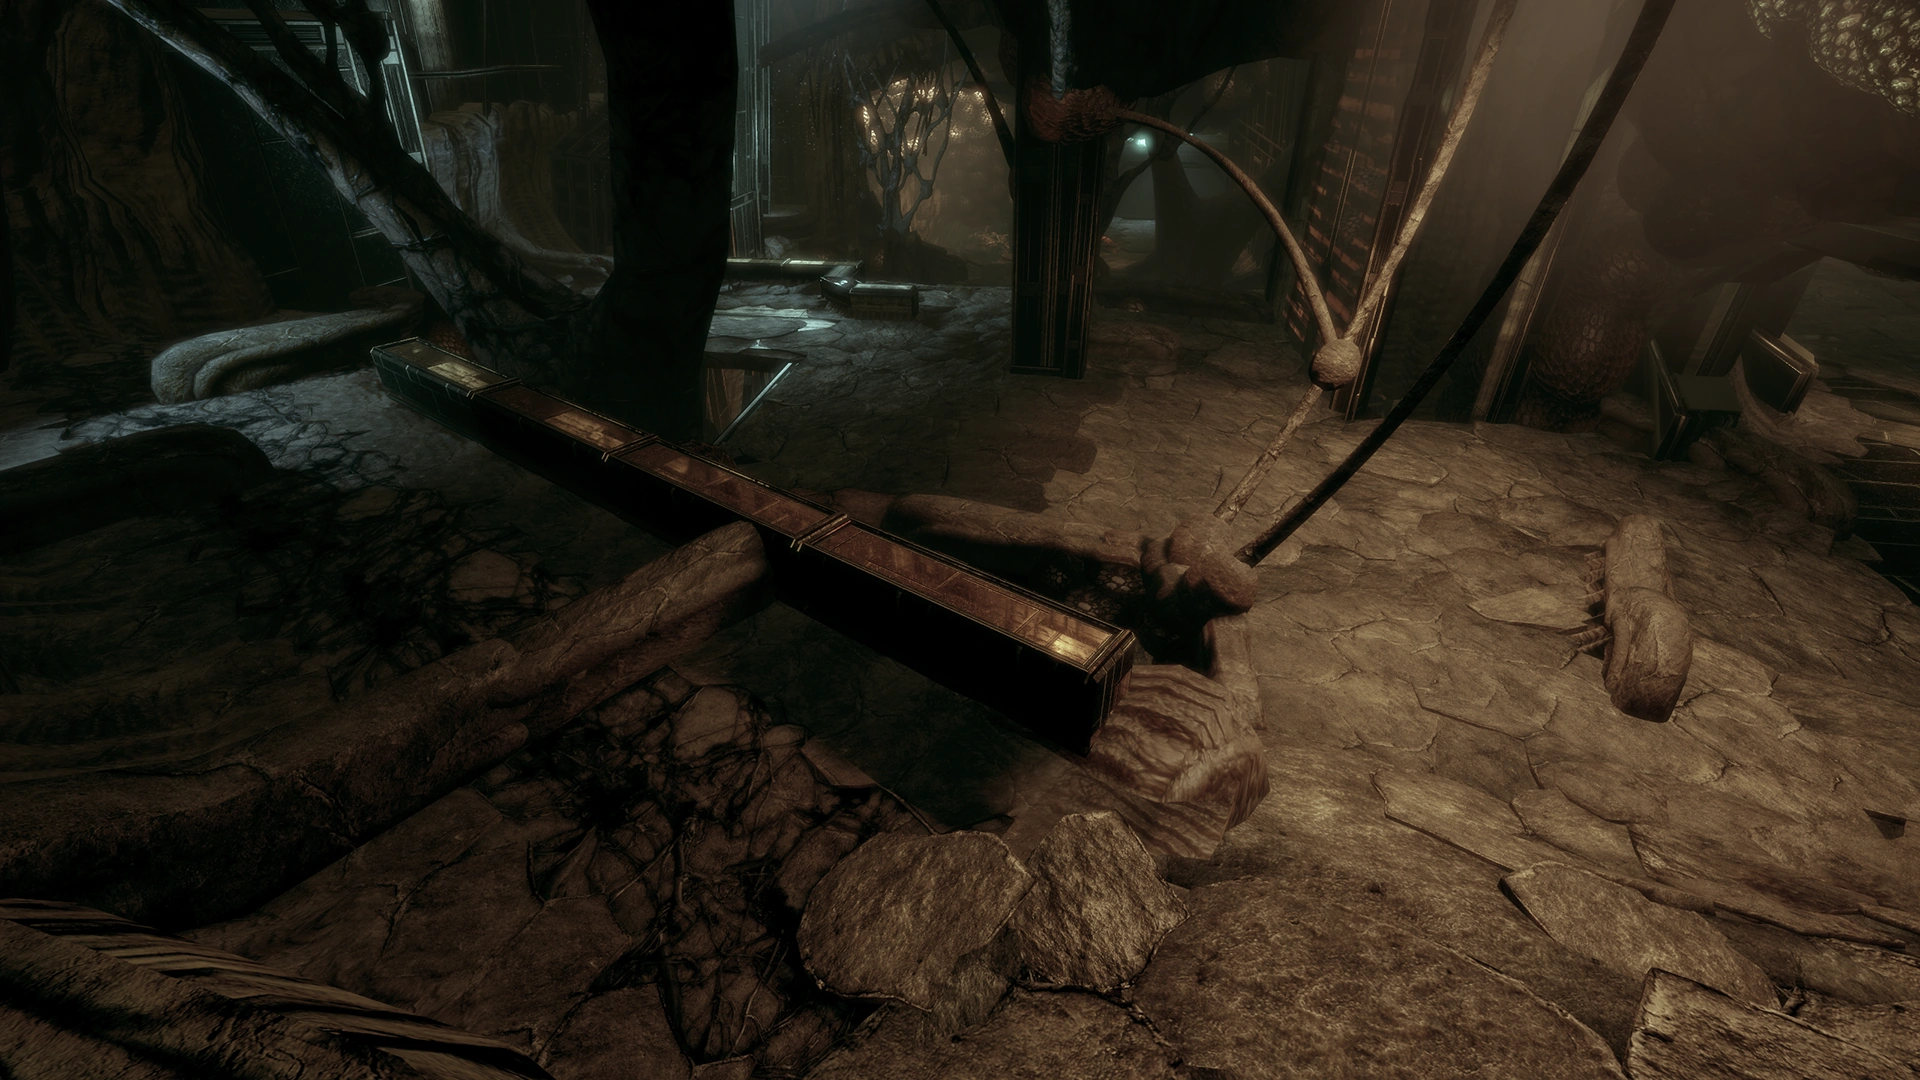
Combat Strategy: Order your squadmates to take cover on the left side of the area while staying outside the entrance, which doesn't trigger the fight until you move inside. There's one Collector pod on the ground and some raised ridges up against the high ground area. It's a good idea for the whole party to remain in this low ground on the left for most of the fight. Move forward to trigger the first wave and get ready—when the Abominations spawn, they need to be killed quickly with weapons or powers. All other Collectors from this point on will not come down the ramp and should have difficulty firing at your squad if it's positioned well. Harbinger will appear and several Collectors spawn in the first wave, but they stay at a distance on the higher ground. Kill the enemies using weapons or powers by moving forward towards the ramp and then running back to recharge shields. Additional waves can be lured out by moving forward carefully, then running back once enemies start flying in. This strategy takes time, but you can use powers and snipe with accurate weapons from a distance and conserve ammo while minimizing the danger.
Once all the Collectors are eliminated, the final hurdle is a lone Scion who lingers by the passageway leading out of the area. It won't move from this location, so you can even conserve ammo and kill it entirely with powers if you don't mind taking the extra time. Once it is down, search the areas where Collector troops died for any thermal clips they may have dropped.
Warning: Save your game at this point as you will be unable to save your game until after all the remaining combat in the mission is over.
The final part of this mission involves a gauntlet of about twenty husks. Head down the lengthy hall until you hear Joker over the comm recommending that you pick up the pace which is your cue the husks are about to appear.
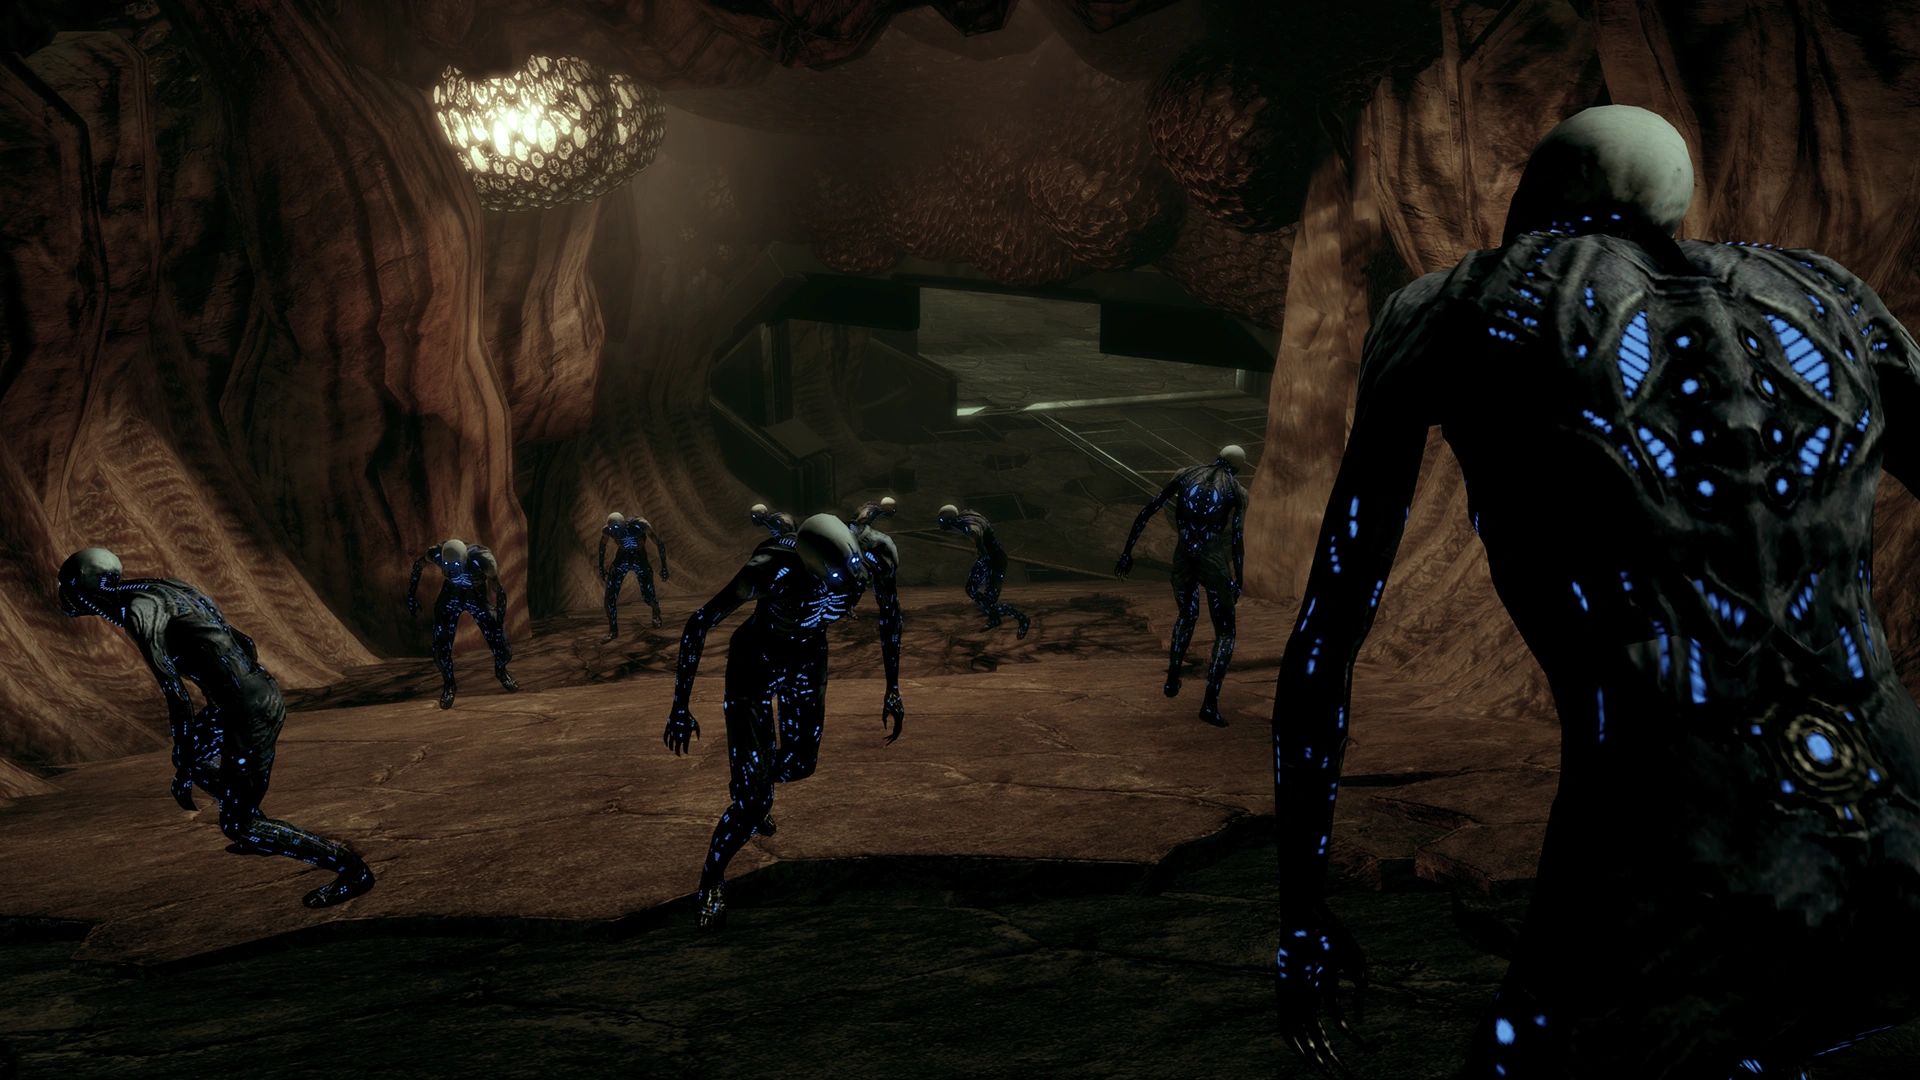
Combat Strategy: Keep moving so as not to get cornered while you eliminate the Husks. On higher difficulties shoot off their armor and then use force-based abilities such as biotics or Flashbang Grenade to instantly kill unarmored Husks in groups. If worst comes to worst and conventional weapons and powers aren't cutting it, take out a heavy weapon if you have one with good spread and blast away. Another tactic is to retreat all the way back to the last room where you fought the Collectors and take cover behind some of the low walls which will confuse and slow down the Husks.
Alternative Strategy: Although it takes some courage to attempt, you can bypass the Husks entirely by sprinting past them to the shuttle which triggers the escape cutscene. Start running the moment you hear Joker over the comm, then stop to catch your breath as you round the corner, then sprint again to get past the majority of the Husks; if you're quick about this you'll see that most of the Husks aren't really aware of you yet and aren't rushing to the attack. To make this easier, a Soldier can Adrenaline Rush past the Husks, an Infiltrator can Tactical Cloak, and a Vanguard can Charge at a Husk nearest the exit. If playing as an Adept, Sentinel or Engineer, then a few shots with the Avalanche or the Grenade Launcher will clear a path through the bulk of the Husks without a problem.
Once the Husks are thinned out or completely eliminated, the way back to the shuttle is clear. Upon reaching it, a cutscene will play that covers your return to the Normandy and your narrow escape from the fully operational Collector vessel.
Normandy[]
Following your harrowing ordeal, you find yourself in another conversation with the Illusive Man. Since he knowingly sent you and your crew into a trap, let him have it any way you wish. However, he firmly maintains that he didn’t risk all of your lives unnecessarily and suggests you communicate that to the crew. Most importantly, his gamble paid off.
Thanks to EDI's analysis of Collector data, Cerberus has discovered how the Collectors survive the passage through the Omega 4 Relay: an advanced form of an Identify Friend/Foe device, or "IFF". The Illusive Man tells you that any Collector or Reaper ship is likely equipped with such a device, though unfortunately there wasn't enough time to search for and recover one from the vessel you just left. After you respond, he tells you that Cerberus has located a Derelict Reaper in the Thorne system of the Hawking Eta Cluster, in orbit of the brown dwarf Mnemosyne. The vessel’s still-active mass effect fields keep it aloft and safe, but the Cerberus science team he had dispatched to study it stopped reporting in; you'll have to investigate the Reaper yourself to find out what happened and hopefully obtain an IFF. After you comment on this, the Illusive Man concludes by warning that traveling through the Omega 4 Relay is likely to be a one-way trip, so your team needs to be focused on their tasks to have any chance of surviving.
After the meeting Jacob Taylor, Miranda Lawson, and Mordin Solus join you in the briefing room. You can explain the Illusive Man’s actions any way you want. No matter the conversation, the general consensus is that the mission was a success. EDI comes over the comm and tells you that, based on the Collector ship’s course through the Omega 4 Relay, she can calculate the location of the Collector homeworld. She brings up a display of the Milky Way, and to everyone's shock, the path of the trace ends up in the galactic core. After you comment, Jacob voices his skepticism, arguing that nothing can survive in the core. Mordin theorizes that it would be possible for an artificial installation protected by strong mass effect fields and radiation shielding to operate there. You can point out that the Collectors are merely pawns of the Reapers, and considering the capabilities the Reapers have already demonstrated with feats like constructing the Mass Relays and the Citadel, constructing a base at the heart of the galaxy doesn’t seem all that far-fetched.
At the end of the conversation, you have dialogue options about whether to go after the Reaper IFF immediately or build up the team. It is strongly recommended that you continue to build up the team first, but your answer in the conversation does not commit you one way or the other. Actually going after the IFF will commence the final chapter of the game.
When you next access the galaxy map, you'll find that the Normandy has been transported to the Balor System of the Caleston Rift, the apparent result of EDI's blind FTL jump.
Two additional upgrades become available for purchase on Illium after completing this mission.
Enemies[]
Mission Summary[]
Gathered vital intel regarding Collectors and Omega-4 relay.
With Shepard's escape, Harbinger knows our true capabilities and will have to adopt new tactics. Will have to be careful, as Harbinger's information network may rival Cerberus or Shadow Broker's. Also appears impossible to block his ability to possess minions. EDI's work was exceptional, however, proving value of shackled AI.
- Experience: 1,000 (1,250)
- Credits: 75,000
- Cerberus Funds: 37,500
- Credits Found: 37,500
- Weapons
- M-76 Revenant (Soldier class only)
- M-300 Claymore (Soldier and Vanguard classes only)
- M-98 Widow (Soldier and Infiltrator classes only)
- Resources:
- Element Zero: 500
- Upgrades: