Cattlesquat (talk | contribs) (→Preparation: cleanup) |
m (Dash to exclamation) Tag: Visual edit |
||
| (42 intermediate revisions by 11 users not shown) | |||
| Line 1: | Line 1: | ||
| ⚫ | |||
| − | [[File:Tuchanka Keystone.jpg|right|300px]] |
||
| ⚫ | |||
== Acquisition == |
== Acquisition == |
||
| − | {{Prerequisite|Dossier: The Warlord}} |
+ | {{Prerequisite|Horizon (mission)|Horizon (mission),| and waking Grunt following [[Dossier: The Warlord]] }} |
| − | {{Prerequisite|Horizon (mission)}} |
||
This is Grunt's loyalty mission, in which he requests that Shepard travel to Tuchanka so that he may complete the [[krogan]] rite of passage. |
This is Grunt's loyalty mission, in which he requests that Shepard travel to Tuchanka so that he may complete the [[krogan]] rite of passage. |
||
| Line 11: | Line 9: | ||
== Preparation == |
== Preparation == |
||
| − | All of the [[#Enemies|enemies]] in this mission are armored, and most of them aggressively attempt to close to point-blank range. Fire-based powers for frying armor and stopping krogan regeneration, Cryo-based powers for freezing things that are charging you, and the various ammo powers useful against |
+ | All of the [[#Enemies|enemies]] in this mission are armored, and most of them aggressively attempt to close to point-blank range. Fire-based powers for frying armor and stopping krogan regeneration, Cryo-based powers for freezing things that are charging you, and the various ammo powers useful against armor are all things to look for in a squadmate. Consider upgrading Grunt's [[Incendiary Ammo]] to share with the whole squad. |
| + | It's also a very good idea to go into this mission with the [[Research#Heavy Pistols|heavy pistol upgrades]] for bonus damage to armor and critical hit, as with those upgrades the pistol becomes the most effective weapon against most of the enemies in the level, even in the "boss" encounter near the conclusion of the mission. The [[Research#Sniper Rifles|sniper rifle upgrade ]] for bonus damage to armor is also useful if you carry one. |
||
| − | Also... if you're in the mood to actually ''kill'' the Thresher Maw, consider bringing a long-range heavy weapon - either the Cain, the Arc Projector, or the Missile Launcher, though to be clear it is entirely possible to kill the Thresher Maw on Insanity using only a Heavy Pistol and your squadmates' powers. |
||
| + | |||
| + | Any Heavy Weapon can find a use in this level but bringing one with both good area of effect and disruption such as the [[Arc Projector]], [[M-622 Avalanche]], or [[M-490 Blackstorm]] is recommended. |
||
== Walkthrough == |
== Walkthrough == |
||
| ⚫ | [[File:Tuchanka Harvester Rite of Passage.jpg|left|250px|Can't fight these critters but they will drop enemies you and Grunt can fight.]]With Grunt in your party, speak with the current leader of [[Clan Urdnot]], who is either Shepard's old friend, [[Urdnot Wrex|Wrex]], or (if he died on [[Virmire]] or was never recruited) his brother, [[Urdnot Wreav|Wreav]]. Either will note that Grunt is not sick, he is of the age where he must complete the krogan rite of passage, and refers the party to the clan [[Shaman]]. The clan Shaman will relate various information about the rite, as well as krogan history and culture. [[Gatatog Uvenk]] will protest Grunt taking the rite, as he is tank bred. You can get Uvenk to stand down in a number of ways. After Shepard agrees to be Grunt's [[krantt]], the Shaman sends Grunt and company to the traditional grounds of the rite. |
||
| − | [[File:Tuchanka Harvester Rite of Passage.jpg|left|250px|Can't fight these critters but they will drop enemies you and Grunt can fight.]] |
||
| ⚫ | With Grunt in your party, speak with the current leader of [[Clan Urdnot]], who is either Shepard's old friend, [[Urdnot Wrex|Wrex]], or (if he died on [[Virmire]] or was never recruited) his brother, [[Urdnot Wreav|Wreav]]. Either will note that Grunt is not sick, he is of the age where he must complete the krogan rite of passage, and refers the party to the clan [[Shaman]]. The clan Shaman will relate various information about the rite, as well as krogan history and culture. [[Gatatog Uvenk]] will protest Grunt taking the rite, as he is tank bred. You can get Uvenk to stand down in a number of ways. After Shepard agrees to be Grunt's [[krantt]], the Shaman sends Grunt and company to the traditional grounds of the rite. |
||
| − | === |
+ | === The Keystone === |
| − | To begin each of the three waves of the Rite, you will need to activate the "keystone" that's near the central stairs where Shepard is standing when you enter the area. |
+ | [[File:Tuchanka Keystone.jpg|right|300px|Let's get started, Shepard. Hit the Keystone!]]To begin each of the three waves of the Rite, you will need to activate the "keystone" that's near the central stairs where Shepard is standing when you enter the area. |
'''Before''' beginning the first wave, take a moment to run bypasses on the turbine parts on either side of the central stairs and salvage the credits from four dead krogan on the upper level. There are also three Med-Kits and two power cells. |
'''Before''' beginning the first wave, take a moment to run bypasses on the turbine parts on either side of the central stairs and salvage the credits from four dead krogan on the upper level. There are also three Med-Kits and two power cells. |
||
| − | {{note|Insanity Tip:}} It is best to leave the power cells and medkits where they are until you need them. However one power cell box and one medkit are on the lower level - you may wish to collect them before the third wave starts. Finally, as soon as you beat |
+ | {{note|Insanity Tip:}} It is best to leave the power cells and medkits where they are until you need them. However one power cell box and one medkit are on the lower level - you may wish to collect them before the third wave starts. Finally, as soon as you beat the third wave you will no longer be able to loot any of the objects, so be sure to get them all picked up before that happens. |
Remember to get all of your ammo powers equipped - preferably Incendiary, Warp or best of all Armor Piercing. Also before hitting the keystone, you can take this time to scout out the area and note the locations of ammo cartridges, all of which will respawn repeatedly throughout the rite. Grunt will "helpfully" remind you to hit the keystone precisely every fifteen seconds when you are between waves, just to keep you from getting too distracted. |
Remember to get all of your ammo powers equipped - preferably Incendiary, Warp or best of all Armor Piercing. Also before hitting the keystone, you can take this time to scout out the area and note the locations of ammo cartridges, all of which will respawn repeatedly throughout the rite. Grunt will "helpfully" remind you to hit the keystone precisely every fifteen seconds when you are between waves, just to keep you from getting too distracted. |
||
=== Wave One === |
=== Wave One === |
||
| − | [[File:Urdnot ruins - grunt smash.png|260px|right|Grunt getting ready to stomp some varren.]][[Varren]] - The first wave summons multitudes of varren and they all descend upon Shepard, Grunt and the third party member. Since they can only attack at melee distance, they should all be dispatched at range. They come from two sides of the map at the opposite corners from the switch, so you need to stay sharp and not leave your back unguarded. |
+ | [[File:Urdnot ruins - grunt smash.png|260px|right|Grunt getting ready to stomp some varren.]][[Varren (enemy)|Varren]] - The first wave summons multitudes of varren and they all descend upon Shepard, Grunt and the third party member. Since they can only attack at melee distance, they should all be dispatched at range. They come from two sides of the map at the opposite corners from the switch, so you need to stay sharp and not leave your back unguarded. |
| − | {{note|Insanity Tip:}} Get the armor stripped off each varren as quickly as possible |
+ | {{note|Insanity Tip:}} Get the armor stripped off each varren as quickly as possible so that you can then use powers to slow down their approach. Be careful with Shepard's powers however: Varren are quite fast, fast enough to outrun powers with slower moving projectiles such as most biotics or [[Incinerate]]. Time and aim powers carefully to avoid getting juked, or use a power with an instant effect such as [[Neural Shock]] or very large area of effect such as [[Shockwave]] to compensate. This isn't an issue with squad powers as those are instant. |
{{Note}}It is possible to face the varren all from one side if Shepard quickly makes it to the top of the center set of stairs (it's really a bit to the right of center). The varren will all come up at Shepard up from the bottom of these stairs as it is the quickest route to Shepard and the team. |
{{Note}}It is possible to face the varren all from one side if Shepard quickly makes it to the top of the center set of stairs (it's really a bit to the right of center). The varren will all come up at Shepard up from the bottom of these stairs as it is the quickest route to Shepard and the team. |
||
Once all the enemies are down, Grunt will begin reminding you to hit the keystone. Before you do that, walk around and refill all your ammo. |
Once all the enemies are down, Grunt will begin reminding you to hit the keystone. Before you do that, walk around and refill all your ammo. |
||
| − | |||
| − | {{Note}} There is a glitch wherein when you kill all the varren there will still be one left, this varren does not have a health bar it just has a name saying varren, it will not attack and it will not die, whenever you try to kill it, it will just stand up and stay in an aggressive stance. There are two solutions for this; either reload the game, or have a [[biotic]] squadmate use [[Pull]], and repeatedly shoot the varren with your shotgun in an upwards direction, effectively blasting it out of the map. If successful, the Rite will continue. |
||
=== Wave Two === |
=== Wave Two === |
||
| − | [[File:Urdnot ruins - grunt on fire.png|250px|left|Grunt warming himself with klixen fire.]][[Klixen]] - These fire-breathing creatures make up the second wave and are delivered by [[ |
+ | [[File:Urdnot ruins - grunt on fire.png|250px|left|Grunt warming himself with klixen fire.]][[Klixen]] - These fire-breathing creatures make up the second wave and are delivered by [[Harvester (enemy)|Harvesters]] on either side of the map; don't waste your ammo, the Harvesters cannot be killed. The klixen will need to be taken out while you are still out of their fire-breathing range or they can quickly cause havoc and deal a lot of damage. They are resistant to [[Incendiary Ammo]] and Incinerate (but their armor isn't) and they're weak against [[Armor-Piercing Ammo]], [[Reave]] and [[Warp Ammo]]. |
| − | {{note|Insanity Tip:}} Once you've stripped their armor, abilities like Grunt's Concussive Shot can stop the klixen before they get too close. |
+ | {{note|Insanity Tip:}} Once you've stripped their armor, abilities like Grunt's Concussive Shot or Jacob's Pull can stop the klixen before they get too close. |
{{note|Tip:}} If you watch your teammates carefully, they will automatically face the direction of the next incoming harvester. |
{{note|Tip:}} If you watch your teammates carefully, they will automatically face the direction of the next incoming harvester. |
||
| + | {{note|Tip:}} Unlike Varren, Klixen are quite slow and you can easily stay out of range of their attacks by continuously moving and shooting. Your squadmates will have to be ordered to do this or they will stand and fight (and often die) but Shepard alone can beat this section simply by continuously moving and shooting/using powers while picking up respawning thermal clips. Downed squadmates will automatically revive at the end of this (and all other) waves. |
||
| ⚫ | Once the klixen stop coming, Grunt will again start reminding you to hit the keystone. Refill your ammo before you do so, and consider collecting the medkit and powercells that are down on the lower level before you begin wave three -- they |
||
| ⚫ | |||
| − | {{Note}} Just like with the varren in wave one, there is a glitch where there will still be one klixen left without a health bar, and it just has a name saying klixen. Sometimes it will not even be visible, but will appear to be hidden under the ground. Just as before, there are two solutions for this: Either reload the game, or have a squadmate use Pull, and repeatedly shoot the klixen with your shotgun in an upwards direction, effectively blasting it out of the map. If successful, the Rite will continue. |
||
=== Wave Three === |
=== Wave Three === |
||
| − | [[Thresher Maw]] |
+ | [[Thresher Maw (enemy)|Thresher Maw]]! This is not so much a wave as it is a giant creature attack. There is only one Thresher Maw and the primary objective is simply to survive. All you have to do is survive the attack for five minutes and the test will be ended, though there are additional dialogue accolades if you succeed in taking it down. |
| − | [[File:Urdnot ruins - gruntpocalypse now.png|285px|right|Grunt ponders whether to watch the Thresher Maw eat a Cain slug or to blast at it while it eats the Cain slug.]]If you manage to kill the Thresher Maw, you gain the respect of the krogan and the rite ends. The Thresher Maw moves around the outskirts of the map, but its trail of flying dirt clods is easy to follow when it dives back underground. The Thresher Maw can destroy some of the weaker structures, so try to avoid those for cover and go for the sturdier walls instead. Its acid spit is an area of effect attack and will accurately shoot at you even if you're cloaked. Its blue "tongue" seems to be a weak spot, and incurs more damage than its armored carapace. |
+ | [[File:Urdnot ruins - gruntpocalypse now.png|285px|right|Grunt ponders whether to watch the Thresher Maw eat a Cain slug or to blast at it while it eats the Cain slug.]]If you manage to kill the Thresher Maw, you gain the respect of the krogan and the rite ends. The Thresher Maw moves around the outskirts of the map, but its trail of flying dirt clods is easy to follow when it dives back underground. The Thresher Maw can destroy some of the weaker structures, so try to avoid those for cover and go for the sturdier walls instead. Its acid spit is an area of effect attack and will accurately shoot at you even if you're cloaked. Its blue "tongue" seems to be a weak spot, and incurs more damage than its armored carapace. |
| + | {{note|Combat Strategy:}} There is one indestructible stone pillar on the low ground area of the level that you can use to take cover from the Maw from any direction it might appear. Additionally, there are two respawning thermal clips at the base of this pillar as well as easy access to a Medi-gel and power cells on the higher ground that you can pick up from the edge of the raised area without needing to climb up. This is without a doubt the optimal place to fight the Maw. Place your squadmates in cover behind the other two indestructible pillars on the high ground and they should also be safe and might even draw the Maw's fire giving you free rein. If a squadmate does go down it's not the end of the world, Shepard alone is more than enough to beat the Maw even on Insanity. |
||
| ⚫ | |||
| + | |||
| − | * When the Thresher Maw is on the left or right side of the battlefield, interpose the central steps (near the keystone) between you and it. That way you can pop out and shoot in between acid spittles. You can also interpose the various "square columns" thereby saving "sprinting" time, but many of those are destructible and will only block a single shot from the Maw - always have an exit plan. |
||
| ⚫ | |||
| − | * When the Thresher Maw moves to the center, keep an eye out for the two taller pylons at the far end of the upper platform -- not only is the Thresher Maw unable to destroy them, but if you interpose them perfectly between Shepard and the Thresher Maw they will block the Thresher Maw's acid spittle but leave plenty of places visible to shoot at. |
||
| + | * The metal pillars can be destroyed by the Thresher Maw in one hit, but any cover made of stone/concrete is not destructible. You should always try to interpose indestructible cover between yourself and the Maw. The Maw's spit projectile does have an area of effect so try to be as completely in cover as possible when the Maw attacks to ensure you are not hit. |
||
| − | * Shepard's shields take longer than usual to recover after an acid hit, so be careful. On the plus side it takes about three consecutive hits to kill Shepard even on Insanity. |
+ | * Shepard's shields take longer than usual to recover after an acid hit, so be careful. On the plus side it takes about three consecutive hits to kill Shepard even on Insanity. Don't hesitate to use a Medi-gel to instantly restore your shields (provided you have the Emergency Shielding [[Research#Medical Upgrades|Medi-gel upgrade]]). |
| ⚫ | * |
||
| + | * A well-upgraded pistol is more than sufficient to take out the Maw as long as you take advantage of respawning thermal clips to keep replenishing its ammo. |
||
| ⚫ | * On Insanity, the Thresher Maw's sheer amount of health makes using Heavy Weapons inefficient. The best strategy is to utilize [[Armor-Piercing Ammo]] on the creature (Warp and Incendiary Ammo being reasonable second choices), and have your squadmates constantly help you in attacking the Thresher Maw with conventional weapons. |
||
* Grunt's [[Concussive Shot]], even though marked as ineffective against armor, if applied when the Maw surfaces will "stagger" the Maw reducing the number of acid shots it will take before retreating. |
* Grunt's [[Concussive Shot]], even though marked as ineffective against armor, if applied when the Maw surfaces will "stagger" the Maw reducing the number of acid shots it will take before retreating. |
||
| − | * [[Zaeed]]'s [[Inferno Grenade]], [[Mordin]]'s [[Incinerate]], and [[Samara]]'s [[Reave]] are examples of good squadmate attacks to use. |
+ | * [[Zaeed]]'s [[Inferno Grenade]], [[Mordin]]'s [[Incinerate]], and [[Samara]]'s [[Reave]] are examples of good squadmate attacks to use. Using weapons with high armor penetration such as the [[M-98 Widow|Widow]], [[M-76 Revenant]], [[M-96 Mattock]], or most pistols will help a lot. |
| − | * The [[Cain]] |
+ | * The [[Cain]] will usually only damage half the Thresher Maw's health on Insanity. |
| + | * The Thresher Maw is immune to the effects of [[Stasis]]. |
||
| − | * Even on Insanity, a Heavy Pistol is more than sufficient to kill the Maw provided you are able to use it constantly and efficiently. You'll need to minimize the time you spend running between hiding places while finding enough ammo and nonetheless avoiding getting staggered by acid blasts - it's fun! |
||
=== Uvenk's Folly === |
=== Uvenk's Folly === |
||
| − | [[File:Tuchanka Uvenk Proposal.jpg|left|250px|Uvenk presents his proposal to Grunt]]After the Thresher Maw is destroyed or the timer hits the five-minute mark, the Rite of Passage is officially over. However, at that point Gatatog Uvenk and his krantt make an appearance. During the cutscene, Uvenk expresses that he is impressed by Grunt's accomplishment. He then seeks out a loophole that he believes will allow him to accept Grunt. Grunt, however, is not at all pleased by what Uvenk is saying. |
+ | [[File:Tuchanka Uvenk Proposal.jpg|left|250px|Uvenk presents his proposal to Grunt]]After the Thresher Maw is destroyed or the timer hits the five-minute mark, the Rite of Passage is officially over. However, at that point Gatatog Uvenk and his krantt make an appearance. During the cutscene, Uvenk expresses that he is impressed by Grunt's accomplishment. He then seeks out a loophole that he believes will allow him to accept Grunt. Grunt, however, is not at all pleased by what Uvenk is saying as he would be treated little better than a trophy for Clan Gatatog. |
| − | No matter what conversation option Shepard chooses, they end up engaging Uvenk and his krantt. Uvenk has a barrier and armor that need to be taken down to kill him and there are three or four [[Gatatog Warrior]]s with him. Once |
+ | No matter what conversation option Shepard chooses, they end up engaging Uvenk and his krantt. Uvenk has a barrier and armor that need to be taken down to kill him and there are three or four [[Gatatog Warrior]]s with him. Once the final enemy falls, you will automatically return to the Urdnot camp and speak to the Shaman. The Shaman will welcome Grunt as a full-fledged member of Clan Urdnot and award you a shotgun damage upgrade. Once you're done speaking with the Shaman, the mission will end. |
| − | {{note|Insanity Tip:}} For whatever reason most of the krogan, including Gatatog, will move rapidly away at the beginning of the combat, so you will really only be dealing with one or two krogan attacking at any given time - concentrate on one attacker and obliterate it before it can get behind your cover. |
+ | {{note|Insanity Tip:}} For whatever reason most of the krogan, including Gatatog, will move rapidly away at the beginning of the combat, so you will really only be dealing with one or two krogan attacking at any given time - concentrate on one attacker and obliterate it before it can get behind your cover. {{Warning}}Summoning a [[Combat Drone]] on top of the krogan at the start of this encounter will backfire by making all the krogan bum rush your position instead of retreating like they normally would. You don't want that. |
| − | {{Note}}If you |
+ | {{Note}}If you have a heavy weapon with good area of effect and still have ammo, you can wreak havoc on the krogan by targeting them at the start of the engagement while they are all clumped together. |
| − | {{Note}}There are two krogan corpses that can be searched and two [[Medi-gel]] packs to be picked up during the fight against Uvenk |
+ | {{Note}}There are two krogan corpses that can be searched and two [[Medi-gel]] packs to be picked up during the fight against Uvenk, but you have to loot them before finishing the fight because you will automatically leave the area. One is located down the stairs by the medi-gel packs and the other is behind the last barricade where Gatatog and his troops are positioned. It is advisable to wait until most of the enemies are dead before going for this last one. |
=== Mass Effect 3 Consequences === |
=== Mass Effect 3 Consequences === |
||
| Line 80: | Line 79: | ||
=== Email === |
=== Email === |
||
| − | After the mission is complete, Shaman Urdnot sends Shepard this email with what one might call a "request": |
+ | After the mission is complete, Shaman Urdnot sends Shepard this email, titled "To Grunt's commander", with what one might call a "request": |
{{emailquote|From: Shaman Urdnot |
{{emailquote|From: Shaman Urdnot |
||
| Line 93: | Line 92: | ||
=== Enemies === |
=== Enemies === |
||
*[[Klixen]] |
*[[Klixen]] |
||
| − | *[[Varren]] |
+ | *[[Varren (enemy)|Varren]] |
| − | *[[Thresher Maw]] |
+ | *[[Thresher Maw (enemy)|Thresher Maw]] |
*[[Gatatog Uvenk]] |
*[[Gatatog Uvenk]] |
||
*[[Gatatog Warrior]] |
*[[Gatatog Warrior]] |
||
| Line 113: | Line 112: | ||
*Resources |
*Resources |
||
**Platinum: 2,000 |
**Platinum: 2,000 |
||
| + | |||
| + | == Bugs == |
||
| + | The last varren or klixen standing in the waves before facing the Thresher Maw may turn "immortal": they won't attack, but they remain in aggressive stance and can't die when shot or punched at either. The klixen may even clip below the ground. |
||
| + | |||
| + | To get around this, either reload the game, or have a [[biotic]] squadmate use [[Pull]], and repeatedly shoot the varren with your shotgun in an upwards direction, effectively blasting it out of the map. Alternately if you are on PC and have the [[PC Tweaks (Mass Effect 2)#Enabling console|console enabled]], use the "KillEnemies" command. If successful, the Rite will continue. |
||
== Trivia == |
== Trivia == |
||
[[File:Urdnot ruins easter egg (upside down).png|250px|right|The alleged piston with the tiny writings, flipped upside-down.]] |
[[File:Urdnot ruins easter egg (upside down).png|250px|right|The alleged piston with the tiny writings, flipped upside-down.]] |
||
*After this mission, if Shepard killed the Thresher Maw, several krogan will comment on the Thresher Maw Shepard killed, stating that it has not been done since [[Urdnot Wrex]] underwent the Rite himself. |
*After this mission, if Shepard killed the Thresher Maw, several krogan will comment on the Thresher Maw Shepard killed, stating that it has not been done since [[Urdnot Wrex]] underwent the Rite himself. |
||
| − | *Upon returning to Tuchanka after the |
+ | *Upon returning to Tuchanka after the mission, should Shepard have killed the Thresher Maw, [[EDI]] will report that there have been numerous breeding requests directed for Grunt. Humorously (and to Grunt's amusement), there is also one for Shepard. |
*During the fight with Uvenk, heading up the flight of stairs and examining the giant piston will reveal the words: "Lots of very small text put something interesting here or whatever" upside-down. |
*During the fight with Uvenk, heading up the flight of stairs and examining the giant piston will reveal the words: "Lots of very small text put something interesting here or whatever" upside-down. |
||
| + | *Unused dialogue for this mission suggests that originally, Grunt may have considered Uvenk's offer and Shepard would be able to expressly forbid Grunt from joining the Uvenk clan, a decision that Grunt would later confront Shepard about when back aboard the Normandy. Among the dialogue are responses from both Shepard and Grunt depending on how Shepard would have responded to Grunt's complaint.<ref>https://www.youtube.com/watch?v=HrgsVU6qtUw</ref> |
||
| + | |||
| + | ==References== |
||
| + | <references /> |
||
[[Category:Tuchanka]] |
[[Category:Tuchanka]] |
||
[[Category:Mass Effect 2]] |
[[Category:Mass Effect 2]] |
||
Revision as of 08:36, 21 May 2020
Grunt thinks he may be seriously ill and has requested a trip to Tuchanka to get a diagnosis.
Acquisition
This is Grunt's loyalty mission, in which he requests that Shepard travel to Tuchanka so that he may complete the krogan rite of passage.
In the cargo hold of the Normandy SR-2, Grunt will pace back and forth restlessly as he tells Shepard that he is unnerved by his intense desire to destroy and kill. It has become an involuntary compulsion rather than an intentional, pleasure-seeking activity. He requests that Shepard take him to Tuchanka, as EDI is lacking in the area of medical records pertaining to krogan, who now fiercely guard their medical data since the salarians used it against them with the genophage.
Preparation
All of the enemies in this mission are armored, and most of them aggressively attempt to close to point-blank range. Fire-based powers for frying armor and stopping krogan regeneration, Cryo-based powers for freezing things that are charging you, and the various ammo powers useful against armor are all things to look for in a squadmate. Consider upgrading Grunt's Incendiary Ammo to share with the whole squad.
It's also a very good idea to go into this mission with the heavy pistol upgrades for bonus damage to armor and critical hit, as with those upgrades the pistol becomes the most effective weapon against most of the enemies in the level, even in the "boss" encounter near the conclusion of the mission. The sniper rifle upgrade for bonus damage to armor is also useful if you carry one.
Any Heavy Weapon can find a use in this level but bringing one with both good area of effect and disruption such as the Arc Projector, M-622 Avalanche, or M-490 Blackstorm is recommended.
Walkthrough

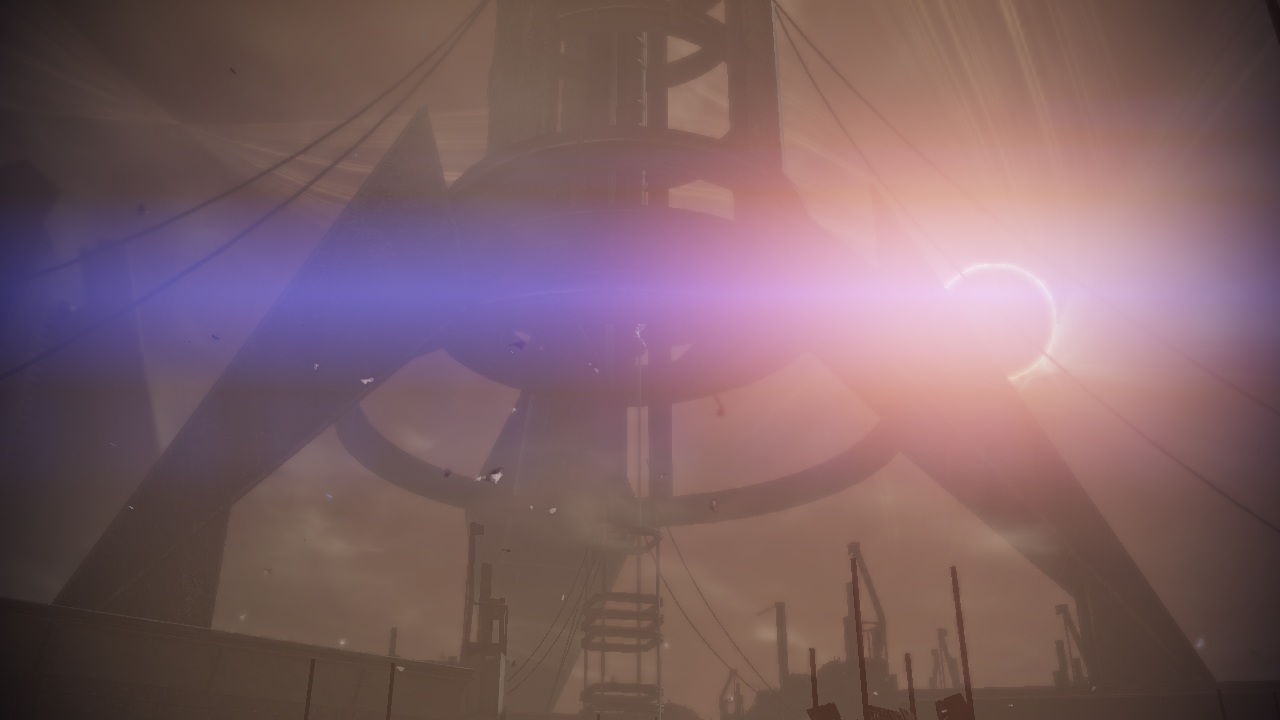
With Grunt in your party, speak with the current leader of Clan Urdnot, who is either Shepard's old friend, Wrex, or (if he died on Virmire or was never recruited) his brother, Wreav. Either will note that Grunt is not sick, he is of the age where he must complete the krogan rite of passage, and refers the party to the clan Shaman. The clan Shaman will relate various information about the rite, as well as krogan history and culture. Gatatog Uvenk will protest Grunt taking the rite, as he is tank bred. You can get Uvenk to stand down in a number of ways. After Shepard agrees to be Grunt's krantt, the Shaman sends Grunt and company to the traditional grounds of the rite.
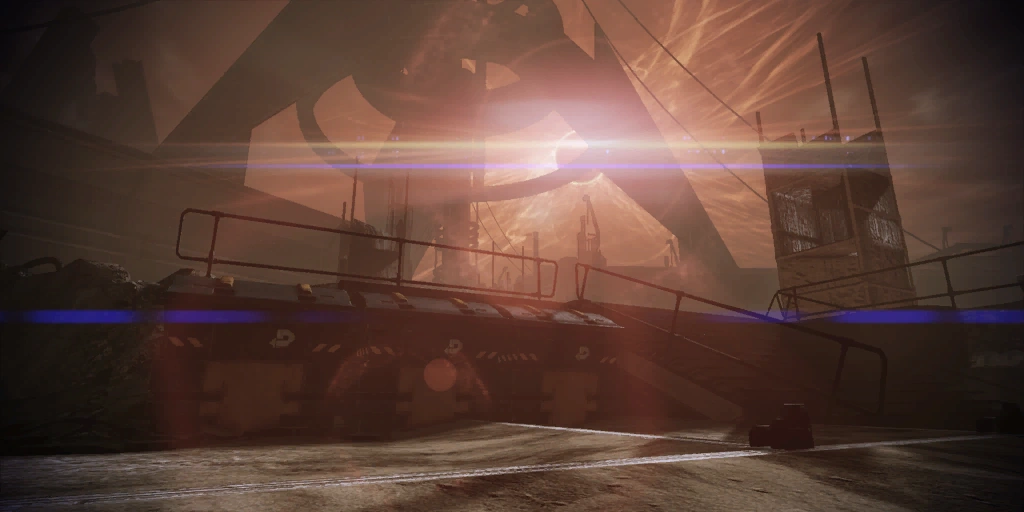
The Keystone
To begin each of the three waves of the Rite, you will need to activate the "keystone" that's near the central stairs where Shepard is standing when you enter the area.
Before beginning the first wave, take a moment to run bypasses on the turbine parts on either side of the central stairs and salvage the credits from four dead krogan on the upper level. There are also three Med-Kits and two power cells.
Insanity Tip: It is best to leave the power cells and medkits where they are until you need them. However one power cell box and one medkit are on the lower level - you may wish to collect them before the third wave starts. Finally, as soon as you beat the third wave you will no longer be able to loot any of the objects, so be sure to get them all picked up before that happens.
Remember to get all of your ammo powers equipped - preferably Incendiary, Warp or best of all Armor Piercing. Also before hitting the keystone, you can take this time to scout out the area and note the locations of ammo cartridges, all of which will respawn repeatedly throughout the rite. Grunt will "helpfully" remind you to hit the keystone precisely every fifteen seconds when you are between waves, just to keep you from getting too distracted.
Wave One
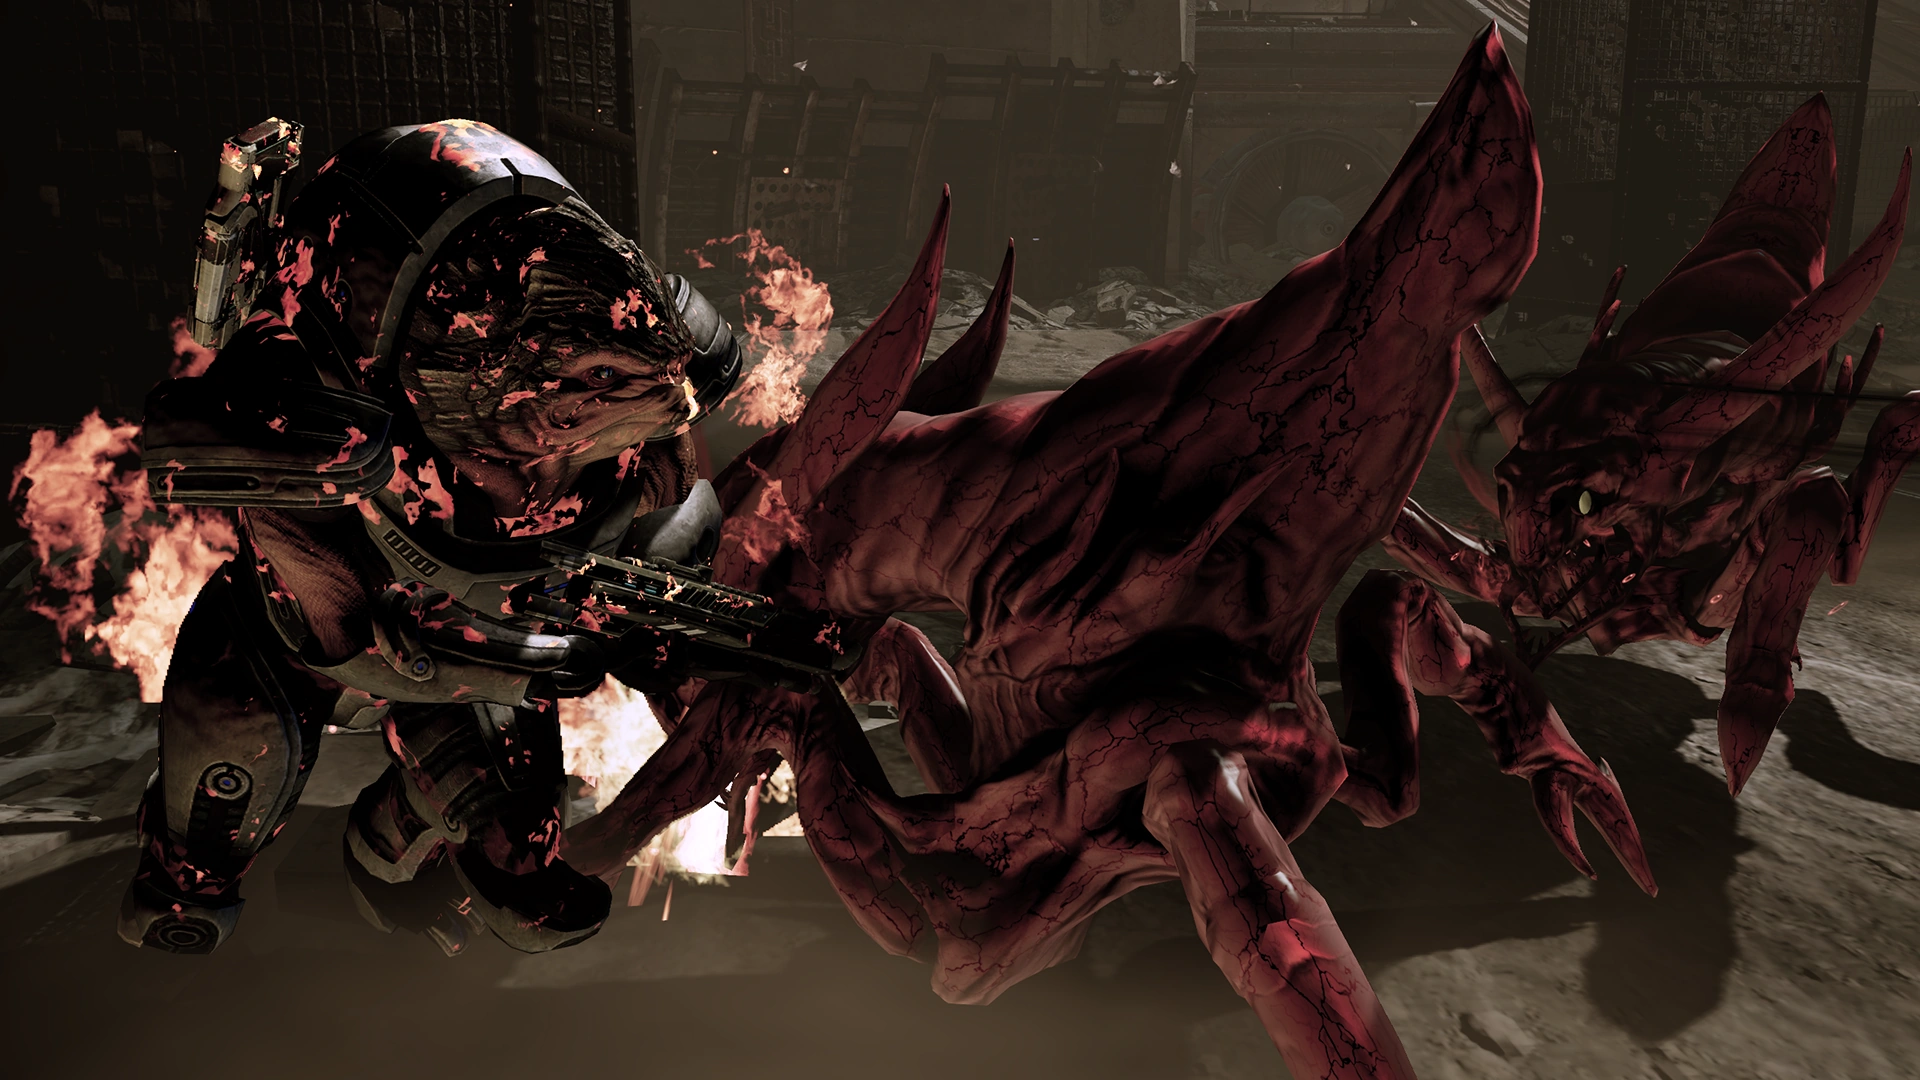
Varren - The first wave summons multitudes of varren and they all descend upon Shepard, Grunt and the third party member. Since they can only attack at melee distance, they should all be dispatched at range. They come from two sides of the map at the opposite corners from the switch, so you need to stay sharp and not leave your back unguarded.
Insanity Tip: Get the armor stripped off each varren as quickly as possible so that you can then use powers to slow down their approach. Be careful with Shepard's powers however: Varren are quite fast, fast enough to outrun powers with slower moving projectiles such as most biotics or Incinerate. Time and aim powers carefully to avoid getting juked, or use a power with an instant effect such as Neural Shock or very large area of effect such as Shockwave to compensate. This isn't an issue with squad powers as those are instant.
Note: It is possible to face the varren all from one side if Shepard quickly makes it to the top of the center set of stairs (it's really a bit to the right of center). The varren will all come up at Shepard up from the bottom of these stairs as it is the quickest route to Shepard and the team.
Once all the enemies are down, Grunt will begin reminding you to hit the keystone. Before you do that, walk around and refill all your ammo.
Wave Two
Klixen - These fire-breathing creatures make up the second wave and are delivered by Harvesters on either side of the map; don't waste your ammo, the Harvesters cannot be killed. The klixen will need to be taken out while you are still out of their fire-breathing range or they can quickly cause havoc and deal a lot of damage. They are resistant to Incendiary Ammo and Incinerate (but their armor isn't) and they're weak against Armor-Piercing Ammo, Reave and Warp Ammo.
Insanity Tip: Once you've stripped their armor, abilities like Grunt's Concussive Shot or Jacob's Pull can stop the klixen before they get too close.
Tip: If you watch your teammates carefully, they will automatically face the direction of the next incoming harvester.
Tip: Unlike Varren, Klixen are quite slow and you can easily stay out of range of their attacks by continuously moving and shooting. Your squadmates will have to be ordered to do this or they will stand and fight (and often die) but Shepard alone can beat this section simply by continuously moving and shooting/using powers while picking up respawning thermal clips. Downed squadmates will automatically revive at the end of this (and all other) waves.
Once the klixen stop coming, Grunt will again start reminding you to hit the keystone. Refill your ammo before you do so, and consider collecting the medkit and powercells that are down on the lower level before you begin wave three -- they will be difficult to collect during the upcoming battle.
Wave Three
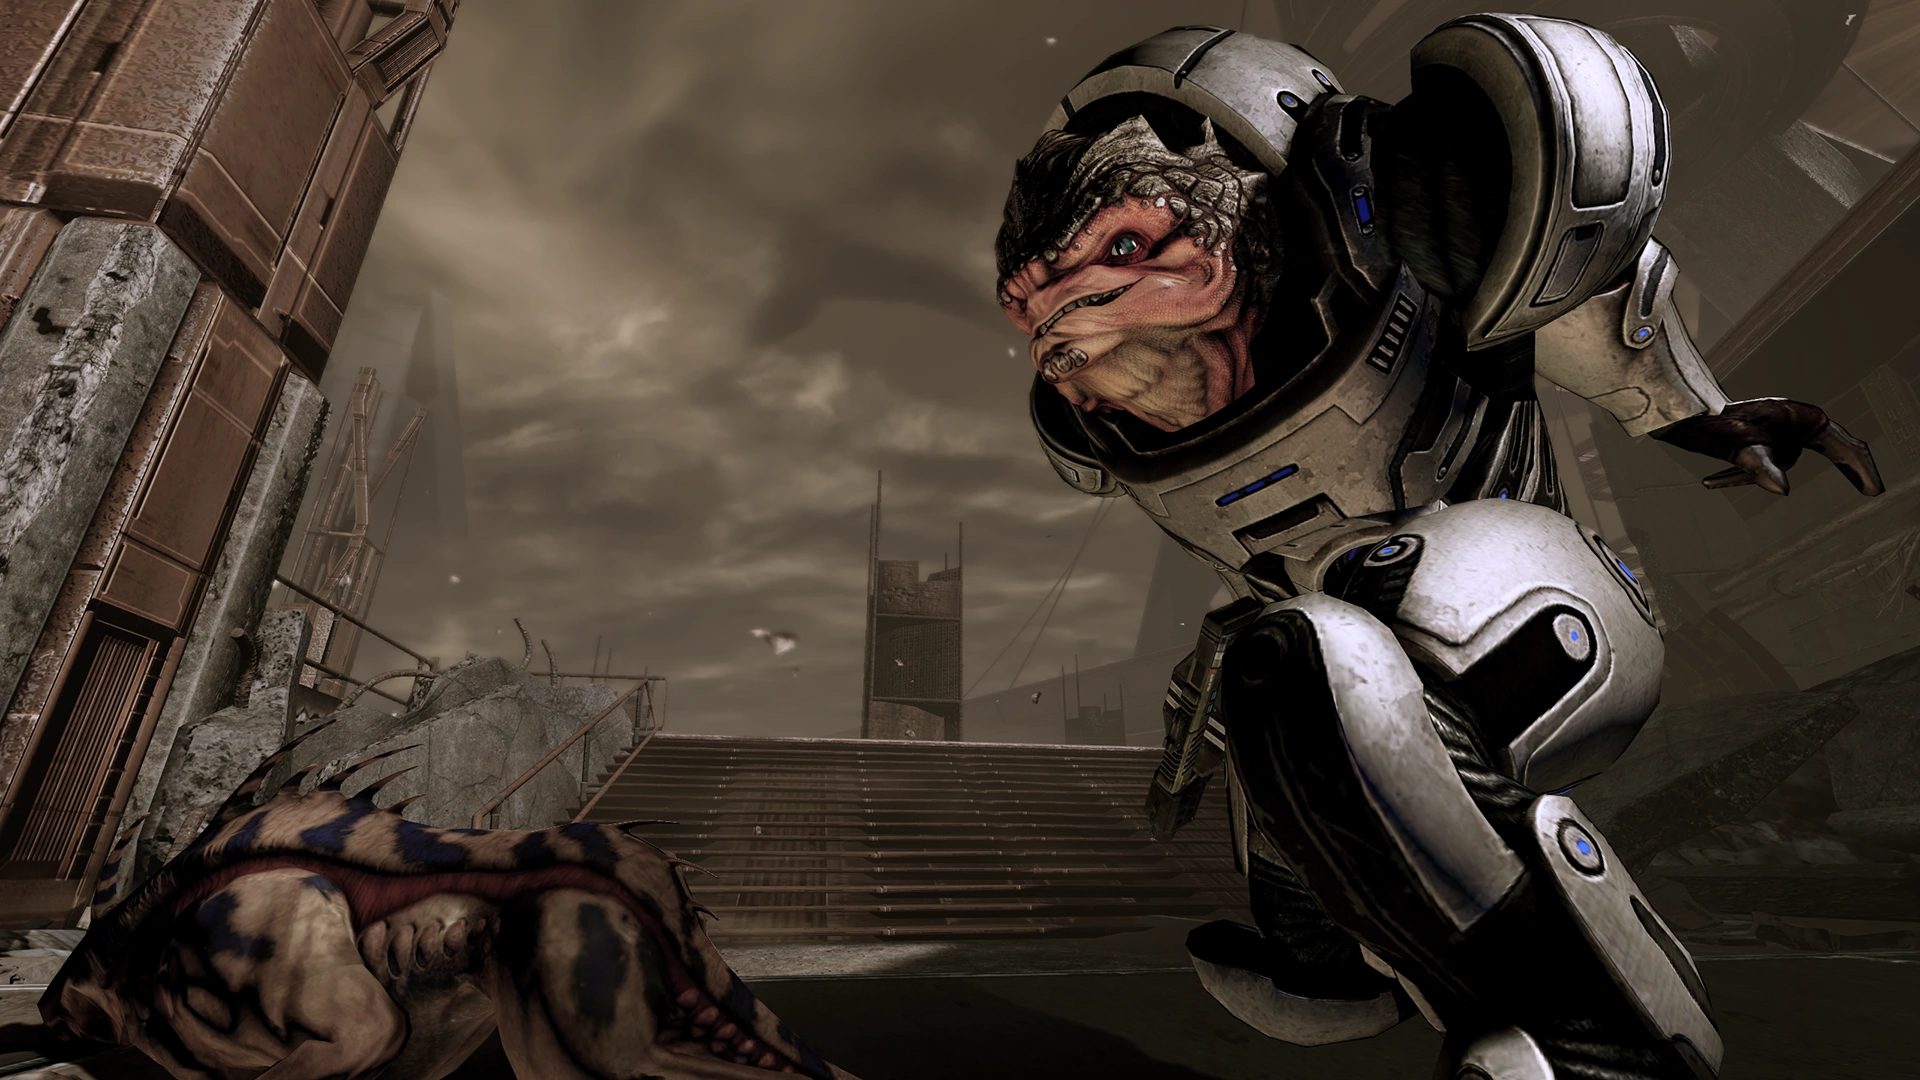
Thresher Maw! This is not so much a wave as it is a giant creature attack. There is only one Thresher Maw and the primary objective is simply to survive. All you have to do is survive the attack for five minutes and the test will be ended, though there are additional dialogue accolades if you succeed in taking it down.
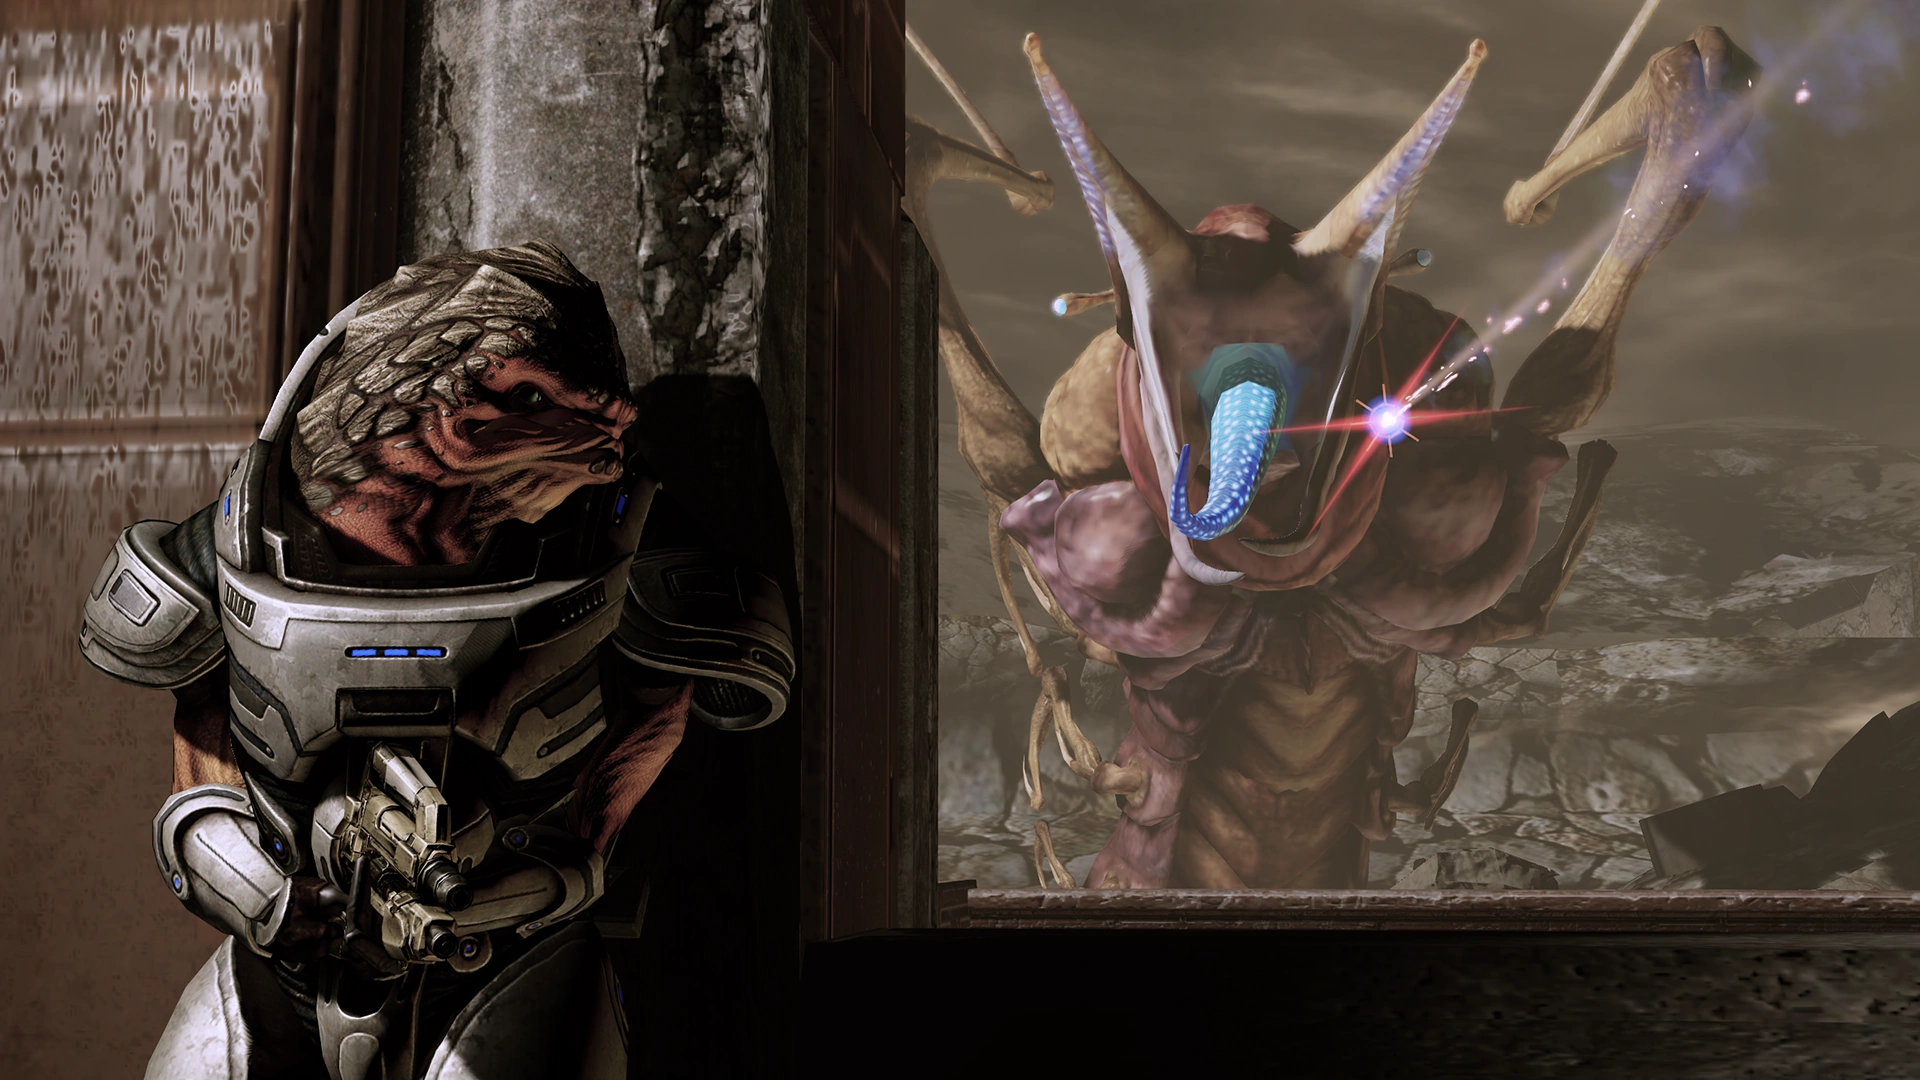
If you manage to kill the Thresher Maw, you gain the respect of the krogan and the rite ends. The Thresher Maw moves around the outskirts of the map, but its trail of flying dirt clods is easy to follow when it dives back underground. The Thresher Maw can destroy some of the weaker structures, so try to avoid those for cover and go for the sturdier walls instead. Its acid spit is an area of effect attack and will accurately shoot at you even if you're cloaked. Its blue "tongue" seems to be a weak spot, and incurs more damage than its armored carapace.
Combat Strategy: There is one indestructible stone pillar on the low ground area of the level that you can use to take cover from the Maw from any direction it might appear. Additionally, there are two respawning thermal clips at the base of this pillar as well as easy access to a Medi-gel and power cells on the higher ground that you can pick up from the edge of the raised area without needing to climb up. This is without a doubt the optimal place to fight the Maw. Place your squadmates in cover behind the other two indestructible pillars on the high ground and they should also be safe and might even draw the Maw's fire giving you free rein. If a squadmate does go down it's not the end of the world, Shepard alone is more than enough to beat the Maw even on Insanity.
Combat Tips:
- The metal pillars can be destroyed by the Thresher Maw in one hit, but any cover made of stone/concrete is not destructible. You should always try to interpose indestructible cover between yourself and the Maw. The Maw's spit projectile does have an area of effect so try to be as completely in cover as possible when the Maw attacks to ensure you are not hit.
- Shepard's shields take longer than usual to recover after an acid hit, so be careful. On the plus side it takes about three consecutive hits to kill Shepard even on Insanity. Don't hesitate to use a Medi-gel to instantly restore your shields (provided you have the Emergency Shielding Medi-gel upgrade).
- A well-upgraded pistol is more than sufficient to take out the Maw as long as you take advantage of respawning thermal clips to keep replenishing its ammo.
- On Insanity, the Thresher Maw's sheer amount of health makes using Heavy Weapons inefficient. The best strategy is to utilize Armor-Piercing Ammo on the creature (Warp and Incendiary Ammo being reasonable second choices), and have your squadmates constantly help you in attacking the Thresher Maw with conventional weapons.
- Grunt's Concussive Shot, even though marked as ineffective against armor, if applied when the Maw surfaces will "stagger" the Maw reducing the number of acid shots it will take before retreating.
- Zaeed's Inferno Grenade, Mordin's Incinerate, and Samara's Reave are examples of good squadmate attacks to use. Using weapons with high armor penetration such as the Widow, M-76 Revenant, M-96 Mattock, or most pistols will help a lot.
- The Cain will usually only damage half the Thresher Maw's health on Insanity.
- The Thresher Maw is immune to the effects of Stasis.
Uvenk's Folly

After the Thresher Maw is destroyed or the timer hits the five-minute mark, the Rite of Passage is officially over. However, at that point Gatatog Uvenk and his krantt make an appearance. During the cutscene, Uvenk expresses that he is impressed by Grunt's accomplishment. He then seeks out a loophole that he believes will allow him to accept Grunt. Grunt, however, is not at all pleased by what Uvenk is saying as he would be treated little better than a trophy for Clan Gatatog.
No matter what conversation option Shepard chooses, they end up engaging Uvenk and his krantt. Uvenk has a barrier and armor that need to be taken down to kill him and there are three or four Gatatog Warriors with him. Once the final enemy falls, you will automatically return to the Urdnot camp and speak to the Shaman. The Shaman will welcome Grunt as a full-fledged member of Clan Urdnot and award you a shotgun damage upgrade. Once you're done speaking with the Shaman, the mission will end.
Insanity Tip: For whatever reason most of the krogan, including Gatatog, will move rapidly away at the beginning of the combat, so you will really only be dealing with one or two krogan attacking at any given time - concentrate on one attacker and obliterate it before it can get behind your cover. Warning: Summoning a Combat Drone on top of the krogan at the start of this encounter will backfire by making all the krogan bum rush your position instead of retreating like they normally would. You don't want that.
Note: If you have a heavy weapon with good area of effect and still have ammo, you can wreak havoc on the krogan by targeting them at the start of the engagement while they are all clumped together.
Note: There are two krogan corpses that can be searched and two Medi-gel packs to be picked up during the fight against Uvenk, but you have to loot them before finishing the fight because you will automatically leave the area. One is located down the stairs by the medi-gel packs and the other is behind the last barricade where Gatatog and his troops are positioned. It is advisable to wait until most of the enemies are dead before going for this last one.
Mass Effect 3 Consequences
Grunt appears during Attican Traverse: Krogan Team provided he survived the suicide mission. At the end of that mission, if you choose to spare the Rachni Queen, Grunt will die if this mission was not completed.
After the mission is complete, Shaman Urdnot sends Shepard this email, titled "To Grunt's commander", with what one might call a "request":
Enemies
Mission Summary
Grunt has joined Clan Urdnot and should be emotionally stable.
Will monitor krogan’s progress of societal acceptance with Clan Urdnot. Hopefully clan bonds will not interfere with loyalty to Shepard. Data regarding krogan clan politics useful.
- Experience: 750 (937)
- Credits: 30,000
- Cerberus Funding: 15,000
- Credits Found: 15,000
- Power Unlocked
- Grunt: Fortification
- Upgrades
- Resources
- Platinum: 2,000
Bugs
The last varren or klixen standing in the waves before facing the Thresher Maw may turn "immortal": they won't attack, but they remain in aggressive stance and can't die when shot or punched at either. The klixen may even clip below the ground.
To get around this, either reload the game, or have a biotic squadmate use Pull, and repeatedly shoot the varren with your shotgun in an upwards direction, effectively blasting it out of the map. Alternately if you are on PC and have the console enabled, use the "KillEnemies" command. If successful, the Rite will continue.
Trivia
- After this mission, if Shepard killed the Thresher Maw, several krogan will comment on the Thresher Maw Shepard killed, stating that it has not been done since Urdnot Wrex underwent the Rite himself.
- Upon returning to Tuchanka after the mission, should Shepard have killed the Thresher Maw, EDI will report that there have been numerous breeding requests directed for Grunt. Humorously (and to Grunt's amusement), there is also one for Shepard.
- During the fight with Uvenk, heading up the flight of stairs and examining the giant piston will reveal the words: "Lots of very small text put something interesting here or whatever" upside-down.
- Unused dialogue for this mission suggests that originally, Grunt may have considered Uvenk's offer and Shepard would be able to expressly forbid Grunt from joining the Uvenk clan, a decision that Grunt would later confront Shepard about when back aboard the Normandy. Among the dialogue are responses from both Shepard and Grunt depending on how Shepard would have responded to Grunt's complaint.[1]