


Cerberus has delivered information on purchases the Shadow Broker has made recently. It may provide the information Liara T'Soni needs to track down the Shadow Broker's location.
Acquisition
A message from Cerberus is sent to Shepard's private terminal after completing the mission on Horizon:
On the galaxy map this mission is titled Give Liara Intel.
Preparation
Once you take a cab to Liara's, this mission runs straight through to the very end. You will have no chance to return to the Normandy or the Galaxy Map, despite its length. When you complete the mission, you will be in a system that is a good three to four hundred units of fuel away from a Fuel Depot. Plan accordingly.
Put considerable thought on when you'll be doing this mission. One would be for storyline immersion, another will be for gameplay purposes. There will be dialogue modifications depending on whether you already took the suicide mission or not. You'll want to weigh the relative difficulty of the fighting (the enemies are smart and they are numerous) versus the extremely valuable rewards awaiting you at the end.
You will be facing primarily shielded enemies, so choose your loadout accordingly. Liara becomes a mandatory squadmate after a while - you can try to build around compensating for her limitations.
There will be quite a few "engineer"-class enemies, so strongly consider bringing at least one Overload which in addition to its normal shield-smashing will instantly eliminate their combat drones before they zap you out of cover. A companion with Warp will be able to combo with Liara's Singularity. Also, for the period that you will have one or more of these squadmates with you, most of your enemies will be of the organic, human-sized variety; this makes some alternate strategies involving Dominate and Shredder Ammo and the squadmates who wield them quite viable, and signals that the Arc Projector will be quite powerful throughout.
Walkthrough
Illium
Meet With Liara
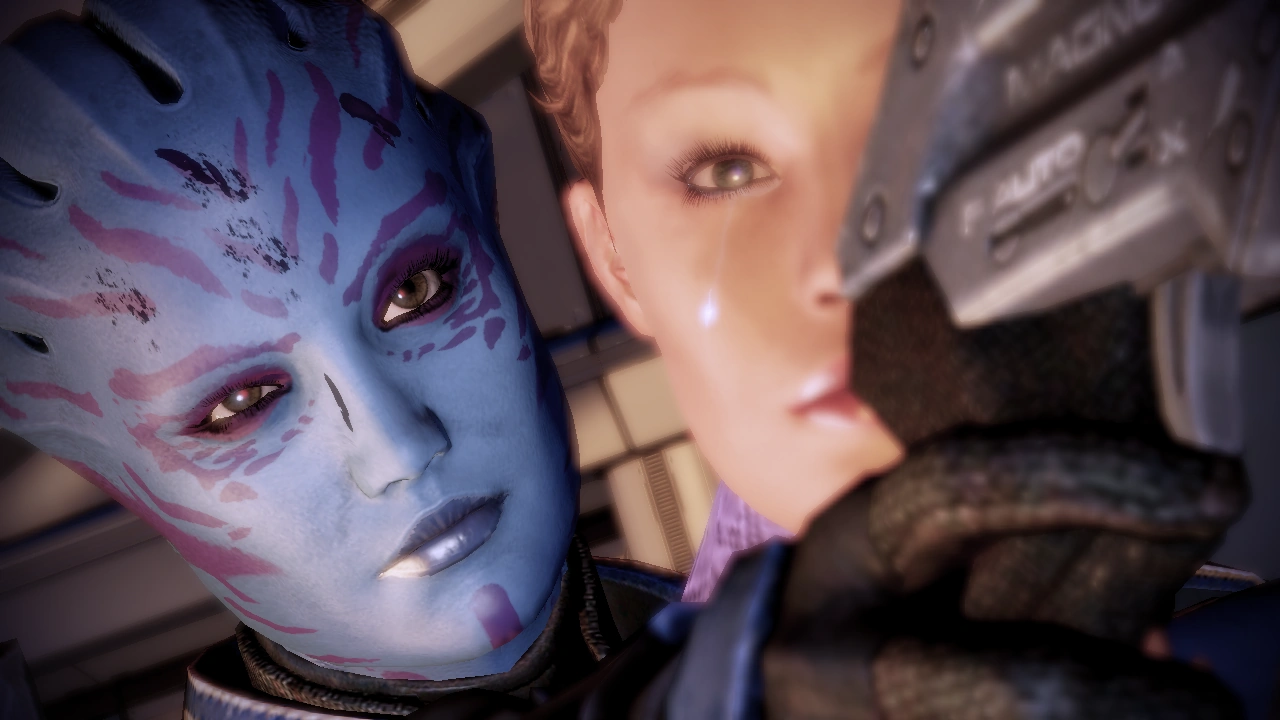
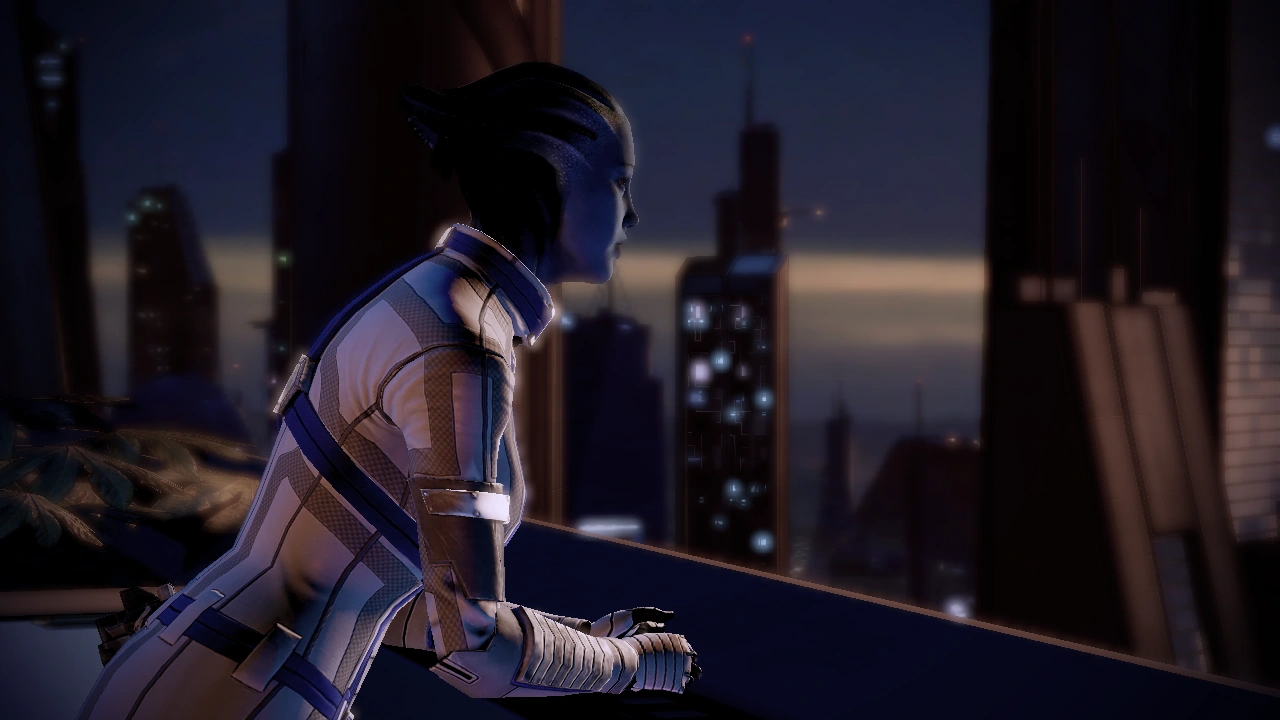
Head to Illium and talk to Liara in her office above the trading floor. Liara is ecstatic about the information as it contains some hints about the Shadow Broker’s location in a conversation between Shadow Broker agents. However, the message also contains information that Feron, Liara’s former drell partner, is apparently still alive. Respond to that any way you choose, and then Liara will express that after two years, she didn’t know, and looks at Shepard's old dog tags on her desk.
Liara then gives some of the backstory for Shepard about how even though Feron betrayed her, he still sacrificed himself to save Liara and Shepard. Liara then walks out to begin forming a plan, and invites you to use her terminal for any local intel. If you haven't recruited Samara or Thane yet, then the terminal will have information about them. This is the same information that you would get from talking to Liara normally.
If Samara and Thane are both recruited, there is no intel available on Liara's terminal, so head over to the car port near the police station, and take a cab to Liara’s apartment.
Note: If the Lair of the Shadow Broker conversation option is selected after starting Illium: Liara: Systems Hacking, the hacking mission instantly completes without awarding credits or experience. Therefore, complete it before beginning the Lair of the Shadow Broker DLC.
Liara's Apartment

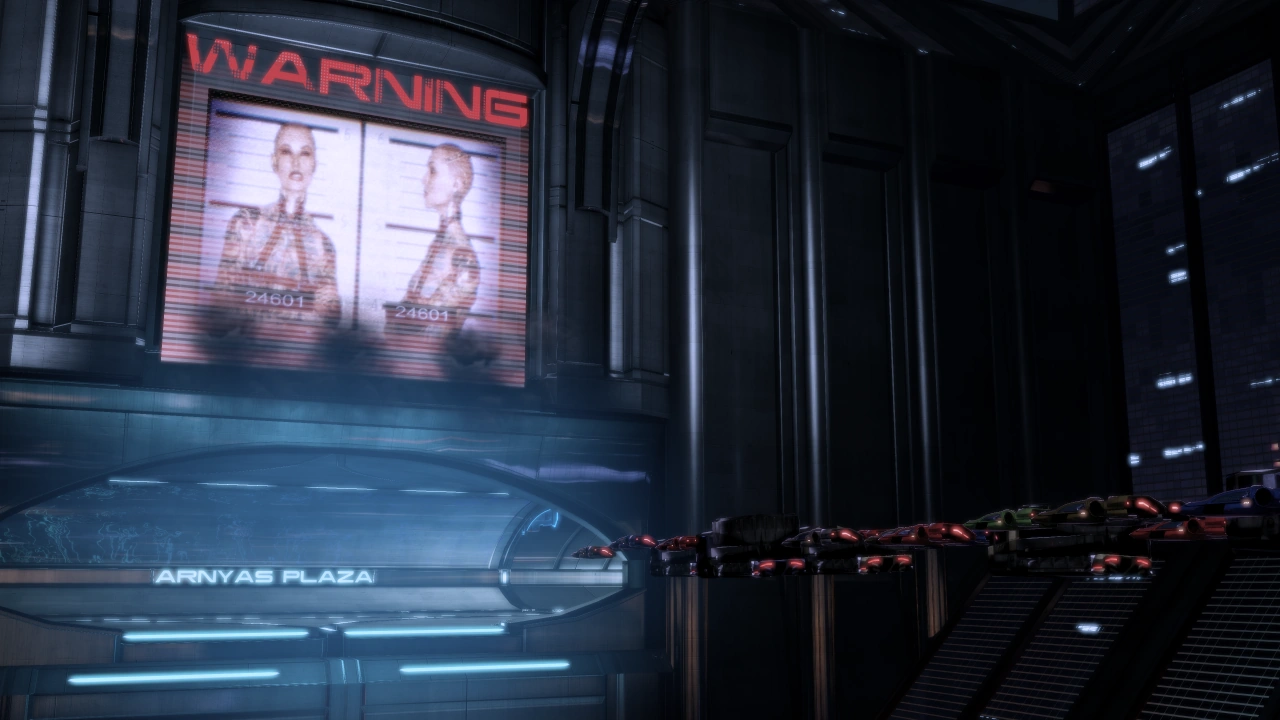
When you arrive, you will find the police are investigating the apartment under the supervision of a Spectre, Tela Vasir. Vasir dismisses the Illium cops and then the conversation will differ slightly if Shepard’s Spectre status was reinstated or not.
Talk to Vasir about the attack and what happened. Apparently, someone attempted to assassinate Liara, and even with that, she still stuck around for some reason. Vasir currently doesn’t have information about her current location however, nor did the cops find anything more. Vasir says that they couldn’t find anything, but she invites you to look around for anything that they may have missed.
Investigate the apartment by looking at specific things:
- Bullet Holes in Window: Vasir will say that the rifle used to do that wasn’t standard issue, and while Liara’s kinetic barriers stopped the bullets, they still penetrated the glass.
- N7 Armor: A piece of Shepard’s old armor that Liara recovered.
- Degree Certificate: Apparently, Liara got a doctorate from the University of Serrice on Thessia. Vasir mentions that she’s getting her money's worth out of that degree.
- Painting: A view from the planet Ilos, presumably of the tunnels area (previously seen by Shepard and the team). Vasir will claim she doesn't know what planet that is but assures that it isn't Thessia, at which point Shepard recognizes it as Ilos.
- Picture: On the upper level is a photo album that changes from the SSV Normandy to a Prothean dig site. Tela Vasir comes up and Shepard mentions that Liara did leave a message.
Investigate the Prothean relics around the apartment:
- Relic Top Level: Nothing of note except that it is apparently worth a fortune.
- Relic Near Door: Nothing of note; Tela Vasir thinks it’s ugly.
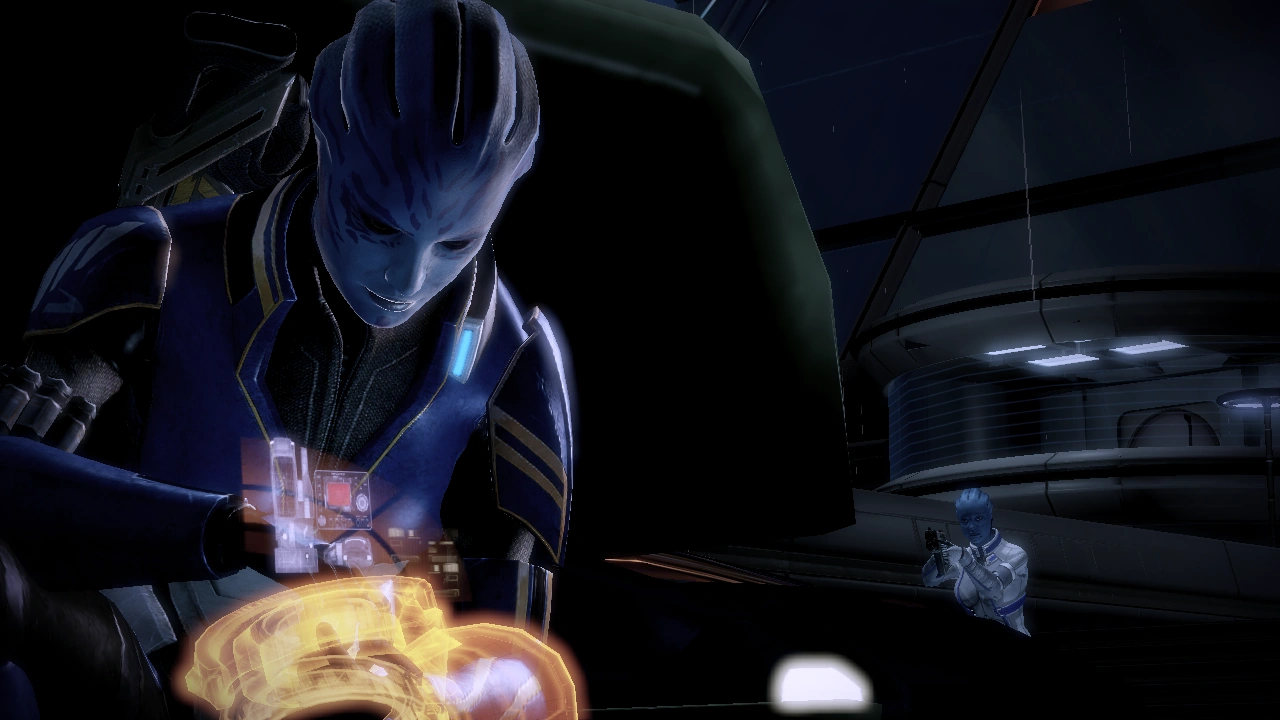
- Relic: Bottom of stairs: It contains a backup disk. When played, it shows a recorded conversation between Liara and one of her contacts, Sekat. He apparently has nailed down where the Shadow Broker is and he can narrow it down to a cluster, maybe a system. He asks Liara to come to his office at Baria Frontiers in the Dracon Trade Center.
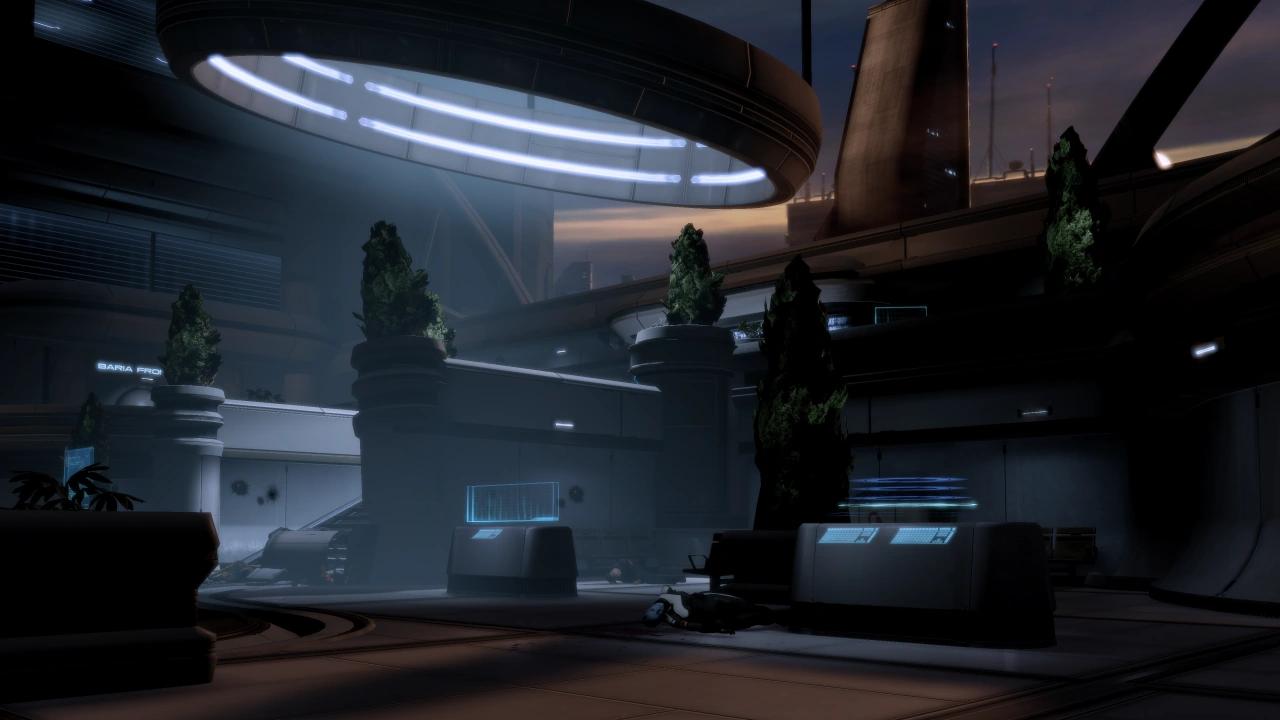
Dracon Trade Center
When the team arrives, Vasir mentions that the Frontiers office is on the third floor. When the squad gets to the top of the stairs, the building explodes. Three floors of the building were taken out to make sure that Liara didn’t get the information she wanted. Vasir takes off in the skycar to seal off the building from the top, while Shepard and the squad work from the bottom up. Get moving; there are some civilians outside, but they have no information as to what happened, so proceed inside.
When you get inside, the building is a mess from the bombs. There is an employee of Baria on the floor to the right, Tela Vasir mentions that Shepard shouldn’t count on Liara’s contact surviving that blast. There is also a locker here (+3750 credits). The elevator on the left hand side of the atrium is locked down and the building’s security isn’t responding. Vasir mentions that it was professional based on the lack of security and police response. Head up the stairs to the right, there's Medi-gel from the Medical Station along the way.
The next plaza contains the salarian embassy on Illium, Nezo Transportation, both currently locked down, a PDA (+2500 credits), and another medical station with Medi-gel. Examining the dead employee reveals that he was killed, not by the explosion but by gunfire. Shepard relays this to Tela Vasir, who is surprised and mentions that this was more than just an explosion after all. Head up the stairs in the center of the plaza to find a hackable ATM (+6250 credits). Off to the right are some power cells, near Exsolar Shipping.
Tip: If you're not short of combat supplies like Medi-gel or ammo, leave them for now as you will have a chance to return here later.
Off to the left, there's a military grade bomb that wasn’t armed. Vasir mentions that they employ similar hardware when they don’t have time to plan. Head into the Baria Frontiers Office just past the unarmed bomb.
General Tip / Insanity Tip: Save before you enter the Baria Frontiers Office. You will not be able to save until multiple waves of enemies have been killed and you have covered a lot of territory.
Examine the log book on the left to find that Liara signed in just a few minutes ago. Head inside, but before you start exploring, take a moment to shoot out the glass logo reading "Baria Frontiers". Take cover beneath the window.
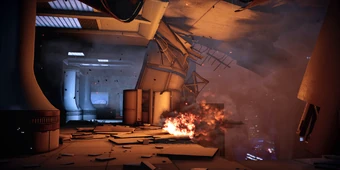
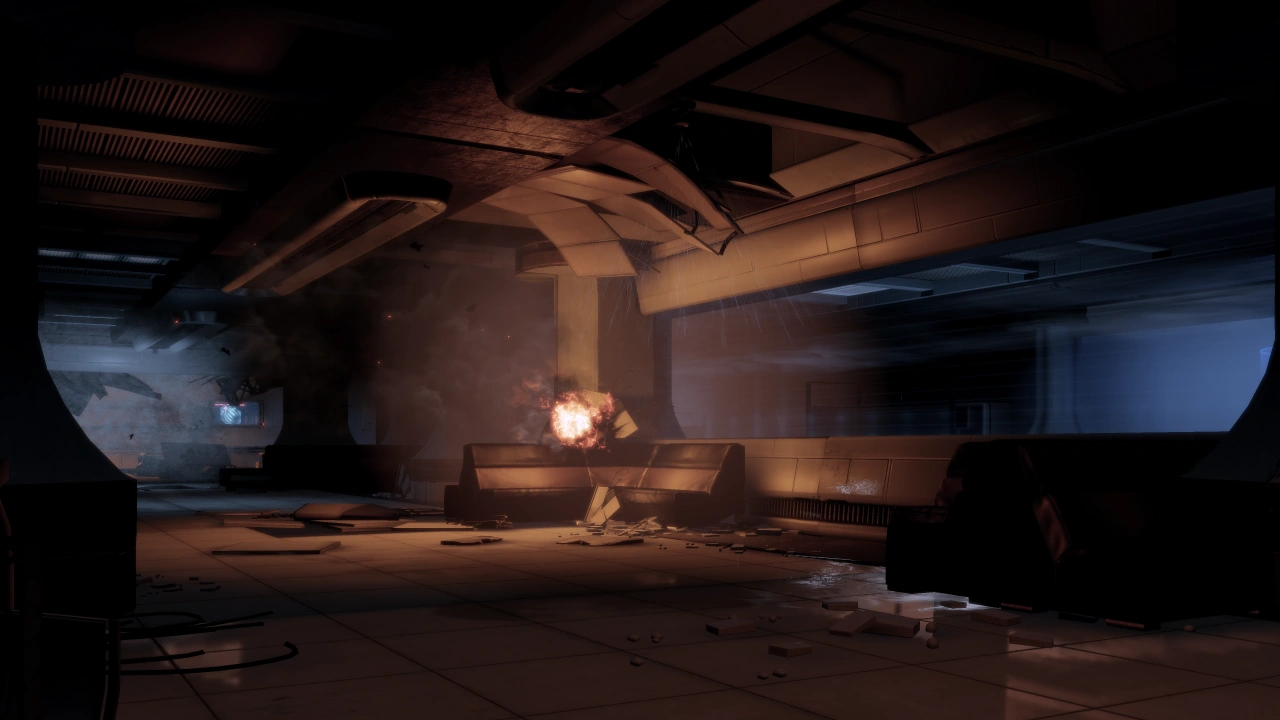
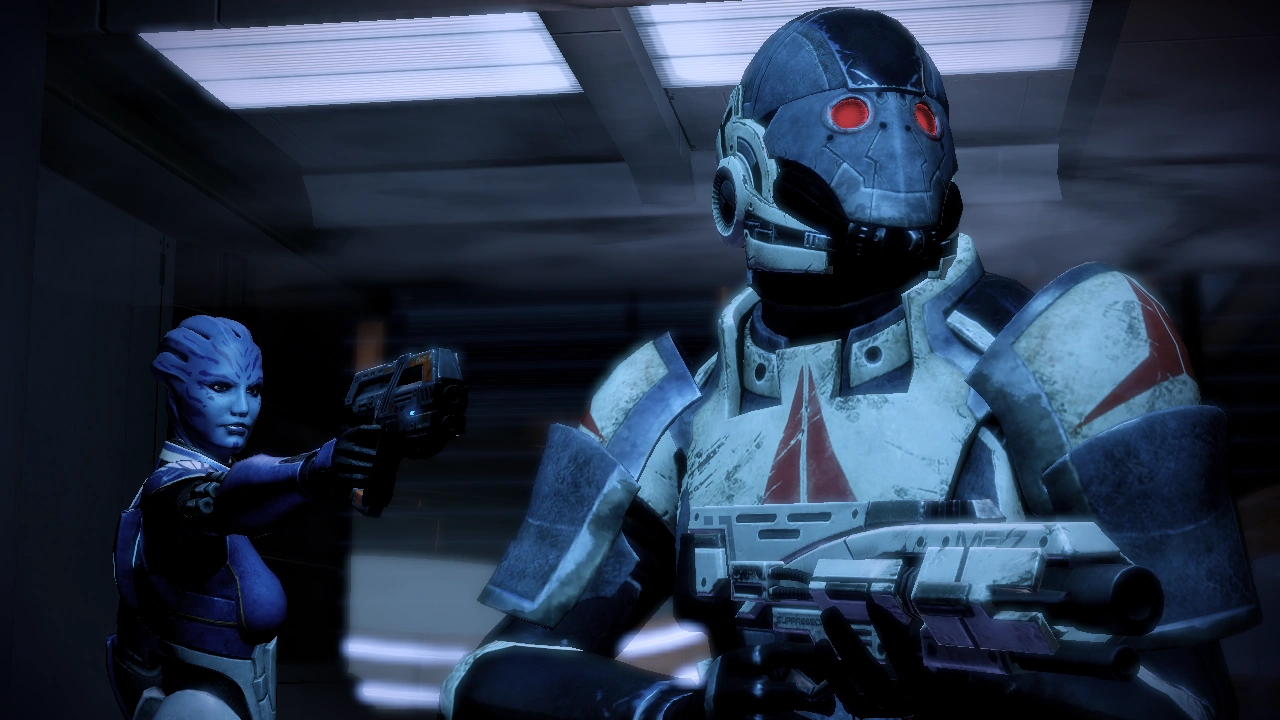
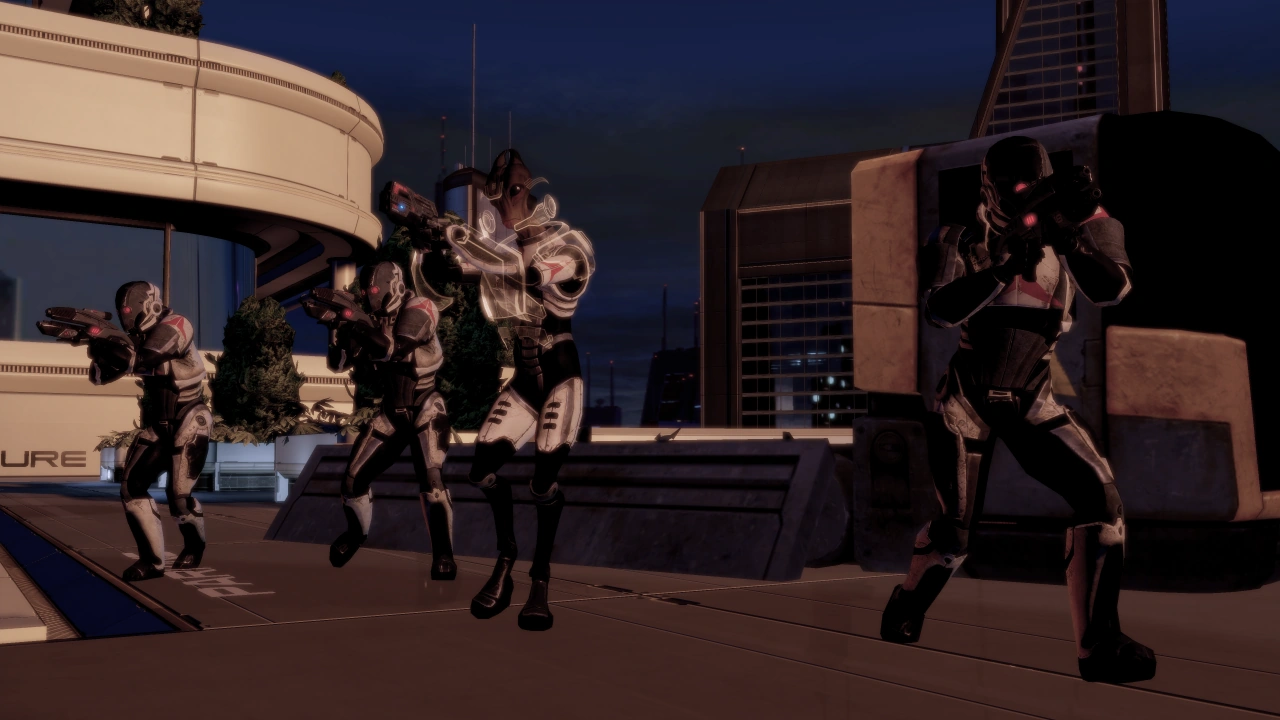
When you approach the window or hallway, the squad is suddenly blinded by a flashbang grenade and now you’re under attack. Shepard radios to Vasir that they are pinned down, she replies that Shepard should say hello to the Shadow Broker’s private army. You are attacked by three Shadow Broker Agents and a Shadow Broker Heavy. There is plenty of cover, so make use of it. You can knock out most of the agents from your spot at the window, but you will often have to head down the hallway on the right to root the Heavy from behind some cubicle desks.
Be careful as you move toward the room that's to the left side of where you entered, because new enemies will spawn there: three Agents, and a Shadow Broker Vanguard. Take them down as quickly as possible because they are a big threat, especially the sturdy Vanguard who can absorb quite a lot of damage. If you headed straight in from the original entry room you'll find the cover situation tricky, but if you are approaching from the right rear with the cubicles (where the Heavy likes to hole up), you'll have a fairly safe approach. There's also a terminal on the left side of the room (+3000 credits).
General Tip / Insanity Tip: Keep your squadmates in cover under the window for this part of the section. The shadow broker mercs will look like they are going to flank you to the right but they won't. As you eliminate the mercs, have Shepard run out into the room to trigger the remaining waves of mercs. You may have to move Shepard far out into the room and run back to the window to take cover.
Once they are down, move your squad up. Keep moving toward/down the rear corridor and you will encounter more Agents and another Heavy. Use the cover to take them out then round the corner to be attacked again, this time by more Agents, Heavies, and a Shadow Broker Engineer. The small "diagonal" box where the back corridor debouches into the next big room is a good starting cover while you survey the room. There will only appear to be one enemy at first, but as soon as you engage the rest will arrive.
Advance slowly, and only after eliminating some enemies, as many more will spawn suddenly as you approach the other end of the corridor. The Engineers have Combat Drones and the Agents have Flashbang Grenades, so be prepared to shift cover locations when necessary. You may find it safer to hide among the cubicles and desks on the right side of this corridor, since it exposes you to fewer enemies at a time and allows you to pick some off individually.
General Tip / Insanity Tip: Keep your squadmates in cover back down the hallway from the small diagonal box the start of this portion of the section. Have Shepard take cover back from the box so that the mercs can't hit Shepard. The shadow broker mercs will look like they are going to flank you to the right in the cubicle area but they won't. Peek out into the room and take down the mercs using weapons / powers. As you eliminate the mercs, have Shepard run out into the room to trigger the remaining waves of mercs and then run back to the cover area. Watch out for the combat drone that the Engineer spawns often. Just run back down the starting hallway, the combat drone will follow Shepard, and your squadmates will take it down. No need to waste ammo.
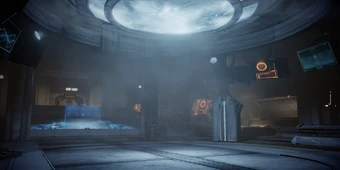
When the enemies are finally down, there is a Terminal (+3000 credits) in the side room, and a medical station with Medi-gel in the cafeteria at the end of the hallway. Also, on a purely aesthetic note, there is quite a nice display of planetary mining locations in the room with the cubicles -- if you played the original Mass Effect you will have Mako flashbacks.
Head around the corner to see the stairs blocked by fire, but don’t try to go into it; the results won't be good. Shepard radios Vasir about it and she says to find a switch to active the fire suppression systems. It's in the side room right to your left where you can find the maintenance console and a crate of eezo (+1000 eezo). Once the suppression systems are active, don’t leave the room before Shepard salvages the Machinery (+1500 credits) then leave. Vasir mentions that she is on her way down, so move up to meet her.
Tip: The fire suppression room is a good location to save your game for the upcoming sections.
On the upper level, be prepared for more combat with three more Agents. Use the limited cover to take them out, and have your squadmates flank, then head into the room they were guarding. Inside is a research terminal, Heavy Pistol Damage, grab it and keep moving into the next room and grab the credits from the wall safe (+5000 credits). Open the door to continue.
General Tip / Insanity Tip: Keep your squadmates in cover at the bottom of the stairway and have Shepard peek around the corner up the stairs at the three agents once they spawn. The agents will not come down the stairs and can easily be eliminated by chipping away at them from down the stairway. Watch out for the Flashbang Grenades that the agents throw and just go down to the bottom of the stairs anytime Shepard needs to recharge shields.
Inside you see Liara’s contact being shot by one of the Broker’s Agents. Tela Vasir then shoots the Agent, who falls dead when Shepard and the squad enter. Vasir asks about Liara’s body, then Liara herself emerges wielding a pistol at Vasir. Attempt to defuse the situation, but Liara will mention that Vasir tried to kill her. Shepard and the squad pull their guns, and Liara tells the story about how Vasir signaled the Shadow Broker's Agents and broke into Liara's apartment. Vasir then killed Saket and took his data, which she probably still has on her.
Vasir tries to get away, by using her biotics to shatter the glass and calling Liara a pureblood while she’s at it. However, Liara throws up a barrier to protect the squad and Vasir makes a run for it. Shepard tackles her, and then they fly out the window. Vasir cushions their fall with her biotics and has a small scuffle with Shepard. Then Liara leaps out of the office, also using her biotics to cushion her fall while the squad watches.
Vasir, now outnumbered, makes a run for it. Liara follows closely behind, blowing past two Shadow Broker Agents in the process. The squad rejoins Shepard in the plaza where more agents emerge from the Eldfell-Ashland Energy office, allowing Vasir to escape. Deal with the guards and continue pursuing Vasir.
Pursue Vasir
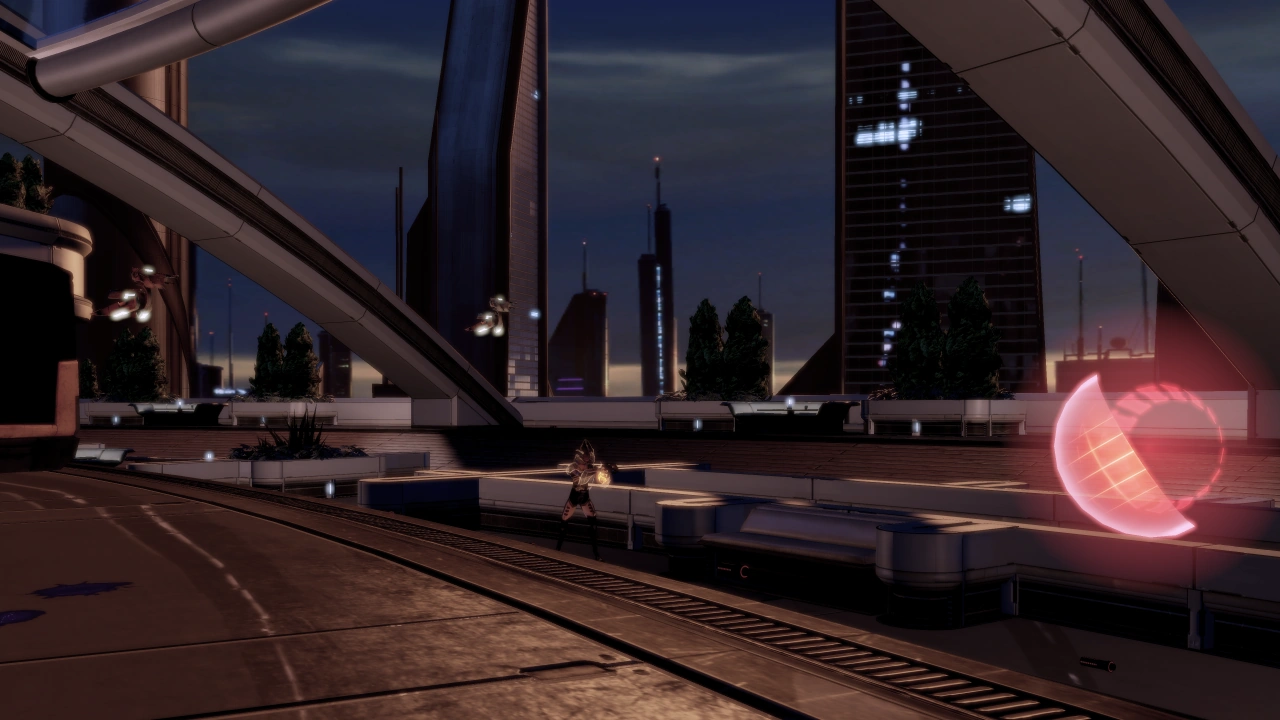
Take out the Agents with haste. There are two Agents and a Heavy to deal with initially, so keep to cover. When they fall, more Agents and a Vanguard emerge, so use the fountain in the center for cover. It not only provides effective cover, but allows for a wide field of fire. Indeed, if it happens to be useful for your tactics, you're actually allowed to get into the fountain.
When they all fall, the benefit of leaving the power cells alone earlier will become apparent -- make a quick trip up the central stairs to retrieve them, and the ammo of all your weapons will be replenished. Now head downstairs and into the atrium. Inside, grab the cover provided by the bench to your left -- resist the tempting large circular column straight in front of you, as its shape makes for more difficult aiming and you aren't allowed to slide smoothly back and forth around the pole.
Take down the ten or so Agents, the Heavies, and the Engineers that try to stop you (the mix appears to vary somewhat by difficulty setting). They will keep coming from the door in waves, so stick to cover and target them as they walk in. Overload can be used to instantly destroy the Combat Drones that the Engineers produce, and it's a good idea because getting dislodged from cover by a drone with this many enemies nearby can produce deadly results.
Tip: You can prevent most waves of enemies from spawning by getting to the far corner of the room where the Heavy is. This is most easily done by an Engineer, who need only send the Combat Drone to that side of the room. Vanguards can charge over, Infiltrators can sneak over, etc.
General Tip / Insanity Tip: This entire battle can be completed without staying into the room to be overwhelmed by the shadow broker mercs. Place your squadmates into cover / squatting down in the top hallway before you go down the first stairway to the landing. Place Shepard on the second set of stairs looking out into the large room. Have Shepard walk down the stairs to flush out the first of many mercs in this area. Use weapons / powers to chip away at the mercs and the mercs will stay stuck in cover. Watch out for the Flashbang Grenades that the agents throw and just walk backwards up the stairs anytime Shepard needs to recharge shields. Walk back down the stairs and chip away at the mercs in the room until they begin to fall. As you kill a merc, another will spawn out of the doorway to replace the dead merc. Watch out for the Engineers as they will spawn Combat Drones. When this happens, have Shepard go back up the staircase past your squadmates and have them take the combat drone down to conserve ammo. Sometimes the mercs will stay in cover that will require Shepard to move out into the room to take them down. Watch out for the Shadow Broker Heavy in the back left corner! The Heavy will stay stuck in cover and will not move out of cover until Shepard goes out into the room after the Heavy.
When the mercs are all finally down, gather up ammo and head out the door to find Liara and Vasir engaged in a firefight.
Tip: Save before you enter the door as you will be unable to save until after the sky way chase.
Vasir calls her X3M and then jumps into it. Liara then grabs a taxi, followed by Shepard. You can only select one squad member to come with, but remember that Liara is a biotic so pick carefully. On the other hand a squadmate with Warp to detonate Liara's Singularity is quite handy. Since Miranda has both Warp to combo with Liara and Overload to take down shields, she makes an excellent pairing. Other notable strategies include Thane who combines Warp combo powers with Shredder Ammo for all the upcoming organic enemies, and the easily-forgotten Morinth whose Dominate can run all the organics in circles attacking each other. When you select your squadmate, hope you have that driver’s license handy as now you have to pursue Vasir through the skies of Illium.
Sky Way Chase
When you get control of the X3M, use the following controls to steer the vehicle:
- Xbox 360/PlayStation 3: Use the left stick to navigate, the right to steer, and the left trigger to boost.
- PC: Use your mouse and normal movement keys to move forward and steer (default W, A, D), and the spacebar to boost.
Keep following Vasir through the skies, and watch out for the traffic, and every other obstacle. Above all, don’t lose Vasir. Just keep in mind that boosting reduces the amount of control you have. If you lose Vasir, the chase will restart. Your boost is more effective if you use it in bursts, especially right after changing directions, rather than simply holding it down.
Liara will be commenting the whole time, which Shepard usually replies to, and the conversations are usually funny. Sometimes, however, her conversations help with direction. After a period of time, Vasir will start dropping proximity bombs, so avoid them, lest you lose speed. Then Liara mentions that Vasir has reinforcements, and Shepard asks if the car has any weapons, to which Liara replies, "It’s a taxi, it has a fare meter," so that would be a no.
Tip: You do not have to repeat the entire sky way chase if you fail right at the end. Once you get far enough into the chase, if you fail, you will respawn in the middle of the chase.
Keep following Vasir and try to avoid a head on collision. Eventually, you are treated to a cutscene where Vasir tries to ram Shepard and the squad out of sky, while dodging traffic, but only succeeds in colliding with another skycar, and damaging hers. She crashes on a building, the Azure Hotel, and is approached by a LOKI Mech, which is then destroyed. Shepard and the squad see the crash and land their intact cab on the top of the building to pursue Vasir, who radios for backup.
Rooftop Chaos
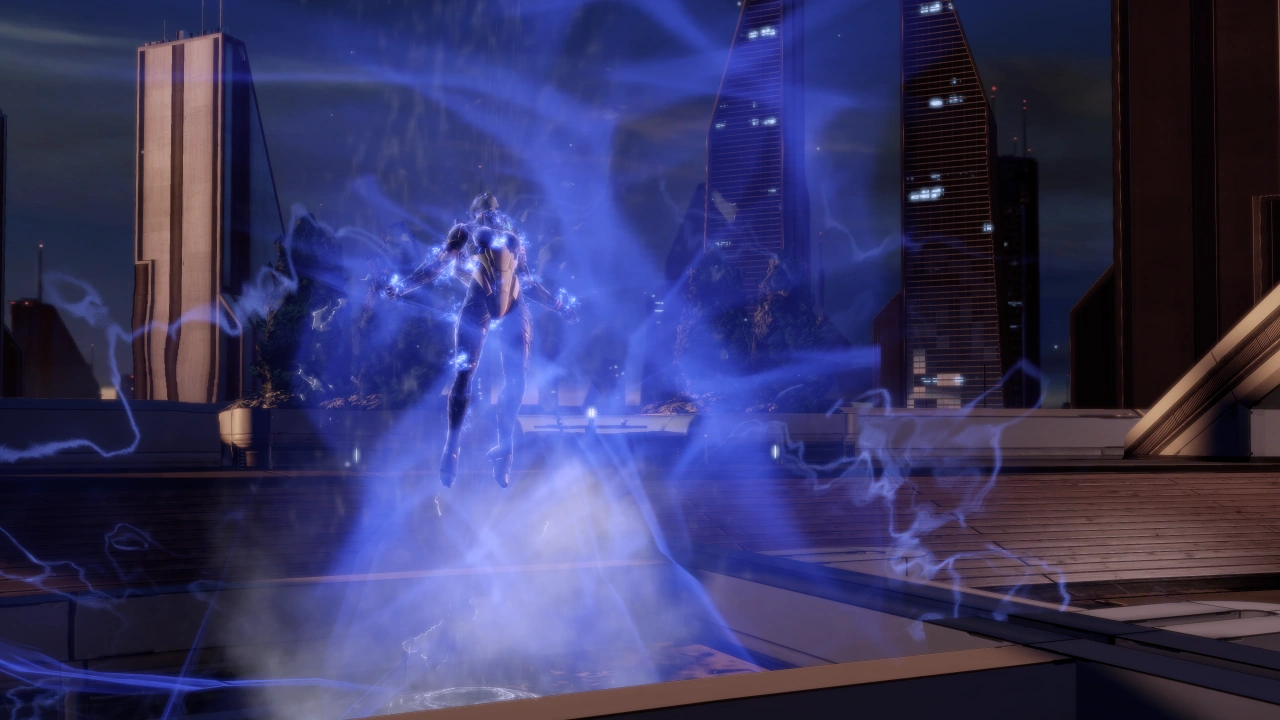
You now have Liara as a squad member. She is armed with Heavy Pistols and Submachine Guns. She also has her class Power Asari Scientist, Singularity, Stasis, and Warp, which is unlocked with Singularity at level two.
IMMEDIATELY stop and make sure you distribute Liara's squad points to her abilities as it will not be done automatically. Save your game before you move! This is very important as the upcoming battle can go wrong very fast and you will have to redistribute Liara's squad points all over again.
Tip: For both of the major "boss" enemies to come in this mission, Stasis will stun or at least distract them even when they have full shields/barriers/armor. It also instantly destroys the flying drones you will encounter from time to time, and of course it has its traditional ability to simplify a combat by temporarily removing a flanking enemy, with the added bonus that the enemy falls down at the end of the stasis. For these reasons fully upgrading Liara's Stasis with the Enhanced Stasis evolution is strongly recommended, particularly on higher difficulty levels.
General Tip / Insanity Tip: Fully max out Asari Scientist and split your points up to get as much Stasis and Warp you can and don't waste any extra points on Singularity. The upcoming Shadow Broker Base mission will require quickly killing Vanguards at close range and a nasty section with multiple rocket drones at once. You can't redistribute Liara's points once you've selected them and while the upcoming rooftop battle isn't fun, the Shadow Broker Base multiple wave battle is much worse and you wants your points spent correctly for that battle.
When you regain control, grab the med-kit from the car while Liara makes a note about Vasir’s car and how she can’t have gotten far. Head up the stairs only to be ambushed by three to five waves of Shadow Broker Agents and Engineers. The first wave will be to your front, the second and third off to either the left or right on the upper platform, or behind you on the lower platform, so plan your cover appropriately. However, the subsequent waves will not appear until the previous one has been eliminated. On higher difficulties, the next wave flies in after a squad has been reduced to one member, so move quickly and eliminate the enemy before you are flanked by the new arrivals.
Also, keep an eye on your ammo, as it might be running low by now. Waves on the lower platform will be a little more difficult because of the skycars on the lower platform. There may be as many as five waves in total so once they are all down, move around and grab thermal clips, as your ammo might be low. Near the door that the first wave blocked is a bank terminal (+1500 credits).
Hardcore/Insanity Tip: Try to hit the reinforcements with Overload while their hovercars are still landing. They are so tightly packed that you could hit them all, even without Area Overload. The Arc Projector, Grenade Launcher, or Blackstorm are also good before they all ditch the hovercar and start spreading out. Regardless of the difficulty level, using such techniques as each wave approaches makes this fight noticeably easier and less time-consuming.
General Tips / Insanity Tips: There is a place of cover that the entire battle can be fought from and you won't get destroyed even on insanity difficulty. Be aware that the instant you move the first wave of mercs will show up so you need to get to the cover spot quickly. (Ignore the med-kit for now.) Orient Shepard so that you are facing the stairway right in front of you. This is the middle stairway. There is a left stairway and a right stairway in this area. Your goal is to get to the two cars right next to the left stairway. They are fairly tall for cover which is excellent. Shepard should be placed in cover on the leftmost car. Place Shepard in the middle of the car on the back of the car. Place your squadmates to the right of Shepard so that one squadmate is right next to Shepard and the third squadmate is next to the second squadmate as close as possible. This seems like a suicidal cover spot as the staircase to the left and the entire level to the right are wide open for flanking opportunities. In fact, this is the perfect cover spot.
The first wave of mercs will drop while you are moving to cover and will run to the elevated cover above you. The mercs will look like they are going to run to the left staircase and flank you but they stop right at the edge of the wall and won't come down. The mercs will also run to the right but will not come down the middle staircase either. The high nature of the cover your squad is in means that even though the mercs have the high ground, they rarely (if at all) can get weapons fire to hit your squad while in cover. The only real danger in this cover position is the Combat Drones that the Engineer will spawn. The combat drones will go to the middle staircase and will attempt to flank your squad to the right but your squadmates will quickly kill the combat drone as long as you wait a moment in the thick of the battle to let them kill the drone. From this cover, chip away at the mercs up on the high ground above you using weapons / powers. Focus on the Engineer first so that the combat drones stop coming down to flank you. The mercs can be hard to hit from this cover as they go to cover often and run back and forth but the mercs can be chipped away at slowly and safely from your cover spot.
When you kill the first wave (or all but one merc on higher difficulty levels), a second wave will come flying in on a truck. DON'T MOVE! Stay the exact same cover and the mercs will run to the exact same high cover. Every single additional wave of mercs once they exit the trucks will go to the same high cover above you even when it looks like they are clearly going to run down the main pathway to the right of your squad and flank your squad, they will not. Focus on the Engineer first for every wave to stop the combat drones and then take down the remaining mercs. Sometimes a Heavy will be stuck in cover up top but wait until all the other mercs are down before attempting to take the Heavy down.
The battle takes time from this cover but you can take the entire battle at your own speed even on insanity. Once the battle is over, go back and get the med-kit from the car (if you didn't already) and collect the credits from the bank terminal. Collect any ammo from the area and save your game! You don't want to do that battle again.
Note: Try to avoid having your squad or Shepard use airborne powers (Pull, Throw, Slam, Shockwave, Concussive Shot) as these can eject an enemy from the battle area. There isn't any fall damage. As such, the Merc stays alive - out of the play space - and prevents subsequent waves from showing up or the scripted crash from occurring. Your only choice out of such a situation would be to reload an earlier save. Even Singularity can unfortunately sometimes create this situation, especially if you then detonate it with Warp. The good news is that Azure is the only part of the mission plagued with this problem - you can Singularity & detonate freely once you reach the Shadow Broker's base.
Now head to the left side of the platform and go into the glass walled room; it’s the only one with a green door sign. Once you get inside, you hear a conversation, but bypass the wall safe on your right first (+6000 credits) and take the med-kit ahead of you. Then head into the room where there is a patron on the ground, but talking to him accomplishes nothing, so talk to Liara about the video. She will provide some information about the hotel and its name, as well as give you another good laugh.
Head out to Vasir’s car where Liara will note that there is a blood trail; Vasir was wounded in the crash. There are some power cells in her car and access the broken panel for a Damage Protection Upgrade. Follow the blood trail until it reaches another room. Inside, there is a lot of dead bodies, but some more interesting things. In the room on your right is a Weapons Locker, so switch weapons if you need to, and a med-kit with Medi-gel. In the main room is a Medical Station for a second Medi-gel in this area and a personal datapad (+2500 credits). Grab both before leaving.
Tip: This is a perfect place to save your game before the upcoming boss battle.
When you exit the second door, the blood trail leads to Vasir, who is still walking and trying to blend in. However, Liara pulls a gun and she stops. Vasir immediately grabs a civilian to use as leverage, then she puts her gun to her hostage’s head. With a few Paragon or Renegade choices, you can avoid hurting the hostage. Shepard talks to Vasir while Liara biotically levels her with a table. However, if you don’t or can't pick either of those options due to insufficient morality points, you will have to either lose your power cells or wound the hostage. Regardless of how the situation is handled, the result is a fight with Vasir.
Note: There have been multiple reports of level 30 characters being unable to select the Renegade/Paragon dialogue option, even with a full Renegade/Paragon bar. This is because of how morality works in Mass Effect 2. If you run into this you may need to further maximize morality points by selecting the +100% Paragon/Renegade class power evolution as opposed to the +70% Paragon/Renegade class power evolution.
Fight Vasir
Tela Vasir has vast amounts of barriers, armor, and health. While you outnumber her three to one, she still presents a tough challenge. Vasir will use her biotics to charge around the battlefield, making her sometimes hard to hit.
When you damage her to about half of her barriers, she will jump out of the fight, leaving you to deal with two Rocket Drones and two Shadow Broker Engineers. Keep in cover during this fight as they will use Incinerate and Combat Drones, and the rockets from the flying Rocket Drones can be hazardous to your health.
When you defeat the first wave, Vasir makes a reappearance, so watch out and employ the same tactics as before. Keep her on her toes, keep shooting her, and when her barriers are gone, she’ll leave again. Deal with the second wave of Rocket Drones and Engineers, two of each once again. Just remember to keep in cover.
After defeating this second wave, Vasir drops back in one final time. She will still continue to charge around the battlefield, so keep moving. Once her armor is down, use any power you have to tie her up and then proceed to let her have it.
Tip: This battle sucks but don't dismay if you die after almost killing Vasir. Each time Vasir leaves the battle there is an autosave that happens. If you die during the battle you don't have to replay from the beginning. Choose "Resume" and you will start again at the last cutscene of Vasir you played through. This doesn't make the battle easier but it does break it down into manageable chunks.
Tip: Once Vasir's barrier and armor are down, knocking her off the building ends the fight immediately even if her health has not been completely drained. This is most easily done by first lifting her using Singularity or Pull and following up with a well placed Throw, Concussive Shot or even a Charge if Shepard happens to be a Vanguard. Vasir reappears for the fight's ending cutscene even if she is knocked off the building in combat.
Once Vasir is finally down, you are treated to a cutscene where Liara takes the disk and finds the information they need, and Vasir continues to protest. Shepard asks why Vasir betrayed the Council, which she rebuffs by saying that she didn't do what Saren did. She had been getting information from the Shadow Broker for years, information that apparently saved lives. Doing a few morally questionable tasks for the Broker is a price that she'll gladly pay.
Shepard can rebuff Vasir, but she reminds Shepard of why the Spectres exist: to do the Council's dirty work. Then she brings up Cerberus and how Shepard is allied with them. Respond to that and Vasir reminds Shepard of a few of Cerberus' choice experiments. The Commander had better look in a mirror before Shepard can compare to Vasir and what she's done. If Shepard is a Sole Survivor, then she mentions how Cerberus was responsible for the thresher maw attack on Akuze. Then Vasir takes her last breath.
Shepard heads back inside where Liara is examining the disk. Apparently, the Shadow Broker really wanted Liara dead, and didn’t care about the collateral damage. Shepard arrives to inform Liara of Vasir’s death, and Liara forwards the data to the Normandy. A series of interrupts can then be taken in rapid succession.
You can use the first Paragon interrupt to convince Liara that they will rescue Feron in time. If the interrupt is taken, Liara reminds Shepard of their past, and how Shepard saved her on Therum, and fought the Krogan Battlemaster while she cowered in fear. She talks about how Shepard always helped her, and how she is still leaning on Shepard. Is that a good thing? Yes, because that is what friends do.
She goes on to talk about how they will get there and how the Normandy’s stealth systems will keep them from being detected. Because the Broker’s agents are still fighting through Illium, and with a bit of luck, they will be able to escape without being noticed. A second Paragon interrupt will have Shepard bringing up how they killed innocent people. Liara responds, then Shepard reminds Liara about how she went after Vasir without a second thought, and aggressively. She then brings up Sekat and how she put him in harm’s way with the stakes involved and how she got him killed. However, things will be simpler now, get to the Shadow Broker, get Feron, and get out.
There is a third interrupt opportunity, and if you romanced Liara in Mass Effect, then this interrupt will give you a chance to talk "about us". Liara explains what she went through for the last two years, and how Shepard can't expect that to instantly vanish. She apologises and asks if they can just focus on getting Feron back, to which Shepard agrees. If you are currently engaged in another romance, such as with Tali'Zorah nar Rayya or Garrus Vakarian, Liara will also comment on that, saying that her career as an information broker leads her to find out various things, including about Shepard.
Hagalaz
The Shadow Broker’s Ship Exterior - Part 1
Note: You have the opportunity to select your squad again, but you do already have Liara, so you can only select one additional squadmate, same as you did prior to chasing Vasir in the vehicle.
You will be facing the same set of mostly-shielded, mostly organic enemies as before, plus the addition of occasional mechs. There will be places where biotic throws and pulls can be used to excellent effect, and likewise opportunities to detonate Liara's Singularity, so choose your squadmate with those facts and tradeoffs in mind.
General Tip / Insanity Tip: Miranda is the great choice for squadmate for the upcoming multiple wave battle. Most of this portion of the mission can be completed from cover carefully so any squadmate would work but the multiple wave battle is much better with a second squadmate with Warp plus her Overload power works well for the rocket drones.
You are then treated to a cutscene where the Normandy launches the Kodiak over a planet where the Broker’s ship is located. Liara talks about the planet and its weather conditions, how the oceans freeze and boil, and how the planet is a maelstrom near the twilight band, which is what the Broker’s ship follows. She also talks about how they will have to land and seek out a hatch to get inside. Liara also states that they can’t stay outside for very long, as the weather and lightning can be a problem.
When you regain control, Liara mentions that while she can’t get a visual, she is picking up a massive communications array at the back of the ship. She says that there is nothing but maintenance areas under it, so that is where they have to get to.
General Tip / Insanity Tip: Save your game before you move forward. This is the first time since the Vasir battle that you can save and not have to repeat the boss battle again.
General Tip / Insanity Tip: For most of the merc battles coming up, put your squadmates into cover well before the battle so you sneak up to the area in question. Peek out and take down the mercs using weapons / powers as you see fit. Focus on Vanguards first as they will charge towards you. Run back to your squadmates to have them help take down the Vanguard. The same strategy is used for combat drones spawned by Engineers. Let your squadmates use their ammo so you can conserve yours. Take your time and the mercs will fall.
Proceed left along the hull, and watch out for the Maintenance Drones. They are basically Combat Drones, but Liara mentions they are probably attacking because they think the squad is debris from the storm. There will be two pairs before you get to a ramp with some salvageable Conductor Components (+3000 credits), grab them and proceed.
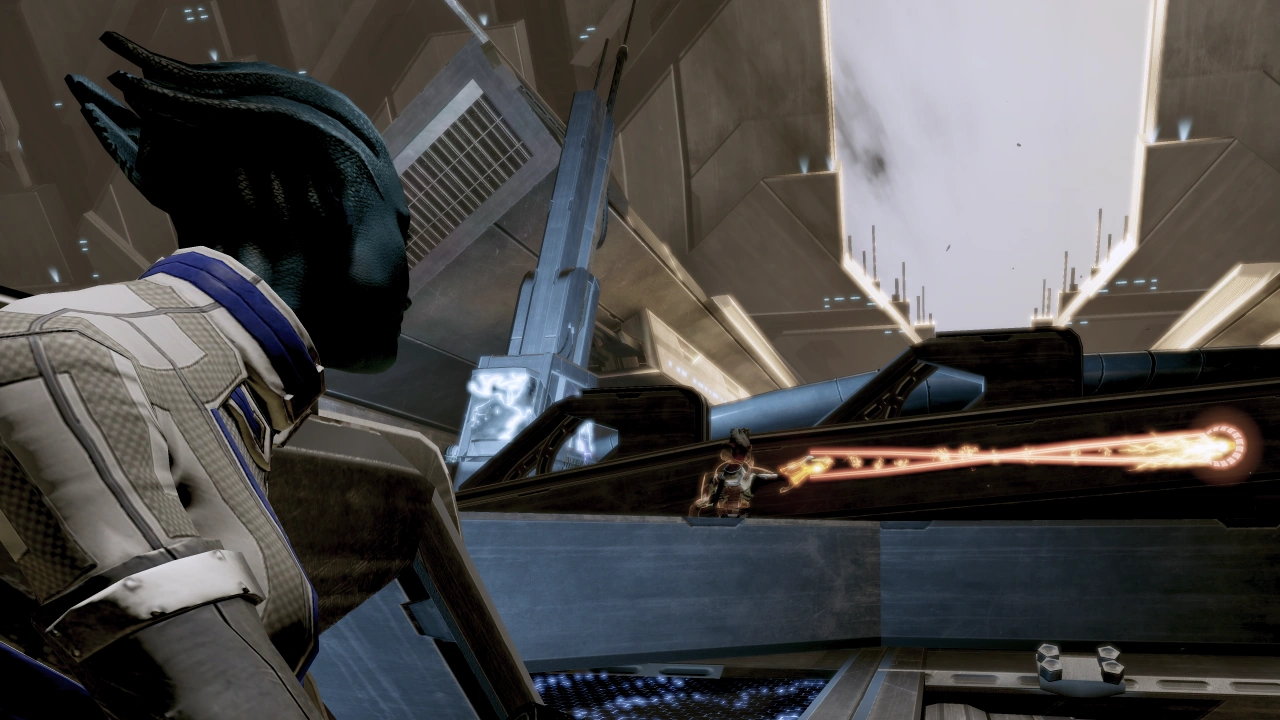
As you come up onto the catwalk, Liara will mention that those capacitors discharge the lightning strikes, but then some more Agents pop up. Shoot the capacitors to make this an easy fight. Once they are down, you can just walk right past the capacitors and down to the left.
As you get onto the lower platform, you come across three LOKI Mechs, get into cover and deal with them with your weapons / powers. You can just biotically throw them over the side if you so choose. Keep moving and when you get to the next area, you will find another capacitor, Agents, and an Engineer. Again shooting the capacitor makes it easier, but also if you can get the enemies off the ground, then the wind can just take them away.
Note: While on the outside of the Shadow Broker's ship, using some biotic powers that lifts enemies off the ground, such as Pull, will cause enemies to fly away into the storm, instantly killing them. Slam however sometimes will not work for this purpose, unless you can cast it on an enemy exactly when it is leaping over an obstacle or combo it with Singularity. Singularity by itself will often not impart enough height to enemies to fly into the storm either, unless it is cast on top of a ledge as well.
When you are in the clear, activate the Rod Controls to lower a lightning rod, and then duck into the trench it left because more enemies are present. This time you have Agents, and Engineer and a Vanguard to deal with, but you again have a lightning capacitor, so blasting it is a good idea.
When you get to the lower platform again, more LOKI Mechs are there to greet you. Take them out and proceed, but don’t pass up the Capacitor Components on your left (+4000 credits).
Keep following the path to your right, and down you will go almost to the keel before encountering a small area in the exterior hull where two Agents and three LOKIs are waiting. Get into cover, and focus on whichever enemy seems the most dangerous. It's a tight area so don't let anything approach too close; you can retreat back up the ramp if the mechs get too close or a flashbang lands at your feet. When the enemies are down, follow the ramps up to a door, and enter.
General Tip / Insanity Tip: Put your squadmates into cover before the staircase so you can sneak down the staircase to the mercs / LOKI mechs. Use weapons / power to chip away at the enemies. Run back up the staircase to recharge your shields as needed. Take your time and the mercs will fall.
The Shadow Broker’s Ship Exterior - Part 2

When you get inside, Liara will mention that the ship must have taken decades to build in secret. Shepard wonders where the contractors went. At the engines, Liara will mention that if the engines stop for even a moment, it will be disaster, but at least the Shadow Broker will go down with them. "Comforting". A little further along is a refined palladium crate (+4000 palladium) and some power cells. Grab both before moving on. There is one final talking point, select the motion dampeners to hear Liara say that they probably can’t even feel the storm from inside the ship.
Head back outside and follow the ramps. At the bottom is a medical station so grab the Medi-gel while you pass. When you reach the very top of the ramps, find cover because there’s more of that private army up here.
General Tip / Insanity Tip: Save your game before you move forward up the ramp.
This particular group has everything, Vanguards, Engineers, and Agents. Use the lightning capacitors to weaken them, and then finish them off, but be careful as the overload from the capacitors can damage you and your squad as well. Again, biotically lifting baddies will cause them to fly away, so use that if you can, too. When you defeat them all, crawl over the barriers, and then find cover again on the far side as two more agents will attack. They are easy to deal with, so make sure that they are dealt with quickly. Keep going down and then find cover again as three LOKI Mechs are waiting for you. Deal with the LOKIs, follow the path, then back up you go.
General Tips / Insanity Tips: When the LOKI mechs appear, move your squadmates into cover several barriers back in the middle section, and then have Shepard draw the mechs to the first barrier. Do not have Shepard take cover behind the first barrier but back one more as the mechs will shoot right over the top of the first barrier while you are in cover.
When you reach the top, be expecting company, or rather they were expecting you. At the top is a Heavy, two Agents, and a Vanguard. Deal with them any way you choose, no capacitors to help you this time, then move on. The Vanguard is probably the most dangerous because of her willingness to approach to close range, but if she's out of sight just take out whoever is available.
When you manage to get to the top of the hull, activate the panel controls to continue. A small path will open in the panels, head through it and when you get to the other side, go right, drop down, and then find cover. Two Agents will be there to meet you, so deal with them then shift to deal with the enemies to your left which will consist of more Agents, a Vanguard, and a few Engineers. Capacitors are available to help deal with these tough opponents, but be careful of the strange geometry of the cover here - not everything that looks like cover will work very well. When they all fall, move up but keep to cover as more Agents and a Heavy are right around the corner.
General Tips / Insanity Tips: Once you enter the area by dropping down Shepard can't go back. Take your squad and quickly put them into cover as far down and to the left as possible. The jumbled nature of the cover here makes it hard to find good cover. If needed, run far backwards to recharge your shields. Move forward as needed to get mercs to spawn and to flush them out of cover. Take your time and the mercs will fall.
When you are in the clear again, head to the bottom to salvage some Conductor Components (+3000 credits), and then get up to the top to retract another rod. Once that one is down, move along the catwalk where Shepard comments about no guard rails and how it must be a joy to patrol the hull. Liara counters with at least there is a nice view. When you reach the end, there is a medical station and your way inside. Tip: Before activating the door, take a moment to explore the surroundings, noting the location of spare ammo cartridges, lightning capacitors, and good cover spots. When you activate the door, Liara starts to hack it, and now you must defend it over Shepard’s objections about her not testing it.
Tip: Save your game before you start the hack as the next battle is the hardest one of this mission.
Defend the Door
Warnings
- If you die at any time during this fight, you will have to restart from the beginning of the fight, auto-save or not. Be careful!
- There are a couple ammo cartridges on each side near the center aisle, but they do not respawn. Any additional ammo resupply for this rather long fight will have to come from taking what the enemies drop.
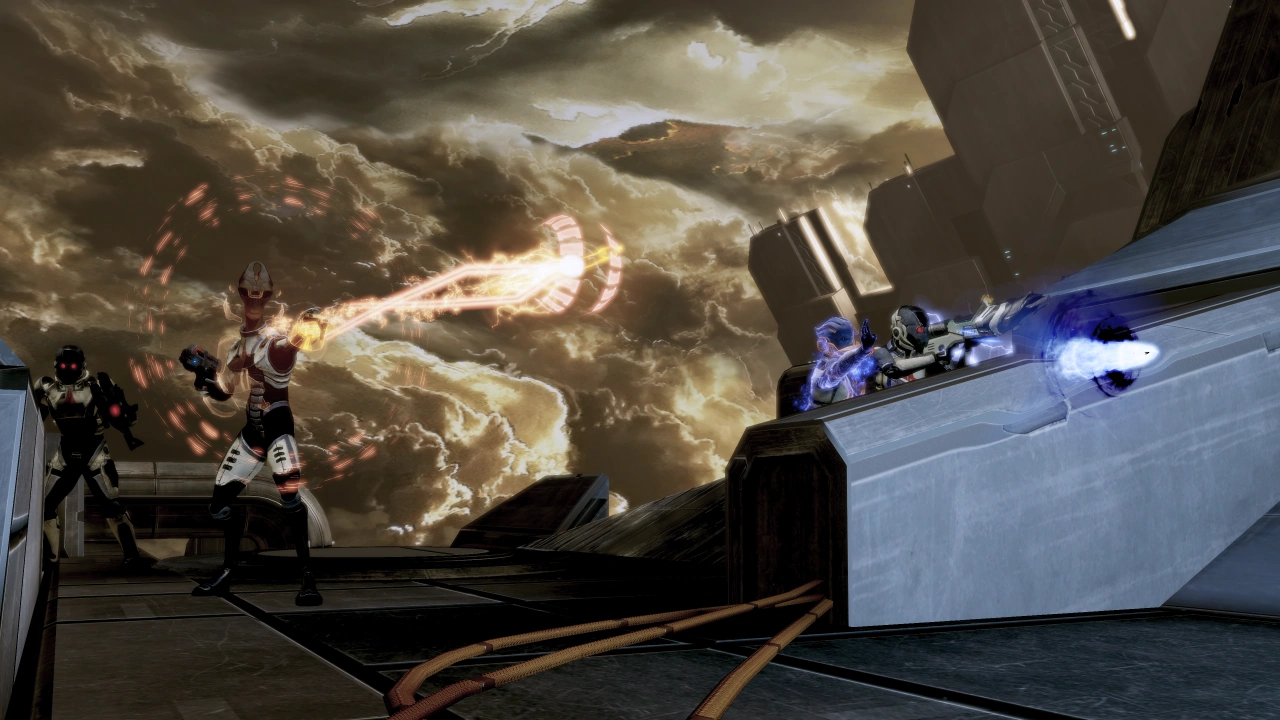
Get into cover as the Shadow Broker doesn’t like what you are doing. First, the enemies will come from the left (as you stand with your back to the door), but be warned they can flank you easily so keep an eye out. The enemies will be everything the Shadow Broker can throw at you, Heavies, Vanguards, Agents, and Engineers, so just keep your cool and focus on them one at a time. Don’t forget about using the capacitors, especially if you are a biotic, as they'll help to strip out your enemies' defenses, allowing you to use any biotic power that lifts them (especially Slam), so the storm can take them out for you, making this fight significantly easier.
When the first wave falls, there will be some brief dialogue. While that is happening, turn around because now they are coming from your rear -- you may want to cross to the other side of the center aisle to take cover. Call any fragile squadmates back to you immediately each time you switch sides, as they will tend to bravely sacrifice themselves by remaining too near the oncoming foes. Follow the same steps as before and you should be fine. Just keep the enemies in front of you, rather than on your flanks or behind you.
When the second wave falls, now there will be four Rocket Drones coming from the bow, turn to meet them and find cover while you’re at it. Liara's Stasis will destroy a Rocket Drone instantly, so make repeated use of that.
When the drones fall, Liara mentions that the mercs would be more effective if they all attacked at once. Shepard playfully replies by saying “Please, don’t give the mercs ideas.” The fourth wave comes again from the left, so get into appropriate cover to deal with them. Finally, the fifth wave arrives from the right, like the second, with the mercs apparently taking Liara’s advice. Well, at least there will be less to deal with inside: “Yeah, keep dreaming, T’Soni." This wave will also include Rocket Drones, so keep on the lookout for them and hit them with Stasis. When the fifth wave falls, the door opens. Rush inside before the mercs get more ideas!
General Tips / Insanity Tips: This fight can be won through strategy and patience. There are a few things to note before you start the hack and the waves of mercs show up. They are:
- After each wave, your squadmates will be revived. Don't waste medi-gel to revive squadmates when they will just pop back alive at the end of the wave.
- Understand where your cover is and where the mercs are going to be at before you even start the battle. When you know where they are going to be, you won't get all freaked out when the bullets and rockets start flying in from what you think is all directions.
- You can do everything right in this battle and through dumb luck get blasted away sometimes. Sometimes a rocket comes in or a Flashbang Grenade can come in when you're above cover and you just don't recover in time. It's a low probability but understand it can happen.
- This battle may take two or three tries until you can calm your nerves and focus on the right mercs to kill and when. If you aren't having luck after a couple of tries, walk away and come back later. This battle sucks for the amount of things happening on the screen at all different distances and the multiple waves.
- You are going to have trouble getting your squadmates to go to the cover locations when you want them to. Lots of times it takes several requests before they will run there and then one or more squadmates are dead. This happens more often when you are switching cover positions for the next wave. Understand it can happen but don't waste medi-gel right away.
Combat Strategy / Insanity Strategy: Before you start the hack, you need to identify the cover locations you are going to be using and the locations of the tricky mercs that show up. Thankfully there are only two cover locations to use that you and your squad will stay in for the whole battle.
- Locate First Cover Location
Place Shepard so that his back is against the door and you are facing forward. To the northeast of your location all the way in the corner of the map as far as you can go is your first cover location. Run over to the area and you will see a low wall that is wide enough for all three of your squad to take cover behind. You will know you are in the correct area when you can't move any more forward or to the right from the starting doorway. When you take cover behind the wall, you will be looking at the other side of the map. Place Shepard in the middle of the wall for cover and your squadmates to the right and left of Shepard as close as possible. Just forward and to your right of the wall cover will be a diagonal piece of metal cover. Note this diagonal metal location as this is where the Vanguard will take cover if it gets close enough to your squad.
- Locate First Cover Shadow Broker Heavy Location
From the first cover location, look up and to the north-northwest of your position. There will be a set of boxes or cover in the distance that are stacked up higher. It's pretty far away from your cover but this is where the Heavies like to go to and they can shoot rockets at your squad. You should be protected from the rockets behind the cover wall but your squadmates sometimes stand up and get a rocket sandwich to the face at the wrong time. It is important to note this location and where those rockets may come in from. The Heavies don't always go up to that cover though. Half of the time they stay lower on the map and just stick to cover. If you are lucky, they stay low. If you are unlucky, they go high.
- Locate Second Cover Location
Thankfully the second cover is very easy to find once you understand where the first cover is located. The ship is a mirror image of sorts. You are going to go over to the other side of the ship to the exact same low wall that is located directly across from the first cover location. The same setup for taking cover with Sheaprd in the middle and the squadmates to the left and right. There is a small piece of diagonal metal again ahead and to your right that the Vanguard will go to when the enemies spawn during the waves.
- Locate Second Cover Shadow Broker Heavy Location
The Heavy location this time is located up and to the north-northeast of your location when in cover. It has the same set of boxes or cover in the distance. Same rules apply for the Heavies using this to fire rockets at you. Sometimes they go high for cover and you get rockets, sometimes they stay low and stick to cover.
- Start the Battle - First Wave
Start the hack and then run to the first cover position on the right side of the map. Order your squadmates to cover but remember they aren't good about getting there fast. The squadmates tend to get stuck in the middle and start fighting. Once in cover, focus everything you have on the Vanguard that shows up. Use any powers to strip off that biotic barrier as fast as possible. The Vanguard will go back and forth in front of your cover and then make a move like it's going to flank you to the right but it won't actually flank you. Remember the diagonal cover location noted above? The Vanguard will go there and try to take down your squadmate to the right but the Vanguard goes to cover and pops up and down with that shotgun. Try to get that Vanguard down or hurt really bad before it can get to cover.
Once the Vanguard is down, then go after the Engineer that tends to stay in cover in front of your squad. You want the Engineer dead because the combat drones it spawns can push your squad out of cover and into a hail of gunfire.
Once the Engineer is down, if you have rockets coming in from the Heavies from the north-northwest location you noted before, and if you have a sniper rifle or long range weapon, take out the Heavies now. (If you don't have anything long range, focus on the Agents in front of your squad using weapons / powers first.)
Take down all of the Agents in front of your cover using any method available.
IF the agents are the last mercs on the battlefield, you need to get up and run to the second cover location immediately and get into cover right away! If there is still a heavy in cover on the other side of the map, this is a good thing because you can order your squad to follow you as you creep over to the other side of the map to take it out. Either way, you want to be moving towards the second cover location before everything is dead or the squadmates get hung up in the middle most times between waves and decide that fighting it out is the right thing to do instead of going to cover.
- Continue the Battle - Second Wave
This is the exact same battle you just fought but now on the other side of the map. Once your squad is in cover, focus on the Vanguard, then the Engineer, Heavies (if you can and they are on high cover), and then the Agents. Once the mercs go down, STAY IN COVER! If your squadmates go down, let them die and chip away at what is left. They will come alive for the third wave.
- Continue the Battle - Third Wave
This wave is where things can go wrong quickly. Four rocket drones are coming in from far to the left of your cover and seem to be two drones at first and then another two right afterwards. The drones will be hidden in the clouds so be on the lookout. You need to have Liara use Stasis to outright kill or hold one of the drones while your other squadmate and Shepard pound the remaining drone fast. As soon as you can get Liara to use Stasis again, hit another drone, and continue pounding away at a third or even fourth drone. They should go down pretty quickly with Stasis but sometimes you get rockets flying in and you go down. This is the time to use medi-gel to revive Liara because you need Stasis. Don't worry about using medi-gel here, it's better than redoing this fight from scratch. At the worst, you should only need to revive Liara once if you get slammed badly.
Note: As soon as the last rocket drone dies you need to be running back to the first cover position as wave four is starting.
- Continue the Battle - Fourth Wave
This is the exact same battle you fought the first and second waves but now on back on the starting side of the map. Once your squad is in cover, focus on the Vanguard, then the Engineer, Heavies (if you can and they are on high cover), and then the Agents. If your squadmates go down, let them die and chip away at what is left. They will come alive for the fifth wave.
IF the agents are the last mercs on the battlefield, you need to get up and run to the second cover location immediately and get into cover right away! If there is still a heavy in cover on the other side of the map, this is a good thing as noted before because you can order your squad to follow you as you creep over to the other side of the map to take it out. Either way, you want to be moving towards the second cover location before everything is dead or the squadmates get hung up in the middle most times between waves and decide that fighting it out is the right thing to do instead of going to cover.
- Finish the Battle - Fifth Wave
This is the exact same battle you fought the first, second, and fourth waves but this time there will be two rocket drones across the map and maybe another Heavy. (Don't worry, the drones stay put for now). Once your squad is in cover, focus on the Vanguard, then the Engineer, Heavies (if you can and they are on high cover), and then the Agents. If your squadmates go down, let them die and chip away at what is left. Creep over the map once everything you can kill from cover is down and note the rocket drones up high flying back and forth almost off the map. For some reason, the drones won't come onto the map to chase you and can be picked off with powers or long range weapons. The drones will start shooting rockets at you though once you are in range so be careful at this point. Take your time as there may be an extra Heavy on the left side of the map this time stuck in cover to contend with.
Note: Once the battle is over, save your game right away. You don't want to repeat that again! You are under no rush so take your time and pick up any and all ammo from the fight as you are going to need as much as you can get for the next section.
The Shadow Broker’s Ship Interior
Note: All your thermal clip ammo will be refilled at this point.
Warning Your ammo does not refill on higher difficulty levels. Don't forget to fill up on any ammo in the area before going through the door.
Once inside, more of the Broker’s private army rush to intercept you. In the first hallway, there are two Agents, an Engineer, and a Heavy. The cover geometry throughout this section is exotic and diagonal, so you may have to get creative. From the position Shepard begins in, you will be unable to use squadmate powers on enemies while in cover - their line of sight will be considered blocked, so you have the choice to do without their powers for a bit, step briefly out of cover whenever you want to activate their powers, or rush forward to a different cover spot a bit further down the hallway on the left.
Use the cover wisely and take out those that are in your way. When you defeat the enemies in the first hallway, round the corner and keep to what little cover there is because the next hallway has more of the same, just more of them and a Vanguard to boot. Keep moving up when you can and keep shooting above all else. Proceed forward and up the stairs. Liara will mention that she downloaded the ship's layout and that they are heading towards the Prison Block and Feron.
General Tips / Insanity Tips: This hallway sucks. Plain and simple. When you first start after the loading screen stops you are immediately in the thick of it with four mercs coming at you. Your cover is crap and your squadmates die so fast it's not even funny. If you can manage it, try to get a squadmate to cover on one of the pillars on the opposite side from Shepard and if possible send the third squadmate to cover as well. Most times you end up losing one or both squadmates here. Don't waste medi-gel if you don't have to!
Focus on the Engineer first, then the Heavy, and then the Agents. The combat drones can flush you out of cover and you end up dead fast. Once the first four mercs are dead, up around the corner are additional Agents and a Vanguard. The best strategy is to pop out quickly, use a weapon / power then back down the hallway to recharge your shields. If you managed to keep squadmates alive, leave them in cover back down the hallway. You can chip away at the mercs and even the Vanguard carefully until they die. The Vanguard will tend to not leave the area it's in around the corner to follow you. Once all of the mercs are down, your squadmates will come back to life (if they were dead).
Note: Save your game at this point as there are very few spots to do so inside the base.
When you round the next corner, there will be a Vanguard standing watch with two Agents and an Engineer. Again the exotic diagonalness of the cover, combined with the tendency of enemies to jump through "windows" to flank you, means you'll need to be creatively careful. Open fire and take them out before they have a chance to do the same to you.
General Tips / Insanity Tips: Get the attention of the Vanguard and it will follow you back down the hallway to your squadmates sitting in cover. Sneak back up and take out the engineer being mindful of the combat drones that can spawn. You can then take out the two agents in the room by using the cover across from them. Be careful as the agents will tend to run out and try to flank you. Just run back down to your squadmates and let them use up their ammo.
When they are down, the door at the end of the hallway won’t open, so backtrack a little and head into the room they were guarding. Inside the room access the Terminal (+4500 credits) and a med-kit for some medi-gel.
Warning Save your game before you bypass the door and talk to Feron. This will be the last time you can save the game until after you have defeated the Shadow Broker.
Bypass the door, to get access to Feron, and Liara’s objective.
When you bypass the door, Liara runs down to try and release Feron, but instead shocks him. Feron explains that if he is pulled out now, then his brain will fry. They must cut the power from central operations first. Any time Feron tries to answer a question he gets shocked, so ask quickly. When you finish your conversation, get back into the main room and into cover.
Three Agents and a Vanguard will be on the attack, but they are also out of cover. Put them down before they have a chance to get into cover -- the last couple you may have to carefully dislodge. When they fall, head to the previously locked door, and proceed.
Follow the hallways until you reach a security checkpoint with just a single Agent. Put him out of his misery then access the Terminal (+4500 credits) and the med-kit for the medi-gel. As you enter the final room, a cutscene plays. Meet the Shadow Broker.
Confront the Shadow Broker
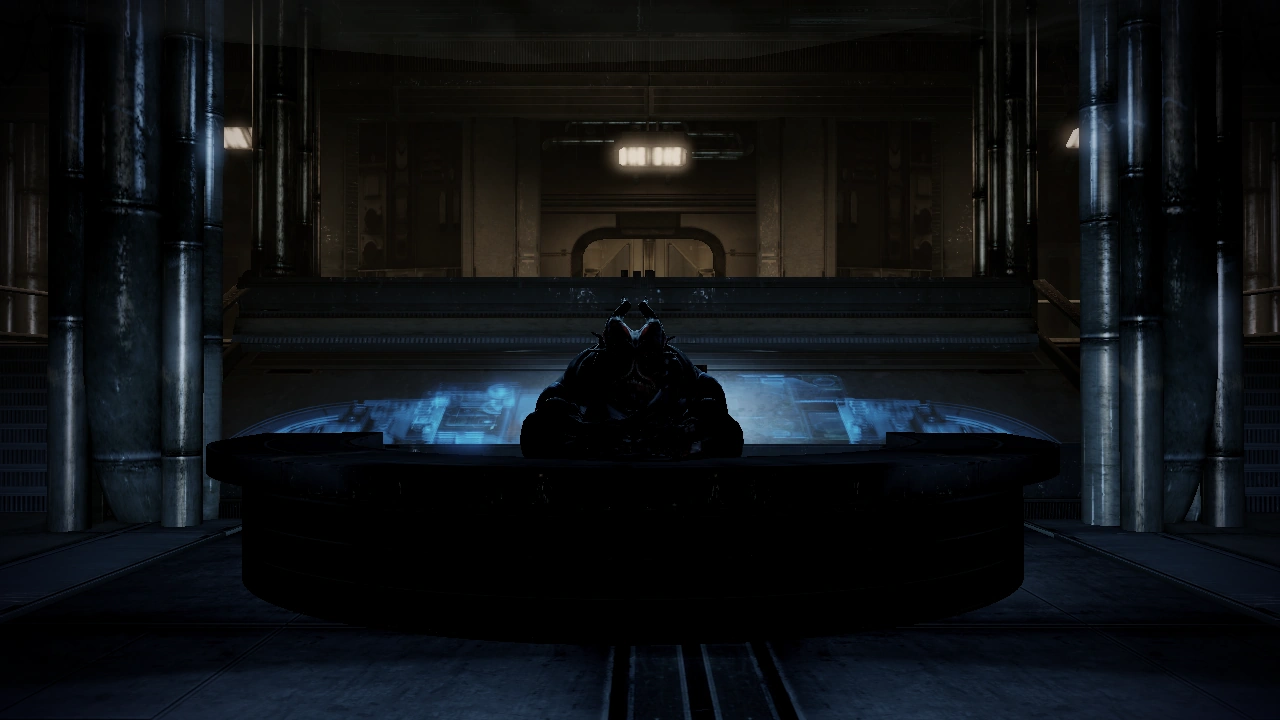
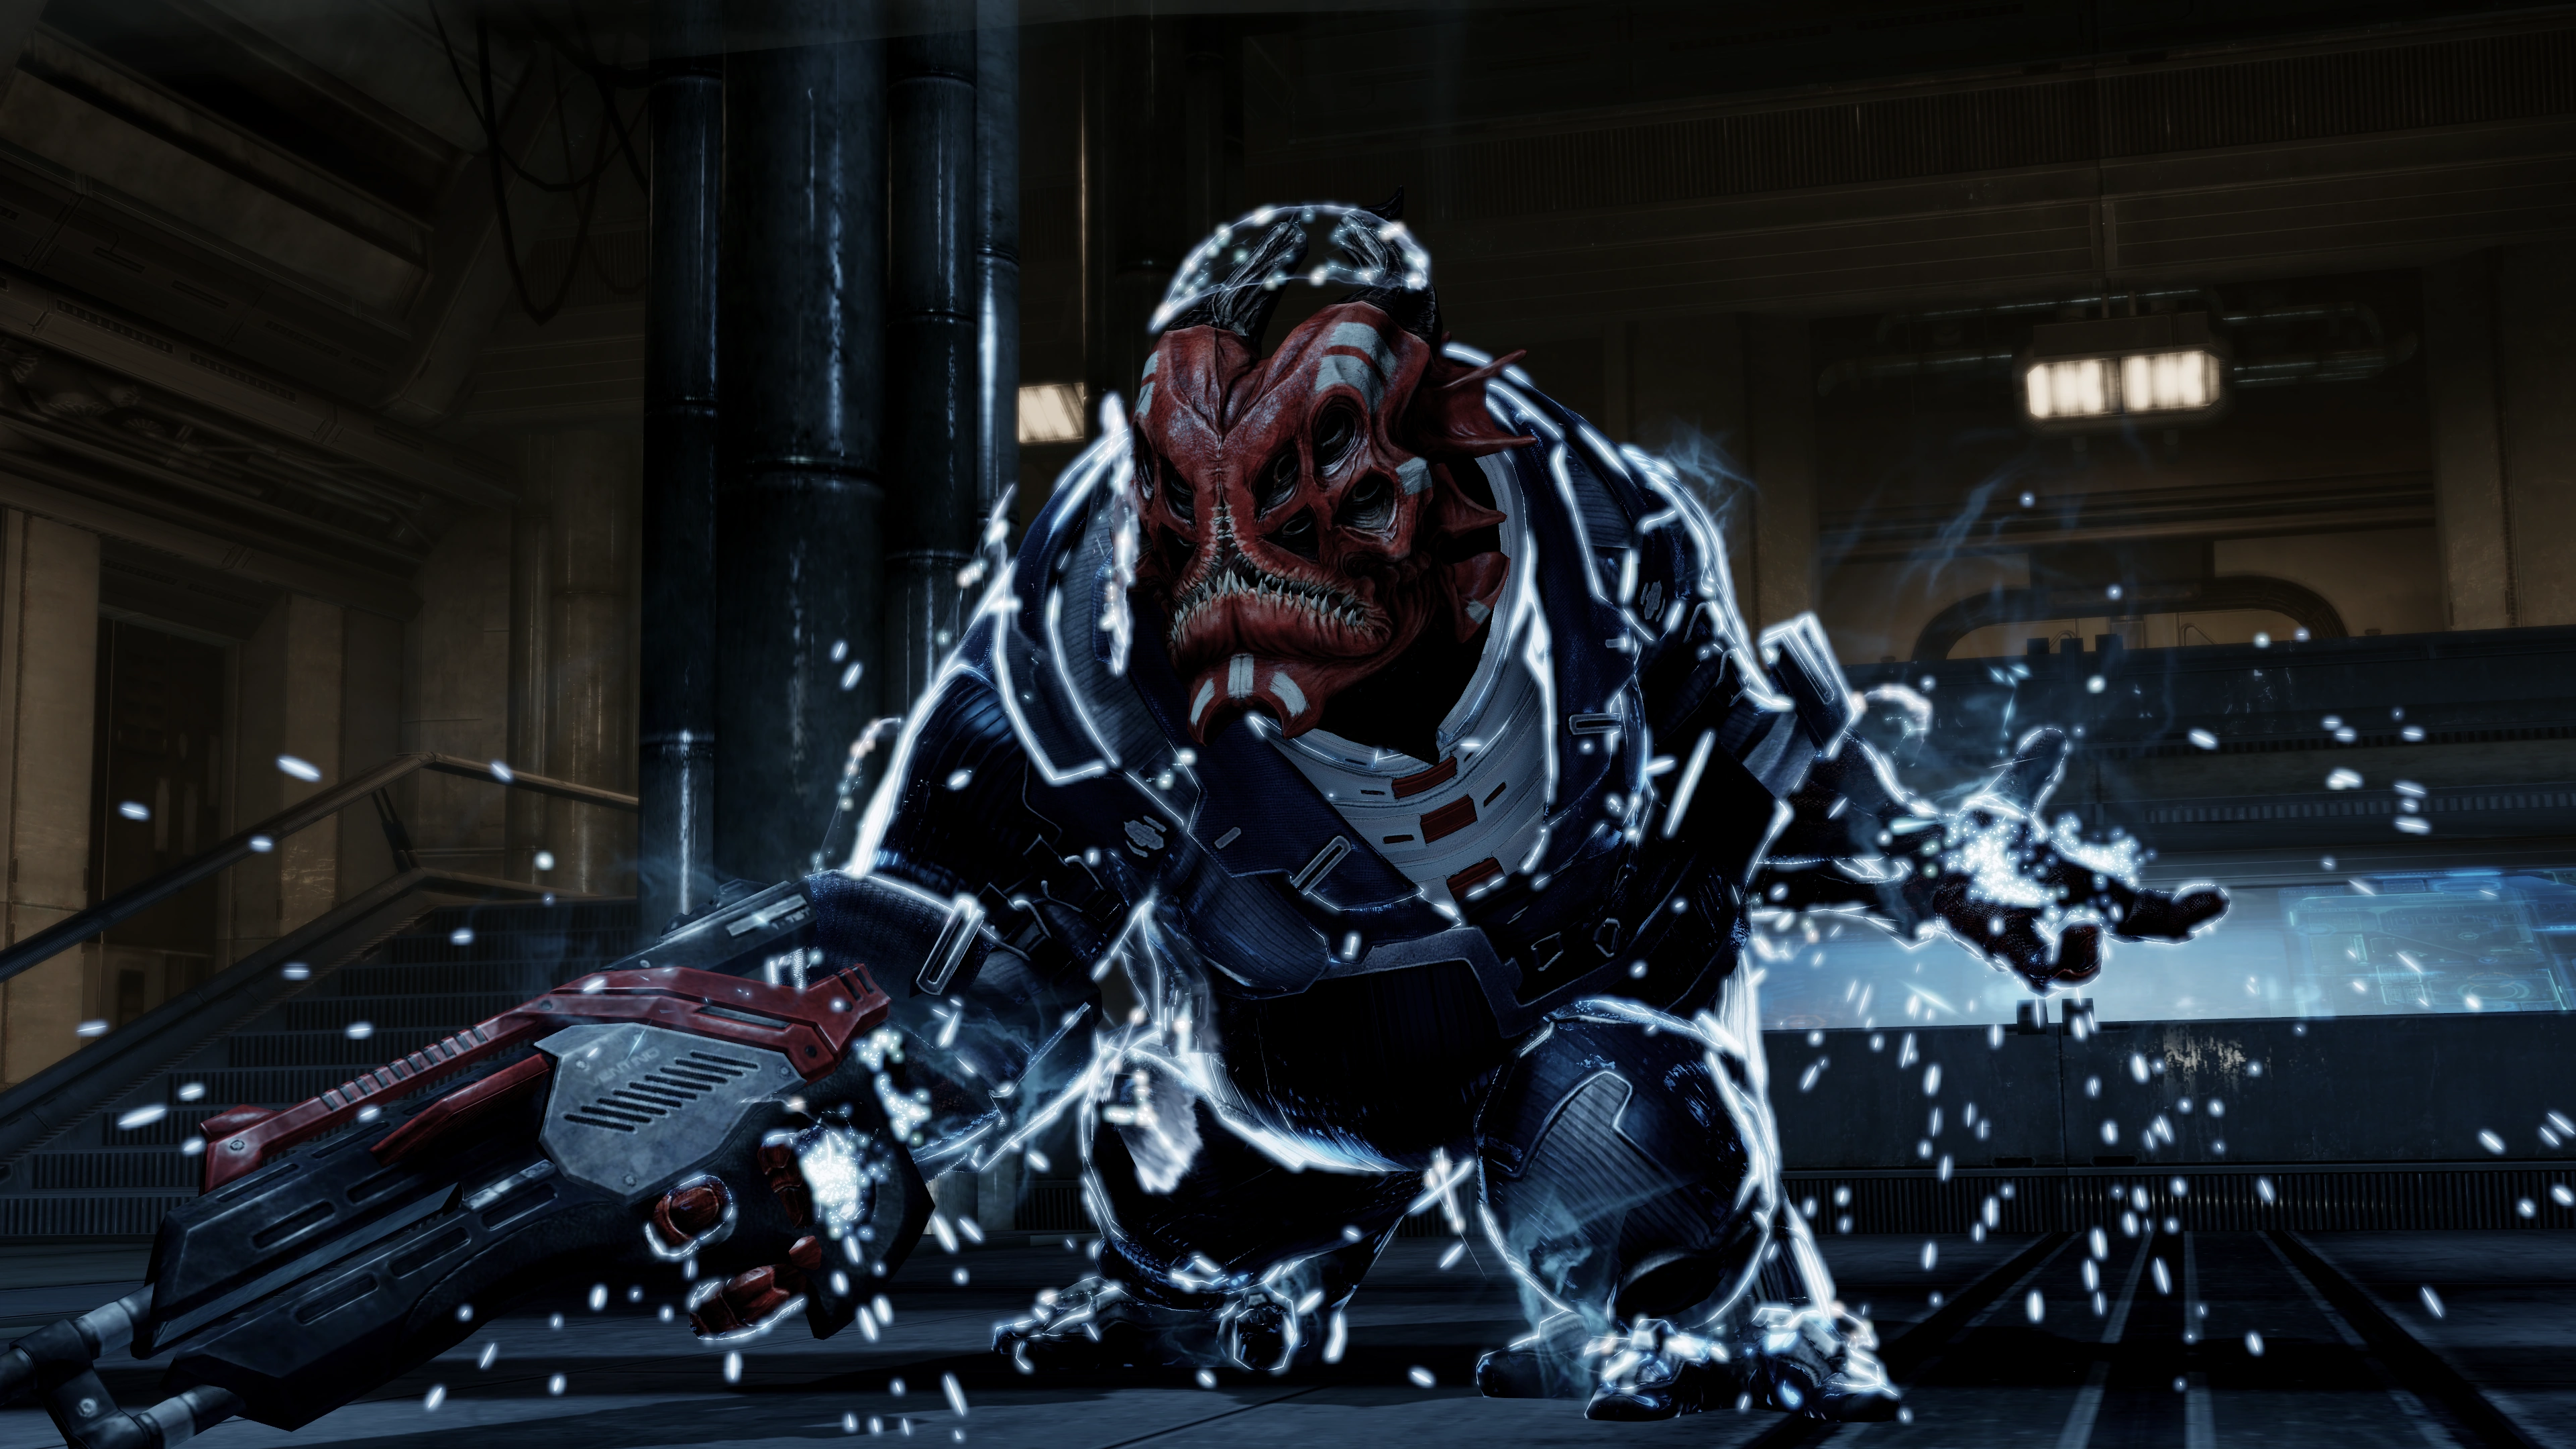
Shepard and the squad storm the Broker’s office, where the Broker calmly awaits them. Shrouded in darkness, the Broker is clearly a species never encountered. Civilly asking if Shepard and Liara are here for Feron, the Broker will note Shepard's actions are reckless, even considering the Commander's history.
After Shepard and the Broker trade words, Liara demands Feron. The Broker reminds her that her own actions put Feron in his situation. If the Collectors have not yet been defeated, the Broker will state that their offer for Shepard still stands. If the Collectors have been defeated, the Broker announces his intention to use the Normandy's IFF to salvage any remaining Collector tech.
Ignoring Liara's threats, the Broker notes the team's third squad member, and arrogantly disregards Liara, as he knows all her secrets. In response, Liara identifies the Broker as a yahg, likely taken from his world as a trophy or pet. Enraged at this reminder of his pathetic origins and Liara's defiance, the Broker smashes his desk and throws it at Shepard, knocking out the third squad member, who becomes unavailable for the remainder of the battle.
Note: While you and Liara speak with him, the Shadow Broker will also comment on your third squadmate. Depending on who that squadmate is, his comment on them will change accordingly.
Kill the Shadow Broker
The first part of this fight isn’t hard, just keep shooting him in the face and moving from cover to cover if he gets too close.
When the Shadow Broker's shields and armor are destroyed, a short cutscene will play where he raises a kinetic barrier which deflects both energy and bullets; time to do this the old-fashioned way. Run up and melee the Broker before he has a chance to respond. You are then treated to a short cutscene involving Shepard and the Broker in a short fist fight. Before Shepard can come around again, the Broker uses his Omni-tool to raise a shield which blocks all bullets. His shields and armor are also fully restored.
Repeat the same process you did before, keep shooting and move to avoid getting too close to the Broker. Be warned that when he charges now, he will go right through cover, so get out of the way. Now is a good time to use distracting tactics to get on his unprotected sides: the Broker can't see through Tactical Cloak, the Broker can be distracted by Combat Drones, and so on.
When you destroy the Broker’s shields and armor, he will again go into the state. Melee him before he comes out of it - if you don't get there in time you will have to do this part over again. You are again treated to a cutscene. The Broker takes a few more hits before control is returned to you.
The third time, everything is the same, but the Broker will make more mistakes and fumble more easily. This time when you destroy his shields and armor, melee him to witness the Broker's fall.
General Tips / Insanity Tips: Stick to the large round columns to the left and the right of the starting console you appear at after each cut scene. The Shadow Broker will charge them but can't destroy them. You can work around the column chipping away at the Shadow Broker until he drops. Use Liara to hit him with powers as much as you can. You can repeat this process for each time you need to drop his shields and armor. Even on insanity, the Shadow Broker is much less dangerous a YMIR mech. The large size and the final boss status can psyche you out easily into thinking this is a hard battle. After doing the five waves battle, this battle is pretty anti-climactic. Just stick to good cover and you can take him down fairly easily.
The final cutscene shows Shepard providing a distraction while Liara gets ready. On Shepard's cue, Liara brings down the electrified liquid in the tank set above the Broker. The liquid causes the Broker's barrier to malfunction and explode from an extreme overload, destroying the Shadow Broker for good.
Meet the New Shadow Broker
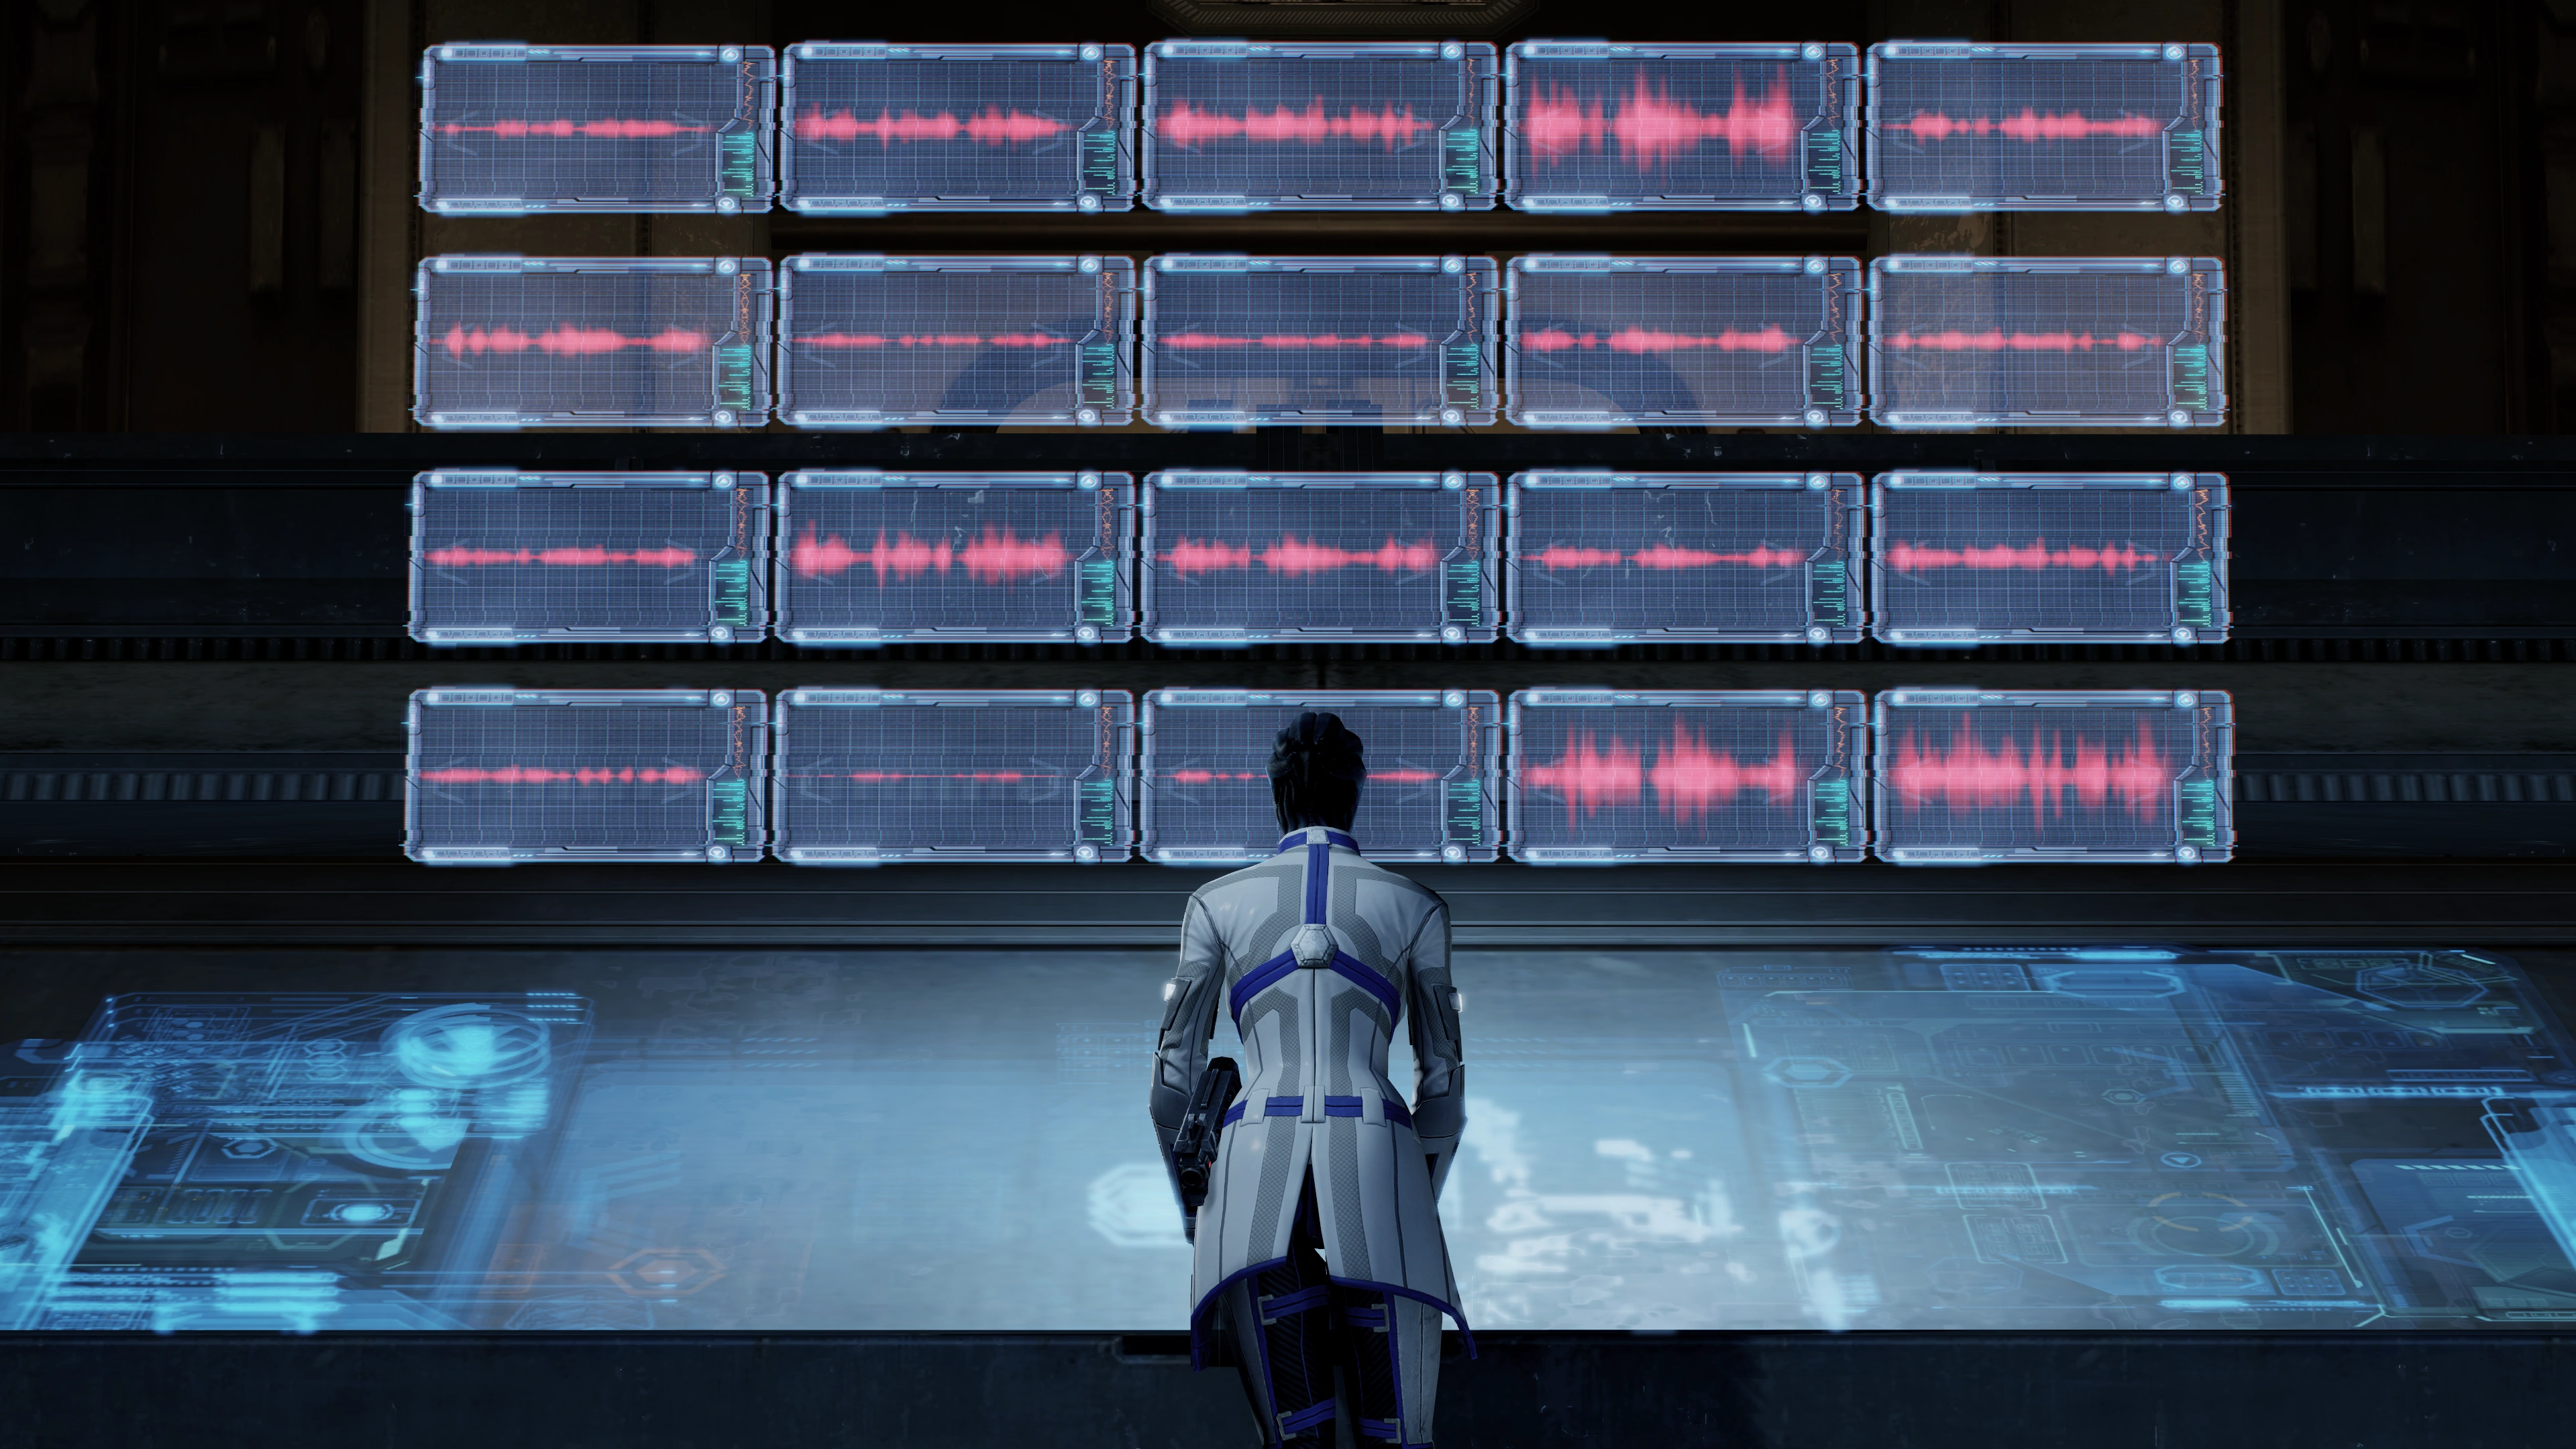
As the squad picks themselves up, the camera cuts to Feron’s cell; the power cuts, and Feron is gone. The scene shifts back to the Broker’s office and all of the various Broker agents begin asking for updates at the same time. While Shepard helps the other squadmate up, Liara focuses on the communications. She looks like she is going to be overwhelmed, then puts her head down, and walks forward.
Liara makes a few taps on the panel and communicates that the situation is under control, using the old Broker’s voice modification, and makes up a story. Feron, who is running away, hears it and then doubles back. Feron storms into the Broker’s office, pulling his gun, but stopping dead when he sees it’s Liara. He starts asking questions, but Liara explains that she is the new Shadow Broker. You can ask if this is what she wants, and she is sure. Feron excuses himself by saying he’s going to check the power systems, and your other squadmate goes with him.
Shepard can comfort Liara with a hug, who says that it’s over... after two years it's finally over (a brief kiss can also be shared if you romanced her). There is a very brief paragon interrupt available if Liara is your romance option, to confirm the relationship.
She walks over to the computer and notes that there are no safeguards or user restrictions, almost like he would be the only one to be in this office. Liara mentions that she will have more for you later, and maybe turn the operation around. When you leave, she says that the door is always open and that Shepard is welcome back any time. Shepard can subsequently invite Liara over to the Normandy regardless of whether she was romanced in Mass Effect. However, if she was romanced, this will partially alter the dialog and Shepard and Liara can talk "about us".
You now have permanent access to the Shadow Broker Base, which you should explore as it offers much of interest. If you are romancing Liara, you can invite her to the ship now, or in a later visit. You can also have a conversation with Feron.
Enemies
- Combat Drone
- LOKI Mech
- Maintenance Drone
- Rocket Drone
- Shadow Broker
- Shadow Broker Agent
- Shadow Broker Engineer
- Shadow Broker Heavy
- Shadow Broker Vanguard
- Tela Vasir
Mission Summary
Shepard has defeated the Shadow Broker. Eliminate Cerberus information leaks as Liara T'Soni takes over. The asari's relationship with Shepard should be watched closely.
- Experience: 1000 (1248)
- Upgrades
- Credits: 90,000
- Cerberus Funding: 36,000
- Credits Found: 54,000
- Resources
- Element Zero: 1,000
- Palladium: 4,000
Trivia
- In Azure, the room with the patterned carpet and red curtained walls seen during the "Lustful Video" that Liara will comment on is a replica of the "Red Room" from the television show Twin Peaks.
- In the final battle, the Unity icon will be white in the HUD power wheel, even though the eliminated third squad member cannot be revived. Using it will only restore Shepard's health.
- The Mission Summary Screen is currently bugged and displays incorrect values for Credits Found. The actual amount of credits you can find is 54,000, but you will get 90,000 credits regardless of what is displayed on the Mission Summary Screen. If you collect more than 45,000 credits, the Cerberus funding will fill in the rest up to 90,000 credits, and if you collect less than 45,000 credits, then you will get only 45,000 credits in Cerberus funding. Any credits you get from Medi-gel and Power Cells that you collect are not taken into account and are added on to your Credit Total after the 90,000 credit Limit from Credits Found and Cerberus Funding has been reached. Example: Collected Credits: 48,000, Cerberus Funding: 42,000, Credits from Medi-gel and Power Cells: 700, Credits Earned: 90,700.