(→Volus Adept: Easter egg for those who played ME2 (see alt-text on image)) |
Lancer1289 (talk | contribs) m (Reverted edits by 173.75.43.61 (talk | block) to last version by Commdor) |
||
| Line 352: | Line 352: | ||
== Volus Adept == |
== Volus Adept == |
||
| − | [[File:ME3 Volus Adept.png |
+ | [[File:ME3 Volus Adept.png|left|225px]] |
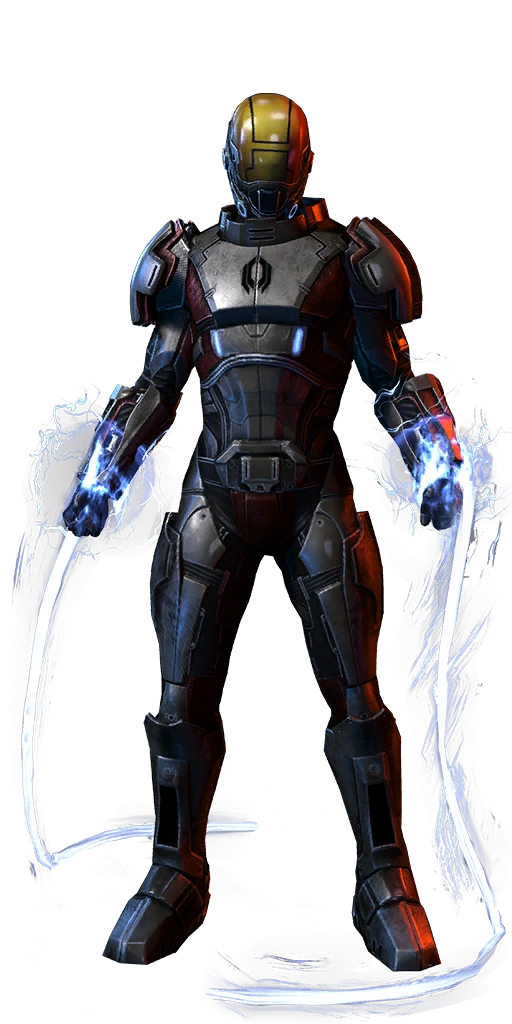
The volus homeworld, Irune, has a high-pressure atmosphere that supports an ammonia-based biochemistry. To survive on other planets, the volus must wear pressure suits and breathers or, when facing combat, specially sealed armor. |
The volus homeworld, Irune, has a high-pressure atmosphere that supports an ammonia-based biochemistry. To survive on other planets, the volus must wear pressure suits and breathers or, when facing combat, specially sealed armor. |
||
Revision as of 18:16, 19 June 2013
Specializing in crowd control, Adepts are an essential asset on the field, allowing for a wide range of combat options which otherwise would not be available. Through the use of biotics, an Adept can lock down a field. Adepts tend to emphasize power usage, especially in combination to create Biotic Explosions.
Human Adept
Humans joined the galactic community after discovering a Prothean data cache on Mars in 2148. Their devotion to understanding and adapting to modern warfare left the staid Council races stunned. Humanity's persistence and unflappable spirit has taken them further than anyone in the galaxy could have imagined.
Human adepts specialize in biotic crowd control, a valuable and renowned asset on the battlefield. Allies often share stories of how an enemy soldier, sneaking from behind to deliver a fatal blow, could suddenly end up floating above their squadron.
Abilities
|
|||||||||||||||||
Heavy Melee and Dodge
- Biotic Blast - The Human Adept blasts a wave of biotic energy with a palm strike.
- Combat Roll - The Human Adept rolls to quickly evade incoming attacks.
Player Notes
- General Notes
- Singularity will prime biotic explosions on ALL enemies caught in the field, even on armored foes. Furthermore it causes constant damage to anything caught inside as well as causing constant stagger to all enemies. Additionally, enemies without shields, barriers, or armor will be picked up by the field.
- It's possible to cause double biotic explosions by using Singularity on an enemy, then Warp to detonate Singularity, and then Shockwave to detonate Warp.
- Singularity and Shockwave are only powerful and damaging on Bronze/Silver - on Gold, they will still pick up enemies/knock them back respectively, but they will do minimal damage to them. Therefore, it is worth fully evolving Warp to do max damage, so that you have a strong power.
- Since Shockwave goes through any surface, an Adept can hide behind a wall and use Shockwave, which will pass through and damage enemies on the other side.
- Additionally, if the Detonate evolution is chosen, Shockwave will set off the most powerful Biotic Explosions available, as it gives a 65% damage bonus to them rather than the 50% given by the Detonate evolutions for other biotic powers.
- Shockwave will stagger even the largest of opponents, allowing the player some respite.
- It may prove effective to fully evolve all powers except for either Singularity or Shockwave. If you do this, you'll get the most out of every power and passive power and still have a way to cause biotic detonations with either Singularity + Warp or Warp + Shockwave.
- The power damage/force evolutions of Alliance Training do not affect biotic explosions.
- As the Human Adept lacks anti-shield powers, they can compensate by using the Acolyte or a weapon with Disruptor or Phasic Ammo.
- Cerberus
- Once a Phantom's barriers are removed, Singularity will pick them up and quickly kill them. Shockwave can also be highly effective when they are cloaked.
- Shockwave is excellent against Cerberus - it can blow Cerberus Troopers away from the player and then deals physics based damage to them. This can allow the player to run around on bronze, knocking down enemies by repeatedly using Shockwave, which stops them from shooting at you. They can then be finished off with a few shots.
- Shockwave will also knock back Guardians, revealing their body, which can then be shot. Otherwise, it is very tricky to kill Guardians whilst playing as a Human Adept without the use of an armour piercing mod or amp, or wrapping a Singularity around their back (which will force them to drop their shield and lift them into the air, while setting up a biotic combo). That being said, if you let an ally play decoy, you can run up behind a Guardian and throw a Singularity.
- A good tactic to set off Biotic Explosions on Atlases is to get behind a wall near it. Then, you can peek out, throw Warp at it and then go behind the wall. You can set the Biotic Explosion off by casting Shockwave through the wall without having to expose yourself. This can be done to all enemies, though the Atlas's walking speed allows one to stay in a good spot for this tactic longer, before the Atlas overruns the location.
- Reapers
- Shockwave, with the Radius evolution, is very effective at knocking back and killing groups of Husks and Cannibals.
- Singularity is also effective at paralysing groups of Cannibals and Husks, as they have no shields to contend with.
- Warp can be used on Cannibals in order to negate the armor they have gained from a Marauder or from cannibalizing.
- Spamming Warp, then Shockwave against Ravagers is perfect at close range, as the Biotic Explosion produced will kill any Swarmers that appear. However, being so close to the Ravager cannons does put you at risk.
- Shockwave can be used effectively to momentarily stagger Brutes who have gotten to close to the player, allowing the player time to escape.
- Due to the high number of armored Reaper foes, biotic detonations can be a major source of damage. Keep in mind that Singularity will not die after one biotic explosion, allowing you to set off multiple explosions on multiple armored targets.
- Geth
- Shockwave, with the Radius evolution, can deal very well with Geth Hunters as it will hit them if it goes near them. This staggers them, allowing the player to headshot them easily.
- Since the geth have a tendency to group together, Singularity (with Warp to detonate it) will prove useful here. Singularity can even deplete shields to the point where Hunters and Rocket Troopers will be picked up by the field.
- Collectors
- Singularity is very effective for crowd control of lesser enemies, such as Collector Captains, Abominations, Collector Troopers, and setting up biotic explosions on the slower moving Scions.
- Singularity can be used to halt the advance of Seeker Swarms while rapidly killing them off with its DoT.
- Power heavy classes, such as the Adepts and Engineers, will have a tougher time bringing down Praetorians, since, like the Banshees, sometimes put up a field that blocks projectile attacks, so it is best to use weapons against them until they drop to the ground to fire their twin cannons.
- A Warp heavy build is highly recommended, since most units have barriers, armour or health.
Asari Adept
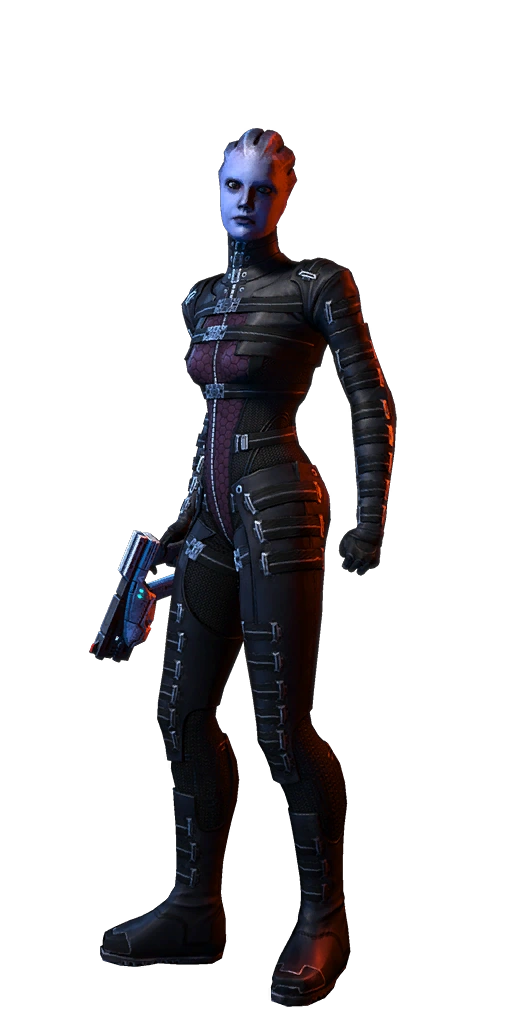
Asari are the most influential and respected sentient species in the galaxy. They are native to the planet Thessia and were the first species to discover the Citadel. Their long lifespan and history have allowed them to serve as galactic mediators for centuries. While not as physically powerful as other species, their proficiency with biotics makes them dangerous opponents.
Asari are fierce, graceful warriors. They are incredibly powerful natural biotics. The asari excel at hit-and-run tactics to ruthlessly eliminate their opponents from the battlefield.
Abilities
|
|||||||||||||||||
Heavy Melee and Dodge
- Heavy Biotic Blast - The Asari Adept unleashes a biotic pulse that damages enemies within a certain radius.
- Biotic Dash - The Asari Adept quickly slides using biotic energy at the expense of barrier strength.
Player Notes
- General Notes
- The Asari Adept is a good Adept to play as if you want to focus on Biotic Explosions, since they have two, long-ranged, enemy-seeking powers that will cause a biotic combo reliably — Warp and Throw. Back-and-forth spamming of these two powers can make a player deal out high area of effect damage at any range, chewing through and knocking back enemies with constant explosions.
- The aforementioned tactic requires no ammo, which means no ammo-dump runs, so if a decent camping location is found, which has ammo sources constantly blocked off by enemy spawns and movement paths, the Asari Adept doesn't need to worry. That being said, allies may still have issues, requiring a different spot be chosen.
- If evolved correctly, a player can produce a Biotic Explosion every 3 seconds by using Warp then Throw in combination. This will quickly kill any enemies in the blast radius — as such, it is best to perform them on large, slow-moving targets that are surrounded by weaker enemies.
- Raise Stasis to at least rank 3, this way it can keep Cerberus Phantoms, Collector Swarmers and Geth Hunters at bay long enough to kill them.
- Combining Stasis with a relatively light sniper rifle (such as the M-92 Mantis) can make for easy headshots. The time it takes to fire of a shot and then reloading the Mantis is enough to recharge Stasis fully.
- If you plan on focusing on Stasis, the Kishock Harpoon Gun is an excellent choice. Stasis negates the biggest drawback of the Kishock: projectile travel time. Furthermore, it is one of the only weapons that can bypass the Shield Gate on Gold, allowing for one hit kills.
- Alternatively, Stasis can be used to freeze enemies at close range and allow for easy shotgun kills.
- If you don't want the encumbrance of a sniper rifle, opt for either a high level Arc Pistol, or a Paladin. Both can fire multiple shots before reloading, which is especially useful on Gold for dealing with shielded enemies. Simply hit them with Stasis, and aim for the head.
- Alternatively, the M-11 Suppressor pistol is ideal for the Asari Adept, who can make the most of its massive headshot bonus with Stasis.
- Cerberus
- Biotic Explosions can be performed at any range by an Asari Adept — as such, they are perfect for taking out Nemeses, Phantoms and Atlases at long range. This is trickier against any enemy other than Turrets or Atlases, especially on higher difficulties, as they dodge with much higher frequency and the power guidance system is inconsistent.
- Stasis can be used to immobilise Phantoms, allowing for easy headshots. Be careful, as a Phantom can only be put into Stasis a couple times before becoming immune to it. If players fail to capitalize on this opportunity, a Phantom's greatest weakness can become unexploitable before the Phantom gets killed.
- Stasis will also cause Guardians to drop their shields, allowing the player to kill them easily, but only if used from a point where the player can get a clear line of sight on the actual body of the guardian, or any time, if one chooses the rank 6 Stasis Bubble evolution.
- Throw can be used to knock away any Troopers that get too close. With power evolutions chosen to maximize damage, it can kill in one or two uses. It can also knock enemies out of the map, which causes them to die.
- Throw can also temporarily knock aside a Guardian's shield, allowing unobstructed shots. It's not the most effective way to kill a Guardian, but it allows an Asari Adept to deal with an alert Guardian without needing an armor piercing mod/amp or a head shot.
- Reapers
- Stasis is of almost no use here — it can be useful as a trap to stop Husks approaching (when evolved with Bubble) but it does nothing to the armoured units that Reaper forces have, which make up half of the standard enemies. That said, Swarmers running into a Stasis bubble (from the rank 6 evolution) will die instantly, allowing a player to place one in front of a Ravager to kill any Swarmers that appear.
- Biotic Explosions can be excellent when used against Ravagers, as they will not only deal heavy damage to it but will kill any Swarmers that appear, due to their area of effect nature.
- Geth
- Stasis is perfect for stopping any Hunters that get to close to the player, and can even (with the Bubble evolution) be used to block off a passage to them. Any that get caught can be easily headshotted or detonated with Throw.
- Using Warp and then Throw on a Geth Prime will not only occasionally stagger it but will also destroy any drones or turrets nearby.
- Collectors
- The Asari Adept makes quick work of Collector forces, stripping armor with a combo of Warp and Throw.
- By using Stasis (Bubble evolution), one can simply plant the power next to their cover and not worry about incoming Abominations.
Drell Adept
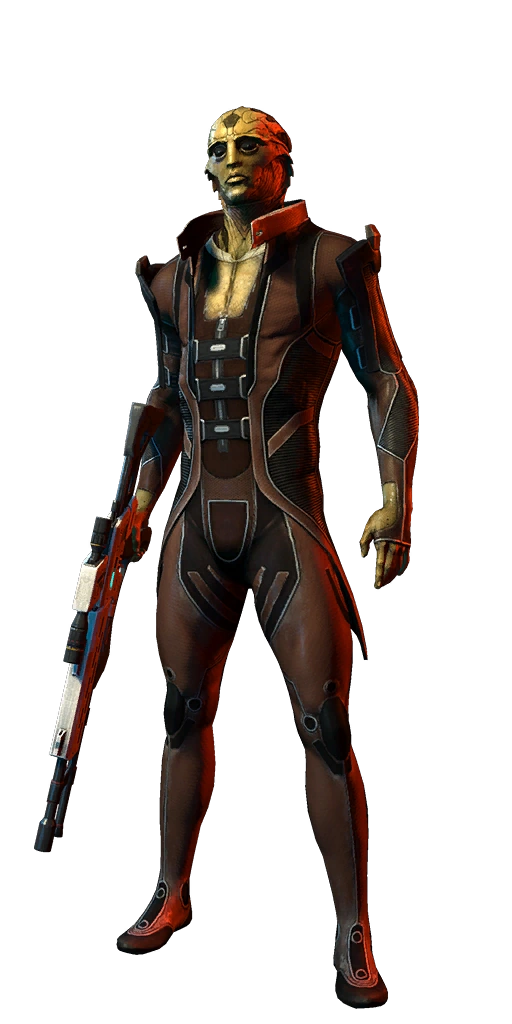
The reptilian drell have dense muscle tissue that grants them surprising, wiry strength. With unique hyoid bones in their throats, drell can vocalize high-pitched sounds outside of human hearing range. The bones have the added benefit of making drell extremely difficult to strangle.
Though drell may lack the rugged durability of other races, they are lightning fast and deadly accurate. Drell are to be feared on the battlefield.
Abilities
|
|||||||||||||||||||
Heavy Melee and Dodge
- Biotic Strike - The Drell Adept strikes at enemies with a biotically-charged fist.
- Acrobatics - The Drell Adept rolls to quickly evade incoming attacks and flips over obstacles.
Player Notes
- General Notes
- After maximizing speed in fitness and cluster grenades the drell adept/vanguard can be used as a strike fighter. Running from ammo box to ammo box. If while traveling you keep your eye open for groups of enemies to toss cluster grenades at and distracting large groups of enemies or simply attacking specifically the larger opponents letting the rest of you team mop up the stragglers. This can be greatly improved with adrenaline mods allowing you to move at blurring speeds. A team of biotics or even just using reave with the cluster grenades can create massive biotic explosions. Stick to hit and run on groups or large enemies, using your grenades as your main attack. Not effective with soldiers or other grenade users as they burn up extra ammo.
- Drell start off with the weakest barrier of all Adepts and, as such, should try to stay in cover - this can be lessened by maximising the damage reduction given by Reave (so that it is 40%) and by fully evolving Fitness to maximise barrier strength and movement speed, which can get you out of sticky situations quicker, saving your life.
- Their innate movement speed bonuses (faster than nearly any other class) greatly support a fully-standing, hit-and-run-tactic fighting style. When you find enemies, find tall cover to get behind, then strafe out of cover enough to get a sight on an enemy and use a power or shoot, before popping back into cover instantly.
- The easiest way to set off a Biotic Combos is to use Reave on any enemy and then throw a cluster grenade at them. The main draw-back is the lack of ammo supply for grenades. In a crucial situation, an under-used Thermal Clip Ammo Pack can refill the players grenade supply.
- An alternate, less reliable way is to use Pull and follow up with either Reave or Cluster Grenades (the former being far more reliable and easier to replace). This will cause a Biotic Explosion but can only be used on unshielded enemies that don't have armour. If you plan on using this tactic more than the Reave-Cluster Grenade combo, an SMG or Assault Rifle is the suggested weapon-of-choice, as barrier/shield protected enemies are the bane of its usage and SMGs/ARs are the most effective against shields and barriers.
- As Cluster Grenades spread out, they become less accurate at range. They should be saved for when the player is near a group of enemies who can be hit by them easily, as they explode on contact. At this range, wounded enemies can easily be finished off with a shotgun.
- If one has weapons upgraded enough, one can have the Acolyte as one weapon, and a moderately bulky weapon such as the Mantis, or the Valiant one can maintain over 100% cooldown, and while this will slightly affect Reave, Pull remains relatively unaffected if recharge speed is picked at Rank 6. Pull's can be used every 1.5 seconds with this setup while Reave can be done roughly every 3.4 seconds. This means you can still play like an Adept, but have the advantages of being able to use a gun to pick people off, or strip shields and barriers away.
- The Drell Adept has a very intersting synergy with the M-11 suppresor, becasue of it's high rate of fire it is a very effective gun to use with a 'hit and run' tactic.
- Cerberus
- Pull will remove Guardians shields, exposing them to weapons fire from all sides.
- On low levels, Cluster Grenades can eliminate whole groups of weaker enemies if allowed to spread out, or individual heavy enemies if they all strike the same target.
- Reave WILL hit Guardians through their shields, but it means damage is restricted for the rest of your team. It wont prove that useful when your friends are alive, but when you or only one other person is alive, this can prove invaluable since you can get multiple enemies with Reave, or you can focus your attention on more serious threats.
- Reapers
- Cluster Grenades can be used to excellent effect against Reaper units, due to their tendency to bunch together, and their slow moving nature. This allows the full effect of Cluster Grenades to be used.
- Pull, when fully evolved, can kill Husks in one go and can be rapidly used, allowing a player to defend themselves at close quarters.
- Use of Reave is highly recommended against Banshees, since their Biotic powers will quickly strip you of your barriers and your health. Reave will lessen this damage somewhat. It will also help protect in general if enemies focus their attention on you.
- Geth
- Reave is very effective against Geth Hunters, as it illuminates them, allowing the player to see them easier and putting them on the AI's auto-target radar. This allows powers to target them automatically, rather than manually. If the Hunter can't be targeted due to auto-target using Reave on a different enemy, the player can choose the Rank 4 Area of Effect evolution and target the nearest enemy, assuming the player is within 3 Meters of the Hunter. The Hunter will then be affected by the AoE damage, allowing them to be targeted by other powers.
- Once Troopers, Rocket Troopers, and Geth Hunters are unshielded, you can Pull them. Then said enemies are at your mercy.
- Collectors
- Using Pull on Abominations is questionable at best since they explode after death, if you do decide to pull said foes, make sure you are at a generous distance. This will ensure you have plenty of time to dispatch them, because if you leave it too long they will detonate after death which will deplete what little shields the drell already has.
- Reave is very useful against Praetorians, since the ability is instant, it can go through the protective shield that the Praetorian sometimes puts up.
- Cluster Grenades are strongly encouraged to take out large groups of trooper level enemies like Abominations, or Collector Troopers.
Asari Justicar Adept
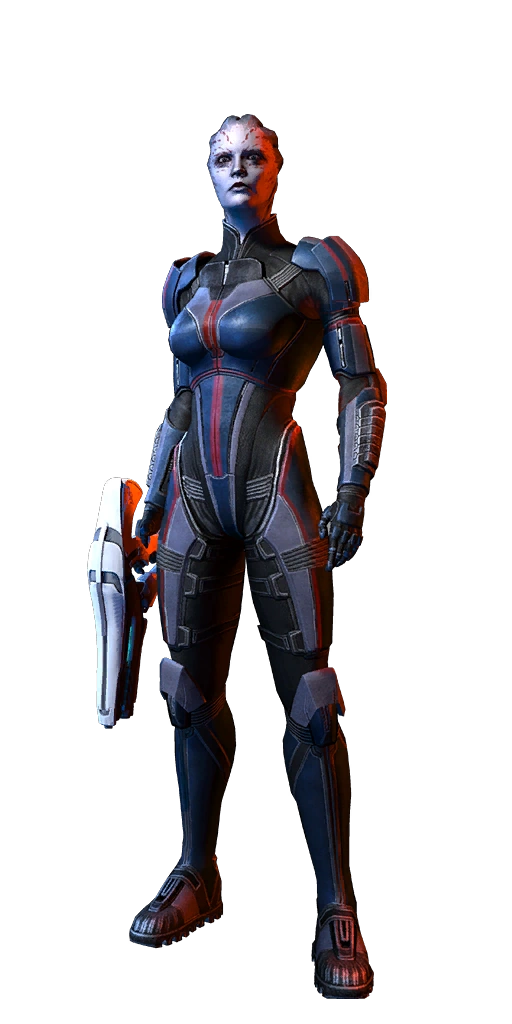
Asari are the most influential and respected sentient species in the galaxy. They are native to the planet Thessia and were the first species to discover the Citadel. Their long lifespan and history have allowed them to serve as galactic mediators for centuries. While not as physically powerful as other species, their proficiency with biotics makes them dangerous opponents.
Asari are fierce, graceful warriors. They are incredibly powerful natural biotics. The asari excel at hit-and-run tactics to ruthlessly eliminate their opponents from the battlefield.
Abilities
|
|||||||||||||||||
Heavy Melee and Dodge
- Heavy Biotic Blast - The Asari Justicar Adept unleashes a biotic pulse that damages enemies within a certain radius.
- Biotic Dash - The Asari Justicar Adept quickly slides using biotic energy at the expense of barrier strength.
Player Notes
- General Notes
- The Warp-Effect Biotic Sphere evolution is very useful, as it allows the Justicar to set up Biotic Combos against any enemy, at any time, rather than requiring enemy shields/barriers/armor to not be present (which is necessary if using the Reave/Pull combination). The caveat of this biotic combo is that it cannot be upgraded to do additional damage, as neither Biotic Sphere nor Reave have Detonate evolutions like Shockwave, Pull, Throw, or Warp, and as a result it may not kill the enemies that get close enough to become susceptible to it. However, it is very useful for CQC players, at it can detonate multiple enemies at close range, who will be knocked back and vulnerable to a shotgun blast.
- Biotic Sphere staggers any and all enemies that are within range upon placement, allowing for the player to escape in close-quarter, clutch situations. With the Rank 5 Damage-Taken evolution, and a shotgun, the player can throw an enemy off-balance then get up close for added damage headshot. Almost every lesser enemy will die with one headshot with this tactic, potentially even a Phantom, if using stronger shotguns like the Claymore.
- Biotic Sphere also benefits from stacking its damage reduction with other powers or traits, such as rage, Shield Boost, or even Energy Drain. The damage reduction only goes up to 90%, but that said, this will make you, and others nearly invulnerable. Even physically frail classes will be able to put up stiff resistance when said powers are in play and even on Platinum you can still fight back and make the enemy really work for their kill.
- Between the Sphere and the Reave protection bonus, the Justicar can have as much as 80% damage reduction herself unless fighting Geth.
- Biotic Sphere also benefits from stacking its damage reduction with other powers or traits, such as rage, Shield Boost, or even Energy Drain. The damage reduction only goes up to 90%, but that said, this will make you, and others nearly invulnerable. Even physically frail classes will be able to put up stiff resistance when said powers are in play and even on Platinum you can still fight back and make the enemy really work for their kill.
- There is a mild glitch with the Biotic Sphere, where, on occasion, when you attempt to use it with no powers recharging, you will not do anything. Moving slightly usually fixes the issue.
- Reave stacks with itself, and due to duration class-innate bonuses, the Justicar not only can have the longest Reave, resulting in the most stacking, but the base damage is also higher. To kill any enemy from far range, just start spamming Reave whenever your recharge is gone and watch them slowly bleed out. Multiple allies Reaving results in massive DoT.
- The M-37 Falcon has an interesting synergy with the Asari Justicar. Using this weapon with Reave allows you to stagger enemies and line up groups of enemies to be reaved all at once, causing massive damage to the whole group. If done correctly whole groups can be taken out effortlessly regardless of difficulty.
- Cerberus
- Biotic Sphere can be used to stagger enemies. Most importantly, this is effective at saving you from Phantoms which love to get close to use melee-based attacks and even insta-kill you.
- Reave is also highly effective against Phantoms, particularly with the armor/barrier damage evolution. It will fairly rapidly strip the Phantom's barrier, and since it does damage over time, it will also allow the Phantom to be targeted through her cloak. Additionally, multiple uses of Reave on a target stack, so (depending on the evolution chosen for Reave) it's possible to kill a Phantom by applying Reave two (Silver) or three (Gold) times, then simply staying clear of her until she dies.
- Reapers
- Reave is very effective against the Reaper forces as it can damage large numbers of enemies at the same time. This can easily stop a charging group of smaller Reaper enemies cold. Reave is also powerful against Banshees and Brutes, since Reave can be evolved to do 75% extra damage against barriers and armor.
- Biotic Sphere is less useful here since Banshees and Brutes will cause the team including the Justicar to move out of the sphere to avoid being instantly killed. It can however be used in a choke point to inflict a small amount of damage, or to set up multiple biotic explosions.
- Although it doesn't show on the kill log, Reave instantly kills all Swarmers in its area of effect.
- Geth
- Biotic Sphere becomes a must have against the geth. Since the Sphere can give significant protection to the Justicar and allies, teams become very difficult to kill. Since geth love rushing the player and allies, this allows the team to take hits, and then use melee, or shotguns from a more accurate range, killing Geth quicker. Just make sure the team doesn't get flanked.
- The Geth's tendency to rush, based on the Hunter and Pyro AI's, and the slower Prime AI's, makes the offensive Biotic Sphere great for trap-tactics. Set a bubble up and fret not when they walk into it, as it merely sets them up to die faster. The Warp Effect sets them up for a Biotic Combo, and the maximum 25% extra damage taken ability allows them to die faster, if short cover is not available for grabs, and the like.
- Collectors
- Biotic Sphere is required for the Justicar against the Collectors. To use Biotic Sphere most efficiently, one should spec the power the protect teammates and to have the warp effect, so you get damage reduction from the Sphere, and, if enemies get too close, you set them up for explosions with the warp effect.
- Spamming Reave is much more effective against Collectors than any other faction since no one has shields, and all are organic. So after just a few Reaves, you already have a massive Damage reduction bonus.
Project Phoenix Adept
A result of the Illusive Man's early experiments in enhanced human physiology, Project Phoenix subjects are highly skilled combat and biotic specialists. When the Illusive Man turned to indoctrination in order to ensure the loyalty of his troops, many Phoenix operatives defected and joined the Alliance in order to stop the Reapers.
Phoenix operatives are highly skilled combat and biotic specialists. Their ability to manipulate Cerberus lash and stasis technology, backed up by their powerful skills, make them invaluable assets on the battlefield.
Abilities
|
|||||||||||||||||||
Heavy Melee and Dodge
- Cerberus Lash - The Project Phoenix Adept swings biotically-charged lashes, striking the surrounding area.
- Combat Roll - The Project Phoenix Adept rolls to quickly evade incoming attacks.
Player Notes
- General Notes
- Singularity will prime biotic explosions on ALL enemies. Furthermore it causes constant damage to anything caught inside singularity as well as causing constant stagger to all enemies.
- It's possible to cause double biotic explosions. A singularity to set up an explosion, detonated by Lash or Smash, which will set up another explosion to be detonated.
- The Ex-Cerberus Adept's Lash ability functions similarly to Pull, except that targets are dealt considerable damage and thrown a good distance. With the Shield Penetration evolution, Lash can be set up to penetrate shields and barriers. Lash can also be used as a primer for biotic explosions, with the Fast Recharge evolution increasing the short time that Lash's biotic effect affects a target.
- Maps that have instant-kill zones are Lash's best friend. Firebase White and Rio immediately come to mind.
- Lash can be somewhat useful even against armoured targets, as it can stagger anything.
- Smash is most effectively used through walls, as the animation leaves the Adept vulnerable to fire, which can be deadly on harder difficulties.
- Smash is very effective against all units, and the knock backs that result from it can be used to escape from the clutches of enemies that can insta-kill you at close range, such as Phantoms.
- Smash's animation may be cancelled while retaining its effect by performing either kind of melee (regular or heavy) or by rolling, allowing the player to negate the ending lag from the power.
- Heavy melee has a shorter animation than regular melee, so cancelling Smash with it allows the player to perform two devastating short-range attacks simultaneously.
- The Project Phoenix Adept's main drawback is its relative inability to effectively deal with heavy enemies (Banshees, Brutes, Atlases, Pyros, Primes). While a fully upgraded Smash can do significant damage to these enemies, its short range requires the player to get dangerously close to the strongest melee enemies in the game.
- Cerberus
- Lash's Shield Penetration evolution is extremely effective vs. Cerberus, since any non-Dragoon infantry can be "yanked" off their feet.
- Project Phoenix Adept's based around power damage can kill a Dragoon quite reliably on silver difficulty in a single Smash. A Smash with power damage, combined with a heavy melee can kill a dragoon in two quick hits on Gold and will knock back anyone else in range of the melee.
- Smash is devastating against Atlases, since they are slow and big. It's also lethal against groups of infantry bunched up.
- Singularity can hold an infantry-squadron in place, allowing the player to utilize Smash's AoE damage.
- Reapers
- Smash is deadly against any reaper foe; use with caution around Banshees and Brutes to avoid being insta-killed.
- Singularity is effective against Swarmers when protecting flanks. Heavy melee's wide strike helps against them as well.
- Use Lash liberally on Marauders and Cannibals. Especially when they are near a downed ally.
- Geth
- Smash is extremely useful when facing Geth Primes, since they do not have a grab-kill move. Even more effective if you choose the 6th level armour-damage increase on Smash. Their melee is slow, wide, and too close to damage you while you use Smash. Be very careful of their pulse cannons, however.
- Lash is is needed to disable Geth Hunters and Rocket Troopers, since they are frighteningly deadly against anybody.
- Despite the close-quarters devastation of Smash, it is recommended to not use it when surprised by Geth Hunters. The animation is too slow to take them out before their Pulse Shotguns take you out. If you can spot them from far away, timing your Smash will be your salvation.
- Collectors
- Project Phoenix Adept's may find themselves at a disadvantage vs. Collectors
- When using Lash, be very careful who you target. It can toss around the two most common Collector units, the Collector Trooper and the Collector Captain (only affected if Shield Penetration Evolution was chosen at Rank 6). However, on armoured units like the Scion and the Praetorian, it will do next to nothing. Collector Webs and Seeker Swarms cannot be pulled but swarms can be trapped in a Singularity.
- While Abominations are about, Lash becomes a hindrance, bringing the exploding creatures closer to you and your team. Possessed Abomination sightings should put a hold on all Lash uses until they are taken care of.
- Since this class's most useful power is close ranged, Smash, you may find yourself being downed a lot, since many Collector units are geared toward close-quarters combat, using fast and powerful melee attacks.
N7 Fury Adept
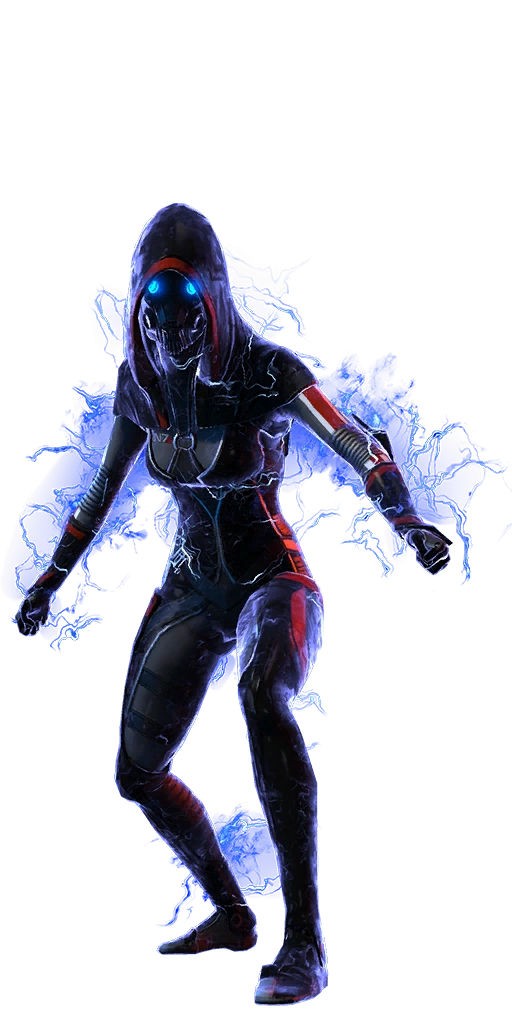
These soldiers are the go-anywhere, fight-anything special forces of the Alliance that were trained at the Interplanetary Combatives Academy in Rio de Janeiro, Brazil. They had to survive combat situations "in an admirable and effective fashion" to receive the N7 rank. Many N7s now train other species in anti-Reaper asymmetric warfare.
Fury operatives use implants to fuel biotics and their incredible movement speed. These operatives wind an unpredictable path on the battlefield, moving in and out of combat before returning to unleash a sweeping biotic attack on their unsuspecting targets.
Abilities
|
|||||||||||||||||
Heavy Melee and Dodge
- Biotic Strike - The N7 Fury Adept teleports a short distance forward before releasing a powerful biotic burst at the expense of barrier strength.
- Acrobatics - The N7 Fury Adept flips and teleports a short distance at the expense of barrier strength.
Player Notes
- General Notes
- Annihilation Field is similar to the Sentinel's Tech armor with a time period; it lasts until the player activates it once more. While it is active, any enemy coming in contact with the field takes damage and is susceptible to a biotic combo. Annihilation field can also detonate any source power, so it's better to evolve its radius to catch more enemies and then explode them with Throw.
- Since Annihilation Field's burning damage is quite small, it may be wise to keep the power on until the player decides to detonate the field. Additionally, it may be wise to choose the option to level up this power to increase their movement speed while the power is active, waiting until the right moment to detonate the power.
- Since this is a power intensive class, a light load-out is highly recommended, focusing on power recharge speed.
- The Fury's combat evasive maneuver is a biotic dash, similar to the asari characters, meaning the player can somewhat teleport at the cost of barrier strength. If the player practices this enough, they can actually move through walls. It is somewhat easier to move through walls of the map if the player dashes from side to side.
- The Fury's melee is a series of kicks and punches. The heavy melee is similar to the biotic blasts of the asari characters. However, unlike an asari's biotic blast where the asari stays in the same place, the Fury's biotic blast moves the player forward some distance. Players should start the melee a little distance prior to the targeted enemy, or they can use it tactically to be target a group of enemies without exposing oneself to enemy fire.
- Be careful with this class on gold difficulty, since even with full shield upgrades you will only have 800-900 shield and in direct combat you'll die quickly, use the teleport ability to your advantage and teleport through walls to escape/surprise enemies (a very fun and effective tactic on "Firebase Glacier"), you may sooner or later have trouble moving through walls on your front (you move into cover instead of teleporting), just teleport sideways. An even better idea (especially if enemies are on the other side) is to execute a heavy melee attack, it also teleports you forward and unleashes a shockwave that knocks enemy units back and buys you some time to kill them off.
- If you don't consider using the Annihilation Field power at all, use the "biotic explosion combo" with throw and dark channel, by using these powers you can dispose of boss units quite fast (atlas mechs usually stagger if hit by a biotic explosion so they don't get close THAT fast)
- The fury can set of multiple biotic explosions that can affect all enemies with Dark Chanel and Throw combination, as Dark Channel travels to the next enemy when they expire, regardless of defences. Used correctly it becomes easy to wipe out a cluster of enemies with minimum difficulty
- The N7 Fury is extremely potent when paired with the M-37 Falcon. The Falcon can stagger a group of enemies long enough for the player to rush in and detonate those caught in the Annihilation field with Throw. If the biotic explosion itself doesn't kill, then a follow-up shot from the Falcon will usually be adequate, and even in cases where it isn't, a second stagger is guaranteed, allowing for another biotic explosion. Strictly speaking, any weapon that can stagger enemies on-demand (such as the Scorpion, Graal Spike Thrower, or Geth Plasma Shotgun) will work. The Falcon's advantage over these is the fact that is doesn't require precise aiming, and because it can impact multiple enemies at a time. This strategy can work against boss enemies, but it isn't recommended, and should only be attempted if your target is occupied with another player.
- The N7 Fury's melee attack can be used to safely prime targets for a biotic explosion. The melee attack will stagger enemies caught in its radius, allowing for a followup by casting Throw or detonating Annihilation Field.
- A low-cooldown Fury with Annihilation Field and Throw is an absolute terror on the battlefield, especially in a map with lots of cover, like Glacier or Reactor. Basically the Fury runs from enemy to enemy while Annihilation Field primes each one, and detonates them with Throw. In this way the Fury creates a seemingly unending chain of biotic explosions, staggering and killing enemies before they can inflict significant harm. The rank 4 radius evolution on Annihilation Field is extremely useful with this tactic. Tougher enemies can be handled from cover with Dark Channel + Throw.
- Cerberus
- Guardians pose a serious problem for the Fury. The shield will block Dark Channel, and it is very risky to run behind them to detonate Annihilation Field. Furies can either use Throw to knock aside the shield briefly for unobstructed shots, or equip a piercing weapon. A Throw arced slightly behind the guardian will knock its shield, but this is difficult to reliably line up. Another option with Guardians is to run by them or circle them quickly with Annihilation Field activated. If you're fast enough, you may not take a hit from them, but you will have applied the biotic effect to them, which begins to damage them as well as give your squad mates a chance to detonate a combo or attack them from behind if the Guardian turns to track you. In any case, you will have damaged them at least a little.
- Dark Channel is invaluable against Phantoms. Because it is a "hit-scan" ability, it will affect the target instantly. This means the Phantom will not have time to raise her power-blocking barrier (which she will frequently use to block projectile power attacks). If the Slow Evolution (Rank 5) is taken, Dark Channel will significantly decrease the Phantom's movement speed; furthermore, the damage-over-time will disrupt her cloaking ability.
- Reapers
- This is probably where the N7 Fury can be most useful since only two units have any form of extra protection.
- Since Dark Channel can now be used as a source power for biotic combos, Brutes, Ravagers, and (especially) Banshees can be taken down almost single-handedly with Dark Channel and Throw that are properly evolved.
- Swarmers will instantly be killed when they come in contact with Annihilation Field. This can potentially eliminate the threat of having barriers or health depleted by Swarmers.
- It may be wise to keep Annihilation Field active in case any Husks get too close to the player. A properly leveled up field can kill Husks in a single detonation.
- Geth
- This is perhaps where the N7 Fury has the most trouble. Almost every enemy has shields, and the Fury's powers are better focused around single enemies. A player should keep their distance at all times.
- Even then, by taking the Drain evolution at Rank 6 of Annihilation Field, the Fury can take advantage of the prevalence of shields by using them to restore their own. Geth Hunters and Pyros can be staggered by biotic explosions this way, buying time for the Fury to retreat to a safer distance.
- Care must be taken when using the above method, since geth are notorious for staggering a player at close range.
- Collectors
- This faction is possibly the easiest (and the hardest) to defeat, since no enemies have shields and all are protected by barriers or armour. But at the same time, have devastating melee and close range attacks.
- If you wish to use the character to best suit the Collectors, aim for a Dark Channel and Throw build, since you would not want to be within melee distance of boss level enemies or Abominations.
- Abominations pose a serious threat, especially when becoming possessed, since their post-mortem explosion is greatly enhanced, to the point where if you kill one close to you, you are instantly downed.
- On that note, throw is still useful as it can push the Abomination away, allowing them to safely detonate far from the Fury.
- A good strategy to use against Possessed Scions is to use the Fury's evade maneuver to dodge the cluster of grenades occasionally thrown at the player.
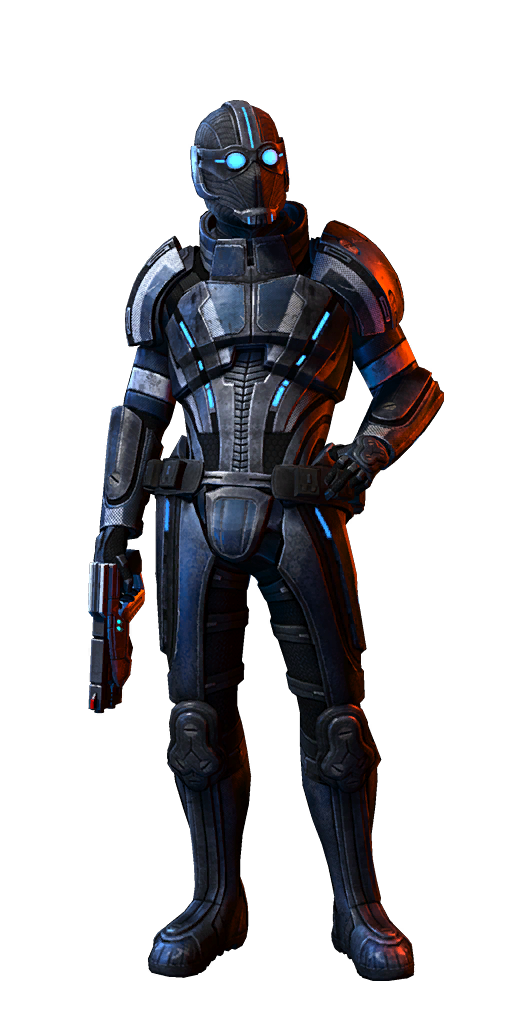
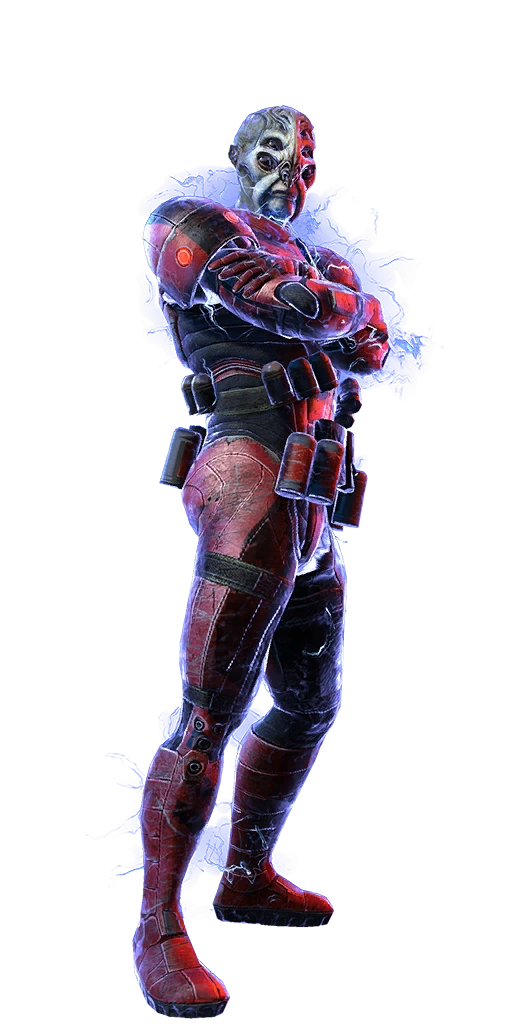
Volus Adept
The volus homeworld, Irune, has a high-pressure atmosphere that supports an ammonia-based biochemistry. To survive on other planets, the volus must wear pressure suits and breathers or, when facing combat, specially sealed armor.
Volus are cagey support specialists that use the most technologically advanced power armor credits can buy. Not to be underestimated, the diminutive volus adept more than makes up for its size with biotic abilities that are nothing short of godly.
Abilities
|
|||||||||||||||||
Heavy Melee and Dodge
- Defensive Stance - The Volus Adept cloaks to avoid enemies, or while stationary generates a protective shield sphere that damages nearby enemies.
- Combat Roll - The Volus Adept rolls to quickly evade incoming attacks.
Player Notes
- General Notes
- It's advisable for Volus characters to put all fitness upgrades into shields and health, as the volus heavy melee is the only means of dealing melee damage; This form of damage is relatively weak even with bonuses.
- The Volus Adept's light melee attack, rather than dealing damage, will instead activate a short-period cloak that lasts 3-4 seconds. Its heavy melee attack will generate a shield surrounding its body, which will temporarily increase your damage reduction and slowly regenerate your shield.
- Since the volus' height is around half the height of a regular human character, they cannot take cover normally, but can take "soft cover" by simply walking into it.
- Without Shield Boost, Volus classes are extremely brittle. Their health will only be 240 at best, even less than Geth without fitness, and their barrier is only 825 when fully upgraded.
- The shield boost power makes them a medic on par (or even better) with Geth Engineer's Turret, while Geth turret recharge one ally's shield at long range, Shield Boost recharge all allies' shield around the player. Properly specced, this ability can restore ~1100 shields, plus ~220 per second for 3 seconds. The final slot of this ability further increases damage reduction, giving all affected players 50% damage reduction for 6 seconds. Combined with a cooldown approaching 2 seconds (4 biotic orbs, light weapon), this makes Volus adept an ideal support character on gold difficulty. What it will not do however is mitigate the "shield gate" aspect of damage - and this can prove fatal if a hard hitter strikes you, such as Atlases, or Phantoms, especially if you are physically frail.
- The Volus's Biotic Orb power inflicts weak damage but grants a large bonus to power recharge rates while active- +10% per orb (15% if upgraded properly). If it is further evolved with increased recharge rate and extra orb abilities, it provides a total of +60% to power recharge abilities. Combined with a very lightweight gun like a pistol or SMG and the Volus Adept can perform Stasis and Shield Boost almost continuously, allowing it to greatly support allies.
- Stasis can be detonated with Biotic Orb, combined with a low cool-down and right power evolutions, a Volus is able to create 4 Biotic Explosions in very quick successions.
- Weapons that stagger enemies e.g. Falcon can be a good tool for Volus' survivability.
- The Rank 6 Expose evolution of Biotic Orbs can help to inflict a great deal more damage on one's foes, especially if the Rank 4 Impact Radius evolution is also taken. Being able to allow your whole party to inflict up to +45% extra damage on a number of different foes can make a huge difference, especially on higher difficulties. If, however, you aren't likely to use Biotic Orbs as an attack, simply select Rank 6 evolution Orb Count instead. Being able to spam Shield Boost more quickly makes a large difference as well.
- Instead of going for weapon damage at rank 6, one can opt for weight reduction. If one should do this, then the Volus class can take the Acolyte without penalty, and they can even take certain assault rifles for 200% Cooldown, or M-13 Raptor or M-97 Viper with them and still have 195% Cooldown rate. This results in a class that is very capable of anti-shield/barrier work, and can excel long range combat without compromising on the cooldown of the Volus's Shield Boost and Biotic Orbs skills.
- Interestingly Shield Boost also gives a second or two of brief invulnerability upon activation. This can prevent a fatal attack from killing you if you haven't been given time to recover naturally. It will also bestow this trait onto your allies, increasing Shield Boost's tactical value even further.
- Biotic Orbs can compensate for a heavier loadout—especially useful as Biotic Orbs is the Volus Adept's only offensive power. A potent combination is to use a chargeable weapon such as the Kishock Harpoon Gun, Arc Pistol, or Geth Plasma Shotgun—Stasis can be used to immobilize a target, setting them up for a charged shot. The Volus's "melee" cloak can make this strategy much less risky.
- Cerberus
- A Guardian will prove a significant threat since they can block your orbs should you use them. Stasis can sometimes be blocked as well, or you may need to target someone else with Stasis, so a piercing mod, high velocity barrel, or piercing weapon will work well here.
- However, if evolved into Bubble, Stasis cannot be entirely blocked, meaning that the Guardians will resist it at first, but will proceed to walk right through it, only to be paralyzed and drop their shields.
- Dragoons should be avoided at all costs, since they can very quickly strip you of all shields and health. Unfortunately Volus cannot take cover, so they cannot avoid the lashes by taking cover. Phantoms are even worse due to their deadly ranged attacks. One hit will destroy your shields, and the second, your health. Shield Gate will not help you survive a second or third hit so Shield Boost will be useless against Phantoms but can be put in stasis.
- Stasis is going to be your mainstay power against Cerberus, since the only enemies that cannot be affected are the Combat Engineers turrets, the Atlas Mechs, and the Dragoons. Whole squads can be trapped in the bubble if evolved into a Stasis bubble, and can be hit hard by your Orbs, or by explosive ordinance.
- Geth
- You will really struggle against the Geth due to the lack of any real offensive powers. You can use stasis, but only to minimal effect due to the fact that armored enemies are immune to stasis. This limits its use to Hunters, Troopers, and Rocket Troopers.
- You may be able to provide yourself some protection against the Geth by getting to cover that's taller than you are, but you may end up flanked and you wont be able to fight back. Considering Volus are more support races this tends not to matter.
- You will need the Acolyte to be sufficient against the Geth due to the lack of any anti-shield power.
- Reapers
- Your choice of weapons will be the main factor of your effectiveness against the Reapers, and is probably the only faction you can safely take on. Husks can easily be dispatched, Cannibals and Marauders can be put in stasis, and the Brutes, Ravagers, and Banshees can be taken down with the use of an anti-armor weapon.
- For the barriers, your orbs fill that role if you use them carefully. But make sure you keep your shields topped up, or you may end up being the latest casualty on the field.
- Collectors
- Avoid direct conflicts with the Collectors, as the majority can inflict serious damage, especially on harder difficulties, where enemies will be harder to kill and hit harder and faster.
- Stasis once again serves little use against this foe, with only the Captains, Troopers, and Abominations being susceptible to it. Continue to serve a support role, and you should be fine.
Krogan Shaman Adept
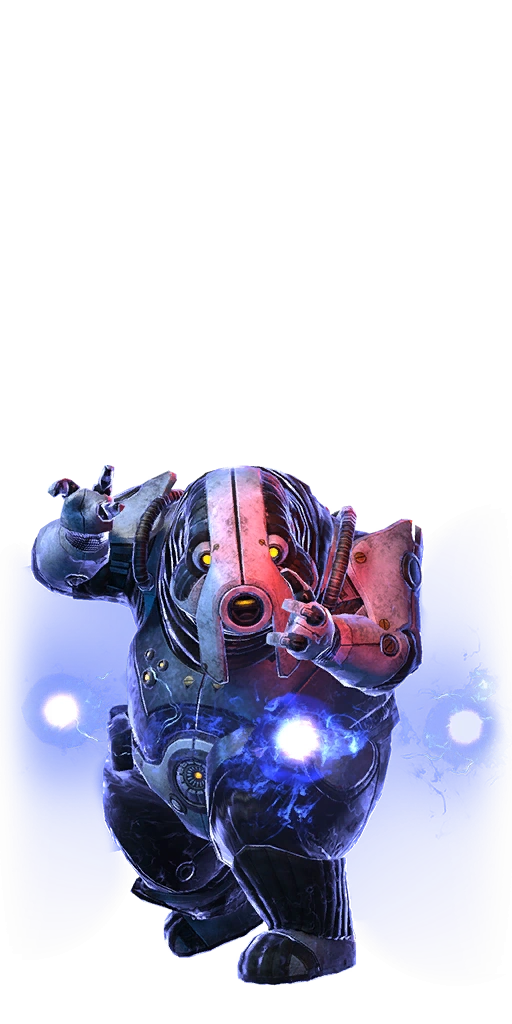
Krogan are large bipeds native to the planet Tuchanka, a world known for its harsh environment, scarce resources, and vicious predators. Until the invention of gunpowder, the leading cause of krogan fatalities was "eaten by predators." Though slow, krogan can take tremendous damage in combat, allowing them to inflict grievous harm with impunity.
Armored like a tank--and as slow as one--an angry krogan has more going for it than the species' infamous belligerence. It should come as no surprise that a krogan dishes out as much punishment as they're able to take on the battlefield.
Abilities
|
|||||||||||||||||
Heavy Melee and Dodge
- Krogan Charge - The Krogan Shaman Adept charges forward a short distance and strikes an enemy with held weapons.
- Krogan Shaman Adepts lack a dodge maneuver.
Player Notes
- General Notes
- The Krogan Shaman has access to Shockwave and Warp, making him the only krogan truly able to take down enemies without firing a shot. This alone makes the Krogan Shaman a great class, but his ability to carry heavier weapons and endure more damage than any other race makes said class very well rounded.
- Cerberus
- Shockwave is useful for exposing Guardians or dealing heavy damage around chokepoints or large squads of enemies.
- Warp serves as your anti-armor/barrier power and can be detonated with Shockwave to devastating effect.
- Be wary of Phantoms: as with all characters that cannot dodge, Krogan Shaman are more prone to being impaled.
- Geth
- Barrier is useful to help combat the geth's many staggering attacks.
- The force effects of Shockwave only affect Rocket Troopers, Hunters and standard troopers.
- To fight armored geth enemies or clustered groups, it is best to combine Warp and Shockwave for the most powerful Biotic Explosions possible.
- Geth Bombers can bomb you into submission very quickly as Krogan aren't exactly nimble nor small: be wary.
- Reapers
- Your powers will do serious damage against this faction. Shockwave will suppress the Husks, Swarmers, Cannibals, and unshielded Marauders, while Warp will adequately deal with every other foe. With a good weapon combo you should have no trouble dealing with the Reapers, no matter what they throw at you.
- Collectors
- This is where you will shine. Since all enemies have barriers and/or armour or health, every single enemy is vulnerable to your biotics in some form or another.
- Shockwave will suppress the weaker enemies such as the Collector Troopers, and Abominations, while Warp will weaken armor and set up Biotic Explosions.
- Combine the Shaman's powers with an Acolyte, or other anti-shield/barrier weapon, and you can easily send the Collectors packing.
Batarian Slasher Adept
Little is known about the batarian homeworld of Khar'shan or its inhabitants. As a result, the race is judged by those whom the Hegemony allows to travel beyond its borders: organized crime enforcers, pirate boarding parties, slaver gangs, and gladiatorial combatants.
Batarians are large brawlers that use nets and spiked weapons to capture targets...or to bleed them dry on the battlefield. If an opponent gets too close, a batarian enforcer bludgeons them with spiked armor and enforcement gauntlets.
Abilities
|
|||||||||||||||
Heavy Melee and Dodge
- Enforcement Gauntlets - The Batarian Slasher Adept winds up a powerful punch with an omni-tool gauntlet.
- Batarian Slasher Adepts lack a dodge maneuver.
Player Notes
- General Notes
- The Batarian Slasher is the only batarian character to lack Blade Armor. However, he is a versatile character, being able to cause both area of effect damage and single target damage from afar, as well as having high base health and shields and a powerful melee attack. This means the Slasher can efficiently switch between ranged and close combat.
- On most maps, a properly angled Lash projectile can toss most enemies out of the map, counting as an instant kill.
- Cerberus
- Lash will be useful against Guardians by removing their shield.
- Cluster Grenade will prove lethal when used on an unshielded Atlas to quickly tear away its armor.
- Although the Batarian Slasher has Lash which can stagger or pull Phantoms, caution should still be exercised as like all the batarians the slasher is slow, and cannot evade at all.
- Because the Batarian Slasher lacks Blade Armor, he is unable to deflect Phantom melees.
- Geth
- If you are playing against Geth than it may be a good idea to leave Lash and invest points somewhere else as it only affects Geth Troopers without the rank 6 shield penetration.
- Reapers
- No Reaper unit other than the Marauder is able to dodge Warp.
- Lash will be of less use here since only Cannibals and Husks will be affected by it without the rank 6 upgrade enabling it to affect shielded enemies.
- Collectors
- Because all Collector units have (or can gain) either barriers or armor, Warp and Cluster Grenades will be very effective.
Awakened Collector Adept
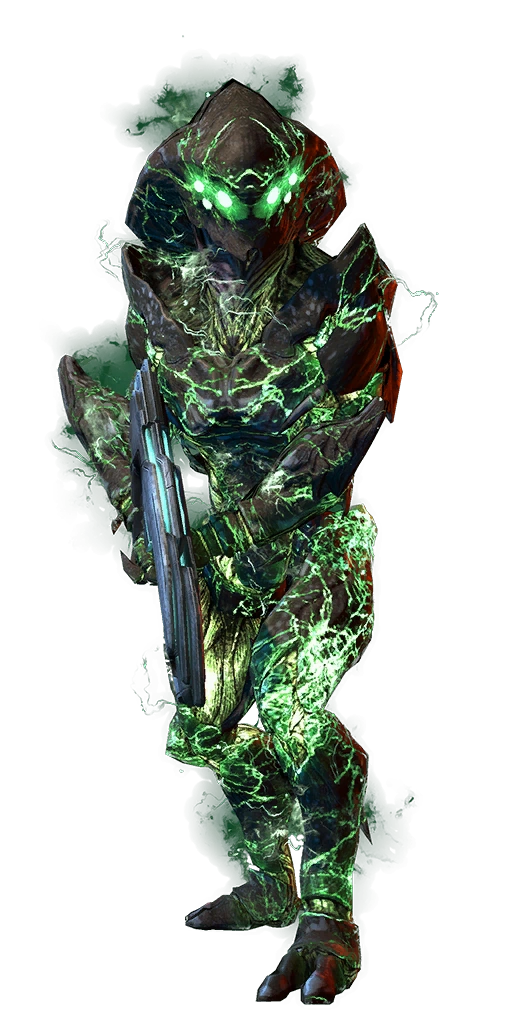
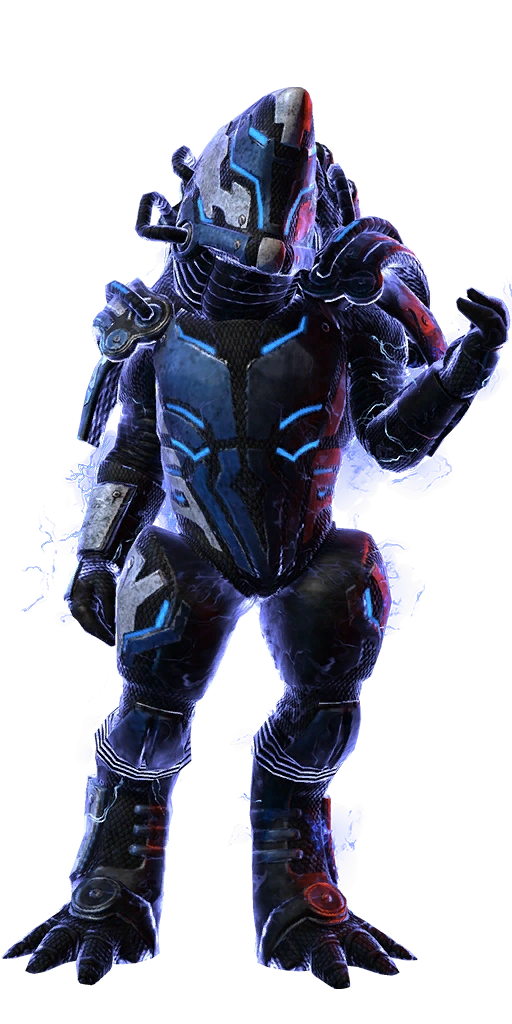
When the Reaper-killer known as Leviathan fought the Collectors, it severed their connection to Harbinger with a thrall device. Most Collector forces died as a result, but a few survived. Now, these rare individuals fight for the memory of their people, a proud race broken by the Reapers.
Protheans appointed avatars to embody and model a single virtue for their society. The Awakened Collectors' virtue is vengeance.
Abilities
|
 | ||||||||||||||||||
Heavy Melee and Dodge
- Vengeful Strike - The Awakened Collector Adept charges a biotic attack for a brief period of time, and strikes out in a small area in front of it.
- Ascension Mode - The Awakened Collector Adept's heavy melee increases damage output and recharge speed at the cost of increasing damage taken, for a short time.
- Forewing Leap - The Awakened Collector Adept flies a short distance using wings.
Player Notes
- General Notes
- This is a character capable of very potent biotic damage, being able to prime multiple biotic combos with Dark Sphere and Dark Channel and single-handedly detonate them in quick succession using Seeker Swarms. A light loadout is especially desirable.
- Alternatively, using Seeker Swarms for the protection bonus and not detonating Dark Sphere allows a heavier loadout supported by biotic damage over time.
- The Collector suffers from both long power cooldowns and activation animations, which can prove extremely untimely in the middle of a battle. Be aware of how many Seeker Swarms you have with you at all times so that the activation animation does not take you by surprise.
- If timed correctly, it is possible to cancel the "summoning" animation of the Seeker Swarm by quickly using a Dark Channel. This has the added bonus of activating the significantly shorter cooldown of Dark Channel.
- The regular melee is a small blast of energy that knocks unprotected enemies away. It also has the highest range of all melee attacks, as well the only regular melee that can hit multiple enemies, causing damage in a small arc in front of the character.
- Ascension Mode will knock nearby enemies back when its animation is complete. It will not do any damage to them.
- Forewing Leap functions similar to the Propulsion Packs of the Turian Ghost, Havoc, and Saboteur.
- Dark Sphere will travel in a straight line to where the crosshairs are pointed, sticking to any solid surface or cover it encounters (including Geth Juggernaut's Hex Shield).
- All enemies that Dark Sphere touches will be primed for a biotic explosion. Seeker Swarm can then be used to perform multiple biotic explosions in quick succession.
- Dark Sphere can still be detonated manually (triggering the cooldown) even if it has been already used for Biotic Explosions. The Detonation is able to hit enemies through cover.
- All enemies that Dark Sphere touches will be primed for a biotic explosion. Seeker Swarm can then be used to perform multiple biotic explosions in quick succession.
- A most potent biotic attack pattern manipulating the cooldown mechanics, is to first send out a Dark Sphere, then Dark Channel (which has a short cooldown), then detonate numerous enemies with Seeker Swarms (make sure you have plenty summoned before initiating the Sphere) and finally, if desired, detonate Dark Sphere.
- By evolving Seeker Swarm to apply damage reduction, the damage taken penalty from Ascension Mode can be completely canceled out.
- Ascension Mode's biggest downside is its fairly limited 45 second duration. This, coupled with its long activation animation can make it a chore to sustain. Use it wisely.
- The Collector can gain a whopping +65% boost to power damage from its passive powers. When equipment and gear are taken into account, the Collector Adept can easily have a more than 100% boost to power damage--and Dark Sphere and Dark Channel both are very high-damage effects.
- It is a good idea to invest points in Seeker Swarm because Dark Channel and Dark Sphere cannot detonate each other.
- The Awakened Collector's passive power gives it a bonus to damage from Collector or Prothean weapons: the Collector Assault Rifle, the Collector SMG, the Collector Sniper Rifle, and the Particle Rifle.
- If you decide to take advantage of this, consider equipping ultralight materials mods as the Collector Assault Rifle, Collector Sniper Rifle, and the Particle Rifle are all very heavy while the Collector SMG is heavy for an SMG. Otherwise, you risk elongating the character's already long cooldown periods.
- The Collector can also be a powerful weapons platform with the Particle Rifle. With Ascension Mode, Dark Channel, Warp Ammo and an up to 10% bonus to the weapon he is one of the best PPR users in the game.
- Cerberus
- Cerberus troops are highly mobile and will dodge the slow-moving Dark Sphere very often. Using choke points and evolving Dark Sphere to have an increased radius can mitigate these problems.
- Dark Sphere can hit through Guardians with their shields up.
- Geth
- Dark Sphere can spot unnoticed Geth Hunters sneaking and quickly dispose of Geth Primes' Combat Drones and Geth Turrets.
- Reapers
- Brutes, Cannibals and Ravagers move slow enough for Seeker Swarm to take full effect, and for Dark Sphere to properly prime.
- Collectors
- Dark Sphere combined with Dark Channel and your Seeker Swarms is useful to take down dangerous groups of Possessed Abominations and Seeker Swarms from afar.
- This is also effective against hardened targets, as all enemies have barriers and/or armor, which are vulnerable to biotics.