AnotherRho (talk | contribs) m (→Player Notes: grammar improvements) |
AnotherRho (talk | contribs) m (→Player Notes: more grammar) |
||
| Line 375: | Line 375: | ||
;Reapers |
;Reapers |
||
| − | *With the use of [[Submission Net]]s Rank 5 Damage/Slow evolution and the Vorcha's mobility, the player can easily outmaneuver [[Brute]]s. |
+ | *With the use of [[Submission Net]]'s Rank 5 Damage/Slow evolution and the Vorcha's mobility, the player can easily outmaneuver [[Brute]]s. |
;Geth |
;Geth |
||
Revision as of 20:03, 14 November 2012
Engineers are support specialists that focus on setting up ambushes and providing support fire, often through the use of a variety of enemy-distracting drones, decoys, and turrets. They excel at destroying enemy tech. Engineers tend to place an emphasis on power usage and the creation of Tech Bursts.
Human Engineer
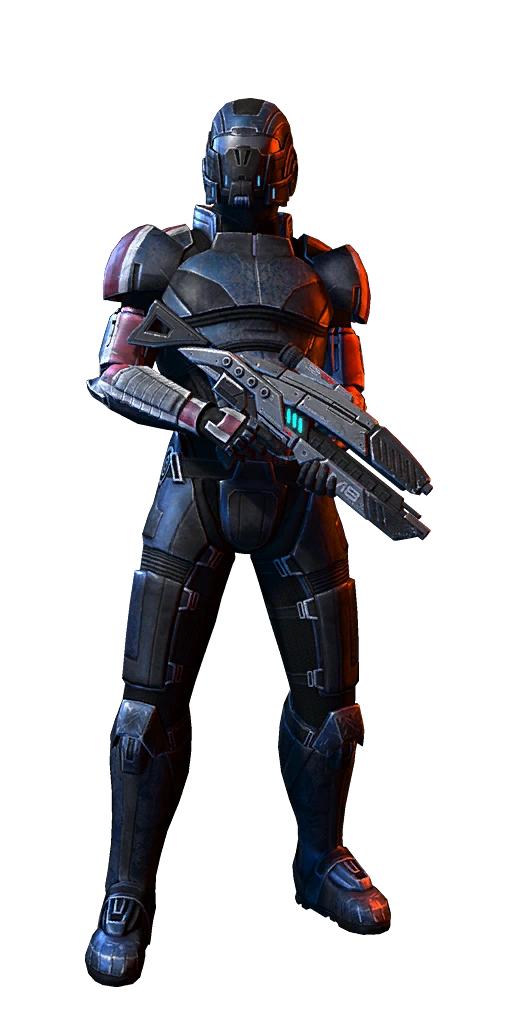
Humans joined the galactic community after discovering a Prothean data cache on Mars in 2148. Their devotion to understanding and adapting to modern warfare left the staid Council races stunned. Humanity's persistence and unflappable spirit has taken them further than anyone in the galaxy could have imagined.
Human engineers are support specialists that set up ambushes, provide fire support, and destroy enemy tech. Their value is not lost on an ally when a battlefield is cleared of turrets.
|
Player Notes
- General Notes
- The Combat Drone is useful for its ability to draw fire away from team mates (even if only for a brief period) and causing a little stress in the enemies' ranks. If there is nothing to target or it's the end of a wave, it is the sort of power you might as well use since it will move toward enemies and you can recover before the enemies arrive.
- Counter-intuitively, it may be wise to reset the powers of a Human Engineer so that you skip the Drone altogether to focus on maxing the Overload, Incinerate, Fitness, and Alliance Training skill trees. By doing this one can get 20% extra weapon damage, and 35% power damage, as well as a few extra capacity points. This tactic allows Incinerate to devastate armour and health, while Overload fills in the gap of dealing with shields and barriers. Combined together, a Human Engineer can be very versatile and capable of taking on almost any enemy single-handedly.
- Because Engineers are a power-focused class, one should keep their loadout as light as possible. At 200% recharge speed, you can potentially fire off Overload and Incinerate every 2 seconds, causing utter havoc against enemies of any kind. A good weapon combination to equip is a Carnifex and either a Disciple or Hornet. This combination with power damage and capacity maxed out, gives 160-165% recharge speed or even 200% when using the "Weapon Weight" rank 6 evolution in Alliance Training. Then outfit the Piercing and Barrel mods with the Carnifex, and you can eliminate the Engineer's biggest problem: armor-plated Reapers, or Cerberus Guardians. Combine the powers with this and you have a character with pretty much all bases covered.
- The Human Engineer can single-handedly create tech bursts and fire explosions, through the use of Overload and Incinerate.
- If you are power focused, you can ignore the last rank of Alliance Training, to upgrade your Combat Drone, which will be very useful when fighting heavy units. The Human Engineer has lower shields than other Engineers, so the Combat Drone is a valuable distraction to draw the enemy fire away.
- If you prefer an assault rifle, the Geth Pulse Rifle and M-8 Avenger at level X are both light enough to give the Human Engineer a 200% recharge speed if the rank 4 "Damage & Capacity" evolution in Alliance Training is chosen.
- When equipped with Disruptor Ammo, the Human Engineer can spam a barrage of tech bursts by simply shooting the enemies before unleashing Overload.
- When evolving Combat Drone, keep in mind the role you want it to have on the battlefield: damage or distraction. With the Rocket upgrade (Rank 6), your drone will deal heavy damage at range; however, it will always back away from the target, making it much less effective at drawing enemy fire. If you have invested in both Overload and Incinerate, it is highly recommended to take the Chain Lightning upgrade (Rank 6), since you already have two powerful tech attacks to shred enemy defenses.
- Cerberus
- When dealing with a Guardian, release a Combat Drone behind him. The Guardian will turn towards the new threat, showing his sensitive side to your sights. Should you have the Neural Shock evolution of Overload, unleash it on the distracted Guardian to make him drop his shield.
- High levels of Overload can wipe out Phantom barriers quickly, making them much easier to take out. If they are doing acrobatics, wait for them to stop before you fire an Overload on them; otherwise it will do less damage.
- A weapon equipped with a Piercing Mod is recommended so that you can take on Guardians regardless of their shields, and the Atlases take more damage from your shots.
- Reapers
- Because most enemies are armored or have only health, Incinerate is extremely useful here. Overload can expose Banshees and Marauders to a burning from Incinerate. All in all, this can be a Human Engineer's best enemy to engage due to the enemies' weakness to Incinerate.
- Combat Drones are exceptionally useful at halting the advance of Brutes and Banshees. If one is destroyed, simply deploy another and the enemy will continue trying to fight it rather than you.
- Geth
- Overload is indispensible against geth troops as all foes other than the basic Geth Trooper have shields. Geth Troopers and man-sized geth that have had their shields removed can also be stunned for a short while.
- Overload or Incinerate on a Geth Pyro with a damaged tank will detonate the tank immediately.
- Overload and Incinerate together will devastate shielding with tech bursts: this is a deadly combo when used on Geth Primes since a single burst can strip most of a Prime's shields in one go, even on Gold. This is also a great combo for Pyros: there is a good chance of their exploding by fire explosion, tech burst or tank explosion.
- Collectors
- Since the Combat Drone appears behind an enemy, it is best used against Scions to distract them and make them turn around, exposing their back, which is a confirmed weak spot of the enemy.
- Because Overload is more effective against barriers, the Human Engineer is very proficient at taking down possessed enemies, along with Praetorians and Collector Captains barriers.
- With the recent update, death is not required to trigger Fire Explosions, so the Engineer can be useful for crowd control.
- The only risk involving using this character is that the Engineer has no close quarters abilties, so equipping a light shotgun, like the Disciple (which has useful staggering effect) would be a good choice.
Quarian Engineer
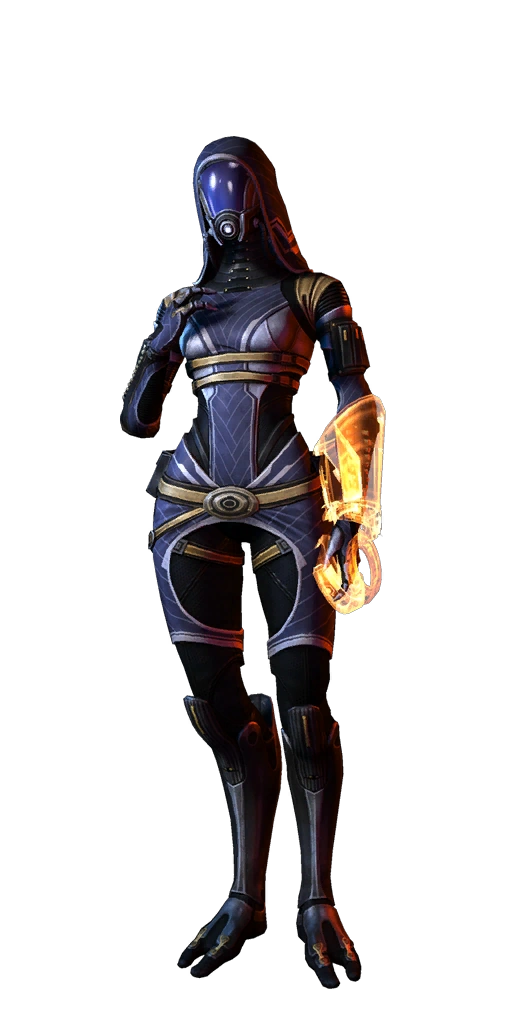
Quarians have spent centuries at perpetual salvage and ship repair--the survival of their species depends on this technical expertise.
Quarian engineers are elite support specialists with a talent for setting up ambushes and providing cover fire through the use of turrets. Their technical wizardry makes them crucial contributors on the battlefield.
|
Player Notes
- General Notes
- Quarian Engineers are a little more focused on dealing with armored and unprotected foes. They are less effective against barriers and shields, but this can be ameliorated by using a weapon effective against shielding. If using the Sentry Turret, it's best to focus on damage per second abilities, i.e. the "Flamethrower", "Armor-Piercing Ammo", and "Shields & Damage" evolutions. If you find the turret to be a little too fragile, weak, or just useless, consider maxing the other four skills. By combining Cryo Blast with Incinerate (and the "Frozen Damage" evolution at rank 6 on Incinerate), you can inflict huge damage to frozen enemies and armoured enemies. It's also possible to sometimes create cryo and fire explosions
- Thanks to the turret, the quarian excels at holding chokepoints. Find a well-enclosed spot with some cover, deploy the turret and, when possible, let the enemies come to you. However, don't let the turret do all the work; keep up the gunfire help mow them down.
- It's worth noting the turret will target cloaked enemies. If you're defending an enclosed area, the "Flamethrower" evolution becomes a warning system and ally against these enemies.
- Cerberus
- Cerberus enemies are mostly shielded, but Cryo Blast will still slow enemies down by 15% or 35%. It also makes them vulnerable to taking double damage from Incinerate with the Rank 6 evolution "Freeze Damage", as with all enemies. Those that are shielded should ideally be tackled with a team mate with Overload, Energy Drain, or a powerful anti-shields/barrier weapon like the Reegar Carbine.
- Against Atlases the Cryo Blast-Incinerate combo is extremely deadly since it allows for over 1000 damage to be inflicted with just one Incinerate. The turret is a simple fire, forget, and hope it kills as many as possible strategy. On higher difficulties, this is very difficult.
- Reapers
- Reapers are the ideal enemy for Quarian Engineers. With only two enemies with extra layers of protection (Marauders and Banshees) it is very easy to snap-freeze the unprotected, or chill and slow the others. Because the enemies cannot dodge (except for Marauders) Cryo Blast is very effective. Incinerate is also deadly on its own, but together they pretty much lock enemies down in a more permanent fashion.
- Only Banshees are a real nuisance because they are heavily protected by barriers, and a very high amount of armour. Their teleport ability also acts as dodging tactic for your bullets and powers, causing a great deal of stress, but if you pair up with somebody with shield-draining powers, the barriers can be brought down quickly, to expose the Armor to Incinerate.
- Brutes are a pain, but are slow, cannot dodge attacks, and are highly vulnerable to Incinerate and powerful-but-slow weapons.
- Geth
- Geth are possibly the most difficult of all the forces, since every enemy (with the exception of the Geth Trooper) has some kind of shielding, preventing snap-freezing. Since most geth are shielded, it would be highly recommended to abandon the Quarian Engineer and instead go for one of the other types of Engineer.
- While Cryo Blast does slow enemies down and can be combined with Incinerate, the amount of times you will be stunned outside of cover by geth makes it very difficult to fire off powers against them.
- The only enemies that Incinerate is effective against are Geth Pyros and Geth Primes, but they need their shields stripped first.
- Collectors
- Collectors are a challenge for Quarian Engineers, since all enemies can gain barriers through possession. A high rate-of-fire weapon, like the Tempest is very useful.
- Cryo Explosions are ultra effective against crowds of enemies, freezing unprotected enemies, and chilling the rest, potentially heightening Incinerates damage (if Freeze Combo evolution was chosen), and Fire Explosions are achieved by deploying the Sentry Turret (with Flamethrower evolution) and using Incinerate to detonate. All are great for crowd control.
- Use of cover is unnecessary since you will be evading multiple aggressors at once.
Salarian Engineer

Salarians have a high-speed metabolism that allows them to function on just one hour of sleep a day. They also process information much faster than other sentient races.
Salarian engineers specialize in providing long-range cover fire and debuffing targets. These agile combatants are deadly and difficult to detect on the battlefield, particularly once they bring their decoy ability into play.
|
Player Notes
- General Notes
- The main strength of Salarian Engineers is their ability to draw enemy fire. Their Decoys are capable of withstanding huge amounts of damage, often allowing their squad to take care of business.
- Energy Drain makes a Salarian Engineer even more difficult to kill, allowing them to siphon the shields and barriers of organic enemies or drain the energy from synthetics.
- If Incinerate is also invested in, it also provides a very good means of destroying armor and health too. However, considering many armored units are synthetic, Energy Drain may often be of better use. It may be wiser to forego Incinerate to allow an investment into durability and weapon damage.
- The Salarian Engineer and Geth Engineer are a good combo. While the Decoy distracts the enemy, the Geth Engineer can spam Overload and heal with the Geth Turret, while the Salarian Engineer damages with Incinerate and Energy Drain. The combination of the different tech powers can result in numerous tech bursts and even fire explosions.
- By ignoring the last Salarian Operative rank, you can upgrade your Decoy to rank 3: you still get the maximum out of your powers and have use of the Decoy.
- Put a Piercing Mod on a powerful sidearm like the Carnifex, and the Salarian Engineer is set.
- By using a heavy hitting close range weapon with a middle to high magazine size and strafing sideways, the Salarian Engineer can distract a group of enemies and then shoot them down quickly to some effect
- Cerberus
- Most enemies have shielding. This provides an ample opportunity to leech off enemies like a vampire. With a low weight loadout a Salarian Engineer is almost invincible: with 40% damage reduction and 50-100% shields for nearly every use, he could be used almost like a charging krogan.
- If Incinerate is employed, it should be used against enemies that are unprotected or Atlases.
- Reapers
- Reapers are a real pain for Salarian Engineers. Since they are more geared for dealing with shielded enemies, it is almost impossible to use anything other than the Decoy effectively. However, even the Decoy is limited: it will be destroyed very quickly due to the aggressive nature of the Reapers.
- Incinerate can be used to great effect, but considering its usefulness is outweighed by Energy Drain more often than not, it is recommended to avoid this type of Engineeer and consider a quarian or human instead.
- Geth
- The Salarian Engineer is ideal for facing geth. Energy Drain affects geth regardless of their protection, health, armor or shielding. This makes geth extremely vulnerable to both Salarian Engineers and Infiltrators.
- Decoy will deter the enemy from firing openly on them while they continue to sap away the geth's energy. A little caution never hurts though, since most geth are capable of stunning their foes on attack. The stuns will disrupt all actions including rolling or taking cover, so stay in cover to negate this effect.
- Collectors
- Salarian Engineers are not as useful as Human Engineers when it comes to distracting enemies and dealing damage. Since decoy does not appear behind the target, enemies will most likely be facing in the same direction you are in.
- Though not as powerful, Energy Drain can be used to replenish shields when getting bombarded by gunfire, which is useful since every enemy can potentially have barriers.
Geth Engineer
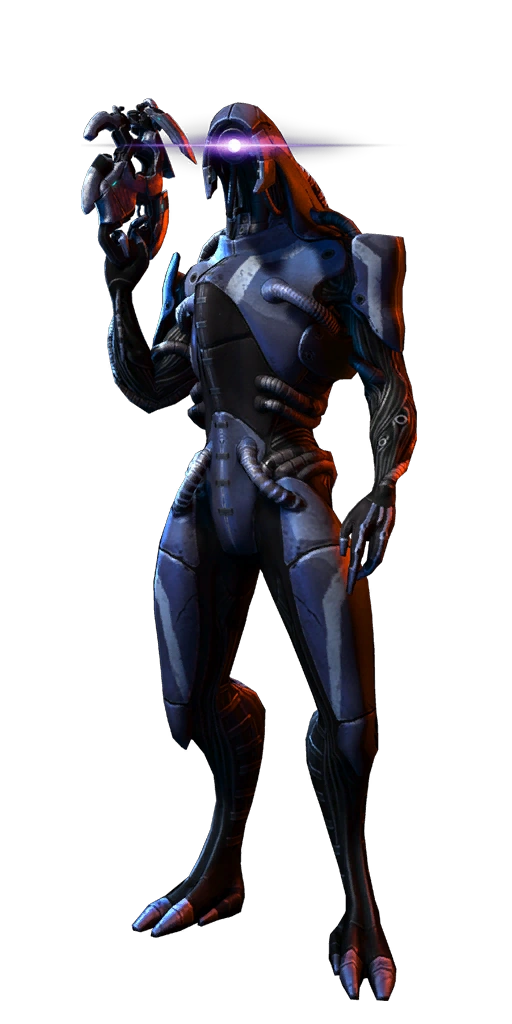
The geth are a humanoid race of networked AIs that were created by the quarians 300 years ago as tools of labor and war. Having since won their freedom from their creators, the geth have proven they are able to reason, analyze situations, and deploy tactics as well as any organic race so long as they remain networked with other geth.
Geth engineers are elite support specialists. Unique perception systems give geth an unsurpassed understanding of the battlefield.
|
Player Notes
- General Notes
- Geth Engineers are very fragile when stripped of shields or during Hunter Mode, but used correctly, are extremely lethal against enemies with shields/barriers or other geth.
- Overload can inflict over 800 damage per use to shields/barriers or synthetics. Hunter Mode makes it even more powerful: Overload can be spammed at break-neck speeds with over 900 damage. This is especially apparent when combined with the Hunter Mode's rank 4 "Power Recharge" and rank 5 "Power Damage" evolutions. Damage can be pushed even higher using gear and/or power amplifiers, allowing for over 1300 damage to be inflicted in one use. This makes the Geth Engineer unmatched for tech power damage.
- The geth's light melee strike is actually slower in execution than the heavy melee shield pulse. The heavy melee also affects a larger radius and inflicts more damage. It is generally better to use the shield pulse.
- Note that holding down the melee button will cause you to continuously send out pulses until you run out of shields.
- The Geth Engineer can use the Geth Turret as a support tool rather than offensive weapon due to its ability to replenish shields.
- When paired with the Salarian Engineer, both characters can easily coordinate tech bursts.
- Because you can't do Power Combos alone, it's best to choose "Chain Overload" evolutions for Overload in order to crowd control.
- The last rank of Networked AI can reduce the weight of assault rifles AND sniper rifles, if you prefer those weapons.
- Cerberus
- Overload is extremely powerful against the shielding of Cerberus troops. Against Atlases multiple Overloads are required, but the shields can be stripped at an unbelievable rate, with only the Reegar Carbine beating its rate of draining.
- Because Hunter Mode halves shielding, caution is advised. Consider using a turret near your location, but in a position where it will be very difficult to hit and subsequently destroy.
- Reapers
- Geth Engineers suffer against Reapers. Lacking any real anti-armor/health powers like Incinerate or Cryo Blast, one would be best using guns, especially those suited to dealing with armor.
- It is recommended to choose the "Flamethrower" evolution for the Geth Turret to provide a better chance against armored targets and to provide a distraction against the aggressive enemy style.
- Overload is, none the less, good against Marauders and especially Banshees, whose barriers are very strong. Despite this, it may be better to opt for a Human or Quarian Engineer instead.
- The weakness of Overload against Reapers can be mitigated by taking the "Neural Shock" and one or both of the "Chain" evolutions, which makes it useful as a crowd control power against unarmored enemies.
- Weapons with piercing mods are also very useful against armored enemies, to make up for the weakness of Overload against them.
- Geth
- Geth Engineers are deadly against geth. Since geth are synthetic and all enemies have shielding (except basic troopers), Overload works absolute miracles here. Being able to destroy the strongest of shields in just 1 or 2 Overloads, even Prime shielding will quickly deteriorate. Combine that with an anti-armor weapon, and you have the ultimate Geth hunting combo.
- If one needs a second anti-shield option, the Reegar Carbine fills that role and a close-quarters role very nicely.
- Collectors
- Armored enemies pose a serious threat to the Geth Engineer. Since it only has one abilty that is useful against armor, which is the Geth Turret, but only with the Flamethrower evolution taken.
- The only real strength that the Geth Engineer has is that it is great at stripping barriers, equipping a hard-hitting weapon like the Claymore can deal with two problems, close combat, and armor.
Quarian Male Engineer

Quarians have spent centuries at perpetual salvage and ship repair--the survival of their species depends on this technical expertise.
Quarian engineers are elite support specialists with a talent for setting up ambushes and providing cover fire through the use of turrets. Their technical wizardry makes them crucial contributors on the battlefield.
|
Player Notes
- General Notes
- Quarian Male Engineers are more directly suited for dealing with shields than their female counterparts. Their Arc Grenades do not operate on a cooldown, so anywhere from 1-9 grenades can be thrown at once, the latter numbers will annihilate any shielding from even the strongest and most durable of enemies. This power pretty much eliminates the need for Incinerate, but grenades need to be kept topped up to maintain combat-effectiveness. Because one can forego Incinerate (the only other power aside from Tactical Scan), one can take a moderate level of weight and still maintain a pretty good level of Scan usage. By going for this approach one can equip a powerful, but heavy weapon such as a Revenant, or Widow, or Claymore and still be very effective.
- Because Arc Grenade deals triple damage to shields and barriers, the Armor Damage evolution is a viable option for dealing with Banshees, Geth Primes, Pyros, and Brutes.
- The Quarian Male Engineer can reliably set up Tech Bursts on its own when using area evolutions of Incinerate and Arc Grenade.
- The Quarian Male Engineer can be a very potent support character when using the Movement Speed and the Area Scan evolutions. Area Scan will reveal all enemies within a very large radius of the enemy scanned, which can reveal cloaked enemies like Phantoms and Hunters. It can also be used "blind", where one does not target an enemy. This can be useful if a smokescreen is set up.
- Equipping a Falcon with Disruptor Ammo is a reliable way to prime and detonate Tech Bursts when throwing Arc Grenades, especially if the Electrical Damage evolution is taken. The area-of-effect damage that the Falcon deals will help set up and trigger Tech Bursts across multiple enemies.
- Cerberus
- Grenades will very quickly tear through initial enemies or drastically weaken Atlas Mechs. Tactical scans can weaken Atlases even further and make them even more vulnerable to a pounding. This also works with Phantoms, which can greatly decrease their movement speed which is their main trait. Combine that with Cryo Ammo, or Cryo Blast from other players, it can bring Phantoms to an almost complete stand-still.
- Reapers
- There is little need to spam Grenades against basic troops since most of them will die in just one shot from a more powerful gun. Against Banshees, let rip with the Grenades and the Barriers will fall in seconds.
- A combination of Tactical Scan and Incinerate can drastically weaken Ravagers, Brutes, and Banshees, especially if you've evolved the scan to decrease movement speed.
- Incinerate is highly useful for Reaper forces regardless of Tactical Scan, since all but Marauders are either unprotected or armored.
- Geth
- Spam grenades: geth are extremely susceptible to Arc Grenades and one can take out entire armies of geth single-handedly. The only real threats are as always the Geth Primes, and Geth Hunters. When out of grenades, try to restock when you can, otherwise use your weapons to take out the stragglers or other enemies. Aside from that, the first chance you get, spam the living daylights out of the Grenade button.
- Collectors
- Arc Grenades with the electrical damage evolution and Incinerate can work wonders against the Collectors. With proper power evolutions, one can pull of 2-9 tech bursts in a matter of seconds, devastating barriers and weakening armor.
- Tactical Scan, followed by anti-armor powers, is a very useful combination against Praetorians and Scions.
N7 Demolisher Engineer
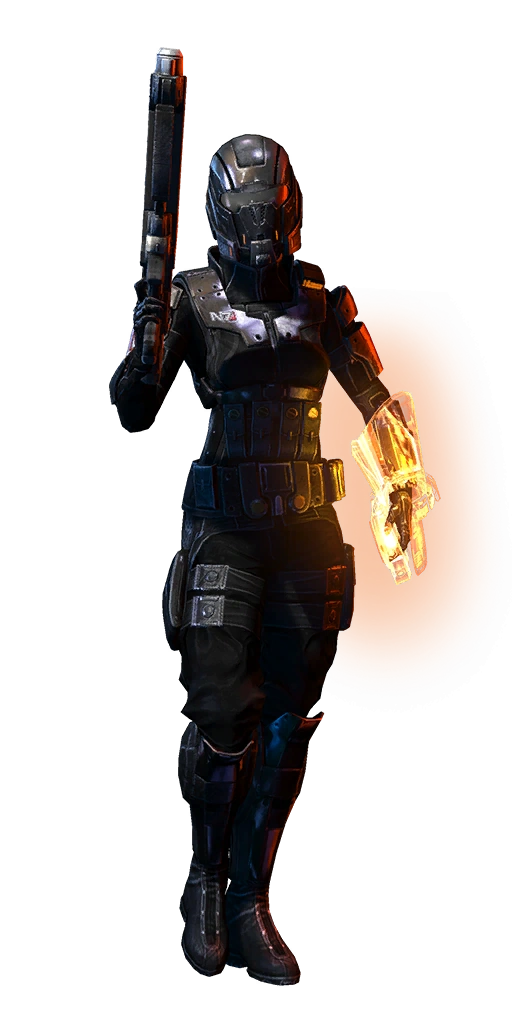
These soldiers are the go-anywhere, fight-anything special forces of the Alliance that were trained at the Interplanetary Combatives Academy in Rio de Janeiro, Brazil. They had to survive combat situations "in an admirable and effective fashion" to receive the N7 rank. Many N7s now train other species in anti-Reaper asymmetric warfare.
The Demolisher uses grenades to attack at range and to terrorize the battlefield. Demolishers can also create a supply pylon that stocks allies with an unending reserve of grenades and thermal reloads.
|
Player Notes
- General Notes
- The Demolisher has two grenade powers, but they both draw from the same pool. Using a Homing Grenade will also deplete your supply of Arc Grenades, and vice versa. Remember to resupply frequently.
- This also applies to your grenade count bonuses from powers. For instance, having both grenade powers at rank 2 will give you two extra grenades. Along with the Demolisher passive skill, extra grenades from equipment should not be necessary. However if one does go for said equipment, one can throw dozens of grenades within 15-20 seconds, allowing for total obliteration of frontal forces, and significant or even fatal damage to the ones behind too.
- Supply Pylon is the Demolisher's only rechargable power. The base charge time is relatively long, and the power does not usually need to be used repeatedly. This allows for the use of heavier weapons with few ill effects.
- Alternatively, aiming for minimal weight is also effective. Since the Supply Pylon immediately drops ammo and grenades when deployed and it is possible to reduce the cooldown to less time than it takes to deploy a grenade drop, a low-weight build can produce greater quantities of ammo and grenades by deploying a new Supply Pylon immediately after grenades are dropped.
- Homing Grenades travel relatively slowly, so they should be used mostly on tougher enemies that aren't likely to be killed before it can arrive.
- On a general comparison, Homing Grenades have a small impact radius but deal more damage than Arc Grenades, which cover a wider area.
- The Demolisher's heavy melee is a blunt omni-tool punch which explodes on contact. While this attack is relatively weak, it is capable of knocking down enemies and push them away slightly, acting much like a Concussive Shot.
- Having a sniper rifle or a heavy pistol/assault rifle with a scope mod can allow a player to "ammo-dump-camp;" throwing grenades from a safe distance and refilling them reliably while sniping enemies.
- Throwing an Arc Grenade followed by a Homing Grenade unleashes a powerful Tech Burst on the enemy.
- Supply Pylon can be recast to instantly grant grenades and thermal clips.
- Weapons with small clip capacity (like the Cerberus Harrier or the Reegar Carbine) can be used to great effect since the Supply Pylon negates the faults of these weapons.
- M-98 Widow is exceptionally useful in the hands of the N7 Demolisher class, who does not require low cooldown times. The shield-breaking qualities of the Demolisher's Arc Grenade (especially if the "Shield Overload" evolution is chosen at Rank 6) help overcome the shield gate seen on higher difficulties, allowing the player to dispatch most, if not all infantry-class enemies with a single headshot (the Extended Barrel is recommended to make sure the player inflicts the most possible damage with the Widow's one-shot clip). In addition, the Demolisher's signature power, the Supply Pylon, remedies another weakness of the Widow: low ammo capacity. This frees up a weapon slot that would otherwise be occupied with the Spare Thermal Clip mod, leaving room for another, more useful mod. The Piercing Mod is generally preferable to the Enhanced Scope, unless Cerberus smoke grenades pose a challenge, at which point the Demolisher could simply proceed to spam grenades into the smoke cloud.
- The Supply Pylon can be used as a psudeo-mine on lower difficulties, and on higher ones in a pinch. When redeployed, the pylon explodes, dealing damage to any enemies withing a roughly 3 meter radius. On higher difficulties, the damage is negligible, but will stun most basic infantry units, allowing for escape or, if planned properly, time to kill them with guns or grenades.
- Cerberus
- Homing Grenades can be quite effective against phantoms, as they might still be in the explosion radius after dodging.
- They also prove rather effective against Guardians, as they tend to drop down from above and bypass the shield entirely.
- Reapers
- Clearing out Cannibals should be your number one job with the Demolisher. Use your gun or grenades to kill a Cannibal, and wait for the rest to begin feeding on it. Dropping a Homing Grenade on this pile will eliminate most, if not all, of them.
- Arc Grenades are very effective at clearing out swarms of husks or swarmers.
- Homing Grenades are also effective against the slow-moving Ravagers, with the added bonus of wiping out recently spawned swarmers aswell.
- Geth
- Geth, and other synthetics, are weak to Arc Grenades. A wise move would be to set up a supply pylon in a defensible well-covered position with an ammo box right by it, and keep up a steady stream of grenades. A damage-optimized grenade will kill Geth Troopers in one hit, and if the grenades don't kill Hunters and Rocket Troopers outright, they'll be severely damaged and easy to finish off. Clearing out the weaker enemies single-handedly will leave the rest of the squad free to bring down the more durable Pyros and Primes. It is advisable to use Disruptor Ammo on your weapon, as this will increase your chances of setting off a tech burst.
- Be warned that because Arc Grenades are highly effective against geth, using a large number of them over a short period will make the Demolisher their highest-priority target. This can make it dangerous to unleash a salvo of Arc Grenades without good cover to hide behind; conversely, it can also be a useful distraction tactic if the Demolisher is in a position to survive the fire of a lot of enemies at once.
- Collectors
- The Demolisher may have a hard time being effective here. Collectors are close-quarters specialists that will rush/flank players and push them out of cover; camping is not recommended.
- Keep a light weight load. Because Supply Pylon cannot be moved around, you may find yourself doing one of two things; running back and forth from ammo drops to get grenades you have just used, or, using up all of your Thermal Clip Pack consumables before wave 5, which is definitely ineffective. Be prepared to continually drop new Supply Pylons.
Volus Engineer
The volus homeworld, Irune, has a high-pressure atmosphere that supports an ammonia-based biochemistry. To survive on other planets, the volus must wear pressure suits and breathers or, when facing combat, specially sealed armor.
Volus are cagey support specialists that use the most technologically advanced power armor credits can buy. Not to be underestimated, the diminutive volus engineer more than makes up for its size with cutting-edge gadgetry.
|
Player Notes
- General Notes
- A key part of Volus strategy is that the Volus cannot utilize cover and vault at all, relying instead on his diminutive stature to keep him protected. This works acceptably, except that explosives tend to be fired just high enough to him, and he cannot snap to cover to get out of enemy fire. On the plus side, because he cannot interact with cover, the Volus does not experience issues with context sensitivity for running and dodging versus cover.
- Both the Volus Adept and Engineer have the Shield Boost ability, which is vital for their defense, as they are incredibly fragile, and it functions as a massive defense boost on a several-seconds cool down.
- It's advisable for Volus characters to put all fitness upgrades into shields and health, as the volus heavy melee is the only means of dealing melee damage; This form of damage is relatively weak even with bonuses.
- The Volus' standard melee is a low level version of Tactical Cloak that isn't broken by firing your weapons or using powers, allowing them to use hit and run tactics. Keep in mind that this cloak has a cooldown of a few seconds (though it is independent of your power cooldown). Lasts around 5 seconds. While the Cloak is in effect, you cannot use your heavy melee.
- The Volus' heavy melee puts up a small white sphere around the Volus which will damage enemies who touch it, as well as restore shields over time. This will noticeably slow a Praetorian's progress on slaying the Volus on Silver difficulty, and severely reduces the ability of smaller enemies to kill the player, but has a severe lag when the player is coming out of it, leaving them rather vulnerable.
- Using this to overcome situations where Shield Boost can't be used is recommended. For example, if one is hit by a Collector Swarm or if the player has recently fired a different ability, using the shield to defend yourself until the cooldown comes off may be wise. The shield can also stagger and inflict damage to enemies trying to use their melee (and even kill attacking Husks), most notably Dragoons. The shield cannot be used together with the tactical cloak.
- The shield barrier can be cancelled by pressing the melee button again, cancelling part of the ending lag. This allows the Volus to quickly shield himself but still run/roll when needed without compromising his movement too much.
- Utilizing a weapon that is precise and light is recommended, such as a single Heavy Pistol or SMG. The majority of a Volus engineer's combat ability comes from his abilities, so adversely affecting your cooldown times is not recommended, as their weight capacity is lower than other classes, even with the proper evolutions.
- Far and away the more powerful move for the Volus is the Recon Mine. Launching it into a high traffic area (such as choke points or enemy spawning areas) or setting it in advance of a point you must defend is wise. Attempting to use it actively against enemies who are any faster than an Atlas or Brute is difficult and ill advised. Fast enemies are better served by using the Proximity Mine, which does respectable damage, stuns, and allows the Volus to press his attack.
- The effects of Recon Mine's Rank 6 "Invasive Scan" evolution and Proximity Mine's Rank 5 "Damage Taken" or "Slow" evolutions stack. One can lure enemies through Proximity Mines and into the Recon Mine's scan area to combine the effects of the debuffs, allowing for a maximum +45% enemy damage taken.
- Launching a Proximity Mine at a target as it enters the scan radius of the Recon Mine will apply the Invasive Scan's damage increase, then Recon Mine can be detonated while the Proximity Mine's Damage Taken debuff is active.
- The Scorpion is a good choice for a Volus Engineer, as it can be used to compliment their mine powers. For maximum effect if you've evolved your mine powers to increase the damage enemies take, position your mines so that enemies will be under the effect of both debuffs when they trigger the Scorpion rounds.
- The Volus is an invaluable team member on Gold. With a 200% cooldown, their Shield Boost can be spammed effectively every few seconds, granting a massive buff to all nearby team members. Because of their fragile nature, the Volus should try to stay close to a more durable team member. This arrangement works well for both parties: the Volus can buff the teammates, allowing them to shrug off damage; and the teammates can prevent the diminuitive Volus from being overwhelmed by enemies. Furthermore, the Volus is an absolute lifesaver on Gold for completing Hacking or Escort objectives, since the whole team will be close enough to benefit from the Shield Boost.
- If you know the map you are playing on well enough, you probably have an approximate idea of where enemies can spawn. When a round ends, it can be highly effective to place a Recon Mine in a potential spawn spot, then move away and wait to see if enemies spawn there. If they don't, simply detonate the mine and plant another one somewhere else. Hitting an entire group of spawning enemies can significantly weaken the stronger foes, and kill the weaker ones outright.
- Cerberus
- Recon Mine is particularly useful for killing Guardians; you can place the mine in front of them, and when they walk past it you can detonate it to avoid their shields completely.
- Both the Recon Mine and Proximity Mine are useful for stopping the advances of groups of Phantoms and Dragoons. With the Rank 6 "Armor Damage" evolution, a single Recon Mine can drastically weaken Dragoons.
- Geth
- If timed right, the Recon Mine combined with the Proximity Mine can effectively dispose of Geth Bombers when they're in low height.
- Reapers
- The Volus Engineer proves invaluable against the Reaper forces. With Proximity Mine, the Volus can slow down enemies, and Shield Boost will recharge allies' shields in a tight situation.
- Banshees are a Volus' biggest problem here. Their unpredictable biotic jumps can quickly overtake the relatively slow Volus. If a Banshee is coming toward you, it is highly advised to cloak and sprint in the opposite direction.
- Recon Mine is ideal for dealing with advancing Brutes and Ravagers. Unless the Brute is charging, it is usually slow enough that the Volus can set up a Mine in front of it, and detonate it when the Brute gets close. Ravagers are a cinch: simply place the Mine and wait for the slow-moving Ravager to move near it. Furthermore, Recon Mine will clear out tightly knit swarms of husks in no time.
- Collectors
- Avoid Collector Swarms at all costs, as the loss of ability to use Shield Boost can quickly spell death.
- The Volus is remarkably effective for tanking Scions and Praetorians if you see their attacks coming. Tagging your teammates with the Shield Boost and then covering yourself with Volus' melee shield will allow your team to make remarkable progress.
- The Volus is adept at clearing weaker enemies like Abominations, Collector Swarms, Troopers, and Captains, as non-possessed variants will die in one blast of the Recon Mine on Silver, and many of the possessed ones as well. Further, the stun and knockback of Proximity Mine and the Shield Boost will help the Volus deal with possessed Abominations and straggling Troopers respectively.
Vorcha Hunter Engineer

Vorcha are considered vermin by other species inhabiting Citadel space, but their unique physiology and innate aggressiveness make them shockingly durable combatants.
A vorcha's resilience and malleable DNA allow them to evolve and adapt to any situation, making them formidable opponents on the battlefield. Their lightning-quick pounce is a direct result of their societally ingrained bloodlust.
|
Player Notes
- General Notes
- This character is capable of setting off his own tech bursts by first using Submission Net and following it up with Incinerate.
- People finding themselves missing their target often with Submission Net may find it easier to get closer to the target with this character. Due to his Bloodlust, this can be easily accomplished without much risk to yourself on lower difficulties. Some caution should be advised on higher difficulties however since the enemy will be more likely to counter the health regen.
- Submission Net can be used to immobilize non-armored targets and render them easy prey for a melee-focused Vorcha. This can be a great help against targets such as Phantoms who would otherwise be dangerous at melee range.
- Cerberus
- With the use of Submission Net's Rank 5 Damage/Slow evolution and the Vorcha's mobility, the player can easily outmaneuver Dragoons.
- Reapers
- With the use of Submission Net's Rank 5 Damage/Slow evolution and the Vorcha's mobility, the player can easily outmaneuver Brutes.
- Geth
- Collectors