m (Formatting - missing word, word repeated twice) Tag: Visual edit |
|||
| (38 intermediate revisions by 22 users not shown) | |||
| Line 1: | Line 1: | ||
| − | The planet [[Sanctum]] ([[Decoris|Decoris system]], [[Sigurd's Cradle]]) has been pinpointed as the source of a [[Blue Suns]] operation using false distress signals to lure ships into range to be attacked and captured by the Blue Suns. Shutting down the distress beacon would deliver a blow to the Blue Suns operations in the area. |
+ | [[File:ME2 N7 - sanctum.png|340px|right|Base exterior]]The planet [[Sanctum]] ([[Decoris|Decoris system]], [[Sigurd's Cradle]]) has been pinpointed as the source of a [[Blue Suns]] operation using false distress signals to lure ships into range to be attacked and captured by the Blue Suns. Shutting down the distress beacon would deliver a blow to the Blue Suns operations in the area. |
== Acquisition == |
== Acquisition == |
||
{{Prerequisite|N7: MSV Strontium Mule}} |
{{Prerequisite|N7: MSV Strontium Mule}} |
||
Upon completion of [[N7: MSV Strontium Mule]], Commander Shepard receives this e-mail from Cerberus Command: |
Upon completion of [[N7: MSV Strontium Mule]], Commander Shepard receives this e-mail from Cerberus Command: |
||
| + | {{emailquote|From: Cerberus Command |
||
| ⚫ | |||
| ⚫ | We've started going through that intel -- fine work, by the way -- and we've discovered the location of the base where the Strontium Mule fell into the Blue Suns' trap. The Blue Suns are indeed using false distress signals to lure merchant freighters near their base with the intent of capturing and raiding those vessels. If you can get out there and shut down their beacon, it'll save a lot of merchants a lot of distress. It'll also strike a blow to the Blue Suns as a whole. |
||
| ⚫ | |||
| + | |||
| ⚫ | |||
| + | The base is on planet planet{{sic}} Sanctum, Decoris system, Sigurd's Cradle. We've uploaded coordinates to the galaxy map.}} |
||
| + | |||
| + | When initially scanning the planet, the following audio is heard on a repeating loop: {{blockquote|--check all those tunnels for runners, and report back to Captain Narom when you're done.}} |
||
| + | |||
| ⚫ | |||
| + | {{blockquote|ANOMALY DETECTED: |
||
| + | |||
| ⚫ | Distress beacon detected on initial sweep is confirmed to be a fabrication set in place to lure unsuspecting ships into orbit for pirate ambush. Preliminary scans indicate that shutting down false distress beacon will stop the Blue Suns transmission and disable their ambush site. Surface scans show Blue Suns communication signatures concentrated around a shuttle hangar bay.}} |
||
| + | |||
| + | == Preparation == |
||
| + | The final fight of this assignment can be quite challenging, especially at the higher difficulty levels, as you [[#Enemies|will be facing]] two [[YMIR Mech]]s simultaneously, followed by a further wave of Blue Suns. As such, you may wish to save this assignment until you have reached a fairly high level with fully upgraded powers and weapons. |
||
| + | |||
| + | Having [[AI Hacking]] power available is strongly recommended for this assignment, as you will be able to make the two YMIRs fight each other, making it much less likely they will be able to corner you. Another great power to have for this mission is [[Stasis]] as even at just level 1 it can be used to instantly disable YMIRs and other tough opponents you will be facing. Beyond that, you will want to consider powers and squadmates that help against shields and armor, as well as squadmates who are tough enough to stand up to incoming fire. Tali is a good squadmate to bring if she has Energy Drain unlocked as this not only helps you against enemy shields but it refreshes hers helping to keep her in the fight, and she also provides AI Hacking for the final battle. |
||
| + | |||
| + | It's also worth considering what heavy weapon to bring, as this assignment is challenging enough to merit using one. Good options are weapons with a large area of effect and good "crowd control" such as the [[M-622 Avalanche]] or the [[Arc Projector]]. There is a difficult fight near the end of the mission where the [[M-920 Cain]] can come in handy if you don't mind spending the extra ammo to use it. |
||
== Walkthrough == |
== Walkthrough == |
||
| ⚫ | The [[Normandy SR-2|Normandy]] flies through the atmosphere dropping the [[UT-47 Kodiak Drop Shuttle|shuttle]]. As the shuttle lands, a Blue Suns merc, who is keeping watch, sees this and runs back inside the facility. Once you have control, find cover quickly as the Suns will be quick to respond. There will be two waves of enemies both consisting of [[Blue Suns Trooper]]s and a [[Blue Suns Heavy]]. Stay in cover as the Heavies will stay back, firing their [[ML-77 Missile Launcher|missile launchers]], while the Troopers cover the distance and attempt to flank you. Once the first wave falls the second will be quick on their heels, however if you take too long, then the second wave may come out anyway. |
||
| − | When Preparing a team for this mission, it is advised to have an ally outfitted with A.I. Hacking as they become invaluable towards the end of this mission. |
||
| ⚫ | The second wave has a few more Troopers and another Heavy. Follow the same tactics as the first wave, keep in cover and pop them while they have their heads out, and you should be fine. Once they are all down, head towards the door, grabbing the crate of iridium along the way. Once you reach the door enter the facility. |
||
| ⚫ | |||
| + | {{note}}You can rush towards the doors after the first wave of enemies appears and shoot them from there. By being near the doors you will prevent the second wave of enemies from spawning. Ordering a squadmate to take position near the doors or spawning a [[Combat Drone]] in that area also helps. Alternatively, you can just ignore the enemies and hit the door switch - in such a way you will also be successfully ported inside. The Infiltrator and Vanguard are the best classes to try this with as the Vanguard can immediately reach the door using [[Charge]] while the Infiltrator can use [[Tactical Cloak]] to sneak up to it. |
||
| ⚫ | The second wave has a few more Troopers and another Heavy. Follow the same tactics as the first wave, keep in cover and pop them |
||
| + | {{note|Combat Strategy:}} One way to make this first fight much less difficult is to immediately take out the [[M-622 Avalanche]] at the start and run towards the door the Blue Suns will pour out of and start firing at the entrance the moment it opens. With good aim and just 5-6 shots you can completely disable all of the enemies before they can get beyond the door and into cover. Using a shield stripping ability or a power that briefly stuns enemies can help with this strategy and make sure to have your squadmates pitch in as well. As stated above, once you reach the door no further enemies will spawn from it and you can finish off the Blue Sun ice sculptures with ease. |
||
| ⚫ | As you enter, a computer voice tells you that the facility is closed due to worker’s safety concerns. However there is a bigger problem, the Blue Suns are on the floor below and aren’t very happy to see you apparently. You have the height, but the Suns have a whole gang of Troopers lead by a [[Blue Suns Commander]]. The commander will have all three forms of protection, no matter the difficulty, |
||
| ⚫ | [[File:Sanctum - blue suns welcoming party.png|250px|left|You have the higher ground, kill the flankers first]]As you enter, a computer voice tells you that the facility is closed due to worker’s safety concerns. However there is a bigger problem, the Blue Suns are on the floor below and aren’t very happy to see you apparently. You have the height, but the Suns have a whole gang of Troopers lead by a [[Blue Suns Commander]]. The commander will have all three forms of protection, no matter the difficulty, and so may be difficult to take out early. The Troopers will try and climb the ramps to get to you and your squad, so keeping them on the highest level is probably a good idea, while you may have a limited firing arc, you have more protection. Once you whittle down the enemy a bit, then head down to the first landing and finish them off. Stay away from the couches in the center of the first landing as the Suns can trap you in there and shoot you like fish in a barrel. |
||
| ⚫ | Once all the suns are down, head down the ramps and into the room on the |
||
| ⚫ | Once all the suns are down, head down the ramps and into the room on the right. In the room is a wall safe (1875 credits), and a datapad where a worker was apparently fired and will be traveling to [[Omega]], because the Blue Suns are hiring people to take out [[Archangel|a vigilante]]. Once you are done in the side room head back out to the entrance room and on the opposite wall there will be a reason why the facility was closed. Apparently someone, Phillips, expanded the north mining tunnels into the mess hall, so the facility had to be shut down. |
||
| ⚫ | Head into the mess hall and take cover as the Suns will come out of that “brilliant” expansion. They will storm into the hall, but since you are in cover, they will be much harder to hit. There will be only Troopers to contend with this time, so make sure to put them down quickly. Once they are down, head into the tunnels, don’t worry about enemies for this part as there are none. |
||
| ⚫ | [[File:Sanctum - more suns.png|250px|right|More cannon fodder for your skills]]Head into the mess hall and take cover as the Suns will come out of that “brilliant” expansion. They will storm into the hall, but since you are in cover, they will be much harder to hit. There will be only Troopers to contend with this time, so make sure to put them down quickly. Once they are down, head into the tunnels, don’t worry about enemies for this part as there are none. |
||
| ⚫ | When you enter the tunnels, you see the drill, and to your left is another crate of iridium, grab it and keep moving. When you reach the large cavern, there is more iridium off to your left and directly ahead of you. Grab |
||
| + | |||
| ⚫ | When you enter the tunnels, you see the drill, and to your left is another crate of iridium, grab it and keep moving. When you reach the large cavern, there is more iridium off to your left and directly ahead of you. Grab all three crates and then access the datapad and grab the power cells near the door, you will need them. Save your game before heading into the next room, otherwise you might regret it. |
||
{{note}}The following fight is difficult, and probably the hardest in the various [[assignments]]. You will be facing Troopers, [[Captain Narom]] and two [[YMIR Mech]]s. |
{{note}}The following fight is difficult, and probably the hardest in the various [[assignments]]. You will be facing Troopers, [[Captain Narom]] and two [[YMIR Mech]]s. |
||
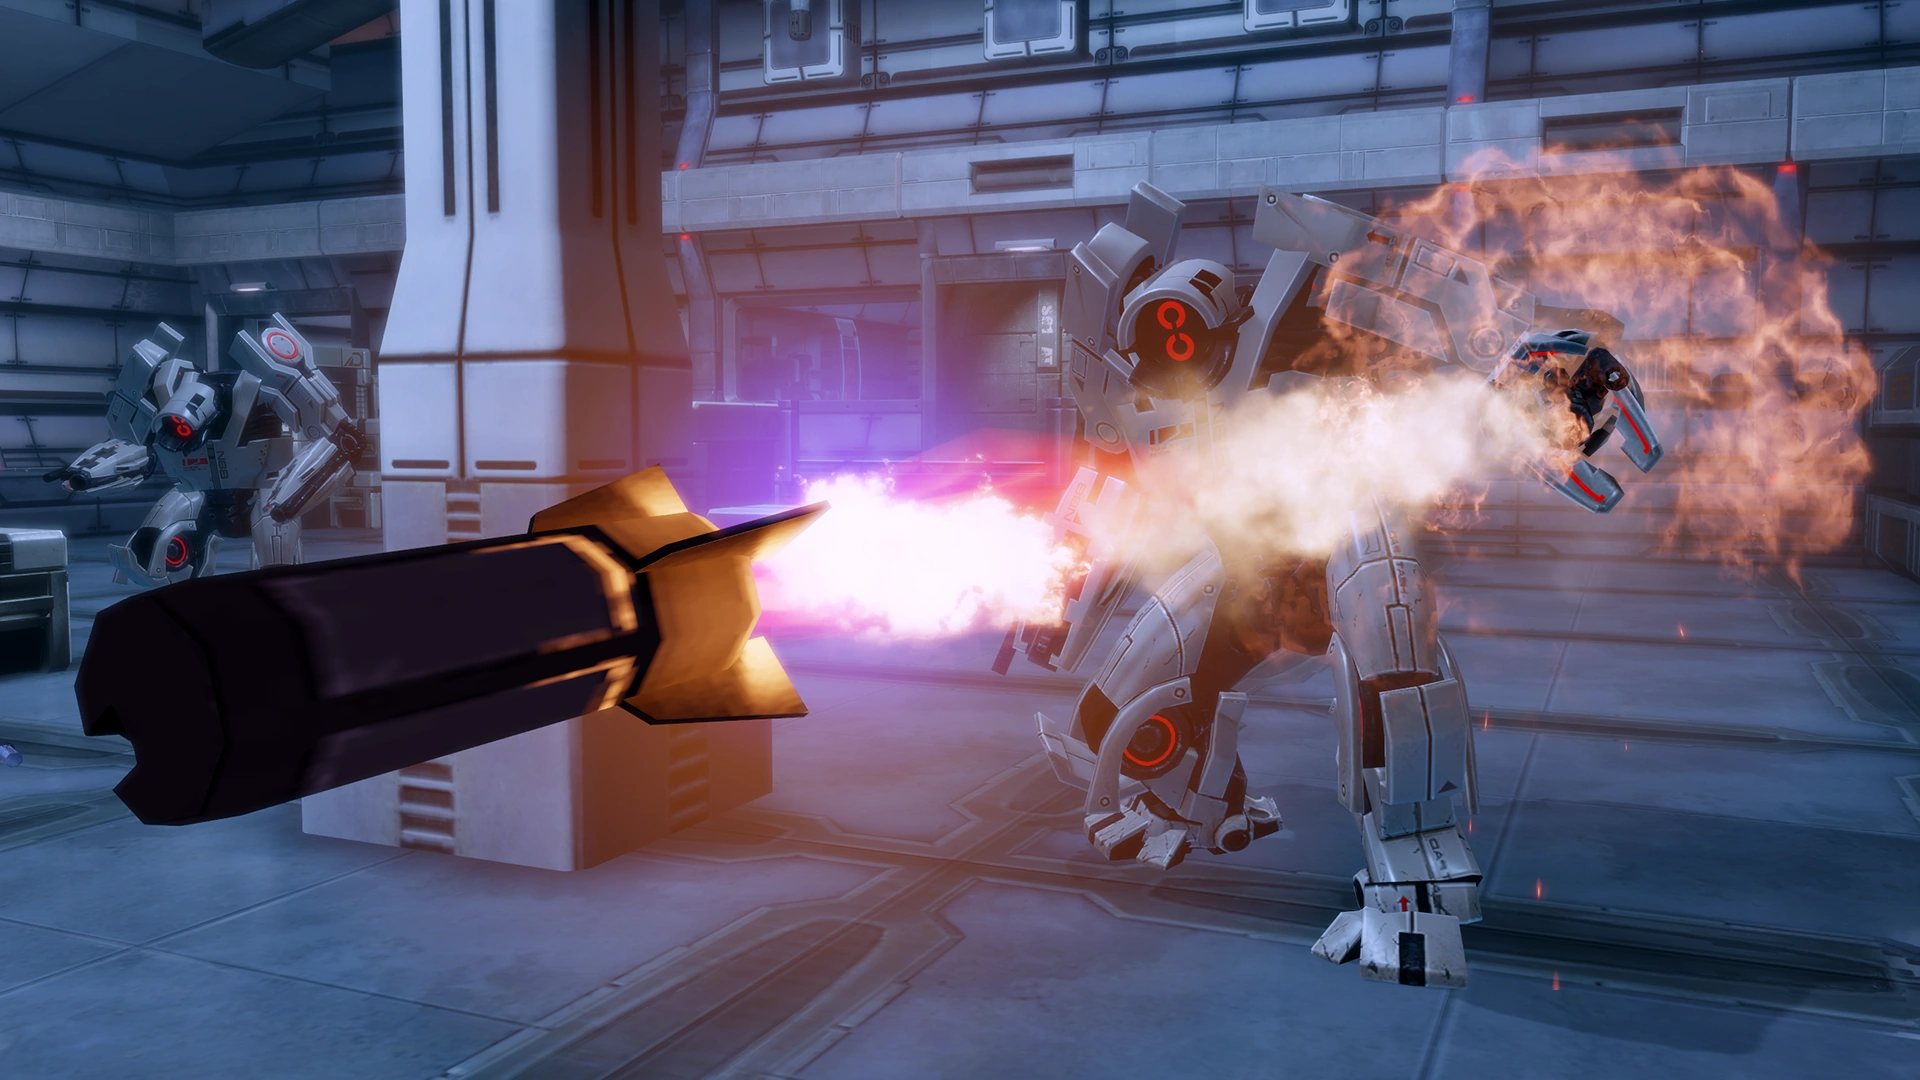
| + | [[File:Sanctum - twin YMIRs.png|250px|left|There's plenty of cover in the room, use them against these]] |
||
| ⚫ | |||
| + | Head through the door and you are treated to a short cutscene where Narom comes over the PA and the YMIRs activate. GET INTO COVER ASAP. {{note|Tip:}} Good long-term cover is to the left of the room, directly across the door from which you entered and up on a raised platform containing a single air car. The path-way there is blocked by a destroyable crate, but a quick melee will get you in. There is a med-kit on the floor, a respawning ammo clip, and cover on all sides. |
||
| ⚫ | Command your squad to focus fire on one YMIR, and when its shields and armor are depleted spam AI Hacking. While your new ally turns on his counter-part, give him a hand. Repeat this process until your confused YMIR is destroyed. By the time this happens, the other mech should have much less of its armor plating remaining. As you are well covered, make short work of him. While you are taking down the mechs, you have no need to worry about any other enemies, as the Suns won’t even make an appearance until the YMIRs are down, but once the last YMIR explodes be prepared for a Blue Suns squadron to come swarming into your room. Chip away at them as they scramble for cover, eventually making their way across from you to the right side of the room. |
||
| ⚫ | The Troopers are easier to deal with but they will try to flank and so will Narom, so watch your back and your flanks as you use anything to take them out. It is actually a better idea to focus on the Troopers first |
||
| + | {{note|Tip:}} If you have Stasis trained as a bonus power for this assignment this normally very dangerous fight becomes laughably easy. Simply take cover with your squad by the door where you came in and wait for the YMIRs to approach; you can poke out to start draining their shields a little bit as they come in. If you're lucky, the YMIRs can sometimes get stuck on the scenery and are unable to approach your location by the entrance door and you can whittle them down with ease and a little time. If on the other hand they don't get stuck and continue to close on you don't panic. Simply use Stasis to disable and ragdoll the closest YMIR and focus on the other one; once the Stasis wears off the first YMIR Stasis the other one if it's also getting close to you and focus on the first one while it's disabled and on the ground or recovering. Rinse and repeat until both are dead or reduced to just health at which point you and your squad can disable them easily in any number of ways. |
||
| ⚫ | When you have finished with them, and before heading into the center room on the opposite side of the |
||
| + | |||
| ⚫ | [[File:Sanctum - narom and goons.png|250px|right|Blue Suns sure like their commanders bald]]The Troopers are easier to deal with but they will try to flank and so will Narom, so watch your back and your flanks as you use anything to take them out. It is actually a better idea to focus on the Troopers first, because the danger here comes more from flanking and combined firepower than from any individual enemy. While Narom may be armed with the [[M-76 Revenant]] the Troopers are the bigger threat because there are more of them, and they will tend to flank more than Narom. Once the Troopers are down, focus on Narom and he should be easy to take down without all of his lackeys. |
||
| + | |||
| + | {{note|Tip:}} The Blue Suns will not approach you if you stayed by the door you came in; they will congregate nearby but won't ever come around the corner of the cover by the entrance door the way the YMIRs can. This is therefore the safest place to face the final wave from as you can't be flanked. |
||
| + | |||
| ⚫ | When you have finished with them, and before heading into the center room on the opposite side of the hangar, off to the left side on one of the fighter pads is a med-kit. Grab it and then move to the room on the left side as it has a wall safe that you will be unable to access after you destroy the transmitter. The room on the right has a computer with some emails on how this operation got set up, so investigate if you want to. When you are ready bypass the center door and then access the console inside to overload the transmitter. |
||
You are treated to a cutscene where Shepard orders the squad out, then rigs the overload, running out the room and vaulting the railing just as the transmitter explodes. |
You are treated to a cutscene where Shepard orders the squad out, then rigs the overload, running out the room and vaulting the railing just as the transmitter explodes. |
||
| + | |||
| + | === Datapads === |
||
| + | {{blockquote|A shuttle just landed outside the southern entrance. Get out there and take them out! Now!}} |
||
| + | |||
| + | {{blockquote|Due to concerns over employee safety, the Brunfeld Mining facility has been closed until further notice.}} |
||
| + | |||
| + | {{blockquote|Hey cousin. That jerk Selim just fired me for no reason. I swear that guy has it out for me. I hear the Blue Suns are hiring people to take out some dumbass vigiliante on Omega. I'm gonna show them how it's done. Wish me luck!}} |
||
| + | |||
| + | {{blockquote|Due to Phillipps' "brilliant" expansion of the northern mining tunnels into the mess hall last week, our small facility will be closing indefinitely. All teams will be transferred to the nearest star base shortly.}} |
||
| + | |||
| + | {{blockquote|We've got a major haul coming in from dig site, boys. Move all the unsorted cargo to the mines to make room.}} |
||
=== Interrogation Logs === |
=== Interrogation Logs === |
||
'''Authorization: Captain Narom''' |
'''Authorization: Captain Narom''' |
||
| − | {{emailquote|Client Agent |
+ | {{emailquote|Client Agent Incoming — An agent from the prospective client arrived today. The client has asked for discretion, which raised a few red flags. On Commander [[Vido Santiago|Santiago]]'s suggestion, I plan to persuade the agent to divulge the nature and location of the cargo.}} |
{{emailquote|[[Prothean]] Artifact Confirmed — Well, that didn't take long. The client's agent folded under minimum pressure. Commander Santiago's hunch was correct: the client hopes to hire us to move a Prothean artifact from the dig site. With a little more pressure the agent should gladly give up the location of the dig site itself.}} |
{{emailquote|[[Prothean]] Artifact Confirmed — Well, that didn't take long. The client's agent folded under minimum pressure. Commander Santiago's hunch was correct: the client hopes to hire us to move a Prothean artifact from the dig site. With a little more pressure the agent should gladly give up the location of the dig site itself.}} |
||
| Line 50: | Line 85: | ||
== Mission Summary == |
== Mission Summary == |
||
| + | Deactivated distress beacon at Brunfeld Mining Facility. |
||
| + | |||
| + | Eliminated Blue Suns resistance. |
||
*Experience reward: 125 (156) |
*Experience reward: 125 (156) |
||
*Credits: 7,500 |
*Credits: 7,500 |
||
| Line 60: | Line 98: | ||
[[Category:Mass Effect 2]] |
[[Category:Mass Effect 2]] |
||
[[Category:Assignments]] |
[[Category:Assignments]] |
||
| − | [[Category: |
+ | [[Category:Anomaly]] |
Revision as of 07:32, 11 May 2020
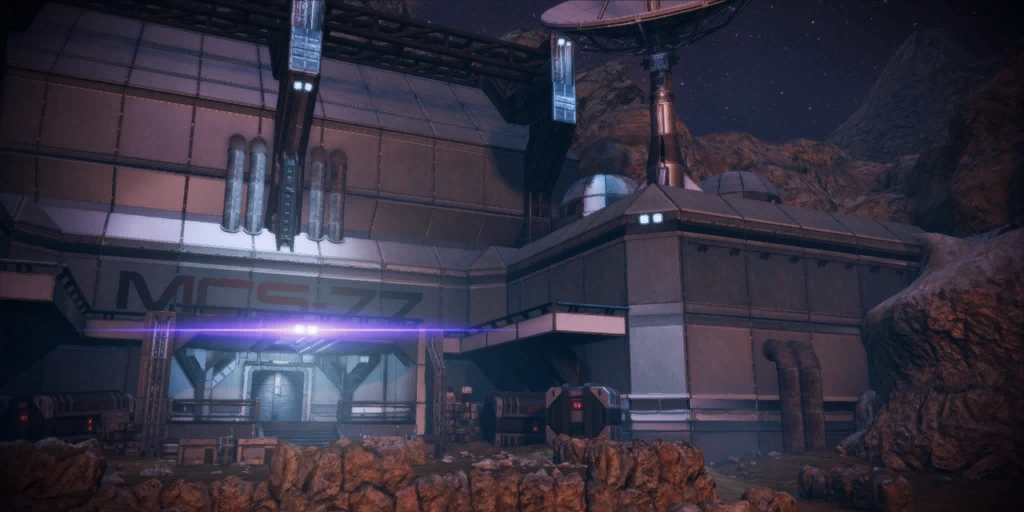
The planet Sanctum (Decoris system, Sigurd's Cradle) has been pinpointed as the source of a Blue Suns operation using false distress signals to lure ships into range to be attacked and captured by the Blue Suns. Shutting down the distress beacon would deliver a blow to the Blue Suns operations in the area.
Acquisition
Upon completion of N7: MSV Strontium Mule, Commander Shepard receives this e-mail from Cerberus Command:
When initially scanning the planet, the following audio is heard on a repeating loop:
“--check all those tunnels for runners, and report back to Captain Narom when you're done.”
On scanning Sanctum, the following text is displayed:
“ANOMALY DETECTED:
Distress beacon detected on initial sweep is confirmed to be a fabrication set in place to lure unsuspecting ships into orbit for pirate ambush. Preliminary scans indicate that shutting down false distress beacon will stop the Blue Suns transmission and disable their ambush site. Surface scans show Blue Suns communication signatures concentrated around a shuttle hangar bay.”
Preparation
The final fight of this assignment can be quite challenging, especially at the higher difficulty levels, as you will be facing two YMIR Mechs simultaneously, followed by a further wave of Blue Suns. As such, you may wish to save this assignment until you have reached a fairly high level with fully upgraded powers and weapons.
Having AI Hacking power available is strongly recommended for this assignment, as you will be able to make the two YMIRs fight each other, making it much less likely they will be able to corner you. Another great power to have for this mission is Stasis as even at just level 1 it can be used to instantly disable YMIRs and other tough opponents you will be facing. Beyond that, you will want to consider powers and squadmates that help against shields and armor, as well as squadmates who are tough enough to stand up to incoming fire. Tali is a good squadmate to bring if she has Energy Drain unlocked as this not only helps you against enemy shields but it refreshes hers helping to keep her in the fight, and she also provides AI Hacking for the final battle.
It's also worth considering what heavy weapon to bring, as this assignment is challenging enough to merit using one. Good options are weapons with a large area of effect and good "crowd control" such as the M-622 Avalanche or the Arc Projector. There is a difficult fight near the end of the mission where the M-920 Cain can come in handy if you don't mind spending the extra ammo to use it.
Walkthrough
The Normandy flies through the atmosphere dropping the shuttle. As the shuttle lands, a Blue Suns merc, who is keeping watch, sees this and runs back inside the facility. Once you have control, find cover quickly as the Suns will be quick to respond. There will be two waves of enemies both consisting of Blue Suns Troopers and a Blue Suns Heavy. Stay in cover as the Heavies will stay back, firing their missile launchers, while the Troopers cover the distance and attempt to flank you. Once the first wave falls the second will be quick on their heels, however if you take too long, then the second wave may come out anyway.
The second wave has a few more Troopers and another Heavy. Follow the same tactics as the first wave, keep in cover and pop them while they have their heads out, and you should be fine. Once they are all down, head towards the door, grabbing the crate of iridium along the way. Once you reach the door enter the facility.
Note: You can rush towards the doors after the first wave of enemies appears and shoot them from there. By being near the doors you will prevent the second wave of enemies from spawning. Ordering a squadmate to take position near the doors or spawning a Combat Drone in that area also helps. Alternatively, you can just ignore the enemies and hit the door switch - in such a way you will also be successfully ported inside. The Infiltrator and Vanguard are the best classes to try this with as the Vanguard can immediately reach the door using Charge while the Infiltrator can use Tactical Cloak to sneak up to it.
Combat Strategy: One way to make this first fight much less difficult is to immediately take out the M-622 Avalanche at the start and run towards the door the Blue Suns will pour out of and start firing at the entrance the moment it opens. With good aim and just 5-6 shots you can completely disable all of the enemies before they can get beyond the door and into cover. Using a shield stripping ability or a power that briefly stuns enemies can help with this strategy and make sure to have your squadmates pitch in as well. As stated above, once you reach the door no further enemies will spawn from it and you can finish off the Blue Sun ice sculptures with ease.
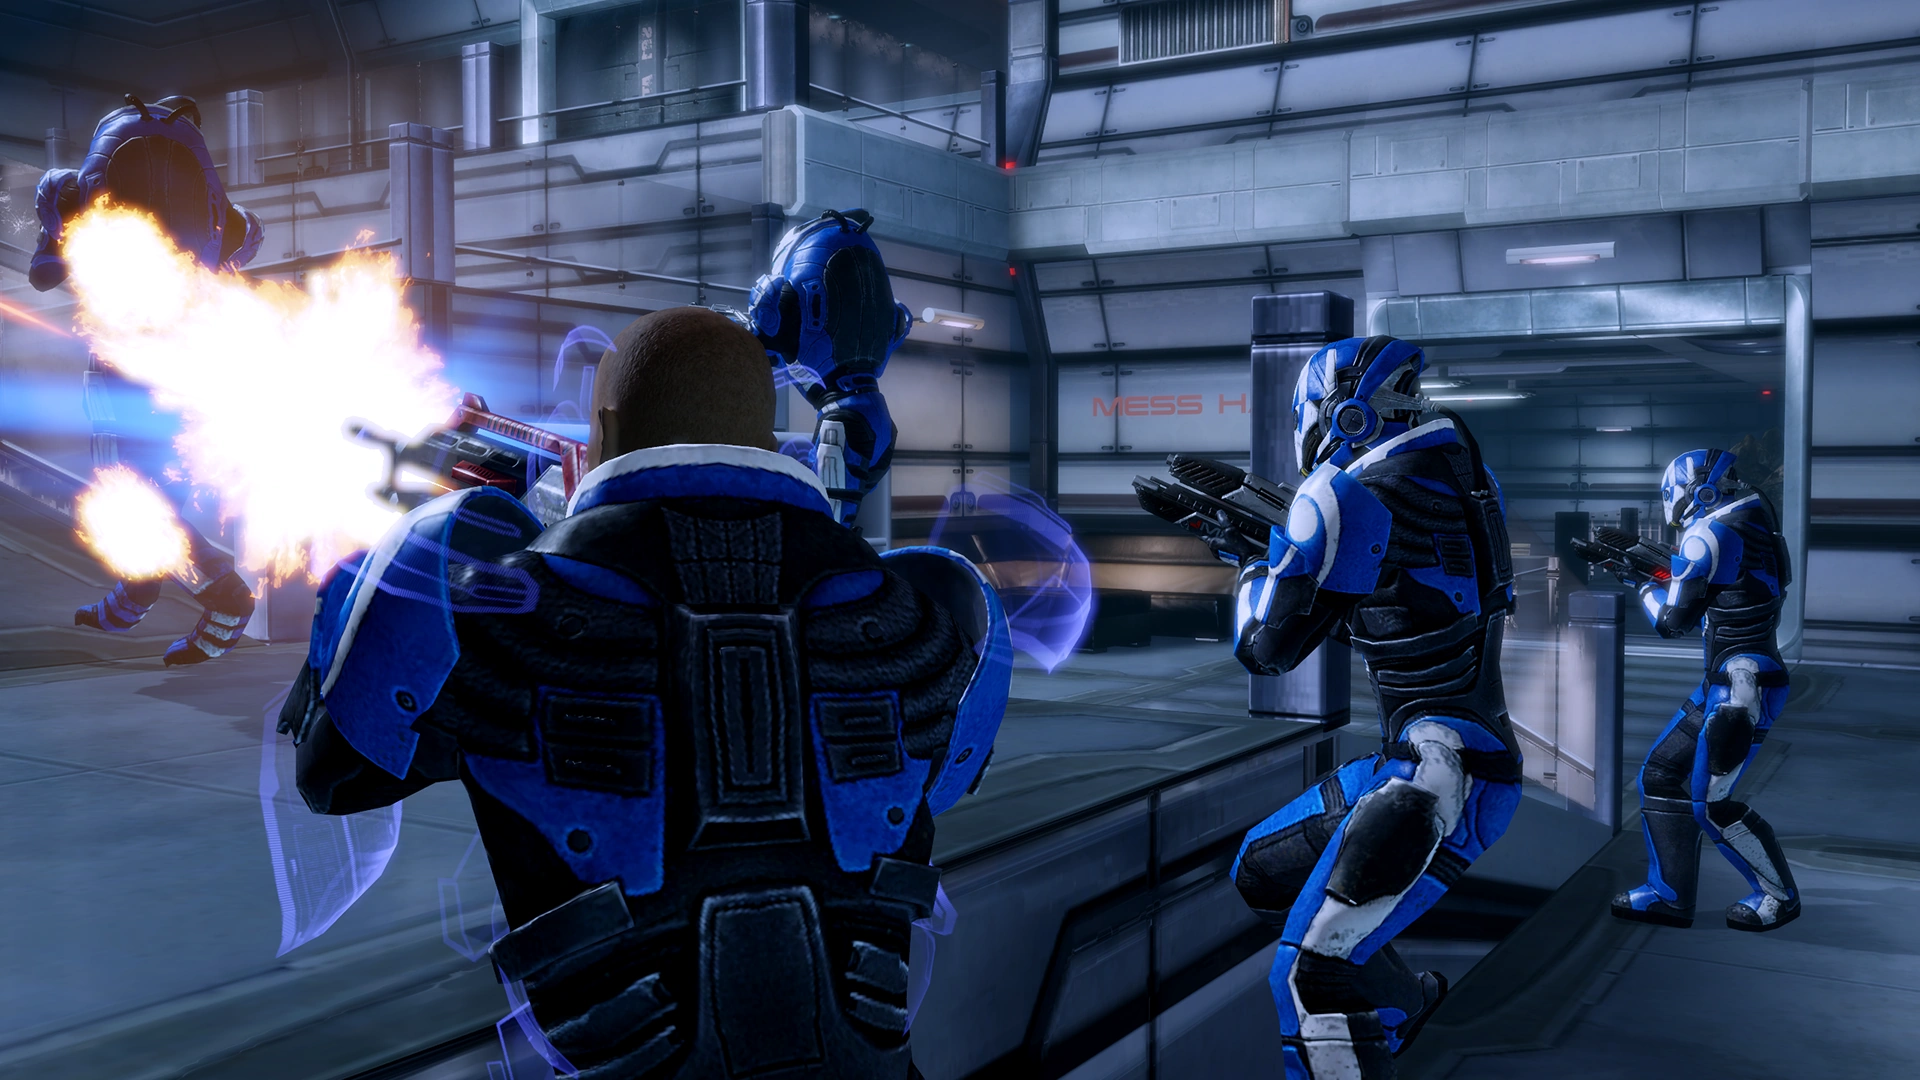
As you enter, a computer voice tells you that the facility is closed due to worker’s safety concerns. However there is a bigger problem, the Blue Suns are on the floor below and aren’t very happy to see you apparently. You have the height, but the Suns have a whole gang of Troopers lead by a Blue Suns Commander. The commander will have all three forms of protection, no matter the difficulty, and so may be difficult to take out early. The Troopers will try and climb the ramps to get to you and your squad, so keeping them on the highest level is probably a good idea, while you may have a limited firing arc, you have more protection. Once you whittle down the enemy a bit, then head down to the first landing and finish them off. Stay away from the couches in the center of the first landing as the Suns can trap you in there and shoot you like fish in a barrel.
Once all the suns are down, head down the ramps and into the room on the right. In the room is a wall safe (1875 credits), and a datapad where a worker was apparently fired and will be traveling to Omega, because the Blue Suns are hiring people to take out a vigilante. Once you are done in the side room head back out to the entrance room and on the opposite wall there will be a reason why the facility was closed. Apparently someone, Phillips, expanded the north mining tunnels into the mess hall, so the facility had to be shut down.
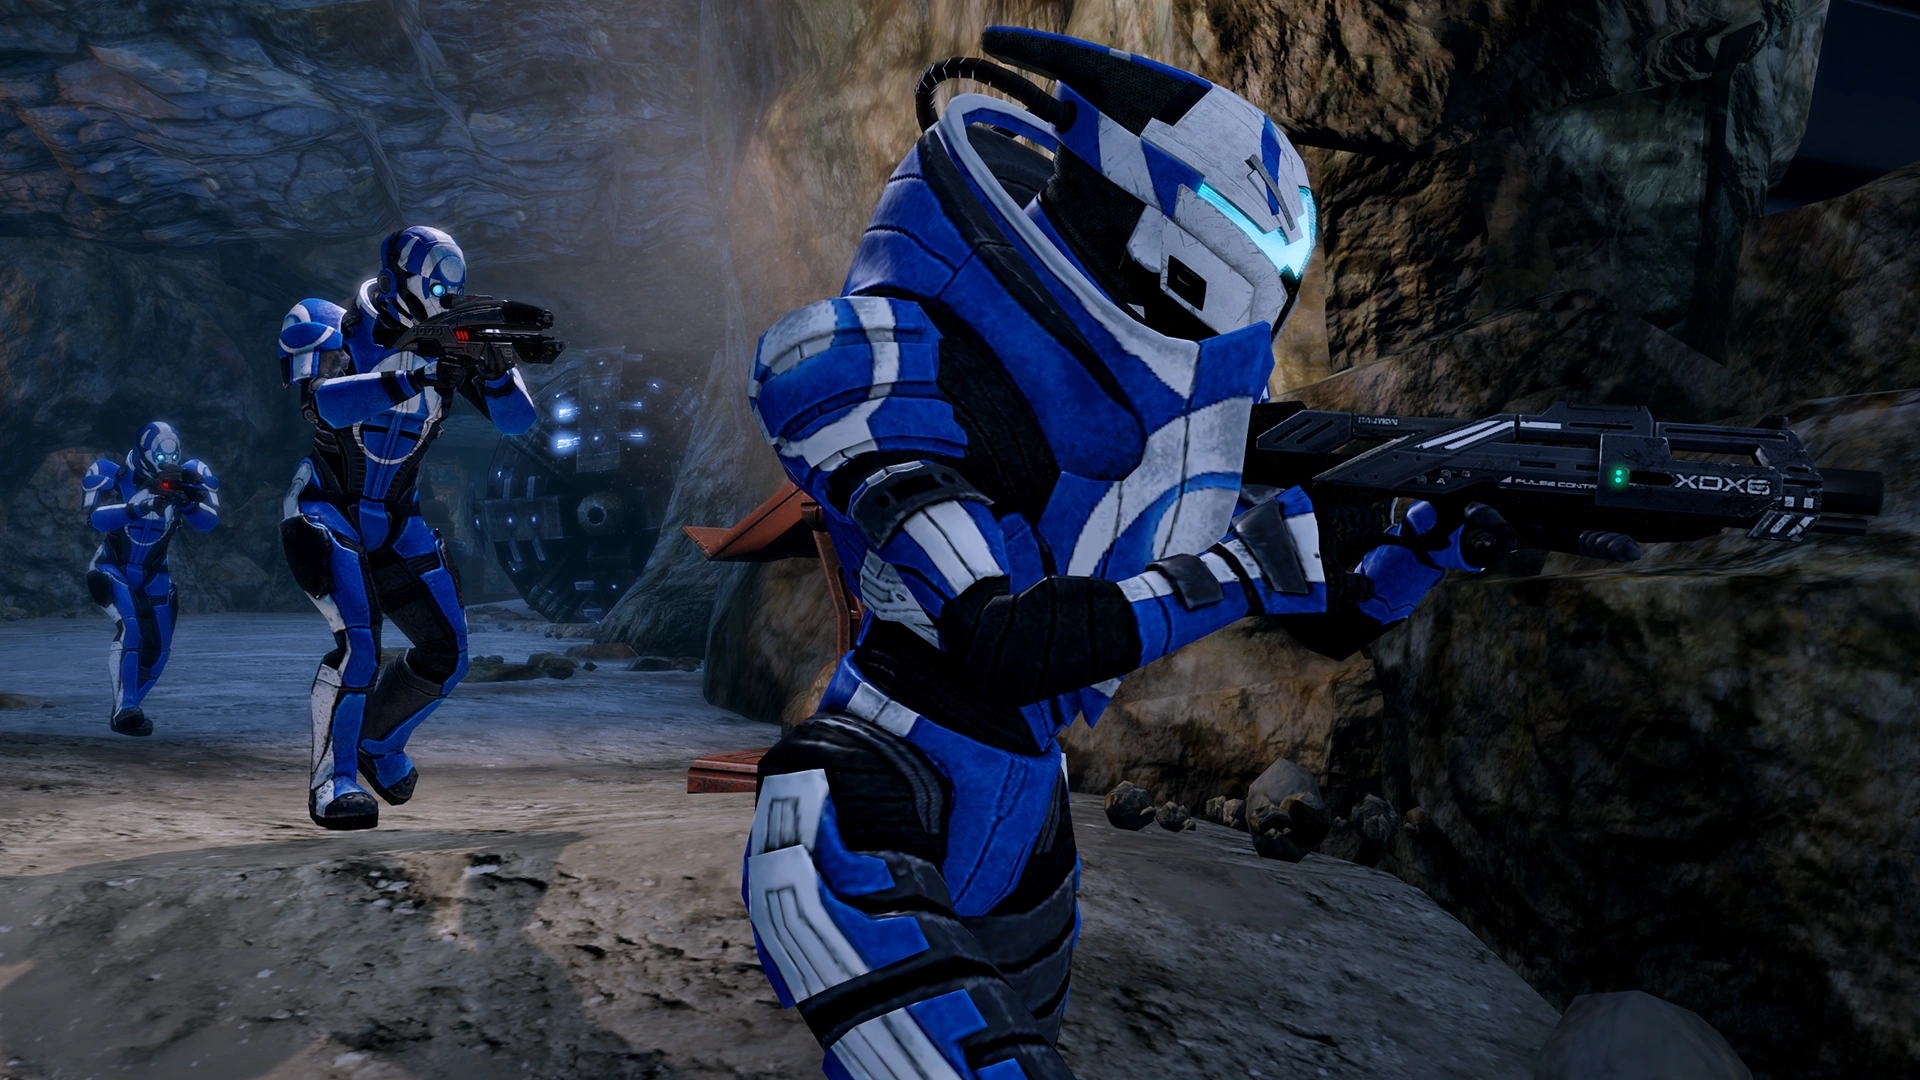
Head into the mess hall and take cover as the Suns will come out of that “brilliant” expansion. They will storm into the hall, but since you are in cover, they will be much harder to hit. There will be only Troopers to contend with this time, so make sure to put them down quickly. Once they are down, head into the tunnels, don’t worry about enemies for this part as there are none.
When you enter the tunnels, you see the drill, and to your left is another crate of iridium, grab it and keep moving. When you reach the large cavern, there is more iridium off to your left and directly ahead of you. Grab all three crates and then access the datapad and grab the power cells near the door, you will need them. Save your game before heading into the next room, otherwise you might regret it.
Note: The following fight is difficult, and probably the hardest in the various assignments. You will be facing Troopers, Captain Narom and two YMIR Mechs.
Head through the door and you are treated to a short cutscene where Narom comes over the PA and the YMIRs activate. GET INTO COVER ASAP. Tip: Good long-term cover is to the left of the room, directly across the door from which you entered and up on a raised platform containing a single air car. The path-way there is blocked by a destroyable crate, but a quick melee will get you in. There is a med-kit on the floor, a respawning ammo clip, and cover on all sides.
Command your squad to focus fire on one YMIR, and when its shields and armor are depleted spam AI Hacking. While your new ally turns on his counter-part, give him a hand. Repeat this process until your confused YMIR is destroyed. By the time this happens, the other mech should have much less of its armor plating remaining. As you are well covered, make short work of him. While you are taking down the mechs, you have no need to worry about any other enemies, as the Suns won’t even make an appearance until the YMIRs are down, but once the last YMIR explodes be prepared for a Blue Suns squadron to come swarming into your room. Chip away at them as they scramble for cover, eventually making their way across from you to the right side of the room.
Tip: If you have Stasis trained as a bonus power for this assignment this normally very dangerous fight becomes laughably easy. Simply take cover with your squad by the door where you came in and wait for the YMIRs to approach; you can poke out to start draining their shields a little bit as they come in. If you're lucky, the YMIRs can sometimes get stuck on the scenery and are unable to approach your location by the entrance door and you can whittle them down with ease and a little time. If on the other hand they don't get stuck and continue to close on you don't panic. Simply use Stasis to disable and ragdoll the closest YMIR and focus on the other one; once the Stasis wears off the first YMIR Stasis the other one if it's also getting close to you and focus on the first one while it's disabled and on the ground or recovering. Rinse and repeat until both are dead or reduced to just health at which point you and your squad can disable them easily in any number of ways.
The Troopers are easier to deal with but they will try to flank and so will Narom, so watch your back and your flanks as you use anything to take them out. It is actually a better idea to focus on the Troopers first, because the danger here comes more from flanking and combined firepower than from any individual enemy. While Narom may be armed with the M-76 Revenant the Troopers are the bigger threat because there are more of them, and they will tend to flank more than Narom. Once the Troopers are down, focus on Narom and he should be easy to take down without all of his lackeys.
Tip: The Blue Suns will not approach you if you stayed by the door you came in; they will congregate nearby but won't ever come around the corner of the cover by the entrance door the way the YMIRs can. This is therefore the safest place to face the final wave from as you can't be flanked.
When you have finished with them, and before heading into the center room on the opposite side of the hangar, off to the left side on one of the fighter pads is a med-kit. Grab it and then move to the room on the left side as it has a wall safe that you will be unable to access after you destroy the transmitter. The room on the right has a computer with some emails on how this operation got set up, so investigate if you want to. When you are ready bypass the center door and then access the console inside to overload the transmitter.
You are treated to a cutscene where Shepard orders the squad out, then rigs the overload, running out the room and vaulting the railing just as the transmitter explodes.
Datapads
“A shuttle just landed outside the southern entrance. Get out there and take them out! Now!”
“Due to concerns over employee safety, the Brunfeld Mining facility has been closed until further notice.”
“Hey cousin. That jerk Selim just fired me for no reason. I swear that guy has it out for me. I hear the Blue Suns are hiring people to take out some dumbass vigiliante on Omega. I'm gonna show them how it's done. Wish me luck!”
“Due to Phillipps' "brilliant" expansion of the northern mining tunnels into the mess hall last week, our small facility will be closing indefinitely. All teams will be transferred to the nearest star base shortly.”
“We've got a major haul coming in from dig site, boys. Move all the unsorted cargo to the mines to make room.”
Interrogation Logs
Authorization: Captain Narom
Enemies
Mission Summary
Deactivated distress beacon at Brunfeld Mining Facility.
Eliminated Blue Suns resistance.
- Experience reward: 125 (156)
- Credits: 7,500
- Cerberus Funding: 3,750
- Credits Found: 3,750
- Minerals:
- Iridium: 2,000
| ← Previous Assignment | Assignment Index | Next Assignment → |
|---|---|---|
| N7: MSV Strontium Mule | Assignments | N7: Javelin Missiles Launched |