A Cerberus station on the planet Aite (Typhon system, Phoenix Massing) has gone off the grid. The Illusive Man has requested assistance investigating the situation.
Acquisition
A message is sent to Shepard's private terminal from the Illusive Man:
On the galaxy map, this assignment is titled Investigate Project Overlord
Preparation
Once you begin Project Overlord, it runs all the way through without any chance to return to the Normandy or the rest of the galaxy. You will have to complete all four of the main assignments before you can leave. However, you will be able to change squad members between each successive assignment.
In all of these assignments, you will be facing synthetics, and in all but Vulcan Station, the synthetics will be shielded geth (at Vulcan, you will face armored mechs instead). Therefore, Tali or Legion with their AI Hacking power makes an extremely useful companion throughout this section, and in one section, their Combat Drone can preempt the spawning of additional enemies. For the first part of this assignment, a companion with Overload or Disruptor Ammo makes a good choice – e.g. Garrus, Zaeed, Kasumi, or Miranda.
Ammo Tip: One other unusual feature of Overlord – six power cells to replenish heavy weapons ammo are available in this sequence, including three in the very first site. This means first of all that you can safely undertake Overlord even when your heavy weapons ammo is low, and a strategic-minded player can even plan to do the mission just after expending lots of ammo in order to "recharge".
Walkthrough
Arrival on Aite

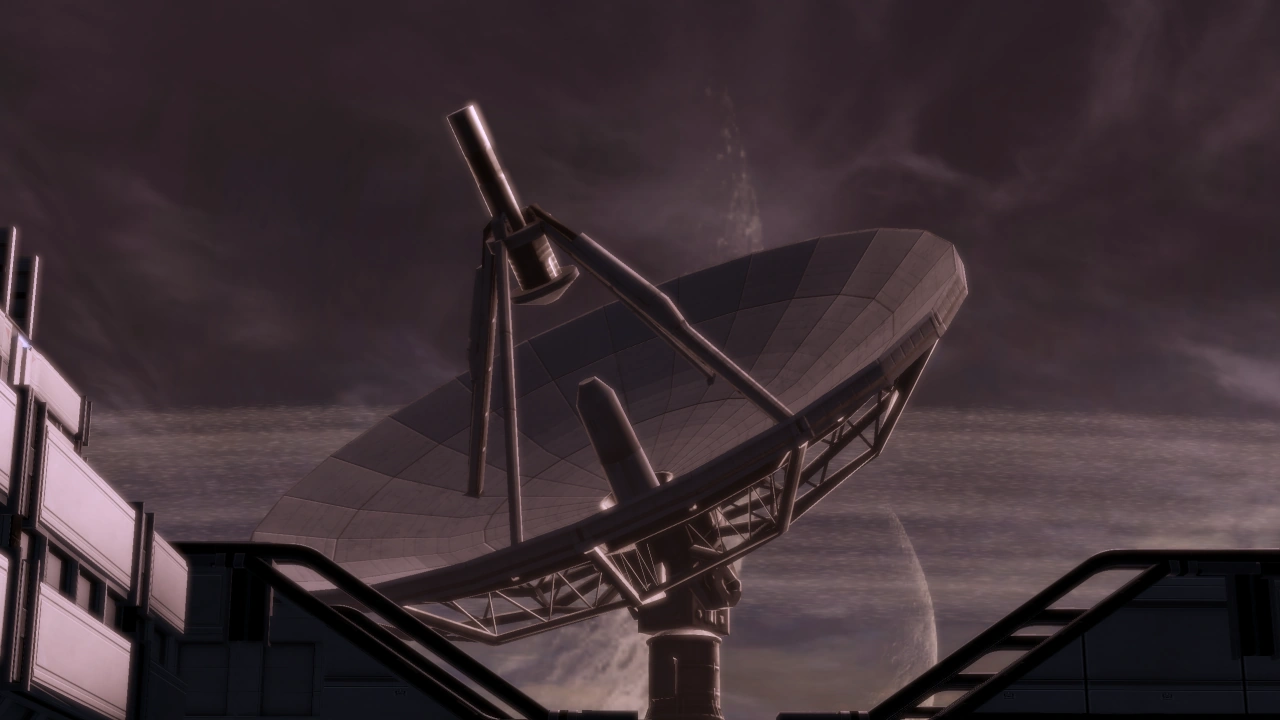
The Normandy flies over the planet and drops the M-44 Hammerhead, which lands on a pad near the facility. Once you land on Aite, Dr. Archer contacts you and gives you a brief rundown of the situation. The Cerberus team faces a possible virtual intelligence breakout, and Dr. Archer needs you to retract the transmission dish before the VI uploads its program off-planet. Before heading into the facility, head down the ramp next to the Hammerhead to retrieve some palladium (+1000 palladium). When you come back up, head to your right and all the way across the pad. In a small alcove on your left will be some power cells.
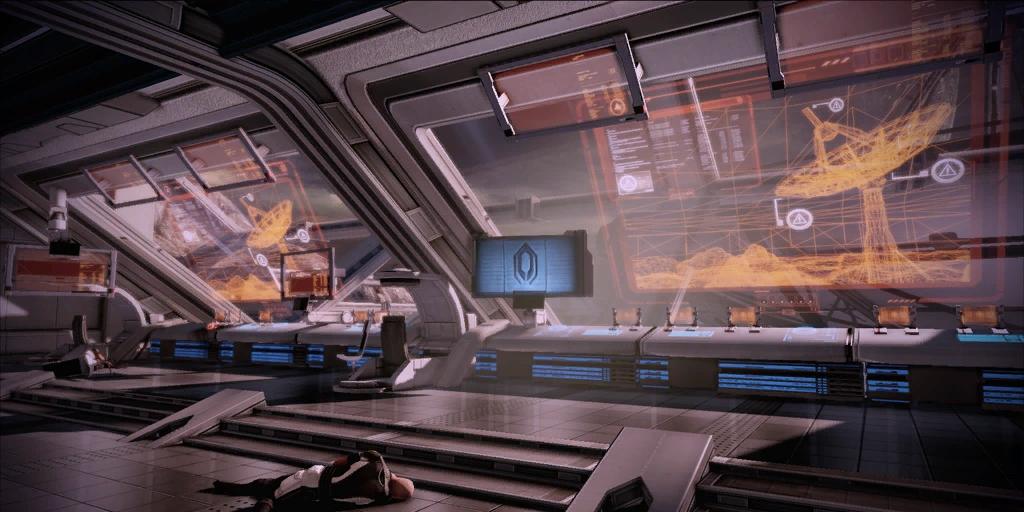
Run across the pad and enter the door. Once you are inside, an announcement says that you must check in with security to be logged in to the facility and have your weapons checked; however, no one is left to do that. Head down the ramps and when you reach the bottom, Archer appears on a monitor. Walk over to it and listen.
Archer says that he has locked himself in a computer room on the far side of the facility, there are geth everywhere, and the VI program has seized control of the geth. Once Archer finishes, proceed not through the door, but towards the security desk. To your left is a cracked window: shoot it, and the glass will shatter. Inside is a medical station, a Cerberus terminal with credits (+1125 credits) and a log from Archer. Grab the medi-gel and credits and listen to the log, then head out of the room. When you exit, move on to the door to the right of you and head inside. The other door out is locked, but in the room are the dish controls and a log from Archer. Listen to the log and then retract the dish.
Getting to the Antenna
The second the dish is fully retracted, you hear two voices, a standard computer voice, “System Error”, and the Rogue VI, which says something that seems like geth communications. Archer comes over the comm and says that the VI has overridden the controls and is still trying to beam itself off planet. You have to stop it before it does. Archer says that you need to destroy the antenna inside the dish, so he directs you to a tram on the lower level. The door heading back to the pad locks, so head to the other door and proceed.
As you move towards the tram, the VI comes over the PA and repeats the unintelligible voice, and the computer says that geth activity has been detected, and all personnel are to remain at their stations until an all clear is given. As you reach the first landing, there is a PDA with credits (+525 credits), access it and proceed. Keep heading down and open the door at the end of the passage.
Now get ready. The real fun is about to start: as you emerge into the next room, the facility’s mess hall, the computer welcomes you and gives the special of the day, egg salad. However there are numerous geth in the room as well. Geth Troopers, Geth Destroyers, Geth Rocket Troopers are waiting, so take them out from the cover near the door, however stay in cover because more geth will come out. More Troopers, Rocket Troopers, and another Destroyer will storm the room, however the Troopers will enter from the second level, so move back to keep in cover. An autosave will kick in when all the geth are down.
Combat Tips: There are four total waves of geth in this overall section: the first triggered when you enter, the second when the first is down and you start to approach either the "kitchen" or the upper floor, the third when you try to enter the kitchen or cross the upstairs, and the fourth at the very end coming from the door to the dish. So as you move forward always be prepared for sudden "ambush" as the geth can spawn suddenly and sometimes quite close to you. You also have the option to travel either through the kitchen or over the upper balcony, and the choice you make will change where most of the geth spawn, so pick what you're most comfortable with. Frequent use of a Combat Drone by an Engineer Shepard or Tali/Legion seems to preempt some of the waves from spawning - try to send the drone upstairs or far to the left so that it travels over the trigger zones early in the combat.
Once the geth are down, head across the room and access a cafe register for some credits (+450 credits) and the medical station for some medi-gel -- remember to be careful because if you haven't fought all the waves geth can suddenly spawn in the kitchen. The back room behind the kitchen contains some power cells. Then head to the upper level, to the right and a door will be accessible. Inside is another of Archer’s logs and a wall safe (+1125 credits), no bypass on this one. Once you are done in the room, head out and walk across the upper level, however remember that the fourth wave of geth spawns from the staircase at the far end of the room, so get into cover. You can take them out from the second floor or from the kitchen, depending on which way you approached. More Troopers, Rocket Troopers, and another two Destroyers are in this bunch, so make sure to keep them at a distance.
Once the final wave of geth is down, head though the door and inside is what appears to be a waiting area with bizarre music. There is a medical station for some medi-gel and some spare parts (+525 credits), so grab them before moving on. The next area is the tram, so save your game, and activate the tram.
Getting to the Dish
As you travel in the tram, Archer comes over the comm saying that the VI is aligning the dish manually and has a clear transmission range at the orbiting satellite. It is going to be tight. Tip: It's actually not going to be tight. There is no actual time pressure in this section, so no need to hurry and get yourself killed.
Once the tram stops, head out the side door and get to that antenna. When you open the door, there will be a series of mezzanine catwalks ahead. As you move forward on the catwalk there will be a set of steps downward into a room that contains some power cells.
Tip: Shepard is able to return to this area for quite some time throughout the next section, all the way until you enter the very bowl of the satellite dish, so if you don't need heavy weapon ammo right now you can save this as your extra stash and return for it later, particularly since picking up a power cells reloads all your other weapons as well.
Right at or slightly past the first steps downwards, there is a geth destroyer and two geth troopers that appear as you move forward along the catwalk. Take them out quickly or move backwards into cover. After the geth are taken care of, as you continue forward on the catwalk there is second set of steps downward into a room containing some palladium (+1000 palladium), a medical station with medi-gel, and another log.
Head back out and the computer will say again that a satellite broadcast window is opening soon, so no time to waste. Get to a terminal and extend the walkway into the dish. Keep moving and get to the base of the dish and get inside. However the VI apparently wants to get off-world, so just as you are about to reach the door, you are ambushed by Troopers and Rocket Troopers from the left. Get into cover and take out the attackers, and once they are down, bypass and unlock the door. Save your game, enter the room, and prepare for a hard fight.
Once inside the base of the dish, head just a bit to your right and get in cover because more geth attack. The first group includes a Geth Hunter so focus on it first. Move from cover to cover as necessary, there's plenty of it, but for now don't venture too far from the entrance as that not only increases the likelihood of getting flanked or surrounded, it also may trigger additional waves of geth before you've finished the first one. Advance gradually across the room to trigger the minimum number of geth at any one time.
The next wave includes a Geth Destroyer - don't let it get close with that flamethrower thing. There is no difference in the number of enemies whether you go left or right, although the Rocket Troopers in one of the later waves like to get up on the staircase/ramps and shoot down at you so keep that in mind when picking your cover. Keep watching your flanks as the geth severely outnumber you and keep moving around to your flanks. Keep to cover as much as you can, and keep destroying geth.
When you approach the far side of the room a Geth Prime appears, so switch your focus to it and again, stay in cover. The Prime likes to stay on the move, so keep your eye on it, move with it, from cover to cover, and take it down. Once the geth are down, head up the catwalks and destroy the dish.
Combat Strategy: The base of the dish battle can be easily completed by stationing your squadmates outside the door in cover/squatting down. Move forward slowly to trigger geth in the room and take them out with weapons/powers. Any time that you are overwhelmed, you can run back out the door to recharge your shields. The geth in this section tend to stay in cover so you have to flush them out carefully. Take care when doing this as you can inadvertently spawn more waves of geth if you move too far around the room. You should be able to slowly chip away at the geth and they will not follow you out the door. When you trigger the geth prime, stay back in the doorway and peek out to snipe/use powers. Be careful as your radar will be jammed as long as the geth prime is alive. Once the geth prime is down, take out the remaining geth in the area. Save your game before continuing. If you didn't get the power cells from the previous section, make sure to return to the sunken room up on the mezzanine catwalks and collect them before you go topside on the dish.
Destroying the Dish
When you get into the dish itself, Archer will say that you need to take out the support struts, so you'll need to destroy three of the four capacitors that are around the edge of the dish. Move up to one of the capacitors, the things that resemble fuel tanks, and access the terminal to lower its defenses. However the moment you open the first capacitor, shoot the tank and find cover immediately because the computer will comment about the dish’s structural integrity, the VI will say something angrily over the comm, and six Geth Rocket Troopers attack. Your goal is now to get any two other capacitors destroyed without getting killed.
Warning: The Geth Plasma Shotgun has no effect at all on the capacitors. The shotgun's bolts will still appear to hit the capacitors, but will not destroy them no matter how many shots are fired.
Combat Tips: You do not need to kill all, or even any, of the geth to make it through this section, you only need to destroy three of the four capacitors. However the more geth around the more dangerous shooting the capacitors will be. Also, a second wave of geth which at least on Hardcore/Insanity consists of a Geth Prime and two Geth Destroyers, will spawn as soon as you drop a second capacitor and will attempt to prevent you from destroying a third. So it's probably a good idea to destroy at least most of the initial Rocket Troopers before blowing the second capacitor. Then, for your second capacitor don't pick one adjacent to the first: instead travel all the way to the opposite side and blow that one. That keeps your options for which direction to go for a third capacitor far apart from each other, making it much harder for the geth to prevent you from reaching one.
After that you either have the option of engaging the rest of the geth, hopefully avoiding getting surrounded on the circular dish, or you can instead travel toward your third capacitor (usually doing so by going back the way you came, even though that's longer, will result in fewer geth encounters) and destroy only the geth that are in your way. If you choose the latter strategy then moving & shooting quickly will help you get to the capacitor before most of the geth. Also, as soon as you shoot your third capacitor all the geth will vanish instantly, along with any missiles that were streaming toward your back.
Combat Strategy: Don't make this battle a hard one. There is no reason to stay up on top on the dish and get cut to pieces. Place your squadmates into cover / squatting on the lower catwalk square core platform so that they are safely out of the way. Move up onto the dish and open the first terminal near the steps down into the dish. When you activate the terminal 6 rocket troopers will appear around the dish. Run back down the stairs you just came up from. Taking your time, carefully climb back up to the top of the stairs keeping the walls as cover between Shepard and the rocket troopers. Snipe/use powers to take out the closest rocket trooper avoiding rockets that come from several directions. Continue with the other rocket troopers you can target lock from the stairs. Once the closest rocket troopers are dead, slowly work around to the other 4 troopers. Take your time and run back down the stairs if you need to recharge your shields. Once the rocket troopers are dead, you can destroy the tank on the first terminal. Pick the second terminal either left or right from the first terminal and note the best path back to the stairs. Activate the second terminal and run back over to and down the stairs. A geth prime and 2 geth destroyers will spawn the instant you activate the second terminal. The geth prime will home in on Shepard but will get stuck topside on the walls and pipes if you move far enough down onto the catwalk square core platform. Shepard and your squadmates can carefully shoot upwards at the geth prime through gaps around the mezzanine located above you as the geth prime tries to get to Shepard. (You can't shoot through the mezzanine but the are large gaps on the sides of each mezzanine walkway above you that expose the geth prime. If you can shoot the geth, the geth can shoot back at you though.) If need be, you can sneak back up the stairs and snipe/use powers on the geth prime. Anytime you need to recharge your shields, go back down the stairs. Once the geth prime is dead, carefully eliminate the two remaining geth destroyers by going up the stairs and killing them from cover. The destroyers tend to get stuck on the walls and pipes in the area trying to get to Shepard leaving themselves completely exposed. After the geth are all killed, shoot the second tank that was exposed from the second terminal. Collect any ammo you might find and make your way to the third terminal. Activate the third terminal and shoot the tank right away. The cut scene will start immediately after this.
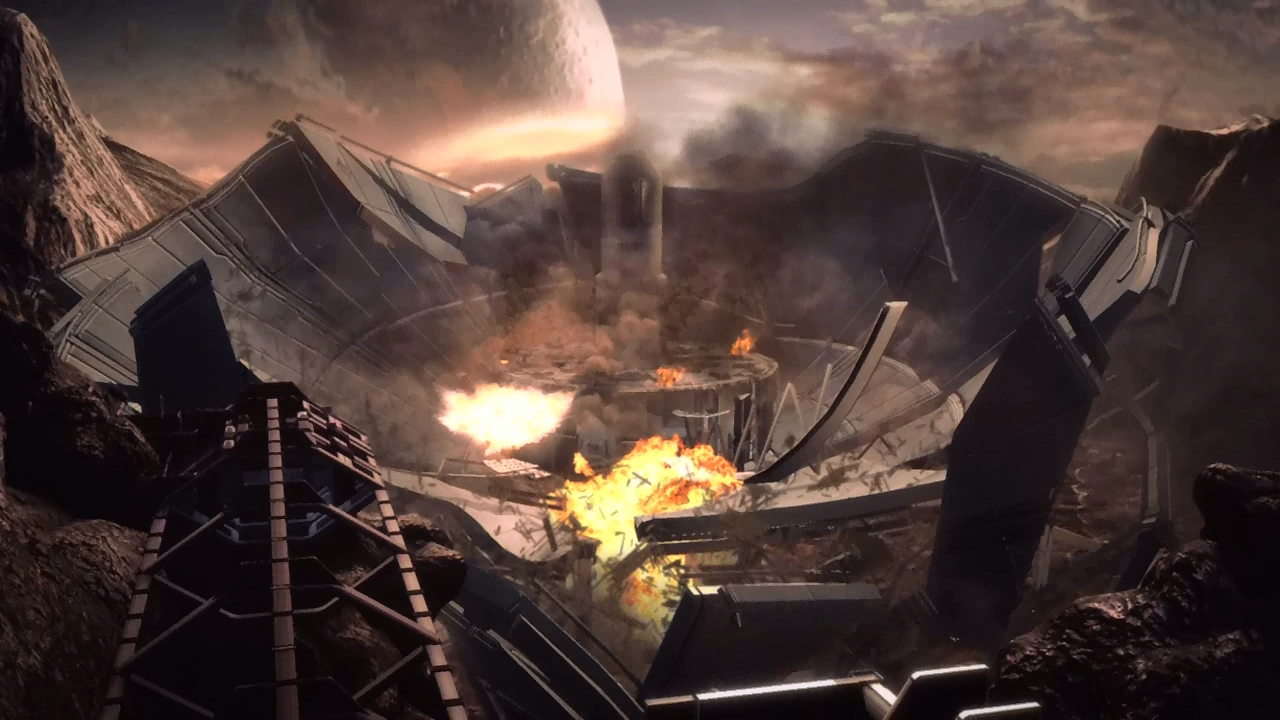
As soon as a third capacitor is destroyed, the combat ends instantly and you are treated to a cutscene where Shepard and the squad are watching the destruction; however, the whole dish starts to collapse. Shepard orders a retreat and the squad runs for it, jumps and lands safely on the catwalks around the dish. Archer comes up at this point to thank them, Shepard asks for an explanation, and Archer tells the squad to come with him.
The Situation
Dr. Archer thanks you for buying some time. Respond any way you choose. Continuing the conversation will give an overview of the project and explain what they were doing. They were trying to gain influence over the geth by interfacing a human mind with a VI, but something went wrong. Respond, but Archer will say they succeeded but the VI overpowered the test subject’s mind, Archer’s brother, and has evolved into a virus. Explore the various conversation options to learn more about what happened, and could happen. You can berate Archer, but he will say they couldn’t account for every possibility.
Archer will tell you that the VI has fortified itself in Atlas Station, and you need to override it from the facilities at Prometheus and Vulcan stations. Archer will explain that the lockdown procedure was in case of an emergency, and all three mission heads are required to override it. Archer will explain the override procedure, however since he is the only one left, he tells Shepard that the other two need to be done manually. Once he is done explaining, Shepard asks what if they need to terminate Archer’s brother; he hopes it won’t come to that.
Explore the various conversation options to learn about the project’s history, its goals, the other stations, and what went wrong with the experiment. When you have all the info you want, leave the conversation and Archer will say the rest of the stations are within driving distance and wishes you luck. If Legion is present, Archer will comment on him.
Before Leaving: Before you leave it is recommended you save your game as you can’t do so inside the Hammerhead. You should also grab the power cells hidden over around a corner on the shuttle pad if you haven't already.
Logs
“Status Report: Please inform the Illusive Man we've made great strides in our research. His doubts about the lack of progress are unwarranted. A demonstration is forthcoming.”
“Memo to all project personnel, I understand there is some concern handling live geth. I agree there is some risk, but the potential rewards are much greater. Someday your sons and daughters will thank you.”
“Memo to all project personnel. Congratulations on all your hard work. Tomorrow we take the next step forward. It will be a great day for Cerberus, and a greater day for humanity.”
“This is Project Overlord with an emergency message to Cerberus Command! We have experienced a catastrophic security failure and are requesting assistance! We - - what do you mean the outgoing comms are jammed? How can it do that?”
Enemies
Mission Summary
Transmission dish destroyed.
Surviving scientist located.
- Experience: 250 (312)
- Credits: 7,500
- Cerberus Funding: 3,750
- Credits Found: 3,750
- Resources
- Palladium: 2,000
Trivia
- When Shepard first encounters Dr. Archer and asks about the situation, he replies with the phrase "man's reach exceeding his grasp". The phrase is an old aphorism that illustrates making scientific achievements that are not yet understandable--what science can "reach" may exceed our "grasp" (comprehension).
| Assignment Index | Next Assignment → | |
|---|---|---|
| Assignments | Overlord: Vulcan Station |