|
This article or section needs to be cleaned up to conform to a higher standard of quality.
See this article's talk page or the editspace comment following the tag for details. |
Mass Effect 3 is based on Unreal Engine 3 and many settings can be modified in a way similar to Mass Effect and Mass Effect 2, allowing the user to mod, tweak or cheat.
Preface
Back Up Your Career
Using the modifications described in this article may alter your SP career permanently. It is recommended to backup your career for the option to revert back later on. The career files' default locations are in the following:
Windows XP:
Documents and Settings\%Username%\My Documents\BioWare\Mass Effect 3\Save
Windows Vista and up:
Documents\BioWare\Mass Effect 3\Save
The career folders are named in the format John_31_Soldier_160312_4a1d758 (first name, psych profile/history, class, date of creation, unique hash numbers).
There is also a profile file called LocalProfile.sav under the same folder in Documents\BioWare\Mass Effect 3\Save that you may want to backup. This file stores your achievements and bonus power unlocks.
Tools
Wenchy Coalesced Utility
This is the recommended editor for novices. It has a User interface. Easy to browse and search by address all .ini files that are in coalesced.bin container, and move values across different inis. You can copy or move one value at a time though.
TankMaster's Coalesce Tool is the best tool to use for advanced Coalesced editing. It decompiles files into text so you can easily search them, copy paste, and do advanced operations on them. To use it, simply drag and drop a Coalesced file (.bin) onto the .exe. To recompile, drag the manifest .xml file (.xml file with the same name as the file you decompiled, e.g. Coalesced.xml) back onto the .exe. This tool works properly with Type 3 and Type 4 values (add/subtract properties, located in DLC), allowing you to make mods that have far less bugs than if you used Gibbed's versions. It creates XML documents rather than JSON, but otherwise they are identical.
Gibbed Coalesced.bin Extractor | Gibbed DLC Coalesced.bin Extractor These tools work with the basegame Coalesced.bin and DLC ones (either or, but not both, there are two tools). It converts .bin into .json text files when you drag the coalesced.bin file onto the .exe. When you are done with editing, drag the decompiled folder onto the .exe again and it will compile a new .bin.
Note: Gibbed's DLC Coalesced.bin Extractor does not properly serialize Type 3 and Type 4 entries which will make duplicate elements appear in multiple places in the game, such as maplists and store items. You should use the TankMaster version if you want to edit DLC.
Note: This tool converts the file into .json format. This means you can use certain JSON-editors to see an overall structure, but navigating the text file itself will be different from what's described in this article. However, if you search for the parameters mentioned in this document, you should be able to find them.
Mass Effect 3 Tweaks has guides for modding ME3 through Coalesced edits, PCC editing, and using the console for modding. It additionally hosts mods for Mass Effect 3.
Mass Effect 3 Tweaks ModMaker is an online editor that lets you tweak the stats of many multiplayer variables such as wavelists, powers, and maps to name a few. Decompiling/recompiling files by hand is not required. It is designed to work with Mod Manager.
Mass Effect 3 Mod Manager is an end-user focused mod management tool for ME3, that automates installation and uninstallation of mods, as well as other user features such as DLC backup, keybindings injection, mixins and more. It also contains tools for developers like AutoTOC and a mod updater.
ME3 Explorer
A toolset with dozens of tools for modding every aspect of game: basic level and kismet editors, script decompiler, asset explorer, editors of packages (.pcc), table of contents (PCConsoleTOC.bin), DLC archives (.sfar), Conditionals (.cnd), text resources (.tlk) and more.
AmaroK86 DLC Explorer
A tool which is used to repack DLC archives (.sfar). Gained its fame in the "ME3 Explorer" package by the name "DLC Editor".
Warning: Editing DLC will cause the DLC fail the integrity check at the title screen. SFAR files that are modified will be a different size than the original. When you start ME3 it will present you with an error message saying that the DLC content cannot be verified (at the main menu). The DLC content will not be loaded. If you then try to load a game it will give you an error message that says you cannot load the savegame because the DLC is not present. You must use a DLC integrity-check bypass tool such as Launcher WV or Binkw32 (see "Enabling game console" below) or the DLC will not load.
If you lose your original DLC, go into Origin and Shop for Add-Ons to ME3. Then right click the corrupt DLC and select Repair. It will redownload the DLC for you.
Location of Configuration File
Note: Before making any edits, make sure to make a backup of an original Coalesced.bin file. If you happen to lose your Coalesced.bin file, right click on ME3 in Origin and do a repair install. It will find Coalesced.bin is invalid and download a new copy.
Windows XP/Vista/7 64bit:
Mass Effect 3\BIOGame\CookedPCConsole\Coalesced.bin
DLC configurations files are stored in a .sfar archive. It can be found in a specific DLC folder under DLC folder.
Mass Effect 3\BIOGame\DLC\%DLC_FOLDER_NAME%\CookedPCConsole\Default.sfar
After unpacking Default.sfar you should get a set of catalogue. Configuration files can be found here:
BIOGame\DLC\DLC_FOLDER_NAME\CookedPCConsole\Default_%DLC_FOLDER_NAME%.bin
Multiplayer warning
BioWare employees have stated in multiple forum sessions that single-player modifications are allowed, but changes that affect the multiplayer aspect of the game may result in a ban if you attempt to use them online.
Many of tweaks contained in this article will affect both SP and MP gameplay. If you choose to use them for SP, it is recommended that you switch to an unmodified Coalesced.bin for any multiplayer matches.
Misc Coalesced.bin Tweaks
This section is for assorted tweaks and cheats that enhance or alter gameplay.
Change HUD Size
As many of you have noticed, the HUD and subtitles in ME3 are rather small. Here is a tweak to change that:
Go to [biogame.ini > sfxgame > biohud]
safearearatiox=0.05
safearearatioy=0.05
Change these to 0.10, which will double the size of the HUD
Codex Voiceover Delay Length
This tweak delays the voiceover in Codex entries, effectively silencing it if given a large enough number.
Go to [bioui.ini > sfxgame > sfxgui > journalcodex]
fvoiceoverdelay = 999.0
Eliminate Store Mark-up
Go to [bioui.ini > sfxgamecontent > sfxgamechoiceguidata > storedata > normandy]
markuppercent = 0.1f
Change 01f to 0.0f.
This will eliminate the store mark-up at the Acquisition Board on the Normandy, allowing you to buy things there at the same price as at the various stores.
Note: You can change it to negative values for a discount, but anything equal or higher than 1.0f crashes the game at start up. Having too many credits while buying might also crash your game.
Unlock Stores and Bonuspowers
Stores: [bioui.ini > sfxgamecontent > sfxgamechoiceguidata > storedata > normandy > storeitemarray]
Bonuspowers: [bioui.ini > sfxgamecontent > sfxgamechoiceguidata > storedata > bonuspowers > bonuspowerarray]
To unlock each item, remove the part "PlotUnlockConditionalID=XXXX" from each line you wish to unlock.
Note: Leviathan DLC will revert these changes. You must edit the DLC coalesced in the same way. Extract Default_DLC_EXP_Pack001.bin from \\DLC_EXP_Pack001\Default.sfar with program "ME3 Explorer" > DLCexplorertool > File > Load > selectDLCpackage. and then edit the coalesced. After editing you need to replace the original Default_DLC_EXP_Pack001.bin in Default.sfar with your modified one.
Editing War Assets
Go to [bioui.ini > sfxgame > sfxgawassetshandler > allassets]
To change the value of a War Asset, edit the "StartingStrength" value. To negate the Galactic Readiness penalty, for example, you can double all the values.
Example:
(ID=0,AssetName="GAWAsset_AllianceEngineeringCorp",Type=GAWAssetType_Military,SubType=GAWAssetSubType_Ground,StartingStrength=260,GUIName=715401,GUIDescription=715515,bIsExploration=False,UnlockPlotStates[0]=0,GUICategoryID=1,DebugConditionalDescription="None",bShowNotificationOnAward=false,ImagePath="gui_codex_images.galaxyAtWar.GM_HumansNoArmor_512x256",NotificationImagePath="")
Note: Any changes to War Assets already collected in a game in progress will not be affected by any changes to Coalesced. (You can only change assets you don't already have.) For maximum effect, make any changes before starting a new game.
Find interaction objects more easily
Setting the highlight distance to make it easier to find interactable objects:
Go to [Biogame.ini > sfxgame > bioplayerselection]
maxhighlightrange=800
8000 works nicely and highlights objects far enough out to cover your visible range easily.
Split and rebind the Use/Cover/Roll/Storm keys
A better/easier way to improve the controls is installing the Intuitive Controls Mod.
Eliminate Weight Penalty
Go to [biogame.ini > sfxgame > sfxcharacterclass]
Change encumbrancemaxcooldown and encumbrancemincooldown both to -2.0f.
This will eliminate the weight penalty on your powers, allowing you to take the full 200% cooldown bonus with any combination of weapons.
Increasing encumbrancemaxcooldown will increase your base cooldown bonus. Changing it to -3.0f, for example, would result in a 300% cooldown bonus.
Note: Modifying this value will also affect multiplayer characters. Also, someone said : modifying this has no effect on the multiplayer encumbrance, only on the meter bar itself.
Exploration Tweaks
Expand the Normandy scan range
Go to [Biogame.ini > sfxgame > bioplanet]
m_fscandetectionrange=60
Anything over 240 should cover an entire system in one scan.
Increase the Fuel Capacity
Go to [Bioweapon.ini > sfxgame > sfxinventorymanager]
maxfuel=1000
This can go up to 9000 and beyond.
Improve Normandy Fuel Efficiency:
Go to [Bioweapon.ini > sfxgame > sfxinventorymanager]
fuelefficiency=1.5
The lower the number, the less fuel used (0.0 - Infinite).
Speed of the Planet Scan Reticle:
Go to [Bioinput.ini > sfxgame > sfxgamemodeorbital]
reticledegreespersecond=90
This is the reticle speed when not scanning. (Higher number = faster.)
scanningreticledegreespersecond=35
This is the default reticle speed when scanning. (Higher number = faster.)
Reapers' detection time and Chase
Go to [Biogame.ini > sfxgamecontent > sfxgalaxymapreaper]
Reduce all of these to nerf the reapers, or increase them to make searching for war assets more of a challenge.
How quickly they catch up to you:
acceleration = 5.0
How easily they find you:
m_fscandetectionrange = 300
How fast they can go:
maxspeed = 67.5
Get Maximum Level and Talents for all Squad Members
To generate enough skill points to max all skills at level 60:
Go to [biogame.ini > sfxgame > sfxgameconfig > levelrewards]
Go to the first line and change it to:
(Level=1,ExperienceRequired=0,TalentReward=11,HenchmanTalentReward=18)
Note: Because ME3 recalculates skill points at every scene load, you can add the extra points needed to any levelrewards line and it will update your character with the extra points automatically. If you are already partway through a game, add the extra to your next level.
Quick skip to level 60:
Go to [bioinput.ini > sfxgame > sfxgamemodedefault > bindings]
Add this line:
( Name="NumPadOne", Command="givexp 180000" )
Editing Store Contents
All stores can be found here: [bioui.ini > sfxgamecontent > sfxguidata > store]
Here you will find subsections, corresponding to each stores in the game ("asari" is nos astra, "batarian" is batarian state arms, and so on).
Each of those "stores" have a subsection called "storeitemarray". In this subsection, you will see items available from the store. Items are categorized in several 'types'. Type name is in capital letters. To unlock item, modify the item's line.
- For types - WEAPON and MOD:
setPlotUnlockConditionalID=XXXXtoPlotUnlockConditionalID=0
OR removePlotUnlockConditionalID=XXXX,PlotPurchaseID[0]=XXXXX
- For types - ARMOR, UNIQUEARMOR, QUEST, INTELBONUSES:
setPlotUnlockConditionalID=XXXXtoPlotUnlockConditionalID=0
OR removePlotUnlockConditionalID=XXXX
Example:
- For instant purchase access to level 5 SMG damage upgrade, go to "asari > storeitemarray = multiple", and modify the value:
(ItemType=TYPE_MOD,ItemClassName="SFXGameContent.SFXWeaponMod_SMGDamage",BaseCost=4000,PlotUnlockConditionalID=1535,PlotPurchaseID[0]=21304)
- to
(ItemType=TYPE_MOD,ItemClassName="SFXGameContent.SFXWeaponMod_SMGDamage",BaseCost=4000)
- When in game, you will be able to purchase the SMG damage mod from lvl 1 to 5 instantly from Nos Astra Sporting Goods.
Editing Intel Bonuses
The Intel bonus "store" can be found here: [bioui > sfxgamecontent > sfxguidata > store > intel > storeitemarray]
To unlock each intel bonus, remove the part ",PlotUnlockConditionalID=XXXX" from each intel drop you wish to unlock. Also, setting the value XXXX to 0 (zero) should do the trick too.
Note: This is tested and mostly working. The intel drops are unlocked and you can pick a bonus from each one but they don't disappear after as they're intended to and it allows both bonuses to be obtained.
Additionally, you can alter the values of the bonuses by going here: [biogame > sfxgame > sfxpawn > player > permanentgameeffects]
This list contains both of the unlocked bonuses for each of the 13 intel drops (26 total). Altering the field "Value=0.05" will alter the value of the bonus.
Example:
Value=0.05 = 5% bonus
Value=0.10 = 10% bonus
Editing FOV
Go to [bioinput.ini > sfxgame > sfxgamemodedefault > bindings]
( Name="F1", Command="set SFXGame.SFXCameraMode FOV 90" )
You can change "F1" to any other key you want. You can also change 90 to another value acceptable for you; it is said that the best FOV would be in the range of 90 to 120, inclusive[1].
Disable the intro movie (EA logo)
Go to [bioengine.ini > fullscreenmovie > startupmovies] and add a semicolon in front of the ME3_sig_logo value to show like this
;ME3_sig_logo
Tweaking the Bloom lighting setting
The setting can be found here: [Biogame.ini > sfxgame > bioworldinfo]
defaultpostprocesssettings=...
This value has a long string of settings, but you would only change
Bloom_Scale=0.2
and leave everything else intact.
The higher the value, the brighter/bigger Bloom lighting will be. Work with small increments, lower than 1 recommended. The game accepts negative values.
Turn the CommandMenu into toggle on/off instead of 'hold key' mode
Go to [BioInput.ini > sfxgame > sfxgamemodebase > bindings]
change this:
( Name="PC_ExitCommandMenu", Command="OnRelease ExitCommandMenu" )
into this:
( Name="PC_ExitCommandMenu", Command="ExitCommandMenu" )
Now you don't need to hold the button for the CommandMenu to stay active. Instead it is now a toggle: push once to activate, push again to exit.
Change reputation thresholds for dialog options
Go to [biogame.ini > sfxgame > sfxgame]
In this section is a variable "reputationthresholds". It lists the various lower limits for reputation dialog unlocks and can be tweaked however you see fit.
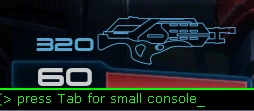
In-game Console
This section is for information on how to enable and use console on PC. Unlike bindings, console can be used any time in the game.
Enabling game console
Mini version of console. Covers one line of the height.
Using WarrantyVoider's DLC Patcher is the simplest and easiest way to enable the console without having to modify any files. WarrantyVoider's DLL will also unlock the full set of console commands, where hex editing the .exe does not and will not enable modified DLC.
Note: This DLL-based patcher mechanism is now maintained by Erik-JS on Github; you can click on the "Releases" link on Erik-JS' Github page to get the DLL files.
The patching method described below is kept for historical purposes only.
As of 2014 This tutorial is the most recent (and easiest) way to enable the console.
In order to use the console you require a HEX editor (e.g., HxD). In build 1.5.5427.124, you need to patch the bytes in MassEffect3.exe (at file offset 0x1515D64 from (20 1D 6B) to (30 A3 D5). Video tutorial
- In case that option not appear, try search at 0х1514564
- Origin Trilogy version has offset at 0x1515d60
- Origin Digital Deluxe Edition has offset at 0x1515d61
- The Ultimate Collectors Edition from 3DM has offset at 0x1514533 or 0x151456E
Note: An alternative to ingame console. There is a tool/plugin for managing key-bindings. You can assign buttons to execute commands from external text files. "External console"
Outdated game versions:
- Patch 1.2, build 1.2.5427.16: MassEffect3.exe, offset 0x1518AEC from (A0 7B 6B) to (60 31 D6).
- Patch 1.3. build 1.3.5427.46: MassEffect3.exe, offset 0x151DCEA from (90 38 6A) to (B0 91 D5).
- Patch 1.4. build 1.4.5427.111: MassEffect3.exe, offset 0x151DCEA from (40 7E 6B) to (90 25 68). Video tutorial
- Demo: MassEffect3Demo.exe, offset 0x150699C from (00 53 D3) to (70 47 D5).
Bear in mind that there could be no visible output from your commands, but they will work (if properly entered). For example, from the main menu, try the command open BioP_MPNov.
On non-US Windows setups you may need to redefine the console keys (Tilde usually doesn't work otherwise). Example:
coalesced.bin -> bioinput.ini/engine/console
consolekey = F11
typekey = F12
List of commands
With console commands you can instantly change different aspects of the game; for example, give Shepard and squad weapons, change camera modes, slow time, open maps and more.
All commands can be entered in console or keybinded (See "In-game Commands" chapter). Commands are NOT case sensitive (except for 'loadgame' and 'savegame'). If you want, you can write only small letters.
Updated list of tested commands with lots of commentary can be found here.
A master list was dumped by FemShep and can be found here. ME3Tweaks also has some information on console commands which can be found here.
Bindings and commands
This section is for information on commands that can be activated through key bindings. For a full list of keys that are bindable, see the UDK/UE3 documentation. The Xbox keys are bindable if bUseConsoleControls and AllowJoystickInput values in Coalesced are set to true. Xbox controls do not work in the interface without specific interface mods.
Keybinds are one or several console commands assigned to any key on keyboard or mouse or controller. Most of them do not work during cutscenes, depending on the command itself and its placement/s within the file, and some effects may be reset when you are not in control of Shepard. But if you want to make keybinds for cutscenes and other game modes, refer to this tutorial project: http://social.bioware.com/project/8334/
All normal mode keybindings are found here:
bioinput.ini > sfxgame > sfxgamemodedefault > bindings
On the right side of the editor you will see the existing keybindings. Scroll down to the bottom where there will be a blank line. Add any new bindings one at a time. Press 'enter' once you've entered a new binding to start a new line.
Keybinding command structure:
( Name="BUTTON",Command="COMMAND" )
For BUTTON, substitute any key not already in use on another binding.
For COMMAND, substitute any valid ME3 command.
Multiple commands can be executed on a single binding by separating them with <space>|<space> like this:
( Name="BUTTON",Command="COMMAND1 | COMMAND2 | COMMAND3" )
- Note: You can map commands to any key, provided it's not already used in-game. If it is, remap that key in-game using the Option/Key Bindings menu before you make any changes to the coalesced.bin file.
Keybind examples
Unlock EVERY weapon in the game (for real this time):
( Name="NumPadZero", Command="giveitem self argus | giveitem self avenger | giveitem self cobra | giveitem self collector | giveitem self falcon | giveitem self gethplasma | giveitem self mattock | giveitem self reckoning | giveitem self revenant | giveitem self saber | giveitem self valkyrie | giveitem self vindicator | giveitem self carnifex | giveitem self eagle | giveitem self ivory | giveitem self phalanx | giveitem self predator | giveitem self scorpion | giveitem self talon | giveitem self thor | giveitem self claymore | giveitem self crusader | giveitem self disciple | giveitem self eviscerator | giveitem self graal | giveitem self katana | giveitem self raider | giveitem self scimitar | giveitem self striker | giveitem self hornet | giveitem self hurricane | giveitem self locust | giveitem self shuriken | giveitem self tempest | giveitem self blackwidow | giveitem self incisor | giveitem self indra | giveitem self javelin | giveitem self mantis | giveitem self raptor | giveitem self valiant | giveitem self viper | giveitem self widow | giveitem self sfxweapon_shotgun_geth | giveitem self sfxweapon_assaultrifle_prothean" )
Enough credits to buy everything up to Level X:
( Name="NumPadSeven", Command="initcredits 9000000" )
To set your paragon / renegade scores:
( Name="NumPadEight", Command="setrenegade 1000" )
( Name="NumPadTwo", Command="setparagon 1000" )
To reset paragon / renegade scores, set value to 0.
( Name="NumPadEight", Command="setrenegade 0" )
( Name="NumPadTwo", Command="setparagon 0" )
Double movement speed while holding a key:
( Name="NumPadSix", Command="SloMo 2 | OnRelease SloMo 1" )
Unlimited ammo and grenades on Reload:
( Name="PC_Reload", Command="SwapWeaponIfEmpty | TryReload | initammo 999 | initgrenades 10")
To upgrade your current weapon to the SuperGun (9999 ammo / ultra-high damage):
( Name="F4", Command="givesupergun" )
To upgrade your current armor's damage protection:
( Name="F5", Command="givesuperarmor" )
For God Mode:
( Name="NumPadZero", Command="God" )
For no Power Cooldown period:
( Name="NumPadZero", Command="ENABLEPOWERCOOLDOWN 0" )
Note: Both God Mode and Power Cooldown effects reset every time you lose control of Shepard (cutscenes) and need to be re-enabled.
FlyCam
The flycam allows you to detach the camera from the player and fly around the map. It can be used to view normally inaccessible areas of the game or to set up screenshots from alternate angles. To make the flycam work properly you have to set up the following command...
( Name="F9", Command="ToggleFlyCam" )
Replace "F9" with a key of your choice.
in the following directories...
Bioinput.ini/sfxgame/sfxgamemodedefault
Bioinput.ini/sfxgame/sfxgamemodeflycam
Toggling the flycam during conversation mode will not allow you to move or look around unless you add the following commands (one line for each command) to Bioinput.ini/sfxgame/sfxgamemodeconversation
( Name="MouseX", Command="PC_LookX" )
( Name="MouseY", Command="PC_LookY" )
( Name="A", Command="PC_StrafeLeft" )
( Name="W", Command="PC_MoveForward" )
( Name="D", Command="PC_StrafeRight" )
( Name="S", Command="PC_MoveBackward" )
Making the "T" Key Available
By default, you're not able to remap the "T" key using the in-game options menu. To allow "T" to be remapped, look in each of these four sections:
bioinput.ini/sfxgame/sfxgamemodedefault/00000409/localizedbindings=(multiple)
bioinput.ini/sfxgame/sfxgamemodedefault/0000040c/localizedbindings=(multiple)
bioinput.ini/sfxgame/sfxgamemodegui/00000409/localizedbindings=(multiple)
bioinput.ini/sfxgame/sfxgamemodegui/0000040c/localizedbindings=(multiple)
and change the "T" in the entry:
"(Name="T", Command="PC_Talk")"
to whatever key you would like to use as the new multiplayer communication key (this key will then become unbindable in game.)
Launching commands from an external batch file
The batch file trick for executing multiple commands that worked with Mass Effect 2 will also work with Mass Effect 3. You can assign a key to execute a text file and in-game it will run whatever command in the text file through the console. Doing so makes it easy to change console commands on the fly by alt-tabbing and saving a new command into the text file.
( Name="NumPadNine", Command="exec powers.txt" )
Note: : the powers.txt file in this case should be placed under Mass Effect 3/Binaries folder, along side with MassEffect3Config.exe.
Editing Powers
This section is for information on adding / editing powers.
You will find the list of all the available powers in the game here:
[Biogame.ini > sfxgamecontent > sfxpowercustomaction]
Unlocking Bonus Powers
All available bonus powers can be found here:
bioui.ini > sfxgamecontent > sfxgamechoiceguidata > storedata > bonuspowers > storeitemarray
Remove the PlotUnlockConditionalID=XXXX or set XXXX to -1 on the desired powers to unlock them.
- Alternative method:
- A more apt option will be to replace the XXXX of desired power with XXXX of a power easily/already unlocked.
- Example:
-
- One may edit the reave power to become-
(ItemType=TYPE_POWER,PlotUnlockConditionalID=1281,BaseCost=3000,ItemClassName="SFXGameContent.SFXPowerCustomAction_Reave",ChoiceEntry=(srChoiceName=314878,srChoiceDescription=314879),Priority=9,BaseCost=5000,LargeImage="gui_codex_images.Store.STO_BonusPower_512x256",SmallImage="GUI_Icons.Notifications.NT_Store_256x1286")
XXXXoriginally was1276but here it is replaced with1281, allowing it to be unlocked along with fortification (unlocked after one good long paragon conversation with Mr. Vega), see Powers (Mass Effect 3) for reference.- Note: Some users report the correct number to use for Vega's conversation to unlock bonus powers is
1282, not1281.
To change the cost of switching bonus powers, go here:
[bioui.ini > sfxgamecontent > sfxgamechoiceguidata > storedata > bonuspowers > storeitemarray]
From here, change BaseCost=5000 to the value of your choice.
Temporarily Adding Any Power
There is a simple method to add any power to your character; however, all talents which are NOT Bonuspowers will be removed every time another save game is loaded or mission start. Just keep checking your active powers and hitting the Num Pad button you bind. On the other hand, Bonuspower talents (Carnage Marksman ProximityMine Decoy ProtectorDrone EnergyDrain InfernoGrenade Reave Stasis WarpAmmo Barrier GethShieldBoost Fortification ArmorPiercingAmmo Slam DarkChannel) will stay after load or mission start. You can add all bonus powers at once and they won't disappear.
Go into bioinput.ini...
bioinput.ini > engine > playerinput > bindings
copy and paste the following string into a blank line on the right of the editor
( Name="NumPadFour", Command="givepower self cryoammo" )
Simply change "cryoammo" to any power name [most correct names have no space, should be straight forward for all powers]
The command's effect will add a talent to your character with the first level already active. You can add as many powers as you like. Simply copy and paste into a second blank line, and change the Num Pad number key being targeted as well as the power itself).
Make Powers Penetrate Cover
In coalesced.bin,
biogame.ini > sfxgamecontent > sfxpowercustomaction >
For many, though not all, of the powers listed here, there is an attribute that includes the statement:
BlockedByObjects=true
If this is currently set to true, changing it to false will cause any radius effects of the power to ignore cover, making the power hit enemies behind cover. Note that this does not make the deployment of the power succeed if hitting cover would cause it to fail - i.e. it won't make your Pulls and Throws penetrate cover, even if set, but it can make your Nova (listed as discharge here) hit enemies behind cover.
In addition, some powers also list this statement, usually in the same line:
ImpactPlaceables=true
If set true, this will cause the power to hit Cerberus Engineer turrets. If false, it will either bass through the turret and ignore it, or simply give an error and not allow targeting, depending on the power in question. Most powers with this attribute are already set properly, but in some cases this can still be useful to change, such as setting some powers that are more effective against the Engineer himself to false will allow you to target him with the power directly, even if he's behind the turret.
NOTE: ImpactPlaceables may affect something besides Cerberus Engineer turrets, but nothing else is yet known.
Zero Squad Power Cooldown Time
In coalesced.bin,
biogame.ini > sfxgamecontent > sfxpowercustomaction >
This is a list of all powers in singleplayer. If a power has the following attribute:
henchmancooldowntime = (basevalue=number, some other irrelevant data)
Then it is useable by a squadmate. Change the number value to .5 for an almost instant recharge. The lower the number, the faster the cooldown.
Edit Power Combo Damage/Radius/Force
In coalesced.bin,
biogame.ini > sfxgamecontent > sfxgameeffect > powercombo > biotic
These are the attributes that control the damage, force, and radius of biotic combo explosions. Editing for tech bursts is in the other nearby sections, namely cryo, electric, and fire. Editing the values here appears to change the damage, force, or radius for detonating one rank 6 power with another rank 6 power.
Make powers penetrate shields/armors
This will allow you to use throw (or any other moving power) on enemy that has any armor like "armor" "shield" etc.
Go to Coalesced.bin,
biogame.ini > sfxgame > sfxgameconfig
In line bShieldsBlockPowers set value to "false"
Editing Weapons
Unlimited ammo
Go into bioweapon.ini > sfxgame > sfxweapon . Change the relevant variable into the one below. Default value is false.
binfiniteammo = true
For bottomless clip/no reload,
ammopershot = 0
To change it back, default value is 1.
Certain weapons (like the N7 Hurricane) have a special parameter for the ammo per shot. You'll have to find them using the method described below and edit their particular value.
Individual weapon tweaks
If you want to change the stats of an individual gun, such as fire rate, damage, or recoil go to
bioweapon.ini > sfxgamecontent > sfxweapon
From there you can open up the files for each weapon which are broken up into sections based on weapon type.
Here are some editable attributes.
- Accuracy
maxaimerror = (X= , Y= )
minxaimeror = (X= , Y= )
X and Y fields should be the same. Bigger values mean less accurate. The above two values fix accuracy when not holding down right mouse, or aiming. "zoomaimerror" is for accuracy while aiming.
maxzoomaimerror = (X= , Y= )
minzoomxaimeror = (X= , Y= )
- Crosshair size
maxzoomcrosshairrange = (X= , Y= )
minzoomcrosshairrange = (X= , Y= )
Crosshairs DO NOT scale with accuracy. It is up to you to fix the cross hair size to fit the accuracy that you have modded.
- Recoil
recoil = (X= , Y= )
This is for recoil when not aiming. Bigger means more recoil.
zoomrecoil = (X= , Y= )
This is for recoil while aiming.
- Damage
damage = (X= , Y= )
X is value of weapon damage at level I, while Y is the damage value at level X.
Note: Make sure you also fix the statbardamage attribute to be the same values as the damage that you set. There are two other values for stat bars: accuracy and rate of fire. These two values don't correspond with the values that actually affect the behavior of the gun.
- Rate of fire
rateoffire = (X= , Y= )
Both X and Y values should be the same.
- Weight
encumbranceweight = (X= , Y= )
Value x is the weight of the weapon at level I, and value Y is the weight at level X. For example, a weight of 1.4 means your cooldown will be slowed by -140% if you equip this weapon.
Customized weapon mods
To modify the mods usable by each weapon go to
bioweapon > sfxgame > sfxweapon > weapon type > base
and edit the allowableweaponmods field.
Example: Adding SFXGameContent.SFXWeaponMod_SMGMagSize to SniperRifle unlocks the SMG Heat Sink to the list of possible mods for the sniper rifle.
Customizing squad member loadouts
biogame.ini > sfxgame > sfxplayersquadloadoutdata > henchloadoutinfo
then change the appropriate henchman's line.
Example: Change
(ClassName=SFXPawn_Tali,WeaponClasses=(LoadoutWeapons_HeavyPistols,LoadoutWeapons_Shotguns))
to
(ClassName=SFXPawn_Tali,WeaponClasses=(LoadoutWeapons_AssaultRifles,LoadoutWeapons_HeavyPistols))
Tali's weapon set is now assault rifles and heavy pistols.
Note: Squadmates are only allowed to equip up to 2 weapons. Trying to mod them to take on more will be useless since selecting their weapons in the HUD ingame would only allow for 2.
Disable Enemy Grenades or Change Grenade Frequency
You can change the frequency that grenades are thrown (both smoke and frag) by changing the difficulty level configuration in Coalesced.bin. This setting is per difficulty level, per enemy type.
In a Coalesced editor, open:
biodifficulty.ini > sfxgame > sfxdifficultyhandler > level5difficultydata
Difficulty level range from 1 to 5, where "Insanity" is 5. The example above, level5difficultydata is for insanity. Choose the one you want to modify.
Next, choose the enemy type of modify. In this case, Centurion. Find the section that reads StatName=SmokeFrequency,StatRange=(X=1f,Y=2f), and change the x and y values. The higher the number, the less often they will use smoke grenades. You can also change GrenadeFrequency in the same way.
Editing Armor and Casual Appearance
This section is for customizing armor and appearances and the bonus stats.
All armor and appearances can be found here: [biogame.ini > sfxgame > sfxplayercustomization]
Unlocking Armor
armappearances- Armhelmetappearances- helmetlegappearances- Legshoulderappearances- Shouldertorsoappearances- Torsofullbodyappearances- Non-component armor
To unlock, set the PlotFlag for the armor that you want to -1.
Example:
(Mesh=(Male="BIOG_HMM_ARM_SHP_R.SHPa.HM...lthBonus"),Id=0,Name=339526,Description=339527,PlotFlag=-1,Type=CustomizableType_Arms)
Editing component armor bonuses
List of all component armor bonuses:
"SFXGameContent.SFXGameEffect_PartBasedArmor_HealthBonus"
"SFXGameContent.SFXGameEffect_PartBasedArmor_AmmoCapacityBonus"
"SFXGameContent.SFXGameEffect_PartBasedArmor_MeleeDamageBonus"
"SFXGameContent.SFXGameEffect_PartBasedArmor_PowerCooldownBonus"
"SFXGameContent.SFXGameEffect_PartBasedArmor_PowerDamageBonus"
"SFXGameContent.SFXGameEffect_PartBasedArmor_ShieldBonus"
"SFXGameContent.SFXGameEffect_PartBasedArmor_ShieldRegenBonus"
"SFXGameContent.SFXGameEffect_PartBasedArmor_WeaponDamageBonus"
"SFXGameContent.SFXGameEffect_PartBasedArmor_ConstraintDamageBonus"
Each gives a 10% bonus to that stat.
Note: ConstraintDamageBonus is headshot damage bonus. Adding _Weak to the end after Bonus will halve the effect to 5%.
For this example, the arm piece of the N7 armor (the first item on the list) is edited to become this:
(Mesh=(Male="BIOG_HMM_ARM_SHP_R.SHPa.HMM_ARM_SHPa_Slv_MDL",Female="BIOG_HMF_ARM_SHP_R.SHPa.HMF_ARM_SHPa_Slv_MDL"),GameEffects=("SFXGameContent.SFXGameEffect_PartBasedArmor_HealthBonus","SFXGameContent.SFXGameEffect_PartBasedArmor_AmmoCapacityBonus","SFXGameContent.SFXGameEffect_PartBasedArmor_MeleeDamageBonus","SFXGameContent.SFXGameEffect_PartBasedArmor_PowerCooldownBonus","SFXGameContent.SFXGameEffect_PartBasedArmor_PowerDamageBonus","SFXGameContent.SFXGameEffect_PartBasedArmor_ShieldBonus","SFXGameContent.SFXGameEffect_PartBasedArmor_ShieldRegenBonus","SFXGameContent.SFXGameEffect_PartBasedArmor_WeaponDamageBonus","SFXGameContent.SFXGameEffect_PartBasedArmor_ConstraintDamageBonus"),Id=0,Name=339526,Description=-1,PlotFlag=-1,Type=CustomizableType_Arms)
This piece will now contain EVERY bonus stat available. Copy-paste the GameEffects terms into other armor pieces to give them all stats.
You can also add these effects to the "No Helmet" component if you prefer to play that way.
Editing complete armor set bonuses
Complete armor sets (non-component) can also be tweaked this way. The bonus stats for these armors are below and can be added to all armor in the same method as adding to the components above.
"SFXGameContent.SFXGameEffect_UniqueArmor_BloodDragon"
"SFXGameContent.SFXGameEffect_UniqueArmor_Cerberus"
"SFXGameContent.SFXGameEffect_UniqueArmor_Inferno"
"SFXGameContent.SFXGameEffect_UniqueArmor_Reckoning"
"SFXGameContent.SFXGameEffect_UniqueArmor_Tank"
"SFXGameContent.SFXGameEffect_UniqueArmor_Terminus"
"SFXGameContent.SFXGameEffect_UniqueArmor_Collector"
For this example, all custom armor powers are added to the Inferno armor that is inherited from ME2:
(Mesh=(Male="BIOG_HMM_ARM_SHP_R.FBDa.HMM_ARM_FBDa_MDL",Female="BIOG_HMF_ARM_SHP_R.FBDa.HMF_ARM_FBDa_MDL"),GameEffects=("SFXGameContent.SFXGameEffect_UniqueArmor_Tank","SFXGameContent.SFXGameEffect_UniqueArmor_Inferno","SFXGameContent.SFXGameEffect_UniqueArmor_Cerberus","SFXGameContent.SFXGameEffect_UniqueArmor_Terminus","SFXGameContent.SFXGameEffect_UniqueArmor_Collector","SFXGameContent.SFXGameEffect_UniqueArmor_Reckoning","SFXGameContent.SFXGameEffect_UniqueArmor_BloodDragon"),Id=0,Name=711024,Description=711025,PlotFlag=20988,Type=CustomizableType_Torso)
These effects do appear to stack in-game.
Changing Armor Appearances
Go to [biogame.ini > sfxgame > sfxplayercustomization]
The default line for the armor's helmet appearance:
(Mesh=(Male="biog_hmm_hgr_shp_r.SHPa.HMM_HGR_SHPa_MDL",Female="BIOG_HMF_HGR_SHP_R.SHPa.HMF_HGR_SHPa_MDL",bHideHair=True),Id=0,Type=CustomizableType_Helmet)
Changing the mesh reference in the line so that it would look as follows:
(Mesh=(Male="biog_hmm_hgr_shp_r.SHPc.HMM_HGR_SHPc_MDL",Female="BIOG_HMF_HGR_SHP_R.SHPc.HMF_HGR_SHPc_MDL",bHasBreather=True,bHideHead=True,bHideHair=True),Id=0,Type=CustomizableType_Helmet)
This would result in the armor using Death Mask helmet model, complete with the flanging effect when Shepard speaks.
Removing the mesh reference completely in the line so that it would look as follows:
(Id=0,Type=CustomizableType_Helmet)
This results in the helmet mesh being removed, leaving Shepard without any headgear. Neither modification alters the armor bonuses in any way, and is purely cosmetic.
Unlocking Casual Appearances
Go to [biogame.ini > sfxgame > sfxplayercustomization > casualappearances]
To unlock, set the PlotFlag for the armor that you want to -1.
Example:
(Mesh=(Male="BIOG_HMM_ARM_CTH_R.CTHl.HMM_ARM_CTHl_MDL",Female="..."),Id=9,PlotFlag=-1,Type=CustomizableType_Torso)
Adding a new casual appearance
Go to [biogame.ini > sfxgame > sfxplayercustomization > casualappearances]
Copy the last line to a new line and replace the Male and Female parameters' with the name of the new mesh.
Next, set new Id field (make sure, it's not a existing id) to add this new outfit.
Example:
(Mesh=(Male="biog_hmm_arm_nkd_r.NKDb.HMM_ARM_NKDb_MDL",Female="..."),Id=10,PlotFlag=-1,Type=CustomizableType_Torso)
References
| Mass Effect 3 Guides | |||
|---|---|---|---|
| Completion | Walkthrough • Morality • Search and Rescue • Equipment and Items | ||
| Classes | Adept • Engineer • Infiltrator • Sentinel • Soldier • Vanguard | ||
| Other | Squad Members • Power Combos • PC Tweaks • Interrupts • Merchants • The One and Only | ||