m (rm duped categories) |
m (→Preparation: grammar) |
||
| (25 intermediate revisions by 14 users not shown) | |||
| Line 6: | Line 6: | ||
== Preparation == |
== Preparation == |
||
| − | [[Tali'Zorah vas Normandy]] is a mandatory squadmate for this mission, unless she died in the [[suicide mission]] from [[Mass Effect 2]]. In that case [[Admiral Xen]] will guide you through the mission but not be a squadmate. Tali has [[Energy Drain]], which might just save your life on this mission, and [[Sabotage]], which temporarily hacks any synthetic into fighting for your side. |
+ | [[Tali'Zorah vas Normandy]] is a mandatory squadmate for this mission, unless she died in the [[suicide mission]] from [[Mass Effect 2]]. In that case [[Admiral Xen]] will guide you through the mission but will not be a squadmate. Tali has [[Energy Drain]], which might just save your life on this mission, and [[Sabotage]], which temporarily hacks any synthetic into fighting for your side. |
| − | Since this mission is aboard a geth ship, you will ''only'' face synthetics. Spam Sabotage and you'll basically have a four-person squad all mission long. Regardless of whether you have Tali with you, assessing your team's reactions about geth and the ability to produce [[tech burst]]s often are considerations to think about when choosing who to bring with you. Squadmates with anti-shield capabilities, Kaidan or Ashley (depending on which one of them |
+ | Since this mission is aboard a geth ship, you will ''only'' face synthetics. Spam Sabotage and you'll basically have a four-person squad all mission long. Regardless of whether you have Tali with you, assessing your team's reactions about geth and the ability to produce [[tech burst]]s often are considerations to think about when choosing who to bring with you. Squadmates with anti-shield capabilities, Kaidan or Ashley (depending on which one of them is alive), EDI and Garrus make good choices here. If you have it, Disruptor Ammo, Overload, and similar anti-shield powers will be useful. |
If you have it as a bonus power, consider equipping [[Energy Drain]] on yourself as it can both drain geth shields and restore yours. Alternatively, equipping [[Defense Matrix]] and keeping it up throughout the mission will give you an instant shield restore: you will navigate through geth-filled areas of the dreadnought that are ''very'' damaging to shields. |
If you have it as a bonus power, consider equipping [[Energy Drain]] on yourself as it can both drain geth shields and restore yours. Alternatively, equipping [[Defense Matrix]] and keeping it up throughout the mission will give you an instant shield restore: you will navigate through geth-filled areas of the dreadnought that are ''very'' damaging to shields. |
||
| Line 29: | Line 29: | ||
Two waves of geth will appear the moment you enter the corridor. It's possible to just stay put and let both waves come to you; if you'd like to be more aggressive, a raised control post to the right offers flanking potential. In any case, your squadmates will tell you when it's safe to move, at which point you should head up the hall and take a left to find a maintenance lock. A small ramp to the left, just before the maintenance lock, has some geth data you can salvage for 1250 credits. Once you've activated it, you'll want to sprint. Dawdling inside the maintenance lock for too long will result in the electrical shockwave frying you and resulting in the game over screen. |
Two waves of geth will appear the moment you enter the corridor. It's possible to just stay put and let both waves come to you; if you'd like to be more aggressive, a raised control post to the right offers flanking potential. In any case, your squadmates will tell you when it's safe to move, at which point you should head up the hall and take a left to find a maintenance lock. A small ramp to the left, just before the maintenance lock, has some geth data you can salvage for 1250 credits. Once you've activated it, you'll want to sprint. Dawdling inside the maintenance lock for too long will result in the electrical shockwave frying you and resulting in the game over screen. |
||
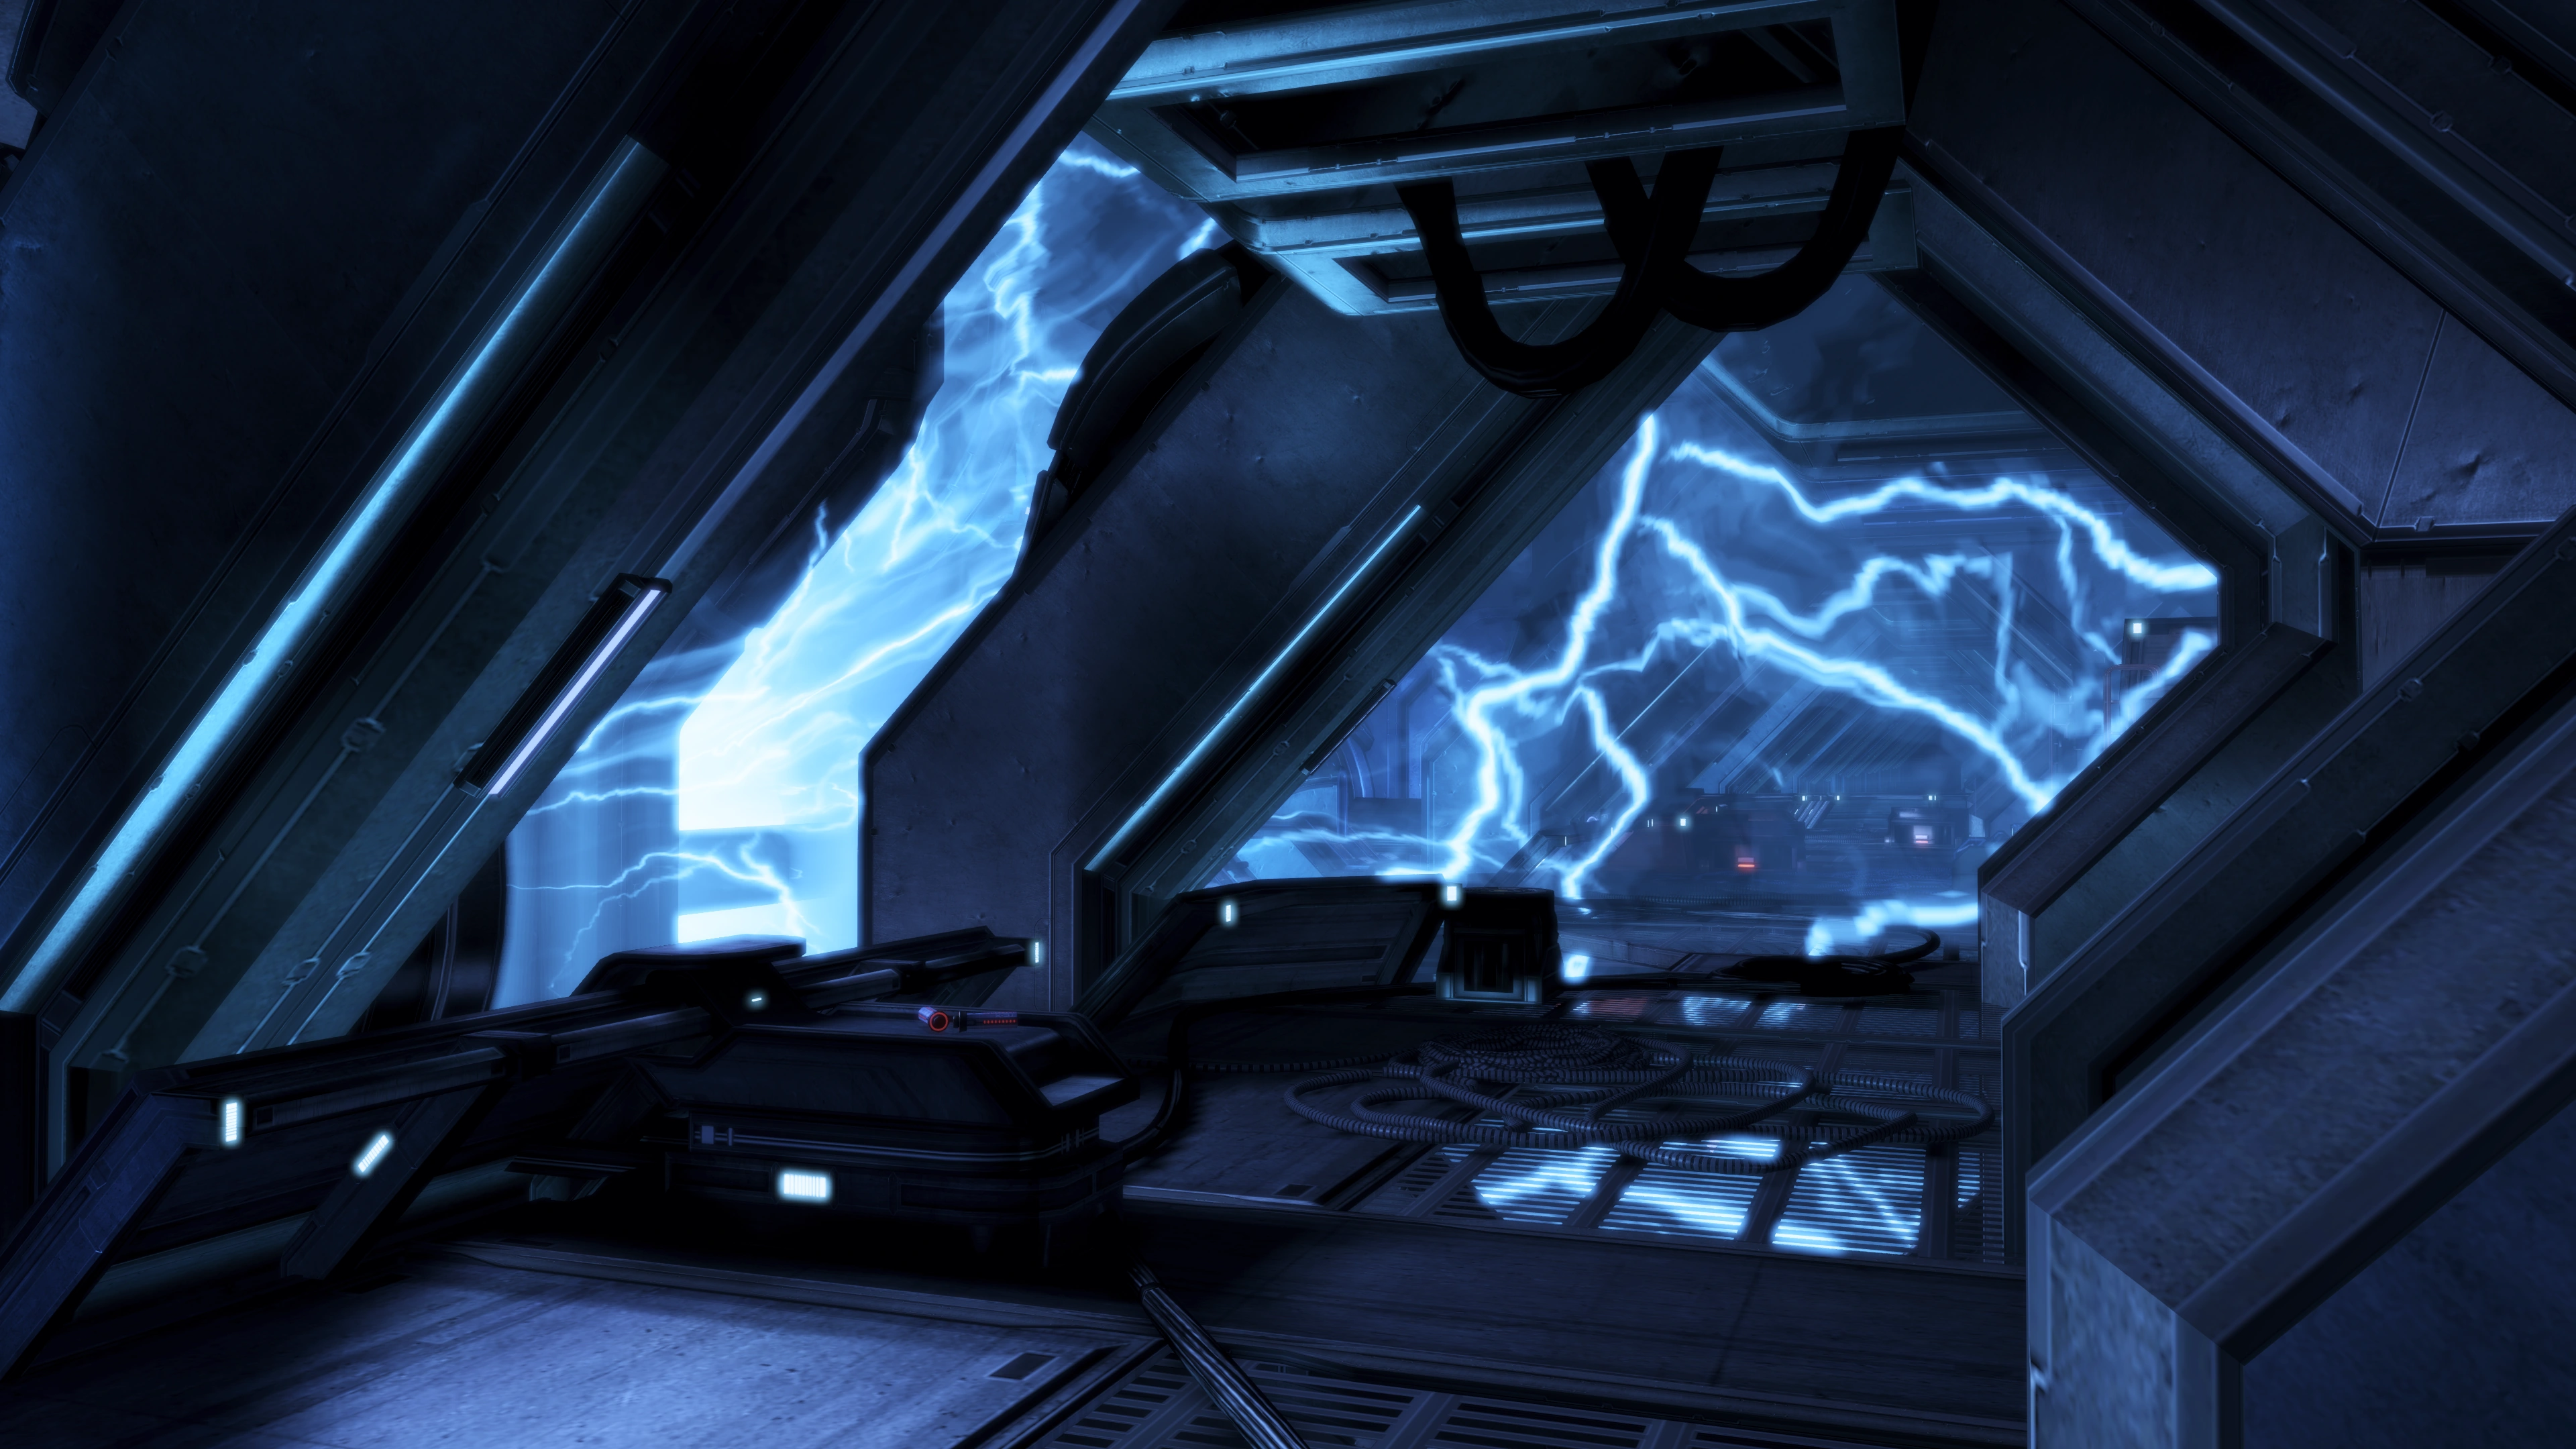
| − | [[File:Geth dreadnought - firing chamber maintenance lock.png|right|290px|The view inside the maintenance lock might be mesmerizing, though it's deadly]]You are now on the opposite side of the main battery, but the shockwaves haven't finished yet. |
+ | [[File:Geth dreadnought - firing chamber maintenance lock.png|right|290px|The view inside the maintenance lock might be mesmerizing, though it's deadly]]You are now on the opposite side of the main battery, but the shockwaves haven't finished yet. |
| + | You'll almost immediately be engaged by the geth. If you go straight forward from where you start, you can take a ramp to a catwalk where the geth are shooting down at you from, but this exposes you to a lot of fire very quickly. |
||
| ⚫ | Alternatively, you can turn right from your starting point and take a ladder up to the other side of same catwalk, but the same problem occurs. You'll have to climb up eventually, though, because the way forward is a ladder on the far side of that catwalk. Clear the area and advance |
||
| ⚫ | Alternatively, you can turn right from your starting point and take a ladder up to the other side of same catwalk, but the same problem occurs. You'll have to climb up eventually, though, because the way forward is a ladder on the far side of that catwalk. Clear the area and advance all the way to hit a dead end. Take the ramp on your left up to another control post, which has a locked door perpendicular the main cannon. |
||
| ⚫ | |||
| + | Bypass the door and go through a second door to reach the elevator platform area. |
||
| ⚫ | Proceed up the ladder, |
||
| + | |||
| + | Before using the elevator platform, go around the outside to the right for more geth data (1875 credits). |
||
| + | |||
| ⚫ | Move onto the platform and access the platform controls. A miniature cutscene will be triggered as you and your squad progress upward, showing two geth with [[ML-77 Missile Launcher]]s. They will shoot the bottom of the platform, causing it to collapse. Sprint forward toward Tali before it collapses completely, and she'll help you up. Loitering there for a while for whatever reason will cause the platform to collapse, taking you with it and resulting in the game over screen. |
||
| + | |||
| ⚫ | Proceed up the ladder, collect and go past a med kit, and go through the door to enter the drive core. A cutscene will be triggered. The drive core will reveal the hardware the Reapers are using to distribute their control signal: [[Legion]] (or a "[[Geth VI]]" if Legion is absent), who will shut down the signal if you release them. |
||
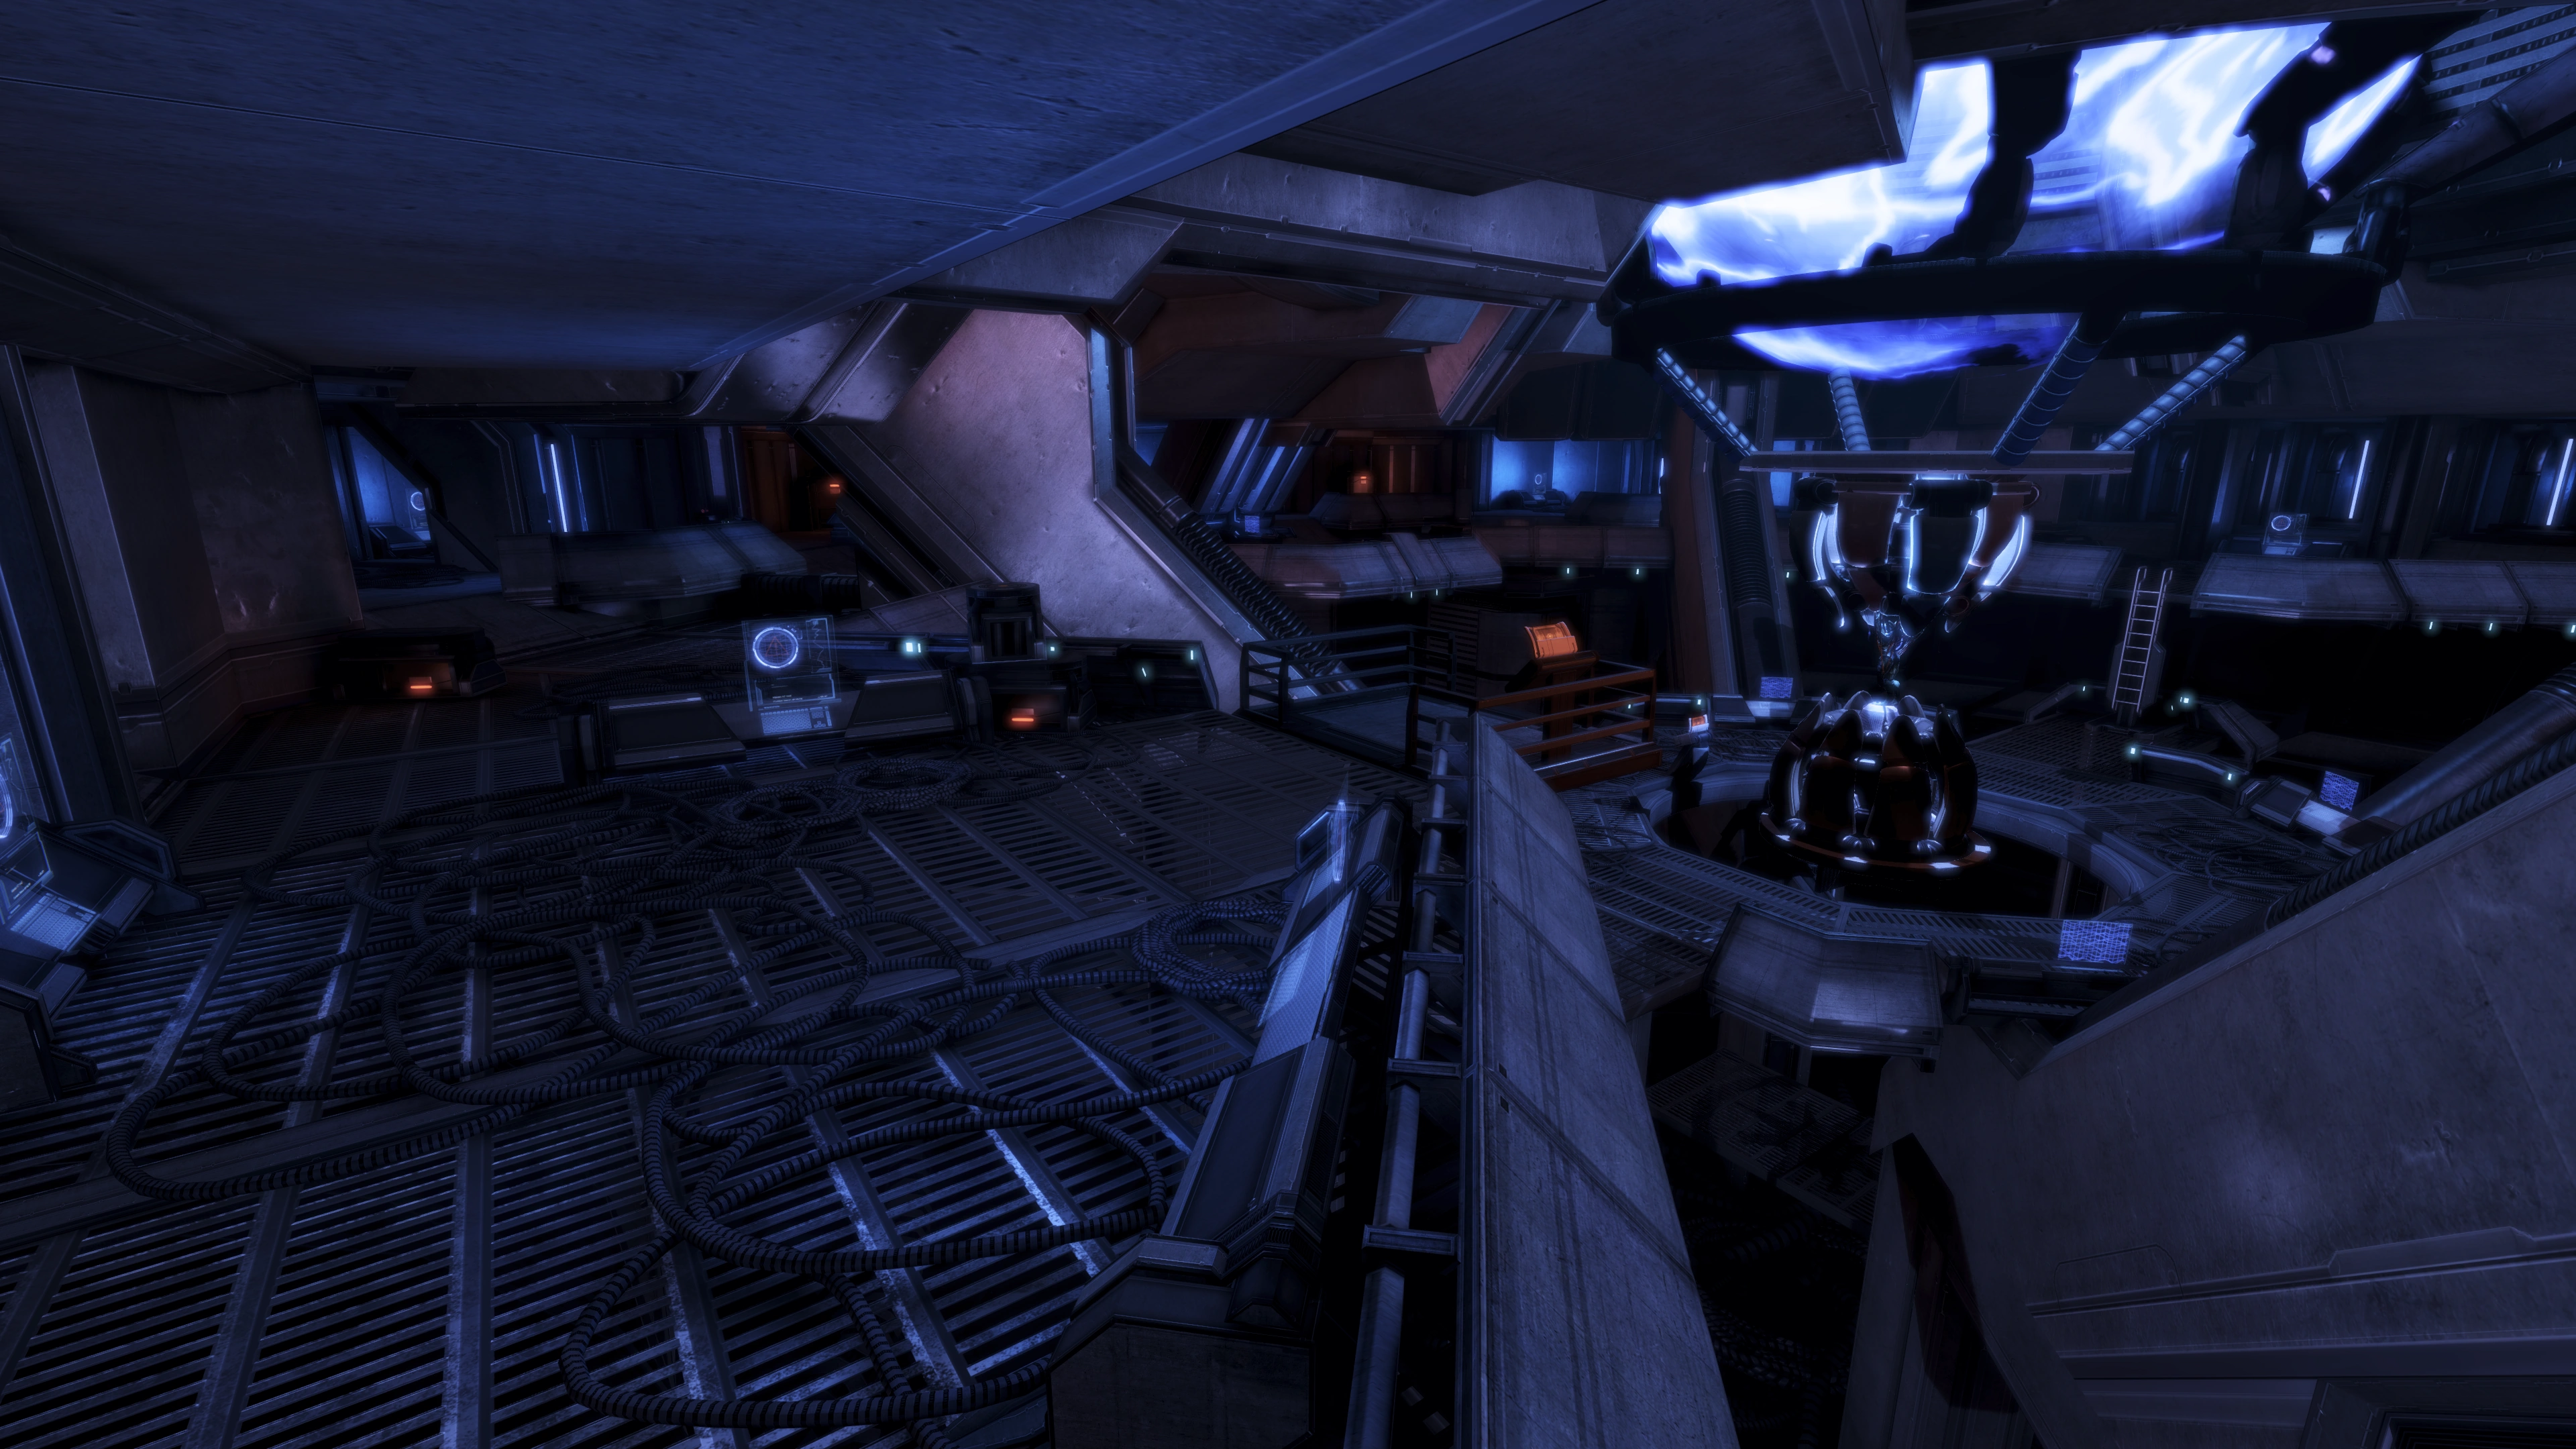
[[File:Geth dreadnought drive core layout.png|left|328px|You'll be fighting off waves of geth all the way till you reach the ladder on the far side once you push the button that frees the geth unit]]Grab the [[Assault Rifle Precision Scope]] and geth salvage (2500 credits) and then take either the platform or the ladder up to the top. If you took the ladder move around the outside to the data core override. Access the panel to free Legion or the Geth VI, who will then shut down the dreadnought's drive core. |
[[File:Geth dreadnought drive core layout.png|left|328px|You'll be fighting off waves of geth all the way till you reach the ladder on the far side once you push the button that frees the geth unit]]Grab the [[Assault Rifle Precision Scope]] and geth salvage (2500 credits) and then take either the platform or the ladder up to the top. If you took the ladder move around the outside to the data core override. Access the panel to free Legion or the Geth VI, who will then shut down the dreadnought's drive core. |
||
| Line 61: | Line 67: | ||
*After the mission, talking to [[Steve Cortez]] in the shuttle bay will result in him remarking on the geth fighter that Shepard's squad flew out of the dreadnought, and that the craft has already been sent to Admiral Hackett's team for study. |
*After the mission, talking to [[Steve Cortez]] in the shuttle bay will result in him remarking on the geth fighter that Shepard's squad flew out of the dreadnought, and that the craft has already been sent to Admiral Hackett's team for study. |
||
*If EDI is brought along for the mission, even though her physical body is standing right next to Shepard, she would still contact the Commander through the comm system. |
*If EDI is brought along for the mission, even though her physical body is standing right next to Shepard, she would still contact the Commander through the comm system. |
||
| − | * |
+ | *Jos Hendriks (level designer) explained on twitter that the tunnel scene was made by rotating the whole world around the player, and putting invisible barriers around to prevent the player falling outside the tube <ref>https://twitter.com/Sjosz/status/1075098592912715777</ref> |
| + | *For N7 Day 2013, a few tidbits of behind the scenes information for this mission were shared by BioWare developers. |
||
| + | **According to designers Jos Hendriks and Dave Feltham, the mission was supposed to include gravitational shifts occurring mid-mission within the ship, but they couldn't get it to work right.<ref>https://twitter.com/DaveFeltham/status/398487966135230464</ref> |
||
| + | **This very wiki, among other sources, was consulted by Jos Hendriks for spaceship structure and layout. This ended up influencing the geth dreadnought's design and the rail gun sequence.<ref>https://twitter.com/Sjosz/status/398494834668748800</ref><ref>https://twitter.com/Sjosz/status/398495688482234368</ref> |
||
| + | **The spacewalk sequence took 3-4 months to develop, and almost ended up getting cut due to difficulties in getting it right.<ref>https://twitter.com/Sjosz/status/398483238944899072</ref> It was primarily inspired by the hallway sequence in the 2010 film [[wikipedia:Inception|Inception]].<ref>https://twitter.com/Sjosz/status/398489550441304065</ref> One of the early ideas featured a fight with turrets on the docking arm, but was scrapped for pacing reasons.<ref>https://twitter.com/Sjosz/status/398485636673335297</ref> The spacewalk tunnel's breaking off originally happened during gameplay and not in the subsequent cutscene, but players didn't naturally turn around and notice the event.<ref>https://twitter.com/Sjosz/status/398491900836986880</ref> |
||
| + | **The speed of slugs fired at the main cannon section is less than 1/1000th of its actual speed in the lore.<ref>https://twitter.com/Sjosz/status/398486489610203136</ref> It proved impossible for players to anticipate and prepare for the shockwaves at higher speeds.<ref>https://twitter.com/Sjosz/status/398486730682015744</ref> |
||
| + | **The elevator sequence was originally all gameplay with a fight, though it was streamlined for pacing reasons.<ref>https://twitter.com/Sjosz/status/398493616122773504</ref> |
||
==References== |
==References== |
||
| Line 68: | Line 80: | ||
{{SeriesNavigation|previous=Priority: Perseus Veil|next=Priority: Rannoch|index=Missions#Plot Missions 2|type=Mission|series=[[Mass Effect 3]]}} |
{{SeriesNavigation|previous=Priority: Perseus Veil|next=Priority: Rannoch|index=Missions#Plot Missions 2|type=Mission|series=[[Mass Effect 3]]}} |
||
| − | <!-- |
+ | <!--interwiki Links--> |
| + | [[de:Priorität: Geth-Schlachtschiff]] |
||
| + | [[fr:Priorité : cuirassé geth]] |
||
[[ru:Приоритет: Дредноут Гетов]] |
[[ru:Приоритет: Дредноут Гетов]] |
||
| + | [[uk:Пріоритет: Дредноут ґетів]] |
||
[[Category:Mass Effect 3]] |
[[Category:Mass Effect 3]] |
||
[[Category:Missions]] |
[[Category:Missions]] |
||
Revision as of 10:49, 15 April 2020
The quarians have tried to retake their homeworld from the geth. Unfortunately, the geth have been upgraded by the Reapers, and the quarian fleet is trapped. Travel to the quarian home system and disable the geth dreadnought broadcasting the Reaper control signal.
Acquisition
This mission is automatically acquired after the meeting with the quarian admiralty.
Preparation
Tali'Zorah vas Normandy is a mandatory squadmate for this mission, unless she died in the suicide mission from Mass Effect 2. In that case Admiral Xen will guide you through the mission but will not be a squadmate. Tali has Energy Drain, which might just save your life on this mission, and Sabotage, which temporarily hacks any synthetic into fighting for your side.
Since this mission is aboard a geth ship, you will only face synthetics. Spam Sabotage and you'll basically have a four-person squad all mission long. Regardless of whether you have Tali with you, assessing your team's reactions about geth and the ability to produce tech bursts often are considerations to think about when choosing who to bring with you. Squadmates with anti-shield capabilities, Kaidan or Ashley (depending on which one of them is alive), EDI and Garrus make good choices here. If you have it, Disruptor Ammo, Overload, and similar anti-shield powers will be useful.
If you have it as a bonus power, consider equipping Energy Drain on yourself as it can both drain geth shields and restore yours. Alternatively, equipping Defense Matrix and keeping it up throughout the mission will give you an instant shield restore: you will navigate through geth-filled areas of the dreadnought that are very damaging to shields.
Walkthrough
Make your way through the ruins of the docking tube alone. If you've played Mass Effect 2, you'll find the spacewalk sequence reminiscent of Prologue: Save Joker: you can only walk slowly and move your camera around. In addition, since you're in a circular tube, you'll be plodding your magnetized boots along the inner ring to navigate through obstacles, which may result in a mild case of disorientation. The walk won't take long and is not overly complicated, opportunities to banter with associates arise at three moments to relieve the boredom: when looking at the profile of the dreadnought, when looking up (or down) at Rannoch, and about 3/4ths of the way down the tube.
Once you've reached the end the tube will detach, leaving you separated from your squad and the Normandy. Enter the Geth Dreadnought. Proceed down and to the left to grab a Shotgun Smart Choke, then climb back up the ledge and circle to the right to get to a ladder directly across from where you came in. Once you have climbed up the ladder, go right and through the door. In this new airlock there's 1875 credits ("Geth Data") to the left, and your goal up another ladder on the right. Activate the controls, and a cutscene will play. Pick up the Arc Pistol before continuing; it's next to the docking controls where Tali left it during the miniature cutscene.
You will enter the geth defense network. Move along the linear path, grabbing GARDIAN Defense Data and a Sniper Rifle Enhanced Scope, and activate the bridge controls. Eliminate all geth hostiles and move forward and down a ladder. You will find more geth troops at the bottom.
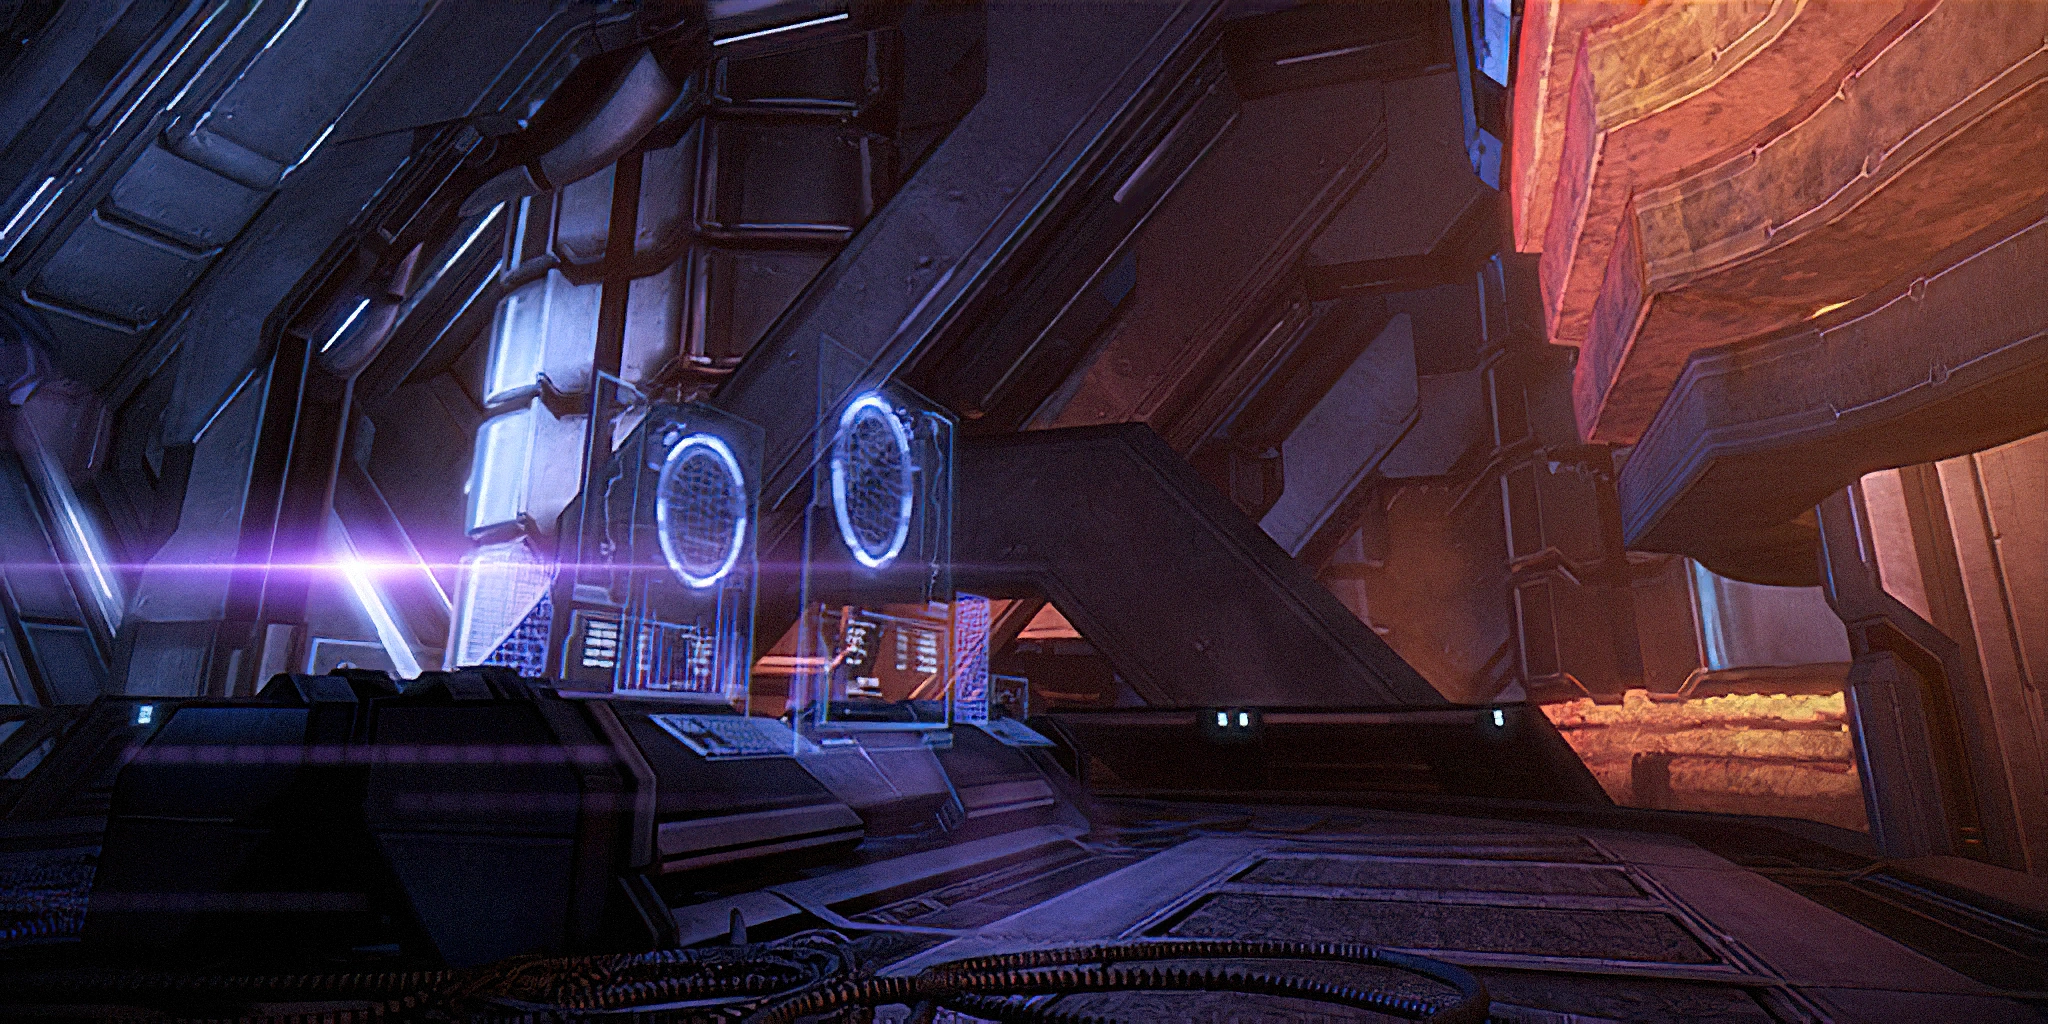
Once they have been eliminated, move along the path and through the door, but be careful advancing: there are Trip Mines on the floor. They can be shot to cause premature detonation, but they blend in pretty well. To conserve ammo, a better tactic is to activate them then perform a combat roll backwards to get out of its blast radius. This is also handy if you trip one by accident; roll backwards the moment you hear the Trip Mine activate. One can also use powers to set them off from a distance; Shockwave is one such power that works for this purpose. Grab more Geth Data (+2500 credits) before passing through the next door, which leads to a room with the Archon Visor in it, plus two sensor consoles that will update you on the progress of the battle; the room beyond it contains a network console and the Geth Pulse Rifle. Finally, you will arrive at the Operations Center where Tali intends to shut down the Reaper signal.

Of course, the Operations Center is manned, particularly by Geth Hunters, who use optic camouflage to sneak up on you and decimate you with their shotguns. Their weak spot is the fact that their cloaking device doubles as their shields, and is nowhere near perfect: if you catch the visual distortion, shoot it to make it targetable, particularly by Overload or Tali's Energy Drain. That will end the Hunter's pretentions at stealth and it will destroy their shields. Note: This first encounter with Hunters seems set up specifically to create flanking opportunities for the Hunters, and they can do it VERY quickly. Particularly if you're playing on one of the higher difficulty levels, be very careful early in the battle.
Once everything's dead, move out, being wary of Trip Mines. Grab the SMG Scope and Geth Data (1250 credits). You can also examine a Data Console near the middle of the room before activating the target console. Tali will inform you that you need to get to the drive core to accomplish your mission. Tali will then open the maintenance tubes and geth will flood inside, including up to four Hunters. Eliminate the hostiles and proceed to the back left of the operations center to enter the maintenance shaft. Bypass the door, then go around left to go down the ladder. Continue around and drop down a second ladder. Pick up the Geth Data (1250 credits) on the left, and go down another ladder. Finally, pick up the med kit and head through the pair of doors into the Main Battery.
This space is where the dreadnought's titanic main gun resides. Every time it fires, an electromagnetic shockwave will come screaming down and disable your shields unless you're in cover. Get used to the timing; you're going to spend a lot of the remaining mission in this corridor. Fortunately, the shockwaves are pretty obvious, and furthermore "in cover" just means "using a chest-high wall," not, "actually ducking." If you've popped out from cover to shoot, the shockwave will not hit you. This is also why Energy Drain is an excellent bonus power to carry around in this mission: not only does it help you deal with the Hunters and Geth Rocket Troopers, it can provide a quick shield boost if you're accidentally snagged by a shockwave.
Two waves of geth will appear the moment you enter the corridor. It's possible to just stay put and let both waves come to you; if you'd like to be more aggressive, a raised control post to the right offers flanking potential. In any case, your squadmates will tell you when it's safe to move, at which point you should head up the hall and take a left to find a maintenance lock. A small ramp to the left, just before the maintenance lock, has some geth data you can salvage for 1250 credits. Once you've activated it, you'll want to sprint. Dawdling inside the maintenance lock for too long will result in the electrical shockwave frying you and resulting in the game over screen.

You are now on the opposite side of the main battery, but the shockwaves haven't finished yet.
You'll almost immediately be engaged by the geth. If you go straight forward from where you start, you can take a ramp to a catwalk where the geth are shooting down at you from, but this exposes you to a lot of fire very quickly.
Alternatively, you can turn right from your starting point and take a ladder up to the other side of same catwalk, but the same problem occurs. You'll have to climb up eventually, though, because the way forward is a ladder on the far side of that catwalk. Clear the area and advance all the way to hit a dead end. Take the ramp on your left up to another control post, which has a locked door perpendicular the main cannon.
Bypass the door and go through a second door to reach the elevator platform area.
Before using the elevator platform, go around the outside to the right for more geth data (1875 credits).
Move onto the platform and access the platform controls. A miniature cutscene will be triggered as you and your squad progress upward, showing two geth with ML-77 Missile Launchers. They will shoot the bottom of the platform, causing it to collapse. Sprint forward toward Tali before it collapses completely, and she'll help you up. Loitering there for a while for whatever reason will cause the platform to collapse, taking you with it and resulting in the game over screen.
Proceed up the ladder, collect and go past a med kit, and go through the door to enter the drive core. A cutscene will be triggered. The drive core will reveal the hardware the Reapers are using to distribute their control signal: Legion (or a "Geth VI" if Legion is absent), who will shut down the signal if you release them.
Grab the Assault Rifle Precision Scope and geth salvage (2500 credits) and then take either the platform or the ladder up to the top. If you took the ladder move around the outside to the data core override. Access the panel to free Legion or the Geth VI, who will then shut down the dreadnought's drive core.
Multiple enemies will filter in shortly afterward, including Geth Primes. These aren't all that much more dangerous than Hunters, but they have a ton of hit points. Tali's Sabotage ability is particularly useful on any enemy which gets dangerously close - converting a Geth Rocket Trooper, Geth Hunter, or even Geth Prime into a temporary ally long enough for you to regain cover/shields. Note: There is very little spare ammo in this room, so conserve your resources and be sure to make good use of powers.
Eliminate all hostiles and proceed back around the half-circle balcony to get to the ladder. From here, you're basically in the clear. You can take your time to look around; the ship will not explode with you in it. Move through the linear path until you reach the hangar. The walkway will collapse beneath you. Run up the ramp to your geth friend to end the mission.
Aftermath
- The missions Rannoch: Admiral Koris and Rannoch: Geth Fighter Squadrons become available.
- Legion or the Geth VI will occupy the Normandy's war room. Admiral Raan's reaction to the incoming geth will depend on whether the geth was present before in Tali's Loyalty Mission or not.
Enemies
Trivia
- When approaching the geth dreadnought, Joker states that with the stealth systems engaged, the only way the geth will detect them is if the Normandy's crew starts singing the Russian national anthem. This is a reference to The Hunt for Red October, where an astute American sonar operator briefly detects the Soviet submarine Red October, which is equipped with an advanced stealth system, due to the singing of the Soviet national anthem aboard the Soviet sub.
- While exiting the geth dreadnought, Joker makes an offhanded comment about the team "waggling their wings" to let them know which geth fighter is theirs. This may be a reference to Gail Halvorsen, a pilot who famously dropped candy for children during the Berlin Airlift; he would "wiggle" the wings of his plane so the children knew which of the thousands of drops was for them. It could also be a reference to the original Battlestar Galactica.
- After the mission, talking to Steve Cortez in the shuttle bay will result in him remarking on the geth fighter that Shepard's squad flew out of the dreadnought, and that the craft has already been sent to Admiral Hackett's team for study.
- If EDI is brought along for the mission, even though her physical body is standing right next to Shepard, she would still contact the Commander through the comm system.
- Jos Hendriks (level designer) explained on twitter that the tunnel scene was made by rotating the whole world around the player, and putting invisible barriers around to prevent the player falling outside the tube [1]
- For N7 Day 2013, a few tidbits of behind the scenes information for this mission were shared by BioWare developers.
- According to designers Jos Hendriks and Dave Feltham, the mission was supposed to include gravitational shifts occurring mid-mission within the ship, but they couldn't get it to work right.[2]
- This very wiki, among other sources, was consulted by Jos Hendriks for spaceship structure and layout. This ended up influencing the geth dreadnought's design and the rail gun sequence.[3][4]
- The spacewalk sequence took 3-4 months to develop, and almost ended up getting cut due to difficulties in getting it right.[5] It was primarily inspired by the hallway sequence in the 2010 film Inception.[6] One of the early ideas featured a fight with turrets on the docking arm, but was scrapped for pacing reasons.[7] The spacewalk tunnel's breaking off originally happened during gameplay and not in the subsequent cutscene, but players didn't naturally turn around and notice the event.[8]
- The speed of slugs fired at the main cannon section is less than 1/1000th of its actual speed in the lore.[9] It proved impossible for players to anticipate and prepare for the shockwaves at higher speeds.[10]
- The elevator sequence was originally all gameplay with a fight, though it was streamlined for pacing reasons.[11]
References
- ↑ https://twitter.com/Sjosz/status/1075098592912715777
- ↑ https://twitter.com/DaveFeltham/status/398487966135230464
- ↑ https://twitter.com/Sjosz/status/398494834668748800
- ↑ https://twitter.com/Sjosz/status/398495688482234368
- ↑ https://twitter.com/Sjosz/status/398483238944899072
- ↑ https://twitter.com/Sjosz/status/398489550441304065
- ↑ https://twitter.com/Sjosz/status/398485636673335297
- ↑ https://twitter.com/Sjosz/status/398491900836986880
- ↑ https://twitter.com/Sjosz/status/398486489610203136
- ↑ https://twitter.com/Sjosz/status/398486730682015744
- ↑ https://twitter.com/Sjosz/status/398493616122773504
| ← Previous Mission | Mission Index | Next Mission → |
|---|---|---|
| Priority: Perseus Veil | Missions | Priority: Rannoch |