m (→Defend Eve) Tag: Visual edit |
|||
| (45 intermediate revisions by 22 users not shown) | |||
| Line 1: | Line 1: | ||
| − | [[File:Priority Tuchanka.png|340px|right|Time to decide the fate of the krogan]] |
+ | [[File:Priority Tuchanka.png|340px|right|Time to decide the fate of the krogan]][[Eve]] is indeed the key to curing the [[genophage]], but creating a cure will take time. Continue to assist [[turian]] and [[krogan]] allies while the cure is synthesized. |
== Acquisition == |
== Acquisition == |
||
{{Prerequisite|Priority: Sur'Kesh}} |
{{Prerequisite|Priority: Sur'Kesh}} |
||
| + | {{Prerequisite|Attican Traverse: Krogan Team||or [[Tuchanka: Turian Platoon]]}} |
||
| − | This mission is automatically available after completion of the prior plot mission. |
||
| + | This mission is automatically acquired after Eve's retrieval from [[Sur'Kesh]]. However, actually finishing this mission requires completing ''either'' mission given by the turian and krogan leaders aboard the [[Normandy SR-2|Normandy]]. The journal text updates to the following entry upon fulfillment of the condition: |
||
| + | |||
| + | {{blockquote|The genophage cure is a success, but it must be synthesized and dispersed across all of Tuchanka using the [[Shroud]] tower. Land on [[Tuchanka]] and get Eve safely to the tower.}} |
||
| + | |||
| + | The NavPoint for this mission is now available on Tuchanka. Upon landing on the planet, the final journal update is shown: |
||
| + | |||
| + | {{blockquote|The plan to disperse the genophage cure has been complicated by the arrival of [[Reaper]] forces, who have occupied the area near the shroud tower. Get Eve safely to the tower.}} |
||
== Preparation == |
== Preparation == |
||
| − | You will be facing Reaper ground forces in this mission. A significant number of them will have armor. There will be a few shielded enemies but only in one encounter, so factor that into your deployment plan. |
+ | You will be facing Reaper ground forces in this mission. A significant number of them will have armor. There will be a few shielded enemies, but only in one encounter, so factor that into your deployment plan. |
| − | In contemplating the final section you may wish to retrain your bonus ability to [[Defense Matrix]] if you have it available |
+ | In contemplating the final section, you may wish to retrain your bonus ability to [[Defense Matrix]] if you have it available; its "purge" ability to instantly raise your shield may be helpful in withstanding very damaging attacks. |
{{Note}}After completing this mission, [[Priority: The Citadel II]] begins immediately upon your next return to the Citadel, rendering some side missions no longer possible to complete. As such, be sure to do the following side missions and interactions ''before'' attempting this mission: |
{{Note}}After completing this mission, [[Priority: The Citadel II]] begins immediately upon your next return to the Citadel, rendering some side missions no longer possible to complete. As such, be sure to do the following side missions and interactions ''before'' attempting this mission: |
||
| − | * [[Benning: Evidence]] |
+ | * [[Benning: Evidence]] |
| − | * [[Citadel: Alien Medi-Gel Formula]] |
+ | * [[Citadel: Alien Medi-Gel Formula]] |
* [[Citadel: Barla Von]] |
* [[Citadel: Barla Von]] |
||
* [[Citadel: Biotic Amp Interfaces]] (obtained during [[Grissom Academy: Emergency Evacuation]], therefore this mission must also be completed before Priority: Tuchanka) |
* [[Citadel: Biotic Amp Interfaces]] (obtained during [[Grissom Academy: Emergency Evacuation]], therefore this mission must also be completed before Priority: Tuchanka) |
||
* [[Citadel: Hanar Diplomat]] |
* [[Citadel: Hanar Diplomat]] |
||
| − | * [[Citadel: Improved Power Grid]] |
+ | * [[Citadel: Improved Power Grid]] |
* [[Ismar Frontier: Prototype Components]] |
* [[Ismar Frontier: Prototype Components]] |
||
| − | * Any interactions with [[Kelly Chambers]] (only available if she survived the [[Collector Base]] assault in [[Mass Effect 2]]). Also, if you visit and tell her to change her identity, she will remain available after the end of Priority: The Citadel II. |
+ | * Any interactions with [[Kelly Chambers]] (only available if Shepard had dinner with her and she survived the [[Collector Base]] assault in [[Mass Effect 2]]). Also, if you visit and tell her to change her identity, she will remain available after the end of Priority: The Citadel II. |
| − | * Any interactions with [[Thane Krios]] in the |
+ | * Any interactions with [[Thane Krios]] in the Patient Lounge at [[Huerta Memorial Hospital]] (only available if he survived the [[Collector Base]] assault in [[Mass Effect 2]]). |
| + | *Choosing either [[Dr. Chloe Michel]] or [[Dr. Karin Chakwas]] (only available if she survived the events of Mass Effect 2) to be the Normandy physician at Huerta Memorial Hospital. |
||
* Conversing with [[James Vega]] in the [[Purgatory Bar]]. |
* Conversing with [[James Vega]] in the [[Purgatory Bar]]. |
||
* Conversing with [[Matriarch Aethyta]] in the Apollo's Cafe. |
* Conversing with [[Matriarch Aethyta]] in the Apollo's Cafe. |
||
* Conversing with [[Joker]] and [[EDI]] in the Meridian Place Market on the [[Presidium Commons|Presidium]]. |
* Conversing with [[Joker]] and [[EDI]] in the Meridian Place Market on the [[Presidium Commons|Presidium]]. |
||
* Conversing with [[Garrus]] in the [[Docks: Holding Area|Refugee Camp]] (if he survived the [[Collector Base]] assault in [[Mass Effect 2]]). |
* Conversing with [[Garrus]] in the [[Docks: Holding Area|Refugee Camp]] (if he survived the [[Collector Base]] assault in [[Mass Effect 2]]). |
||
| + | * Authorizing the [[Spectre Terminal#Partner Benefits Increase|Partner Benefits Increase]] and [[Spectre Terminal#Civilian Deportation Order|Civilian Deportation Order]] entries at the [[Spectre Terminal]] in the [[Citadel Embassies]]. |
||
Additionally, all [[Mass Effect 3: Leviathan|Leviathan]] missions taking place in [[Dr. Bryson's Lab]] will be postponed. Attempting to go to the lab on the Citadel docking menu will instead launch Priority: The Citadel II. |
Additionally, all [[Mass Effect 3: Leviathan|Leviathan]] missions taking place in [[Dr. Bryson's Lab]] will be postponed. Attempting to go to the lab on the Citadel docking menu will instead launch Priority: The Citadel II. |
||
| − | However, [[Tuchanka: Turian Platoon]], [[Tuchanka: Bomb]] and [[N7: Cerberus Attack]] remain available after completing this mission. |
+ | However, [[Tuchanka: Turian Platoon]], [[Tuchanka: Bomb]], and [[N7: Cerberus Attack]] remain available after completing this mission. |
== Walkthrough == |
== Walkthrough == |
||
=== Prologue === |
=== Prologue === |
||
| − | To complete the treaty between the krogan and the |
+ | To complete the treaty between the krogan and the turians, the [[Clan Urdnot]] leader ([[Urdnot Wrex|Wrex]] / [[Urdnot Wreav|Wreav]]) insists that the genophage must be cured. [[Mordin Solus]] / [[Padok Wiks]] needs time to stabilize Eve and prepare the cure — {{note|at minimum, either Tuchanka: Turian Platoon OR Attican Traverse: Krogan Team must be finished}} before Eve is declared ready for transport to Tuchanka. This is a good time to finish the time-sensitive missions mentioned above. |
| − | The genophage cure |
+ | The genophage cure is to be dispersed from the top of the Shroud, a tower constructed by the [[salarian]]s to stabilize the atmosphere of Tuchanka, and later covertly used by the turians to disperse the original genophage virus. The salarian STG member that prepared the cure will travel to the Shroud with Eve and ensure that this takes place. |
| − | Travel to the [[Krogan DMZ]] and the |
+ | Travel to the planet Tuchanka in the [[Krogan DMZ]] and select the proper NavPoint. In the cutscene, you discover that the Reapers are using the Shroud to poison Tuchanka's atmosphere. It is impossible to land the shuttle at the Shroud site due to the presence of a [[Destroyer|Reaper Destroyer]] there. |
| + | |||
| + | It is decided that the krogan will attack the Reaper from the ground while turian fighters fly air support. The [[Dalatrass Linron|salarian Dalatrass]] then privately contacts Shepard and reveals that the Shroud was sabotaged to prevent dispersal of a cure. She suggests tricking the krogan into thinking that the cure has been deployed, and offers salarian support for the war effort if Shepard does so. |
||
=== Defend Eve === |
=== Defend Eve === |
||
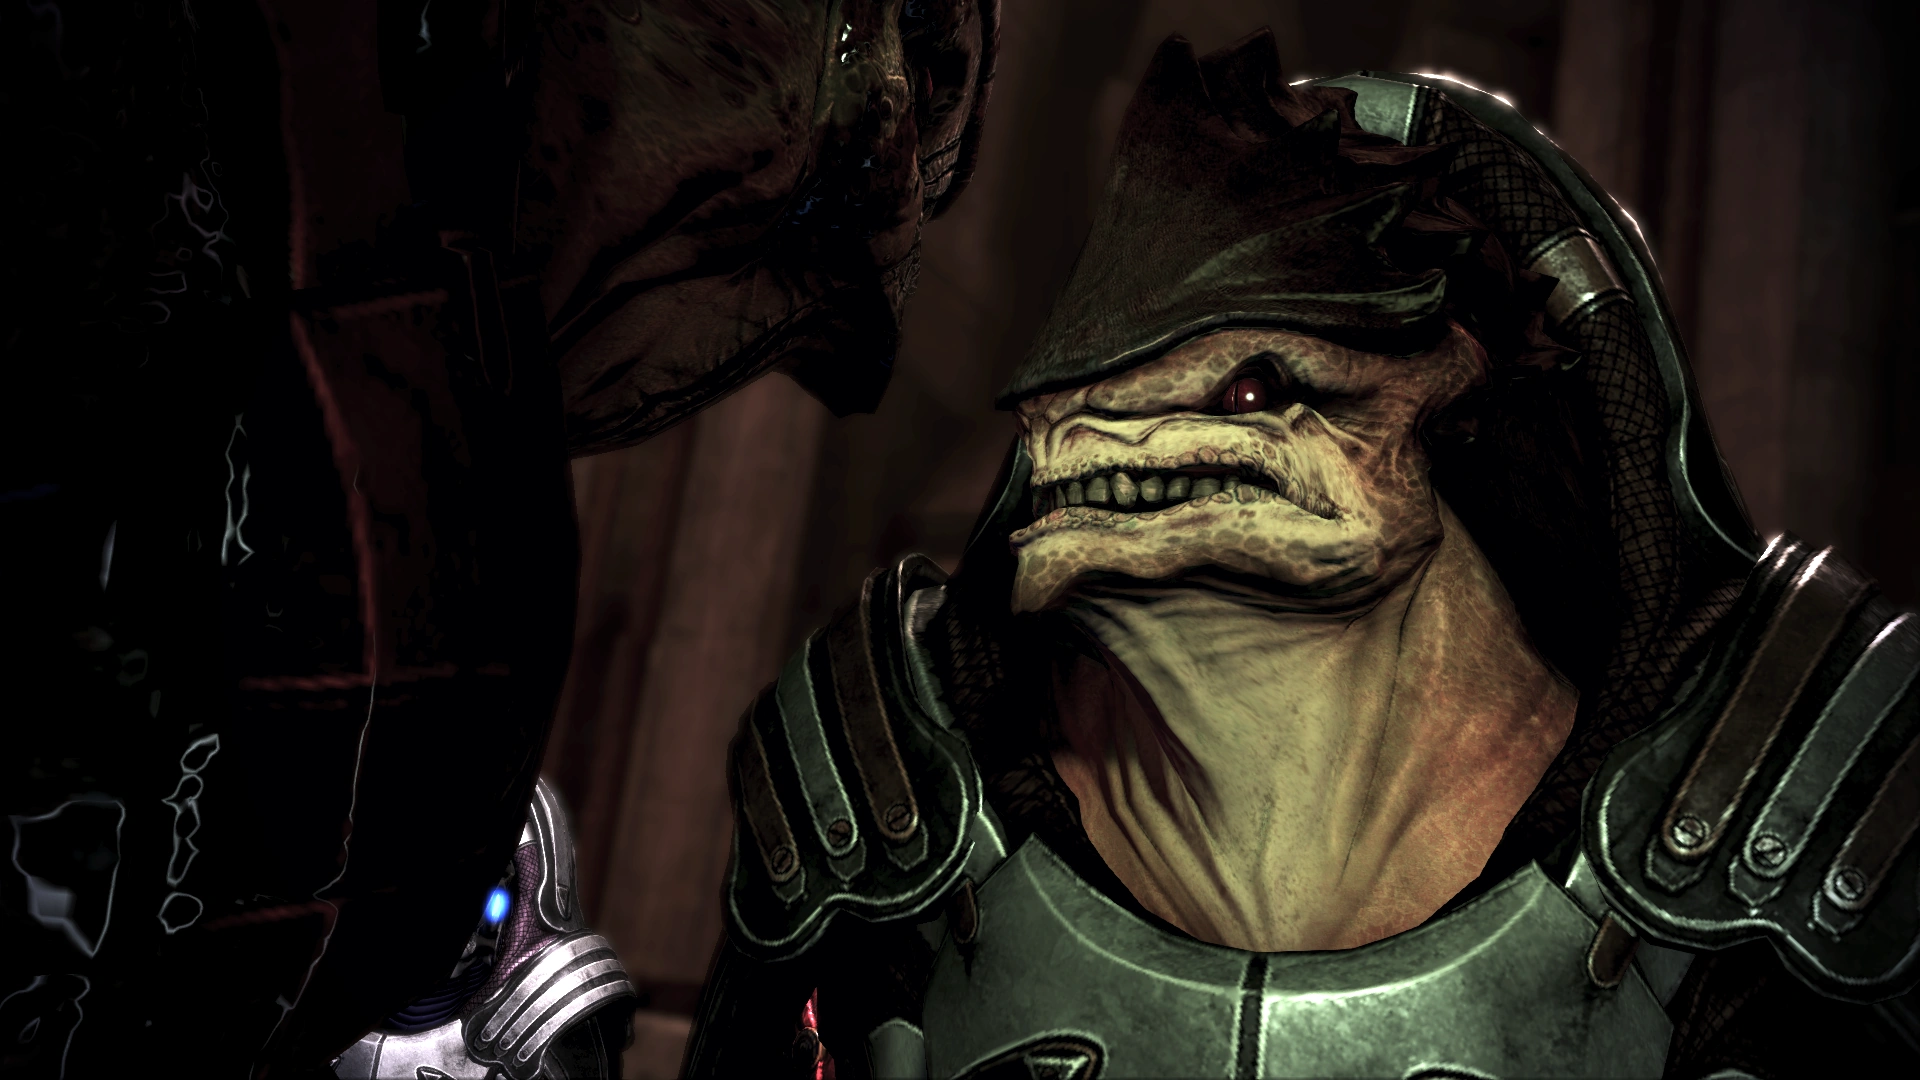
| − | [[File:Wrex-Wreave-PriorityTuchanka.png|right|290px|Wreav]]Shepard will then take a shuttle down to the surface. The Urdnot leader sent word for the krogan clans to assemble at the Hollows, a sacred krogan meeting ground. During the conversation, you can reveal the Dalatrass' offer to sabotage the cure or just remain silent. If you choose to reveal, you will be interrupted by a message that the Hollows are under Reaper attack. |
+ | [[File:Wrex-Wreave-PriorityTuchanka.png|right|290px|Wreav]]Shepard will then take a shuttle down to the surface. The Urdnot leader sent word for the krogan clans to assemble at the Hollows, a sacred krogan meeting ground. During the conversation, you can reveal the Dalatrass's offer to sabotage the cure or just remain silent. If you choose to reveal, you will be interrupted by a message that the Hollows are under Reaper attack. |
| − | When you reach the Hollows, you need to fight off waves of [[Husk (enemy)#Mass Effect 3|Husk]]s swarming the area. It's an arena-type pit with wide berth to run around in circles even with husks appearing from all directions, so putting them down should be easy enough. You will gain 300 experience points after successfully holding off the Husks. In the ensuing scenes, if Wrex is alive, tensions mount between him and Wreav, who is one of his most disloyal supporters; if Wreav leads, [[Jorgal Thurak]] takes his place. Eve intervenes during the rising conflict and makes a rallying call for the krogan to unite against the Reapers. |
+ | When you reach the Hollows, you need to fight off waves of [[Husk (enemy)#Mass Effect 3|Husk]]s swarming the area. It's an arena-type pit with wide berth to run around in circles even with husks appearing from all directions, so putting them down should be easy enough. You will gain 300 experience points after successfully holding off the Husks. In the ensuing scenes, if Wrex is alive, tensions mount between him and his brother Wreav, who is one of his most disloyal supporters; if Wreav leads, [[Jorgal Thurak]] takes his place. Eve intervenes during the rising conflict and makes a rallying call for the krogan to unite against the Reapers. |
=== The Convoy === |
=== The Convoy === |
||
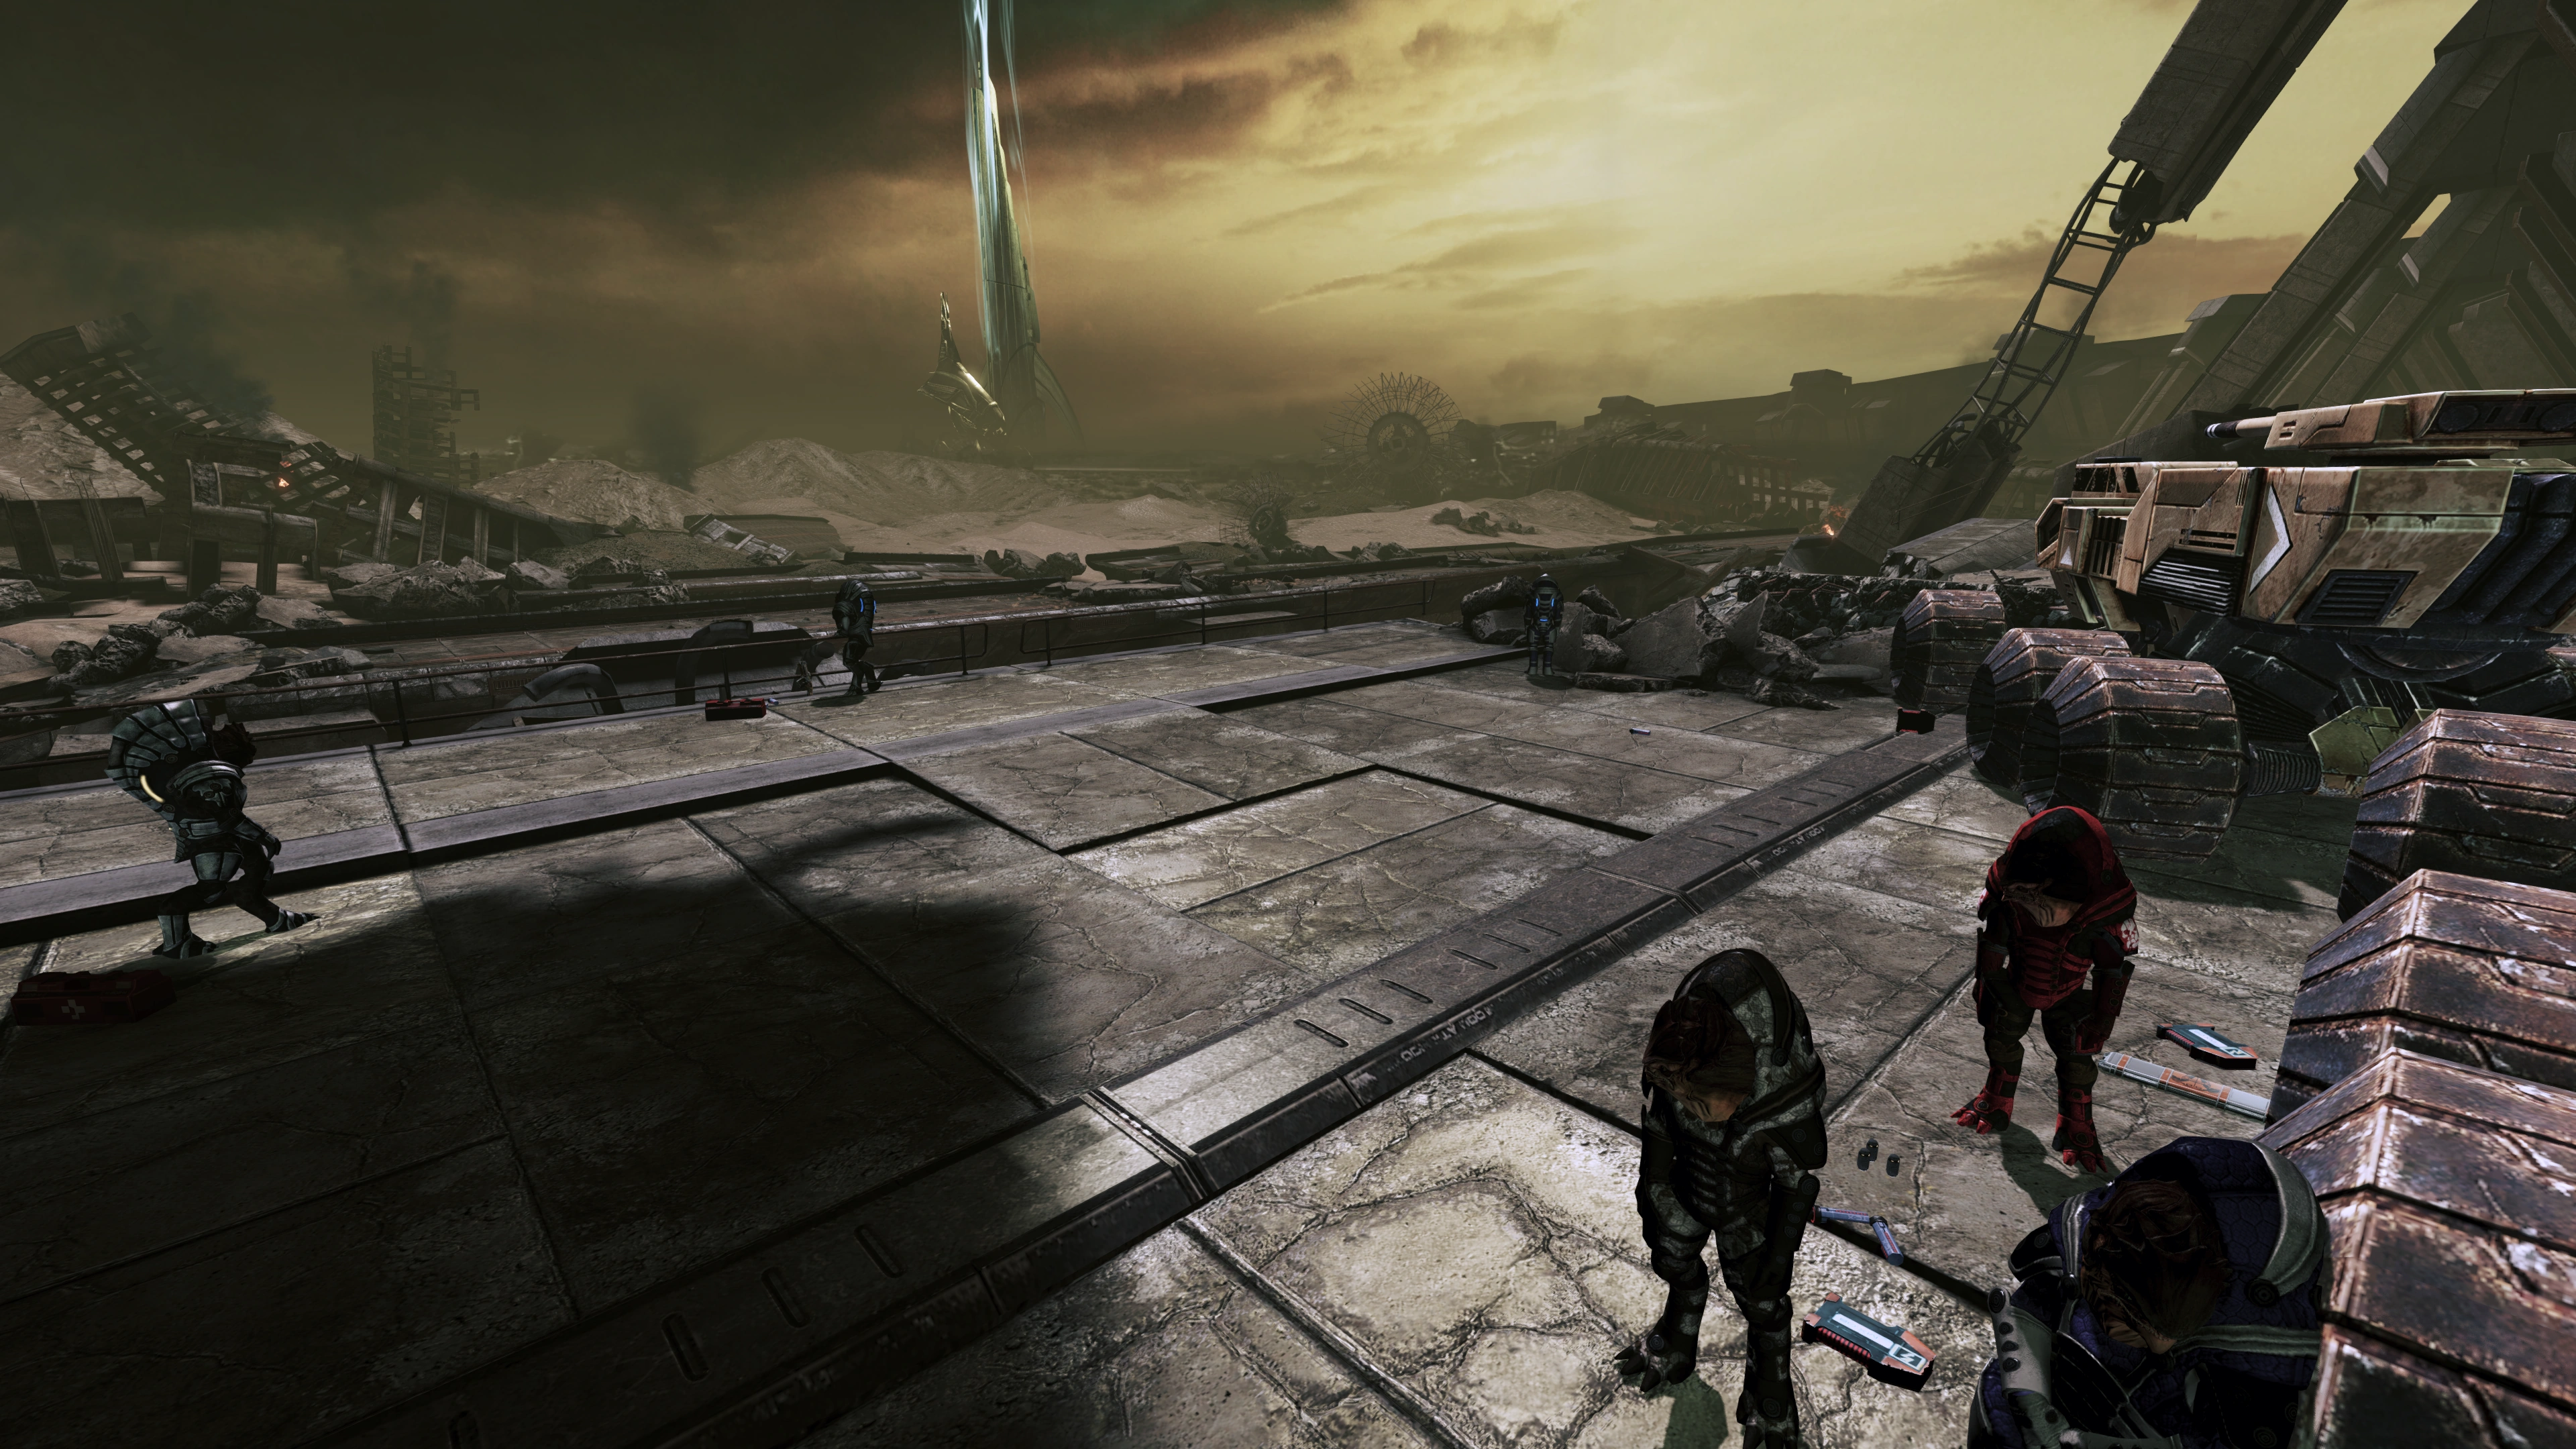
| − | The krogan head out in a convoy towards the Shroud. While travelling, you're given the option again to reveal the Dalatrass' deal or keep quiet about it. Soon after, the convoy comes to an immediate halt and the team dismounts to find out why. |
+ | The krogan head out in a convoy towards the Shroud. While travelling, you're given the option again to reveal the Dalatrass's deal or keep quiet about it. Soon after, the convoy comes to an immediate halt, and the team dismounts to find out why. |
| − | [[File:Tuchanka - stalled trucks item pickups.png|left|320px|If you see the Graal you have good eyesight]]Running around is recommended, the area is a treasure trove of loot. You can pick up a [[Shotgun Smart Choke]] upgrade, a [[Pistol Magazine Upgrade]], a [[Pistol Melee Stunner]], a [[Armor Customization (Mass Effect 3)#Head|Death Mask]] helmet, the [[Graal Spike Thrower]] shotgun and 2 Med-kits around. A couple of krogan interactions are optional: you can speak to one fixing and complaining about a tomkah's [[Tuchanka: Combustion Manifold|combustion manifold]], and there's another who was the owner of the Graal you took and wants whatever you kill with it as his "trophies". To kick off the next part of the plot however speak to the Krogan Scout who tells you that the road is damaged and the convoy can't proceed further. |
+ | [[File:Tuchanka - stalled trucks item pickups.png|left|320px|If you see the Graal, you have good eyesight]]Running around is recommended, as the area is a treasure trove of loot. You can pick up a [[Shotgun Smart Choke]] upgrade, a [[Pistol Magazine Upgrade]], a [[Pistol Melee Stunner]], a [[Armor Customization (Mass Effect 3)#Head|Death Mask]] helmet, the [[Graal Spike Thrower]] shotgun, and 2 Med-kits around. A couple of krogan interactions are optional: you can speak to one fixing and complaining about a tomkah's [[Tuchanka: Combustion Manifold|combustion manifold]], and there's another who was the owner of the Graal you took and wants whatever you kill with it as his "trophies". To kick off the next part of the plot, however, speak to the Krogan Scout, who tells you that the road is damaged and the convoy can't proceed further. |
| − | However, the turian air support has already begun their attack, and are too close to call it off. A fighter is shot down by the Reaper and hits a truck. Shepard radios the Urdnot leader to get out of the area. However, you and the squad are left behind and have to find an alternative route. At this point, you gain another 150 experience. |
+ | However, the turian air support has already begun their attack, and are too close to call it off. A fighter is shot down by the Reaper and hits a truck. Shepard radios the Urdnot leader to get out of the area. However, you and the squad are left behind and have to find an alternative route. At this point, you gain another 150 experience. |
The only path left is through the ruins. Jump over a gap and head into the tunnel. |
The only path left is through the ruins. Jump over a gap and head into the tunnel. |
||
=== Escape the Catacombs === |
=== Escape the Catacombs === |
||
| − | You're now in an ancient krogan city which has been |
+ | You're now in an ancient krogan city which has been abandoned for millennia. There are no enemy encounters here. Go down the stairs into the first room, and either jump through the gap off the ledge on your left, or go down the next set of stairs to your right. In the second room, there is a door to your right and to your left. Go through the door on the left, and on the right-hand wall of that room is an Ancient Krogan Artifact, a painting that can be salvaged for 8,500 credits. |
| + | |||
| + | Return to the door on the right, go down the stairs. Right before another jump down, Shepard and the team experience strong tremors. The Urdnot leader radios that they're not experiencing similar readings on the surface. Eve suggests that it could be something else, warning that Kalros, the mother of all [[thresher maw]]s, is said to live in the region. |
||
| + | |||
| + | Your squadmates will make various comments upon investigating the artifacts and paintings in this area. These comments may interrupt your radio conversations with the Urdnot leader and Eve, but Shepard will apologize and request that they repeat themselves so the radio conversations aren't missed. |
||
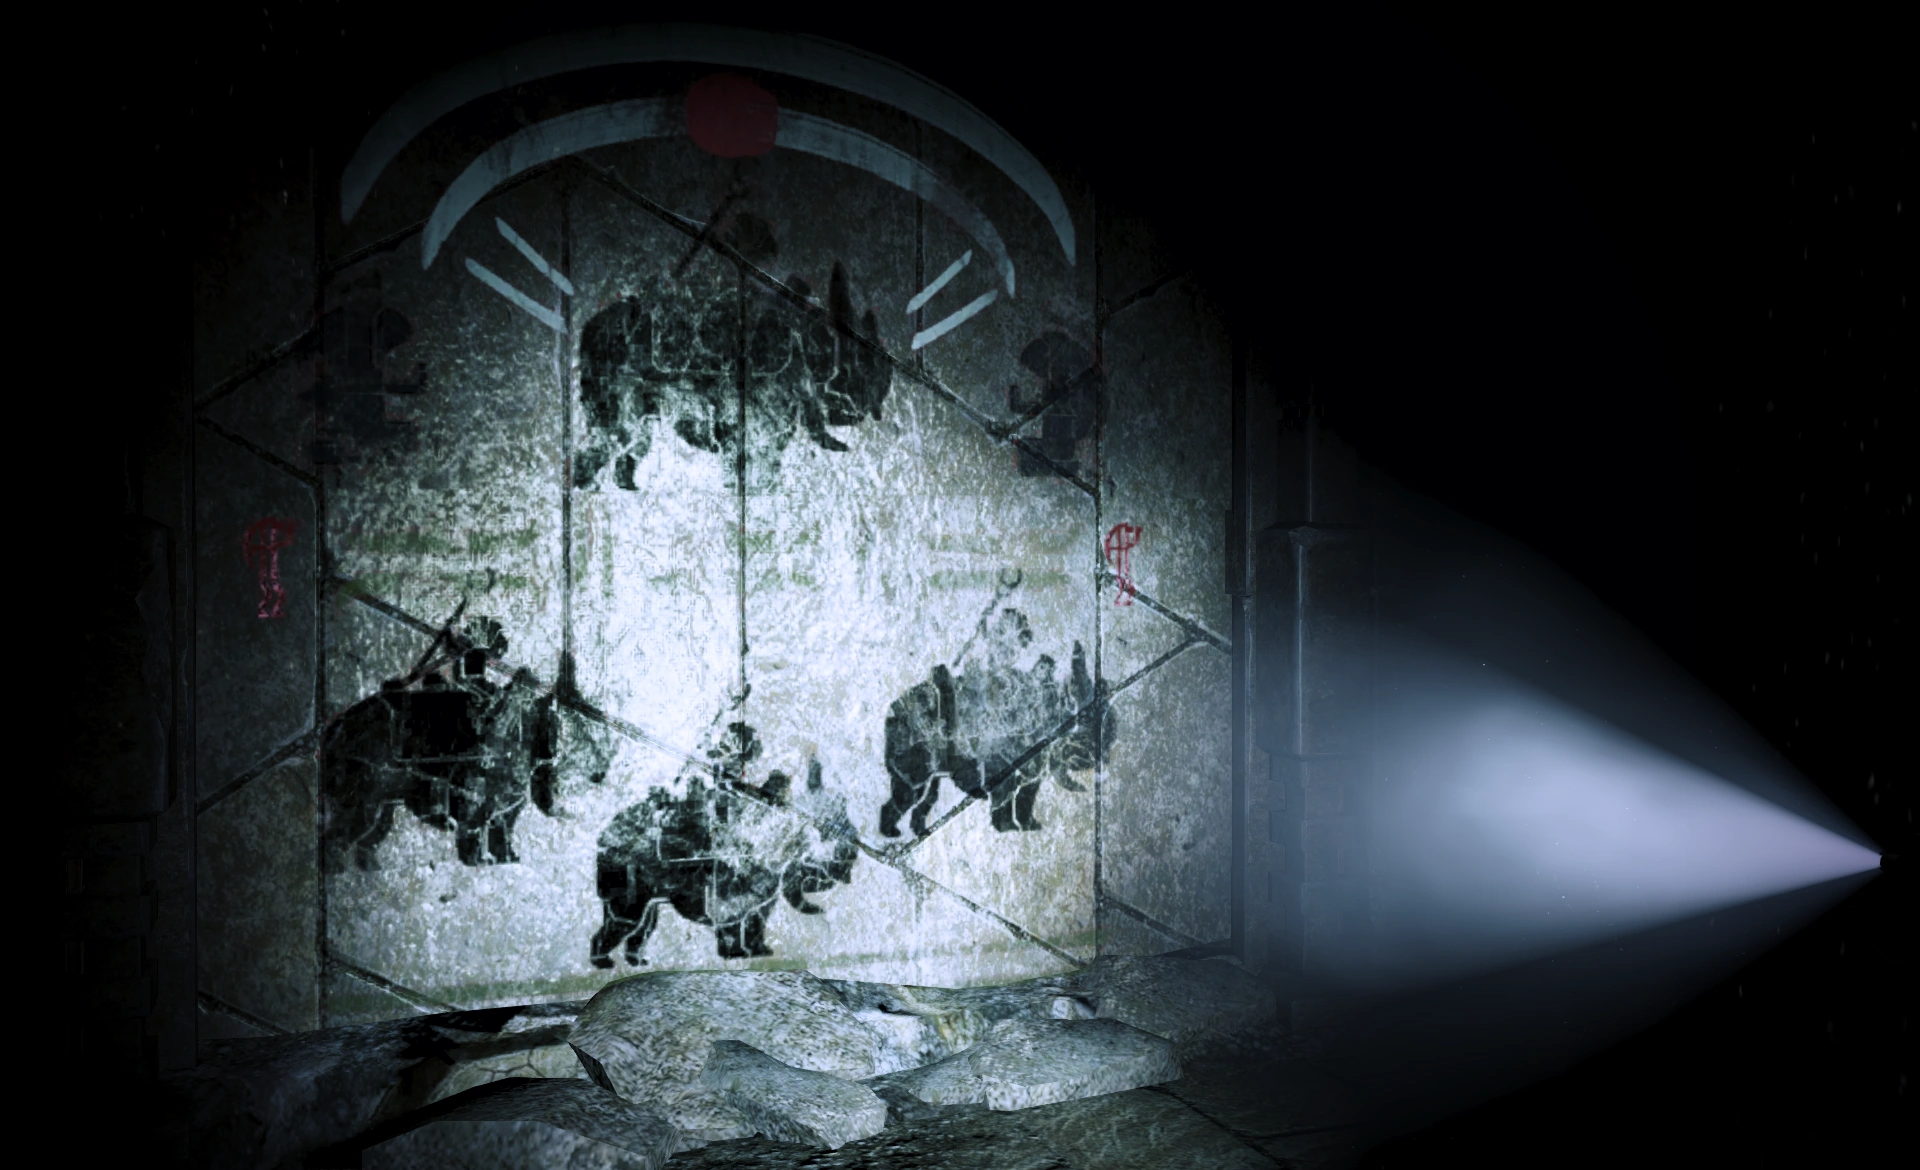
| − | [[File:KroganCavePaintingArtifact.png|290px|right|The third krogan cave painting]]Jump down the ledge at the end of the path and turn to the left. In the far end of this area, you can salvage another Ancient Krogan Artifact on the wall for 8,250 credits – a striking depiction of a thresher maw. After retrieving it, go to the other side of the room and turn left into a tunnel where you'll find the final Ancient Krogan Artifact, another painting, worth 8,250 credits on the right. Further along the path, you will examine an [[rachni|insect-like]] corpse – depending on whether you've [[Utukku: Scout Camp|gone to Utukku]] first or not, you may or may not immediately realize the |
+ | [[File:KroganCavePaintingArtifact.png|290px|right|The third krogan cave painting]]Jump down the ledge at the end of the path and turn to the left. In the far end of this area, you can salvage another Ancient Krogan Artifact on the wall for 8,250 credits – a striking depiction of a thresher maw. After retrieving it, go to the other side of the room and turn left into a tunnel, where you'll find the final Ancient Krogan Artifact, another painting, worth 8,250 credits on the right. Further along the path, you will examine an [[rachni|insect-like]] corpse – depending on whether you've [[Utukku: Scout Camp|gone to Utukku]] first or not, you may or may not immediately realize the importance of the find. |
With the realization in mind, head up the stairs into the light. You will gain another 300 experience after exiting the catacombs. Take the time to enjoy the surroundings, a lot of brown mixed with a surprising amount of green, and you and your team will discuss amongst yourselves the lamentable destruction of old krogan civilization. |
With the realization in mind, head up the stairs into the light. You will gain another 300 experience after exiting the catacombs. Take the time to enjoy the surroundings, a lot of brown mixed with a surprising amount of green, and you and your team will discuss amongst yourselves the lamentable destruction of old krogan civilization. |
||
| − | As you move forward, you will face a wave of [[Cannibal]]s and [[Ravager]]s. Then when you move forward again, a second set will drop from the sky. The ruins provide lots of cover but this can work both ways, so take care to park your squadmates behind cover to prevent their AI from stupidly charging forward and getting themselves killed. Ravagers here provide most of the heavy suppression fire; one tactic is for you to flank the enemy using the tunnel to the left while keeping your |
+ | As you move forward, you will face a wave of [[Cannibal]]s and [[Ravager]]s. Then when you move forward again, a second set will drop from the sky. The ruins provide lots of cover, but this can work both ways, so take care to park your squadmates behind cover to prevent their AI from stupidly charging forward and getting themselves killed. Ravagers here provide most of the heavy suppression fire; one tactic is for you to flank the enemy using the tunnel to the left while keeping your squadmates within the enemy's sight but safely covered. |
| − | Once the area is clear, move ahead and turn right to jump over the gap. A wave of Cannibals will appear followed by some more coming around the corner, and finally a [[Brute]] or two accompanied by some Husks. The second wave is triggered by leaping over the gap. None of the enemies can follow you if you retreat back over the gap after triggering the wave, allowing you to kill them without risking direct combat. A less cheesy way of killing them would be to hunker down on the two conveniently |
+ | Once the area is clear, move ahead and turn right to jump over the gap. A wave of Cannibals will appear followed by some more coming around the corner, and finally a [[Brute]] or two accompanied by some Husks. The second wave is triggered by leaping over the gap. None of the enemies can follow you if you retreat back over the gap after triggering the wave, allowing you to kill them without risking direct combat. A less cheesy way of killing them would be to hunker down on the two conveniently placed debris-for-cover and power- and/or weapon-spamming. After the battle, if you delay overlong the Urdnot leader and the scientist salarian will comically harangue you over comms. |
[[File:Tuchanka hope.png|left|290px|Tuchanka's ruins and remaining plant life]] |
[[File:Tuchanka hope.png|left|290px|Tuchanka's ruins and remaining plant life]] |
||
| − | After the second wave, go forward, around the U-turn, and up the ledges on the left. At the same time, the krogan will be talking over the radio about a plan to |
+ | After the second wave, go forward, around the U-turn, and up the ledges on the left. At the same time, the krogan will be talking over the radio about a plan to hunt Kalros, but Eve will say that the Commander has enough to worry about. |
This is your cue to get into cover, as a third wave of Cannibals, Husks, and Ravagers will attack. You have an elevated and covered platform from which to dispense fire and steel, just be wary of Husks spawning from the left and running up your stairs. Alternately, a circular rock big enough for all of your team for crouching cover is also available. |
This is your cue to get into cover, as a third wave of Cannibals, Husks, and Ravagers will attack. You have an elevated and covered platform from which to dispense fire and steel, just be wary of Husks spawning from the left and running up your stairs. Alternately, a circular rock big enough for all of your team for crouching cover is also available. |
||
| Line 69: | Line 84: | ||
Once they are dead, head for the right side of the open area and toward the krogan statues. |
Once they are dead, head for the right side of the open area and toward the krogan statues. |
||
| − | Upon reaching the second bridge, Kalros appears and chases the convoy, damaging the bridge in the process. Jump over the gap and go to a memorial area further up. Loitering in the promontory overlooking desolate wastelands after the gap before proceeding to the statues will elicit some remarks from your squad. As you approach the small bridge, a wave of Cannibals and Husks will attack. Remember that sending them off the edge of the platforms will result in instant deaths. |
+ | Upon reaching the second bridge, Kalros appears and chases the convoy, damaging the bridge in the process. Jump over the gap and go to a memorial area further up. Loitering in the promontory overlooking desolate wastelands after the gap before proceeding to the statues will elicit some remarks from your squad. As you approach the small bridge, a wave of Cannibals and Husks will attack. Remember that sending them off the edge of the platforms will result in instant deaths. |
After some more dialogue with the convoy, more Husks will attack along with some [[Marauder]]s. Once they are dead, you will find an [[SMG Scope]] upgrade on the left side of this area. Head down and back up the two short sets of stairs where the Marauders came from and find an [[Assault Rifle Extended Barrel]] upgrade on the left. |
After some more dialogue with the convoy, more Husks will attack along with some [[Marauder]]s. Once they are dead, you will find an [[SMG Scope]] upgrade on the left side of this area. Head down and back up the two short sets of stairs where the Marauders came from and find an [[Assault Rifle Extended Barrel]] upgrade on the left. |
||
| Line 78: | Line 93: | ||
[[File:Reaper guarding shroud facility.png|right|290px|Reaper and the Shroud]]Eve suggests using the ancient Maw Hammers to summon Kalros to the area and distract the Reaper away from the Shroud. Shepard agrees and heads out to activate the maw hammers, while your salarian scientist heads out in another direction to finalize a cure to the [[Genophage]]. The Urdnot leader stays behind to take care of the incoming rachni horde. |
[[File:Reaper guarding shroud facility.png|right|290px|Reaper and the Shroud]]Eve suggests using the ancient Maw Hammers to summon Kalros to the area and distract the Reaper away from the Shroud. Shepard agrees and heads out to activate the maw hammers, while your salarian scientist heads out in another direction to finalize a cure to the [[Genophage]]. The Urdnot leader stays behind to take care of the incoming rachni horde. |
||
| − | Clear out the two sets of Cannibals immediately following the cutscene. While you're busy the Urdnot leader radios in to say he's taken care of things on his end, but since you're busy he volunteers to raise the Hammers while you still must push onward to activate them yourself. When you're done go up the flight of stairs. At the top of the stairs, pick up the [[M-5 Phalanx]] Heavy Pistol. |
+ | Clear out the two sets of Cannibals immediately following the cutscene. While you're busy, the Urdnot leader radios in to say he's taken care of things on his end, but since you're busy, he volunteers to raise the Hammers while you still must push onward to activate them yourself. When you're done go up the flight of stairs. At the top of the stairs, pick up the [[M-5 Phalanx]] Heavy Pistol. |
When you attempt to cross the bridge nearby, the Reaper blasts the bridge and Shepard falls down below. As its most immediate threat, the Reaper targets you and begins firing its laser. Take cover frequently, and move up between the shots. Alternatively, because the blasts will be aimed at the structures covering you, it is easy to just sprint into the next area. Once you reach the cover spot in the middle, the turian fighters will thankfully appear again to draw the Reaper's fire. |
When you attempt to cross the bridge nearby, the Reaper blasts the bridge and Shepard falls down below. As its most immediate threat, the Reaper targets you and begins firing its laser. Take cover frequently, and move up between the shots. Alternatively, because the blasts will be aimed at the structures covering you, it is easy to just sprint into the next area. Once you reach the cover spot in the middle, the turian fighters will thankfully appear again to draw the Reaper's fire. |
||
| Line 84: | Line 99: | ||
To reach the Maw Hammer controls, Shepard must fight through a gauntlet of Brutes, while avoiding getting crushed by the Reaper. The Brutes spawn continuously until both Maw Hammers have been activated. It's possible to simply dash through the battlefield, activating the Maw Hammers using Shepard's superior speed, and this is certainly the favored approach for infiltrators who can cloak to evade Brute aggro. |
To reach the Maw Hammer controls, Shepard must fight through a gauntlet of Brutes, while avoiding getting crushed by the Reaper. The Brutes spawn continuously until both Maw Hammers have been activated. It's possible to simply dash through the battlefield, activating the Maw Hammers using Shepard's superior speed, and this is certainly the favored approach for infiltrators who can cloak to evade Brute aggro. |
||
| − | The Reaper's legs are the biggest threat: one hit will drop your shields at the very least; if the Reaper lands a second hit before your shields regenerate, it's an instant kill. Thankfully, many of the leg stabs are focused on the two catwalks leading to the maw hammers. As such, the safest approach is to run across the arena and then walk down the catwalks. |
+ | The Reaper's legs are the biggest threat: one hit will drop your shields at the very least; if the Reaper lands a second hit before your shields regenerate, it's an instant kill. Thankfully, many of the leg stabs are focused on the two catwalks leading to the maw hammers. As such, the safest approach is to run across the arena and then walk down the catwalks. |
{{note|Tips:}} |
{{note|Tips:}} |
||
* You can see where the Reaper is going to hit roughly two seconds before it happens, by looking for the giant shadow cast by its leg. That's enough time to dash to the side and avoid being crushed. |
* You can see where the Reaper is going to hit roughly two seconds before it happens, by looking for the giant shadow cast by its leg. That's enough time to dash to the side and avoid being crushed. |
||
| − | * If you have [[Defense Matrix]] as your bonus ability and keep it active, it will make this section much easier: any time a leg (or a Brute) hits you and knocks your shield down, purge Defense Matrix immediately and your shield will be instantly restored. This will enable you to survive a second leg strike, thus making dashing through the battlefield to the Maw Hammers a far safer prospect. Obviously put Defense Matrix back up as soon as it recharges. |
+ | * If you have [[Defense Matrix]] as your bonus ability and keep it active, it will make this section much easier: any time a leg (or a Brute) hits you and knocks your shield down, purge Defense Matrix immediately and your shield will be instantly restored. This will enable you to survive a second leg strike, thus making dashing through the battlefield to the Maw Hammers a far safer prospect. Obviously, put Defense Matrix back up as soon as it recharges. |
When both hammers have been activated, their combined worth successfully attracts Kalros. In stunning fashion, Kalros bests the Reaper, dragging it beneath the surface of Tuchanka's wasteland. |
When both hammers have been activated, their combined worth successfully attracts Kalros. In stunning fashion, Kalros bests the Reaper, dragging it beneath the surface of Tuchanka's wasteland. |
||
=== The Shroud === |
=== The Shroud === |
||
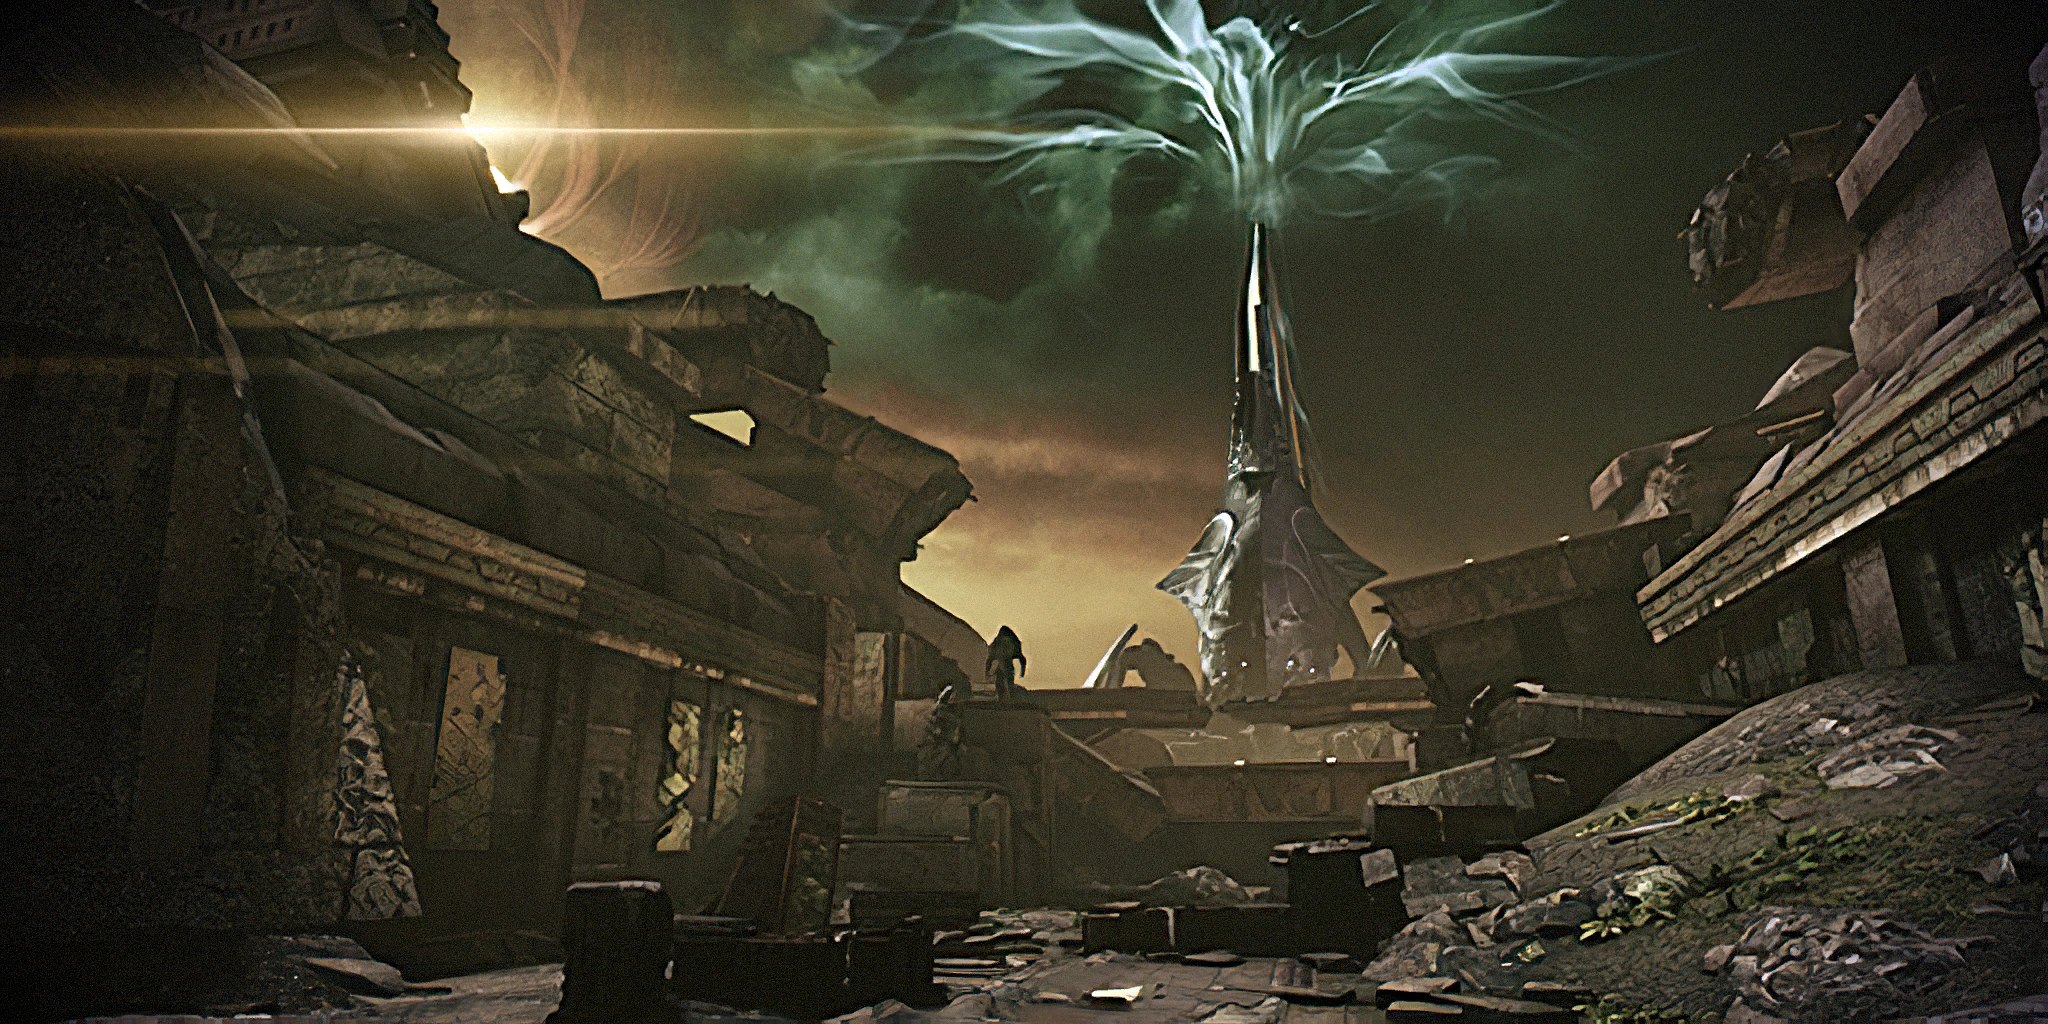
| − | [[File:The Shroud.png|right|290px|Shroud approach]]With all opposition from the Reapers destroyed, Shepard and the salarian |
+ | [[File:The Shroud.png|right|290px|Shroud approach]]With all opposition from the Reapers destroyed, Shepard and the salarian doctor approach the Shroud, their associates having been told to retreat to safety. However, the [[Shroud]] sustained damage in the fight against the Reaper – it is falling to pieces as Shepard approaches. Within, Eve's STG caretaker – [[Mordin Solus]] or [[Padok Wiks]] – is attempting to stabilize the structure. He will also report on Eve's status; in the absence of [[Maelon]]'s data, she will have died whilst Shepard handled the Reaper. |
All outcomes are available regardless of whether Mordin or Wiks is present, so for convenience we will refer to the character as "Mordin". |
All outcomes are available regardless of whether Mordin or Wiks is present, so for convenience we will refer to the character as "Mordin". |
||
| − | At this point, Shepard may either let Mordin go or stop him to sabotage the cure per the Dalatrass' request. There are multiple outcomes to this conversation: |
+ | At this point, Shepard may either let Mordin go or stop him to sabotage the cure per the Dalatrass's request. There are multiple outcomes to this conversation: |
| ⚫ | * If Shepard warned of the Dalatrass's deal in the convoy, Mordin deploys the counter-sabotage and deploys the cure, sacrificing his life in the process. This is the only outcome in this situation. You may use a Paragon interrupt just before Mordin steps into the elevator to get some morality points, but it won't change Mordin's fate. |
||
| − | |||
| − | * If Shepard did not reveal the sabotage while in the convoy to the Shroud, Mordin will realize something is wrong. Either Shepard tells Mordin about the Dalatrass' deal or Mordin will correctly surmise it. |
+ | * If Shepard did not reveal the sabotage while in the convoy to the Shroud, Mordin will realize something is wrong. Either Shepard tells Mordin about the Dalatrass's deal, or Mordin will correctly surmise it. If Shepard tries to sabotage the cure, and Wrex and/or Eve are alive, Mordin will refuse to listen. Shepard is offered a Renegade interrupt to gun him down. If Shepard does not take it, Mordin will deploy the counter-sabotage and successfully cure the Genophage; if not, the sabotage is left intact, and the cure fails. |
| ⚫ | |||
| − | * If Shepard tries to make Mordin abandon the mission while Wrex and/or Eve are alive, Mordin will refuse to listen. Shepard is offered a Renegade interrupt to gun him down. If Shepard does not take it Mordin will cure the Genophage. |
||
* If Shepard has not revealed the sabotage and tries to make Mordin abandon the mission while Wrex and Eve are ''both'' dead, persuade options can be used on Mordin to convince him that it is for the best if the Shroud remain sabotaged and the krogan fooled into believing the genophage cured. This is the only scenario where Mordin lives. Both Mordin and Wiks agree to fake their own deaths, but Mordin becomes a War Asset at the Crucible project, whereas Wiks, according to [[Padok Wiks#Email|an e-mail]] he sends you after the mission, instead seeks out a quiet colony world where he will work as a farmer and take his secret to the grave. |
* If Shepard has not revealed the sabotage and tries to make Mordin abandon the mission while Wrex and Eve are ''both'' dead, persuade options can be used on Mordin to convince him that it is for the best if the Shroud remain sabotaged and the krogan fooled into believing the genophage cured. This is the only scenario where Mordin lives. Both Mordin and Wiks agree to fake their own deaths, but Mordin becomes a War Asset at the Crucible project, whereas Wiks, according to [[Padok Wiks#Email|an e-mail]] he sends you after the mission, instead seeks out a quiet colony world where he will work as a farmer and take his secret to the grave. |
||
| Line 115: | Line 128: | ||
== Aftermath == |
== Aftermath == |
||
This mission results in the following outcomes: |
This mission results in the following outcomes: |
||
| − | * As previously mentioned, [[Priority: The Citadel II]] begins immediately upon your next visit to the Citadel, though in the |
+ | * As previously mentioned, [[Priority: The Citadel II]] begins immediately upon your next visit to the Citadel, though in the meantime, you can still access Citadel shops from the shuttle bay procurement interface. |
* The turians provide the [[War Assets/Turian|43rd Marine Division, Seventh Fleet, and Engineering Corps]]. [[Primarch Victus]] can no longer be found on the Normandy. |
* The turians provide the [[War Assets/Turian|43rd Marine Division, Seventh Fleet, and Engineering Corps]]. [[Primarch Victus]] can no longer be found on the Normandy. |
||
| − | * Whether or not you actually cured the genophage, the krogan provide the [[War Assets/Krogan|the Urdnot Leader, Krogan Clans, and Clan Urdnot]]. You will also earn Krogan Mercenaries if Wrex is leader. However, they may be diminished in strength if Eve died or Wreav is leader. Furthermore, if you did ''not'' cure the genophage, Wrex will eventually find out |
+ | * Whether or not you actually cured the genophage, the krogan provide the [[War Assets/Krogan|the Urdnot Leader, Krogan Clans, and Clan Urdnot]]. You will also earn Krogan Mercenaries if Wrex is leader. However, they may be diminished in strength if Eve died or Wreav is leader. Furthermore, if you did ''not'' cure the genophage, Wrex will eventually find out and confront you during [[Priority: The Citadel III]], leading to his death and a diminishing of the krogan's military strength. If Wreav is the Urdnot leader, he never discovers the deception. Urdnot [[Wrex]]/[[Wreav]] will no longer be found on the Normandy. |
* If you cured the genophage, you will receive no salarian assets at this time, leaving the [[STG]] force you gained from Sur'Kesh as their race's only representatives at this time. Sabotaging the cure grants you their [[War Assets/Salarian|First Fleet]] and Mordin Solus (if he was spared). |
* If you cured the genophage, you will receive no salarian assets at this time, leaving the [[STG]] force you gained from Sur'Kesh as their race's only representatives at this time. Sabotaging the cure grants you their [[War Assets/Salarian|First Fleet]] and Mordin Solus (if he was spared). |
||
| − | * If Shepard stops by, [[Diana Allers]] |
+ | * If Shepard stops by, [[Diana Allers]] performs an interview which depending on the mission's outcome and morality choices can result in War Asset improvements e.g. to the [[War Assets/Krogan#Krogan Clans|Krogan Clans]] asset. |
<!-- Please note policy has changed - talkpage before removing the two bullet points below --> |
<!-- Please note policy has changed - talkpage before removing the two bullet points below --> |
||
| − | * [[Garrus]] will be found on Normandy's bridge following the mission, having a joke-telling contest with [[Joker]]. Talking to him will produce reflections on Mordin, the krogan situation, and the salarian plot. |
+ | * [[Garrus]] will be found on Normandy's bridge following the mission, having a joke-telling contest with [[Joker]]. Talking to him will produce reflections on Mordin, the krogan situation, and the salarian plot. |
* [[EDI]] will be found down in the AI core following the mission. |
* [[EDI]] will be found down in the AI core following the mission. |
||
| Line 127: | Line 140: | ||
== Emails == |
== Emails == |
||
| − | After this mission, regardless of whether the genophage was actually cured or not, Shepard receives an email from the Urdnot leader. |
+ | After this mission, regardless of whether the genophage was actually cured or not, Shepard receives an email from the Urdnot leader. |
Shepard receives this message if Wreav is the Urdnot leader and Eve is dead: |
Shepard receives this message if Wreav is the Urdnot leader and Eve is dead: |
||
| − | {{emailquote|'''The krogan will rise again''' |
+ | {{emailquote|'''The krogan will rise again''' |
---- |
---- |
||
| Line 148: | Line 161: | ||
Shepard receives this message if Wreav is the Urdnot leader and Eve is alive: |
Shepard receives this message if Wreav is the Urdnot leader and Eve is alive: |
||
| − | {{emailquote|'''The krogan will rise again''' |
+ | {{emailquote|'''The krogan will rise again''' |
---- |
---- |
||
From: Urdnot Wreav |
From: Urdnot Wreav |
||
| − | shepard. don't usually type. I yell. so consider this message a rare honor. you proved yourself a worthy ally of the krogan. maybe a worthy enemy when this war is over. after we destroy the reapers, our empire will rival the asari or turians. we have you to thank for that. retribution will be |
+ | shepard. don't usually type. I yell. so consider this message a rare honor. you proved yourself a worthy ally of the krogan. maybe a worthy enemy when this war is over. after we destroy the reapers, our empire will rival the asari or turians. we have you to thank for that. retribution will be |
nevermind. eve is calling. she doesn't like this talk. says she won't allow it. we'll see. at least shes good for something. shes in the valley getting the clans to support us. i say the more krogan who accept urdnot law, the better. |
nevermind. eve is calling. she doesn't like this talk. says she won't allow it. we'll see. at least shes good for something. shes in the valley getting the clans to support us. i say the more krogan who accept urdnot law, the better. |
||
| Line 182: | Line 195: | ||
Shepard receives this message if Wrex is the Urdnot leader and Eve is dead: |
Shepard receives this message if Wrex is the Urdnot leader and Eve is dead: |
||
| − | {{emailquote|'''Making babies''' |
+ | {{emailquote|'''Making babies''' |
---- |
---- |
||
| Line 189: | Line 202: | ||
Shepard: |
Shepard: |
||
| − | Making babies again will be fun. Soon as this war is over, let's just say I'll do my part to build our numbers back up. You really came through for us. |
+ | Making babies again will be fun. Soon as this war is over, let's just say I'll do my part to build our numbers back up. You really came through for us. |
My plans for the krogan go forward once we take care of the Reapers. Having Eve around would have helped. She would have been a great leader some day, could have united the clans. That's a shame. |
My plans for the krogan go forward once we take care of the Reapers. Having Eve around would have helped. She would have been a great leader some day, could have united the clans. That's a shame. |
||
| Line 200: | Line 213: | ||
== Trivia == |
== Trivia == |
||
| − | *According to level designer [https://twitter.com/DaveFeltham/status/398486418982330368 Dave Feltham], the mission was originally not going to involve the turians, but that was changed because "the level felt too bleak and |
+ | *According to level designer [https://twitter.com/DaveFeltham/status/398486418982330368 Dave Feltham], the mission was originally not going to involve the turians, but that was changed because "the level felt too bleak and [people] needed hope." |
{{SeriesNavigation|previous=Priority: Sur'Kesh|next=Priority: The Citadel II|index=Missions#Plot Missions 2|type=Mission|series=[[Mass Effect 3]]}} |
{{SeriesNavigation|previous=Priority: Sur'Kesh|next=Priority: The Citadel II|index=Missions#Plot Missions 2|type=Mission|series=[[Mass Effect 3]]}} |
||
| − | <!-- |
+ | <!--interwiki links--> |
| + | [[de:Priorität: Tuchanka]] |
||
[[fr:Priorité : Tuchanka]] |
[[fr:Priorité : Tuchanka]] |
||
| + | [[pl:Priorytet: Tuchanka]] |
||
[[ru:Приоритет: Тучанка]] |
[[ru:Приоритет: Тучанка]] |
||
| + | [[uk:Пріоритет: Тучанка]] |
||
[[Category:Mass Effect 3]] |
[[Category:Mass Effect 3]] |
||
[[Category:Missions]] |
[[Category:Missions]] |
||
Revision as of 05:28, 21 January 2021
Eve is indeed the key to curing the genophage, but creating a cure will take time. Continue to assist turian and krogan allies while the cure is synthesized.
Acquisition
This mission is automatically acquired after Eve's retrieval from Sur'Kesh. However, actually finishing this mission requires completing either mission given by the turian and krogan leaders aboard the Normandy. The journal text updates to the following entry upon fulfillment of the condition:
“The genophage cure is a success, but it must be synthesized and dispersed across all of Tuchanka using the Shroud tower. Land on Tuchanka and get Eve safely to the tower.”
The NavPoint for this mission is now available on Tuchanka. Upon landing on the planet, the final journal update is shown:
“The plan to disperse the genophage cure has been complicated by the arrival of Reaper forces, who have occupied the area near the shroud tower. Get Eve safely to the tower.”
Preparation
You will be facing Reaper ground forces in this mission. A significant number of them will have armor. There will be a few shielded enemies, but only in one encounter, so factor that into your deployment plan.
In contemplating the final section, you may wish to retrain your bonus ability to Defense Matrix if you have it available; its "purge" ability to instantly raise your shield may be helpful in withstanding very damaging attacks.
Note: After completing this mission, Priority: The Citadel II begins immediately upon your next return to the Citadel, rendering some side missions no longer possible to complete. As such, be sure to do the following side missions and interactions before attempting this mission:
- Benning: Evidence
- Citadel: Alien Medi-Gel Formula
- Citadel: Barla Von
- Citadel: Biotic Amp Interfaces (obtained during Grissom Academy: Emergency Evacuation, therefore this mission must also be completed before Priority: Tuchanka)
- Citadel: Hanar Diplomat
- Citadel: Improved Power Grid
- Ismar Frontier: Prototype Components
- Any interactions with Kelly Chambers (only available if Shepard had dinner with her and she survived the Collector Base assault in Mass Effect 2). Also, if you visit and tell her to change her identity, she will remain available after the end of Priority: The Citadel II.
- Any interactions with Thane Krios in the Patient Lounge at Huerta Memorial Hospital (only available if he survived the Collector Base assault in Mass Effect 2).
- Choosing either Dr. Chloe Michel or Dr. Karin Chakwas (only available if she survived the events of Mass Effect 2) to be the Normandy physician at Huerta Memorial Hospital.
- Conversing with James Vega in the Purgatory Bar.
- Conversing with Matriarch Aethyta in the Apollo's Cafe.
- Conversing with Joker and EDI in the Meridian Place Market on the Presidium.
- Conversing with Garrus in the Refugee Camp (if he survived the Collector Base assault in Mass Effect 2).
- Authorizing the Partner Benefits Increase and Civilian Deportation Order entries at the Spectre Terminal in the Citadel Embassies.
Additionally, all Leviathan missions taking place in Dr. Bryson's Lab will be postponed. Attempting to go to the lab on the Citadel docking menu will instead launch Priority: The Citadel II.
However, Tuchanka: Turian Platoon, Tuchanka: Bomb, and N7: Cerberus Attack remain available after completing this mission.
Walkthrough
Prologue
To complete the treaty between the krogan and the turians, the Clan Urdnot leader (Wrex / Wreav) insists that the genophage must be cured. Mordin Solus / Padok Wiks needs time to stabilize Eve and prepare the cure — at minimum, either Tuchanka: Turian Platoon OR Attican Traverse: Krogan Team must be finished before Eve is declared ready for transport to Tuchanka. This is a good time to finish the time-sensitive missions mentioned above.
The genophage cure is to be dispersed from the top of the Shroud, a tower constructed by the salarians to stabilize the atmosphere of Tuchanka, and later covertly used by the turians to disperse the original genophage virus. The salarian STG member that prepared the cure will travel to the Shroud with Eve and ensure that this takes place.
Travel to the planet Tuchanka in the Krogan DMZ and select the proper NavPoint. In the cutscene, you discover that the Reapers are using the Shroud to poison Tuchanka's atmosphere. It is impossible to land the shuttle at the Shroud site due to the presence of a Reaper Destroyer there.
It is decided that the krogan will attack the Reaper from the ground while turian fighters fly air support. The salarian Dalatrass then privately contacts Shepard and reveals that the Shroud was sabotaged to prevent dispersal of a cure. She suggests tricking the krogan into thinking that the cure has been deployed, and offers salarian support for the war effort if Shepard does so.
Defend Eve
Shepard will then take a shuttle down to the surface. The Urdnot leader sent word for the krogan clans to assemble at the Hollows, a sacred krogan meeting ground. During the conversation, you can reveal the Dalatrass's offer to sabotage the cure or just remain silent. If you choose to reveal, you will be interrupted by a message that the Hollows are under Reaper attack.
When you reach the Hollows, you need to fight off waves of Husks swarming the area. It's an arena-type pit with wide berth to run around in circles even with husks appearing from all directions, so putting them down should be easy enough. You will gain 300 experience points after successfully holding off the Husks. In the ensuing scenes, if Wrex is alive, tensions mount between him and his brother Wreav, who is one of his most disloyal supporters; if Wreav leads, Jorgal Thurak takes his place. Eve intervenes during the rising conflict and makes a rallying call for the krogan to unite against the Reapers.
The Convoy
The krogan head out in a convoy towards the Shroud. While travelling, you're given the option again to reveal the Dalatrass's deal or keep quiet about it. Soon after, the convoy comes to an immediate halt, and the team dismounts to find out why.
Running around is recommended, as the area is a treasure trove of loot. You can pick up a Shotgun Smart Choke upgrade, a Pistol Magazine Upgrade, a Pistol Melee Stunner, a Death Mask helmet, the Graal Spike Thrower shotgun, and 2 Med-kits around. A couple of krogan interactions are optional: you can speak to one fixing and complaining about a tomkah's combustion manifold, and there's another who was the owner of the Graal you took and wants whatever you kill with it as his "trophies". To kick off the next part of the plot, however, speak to the Krogan Scout, who tells you that the road is damaged and the convoy can't proceed further.
However, the turian air support has already begun their attack, and are too close to call it off. A fighter is shot down by the Reaper and hits a truck. Shepard radios the Urdnot leader to get out of the area. However, you and the squad are left behind and have to find an alternative route. At this point, you gain another 150 experience.
The only path left is through the ruins. Jump over a gap and head into the tunnel.
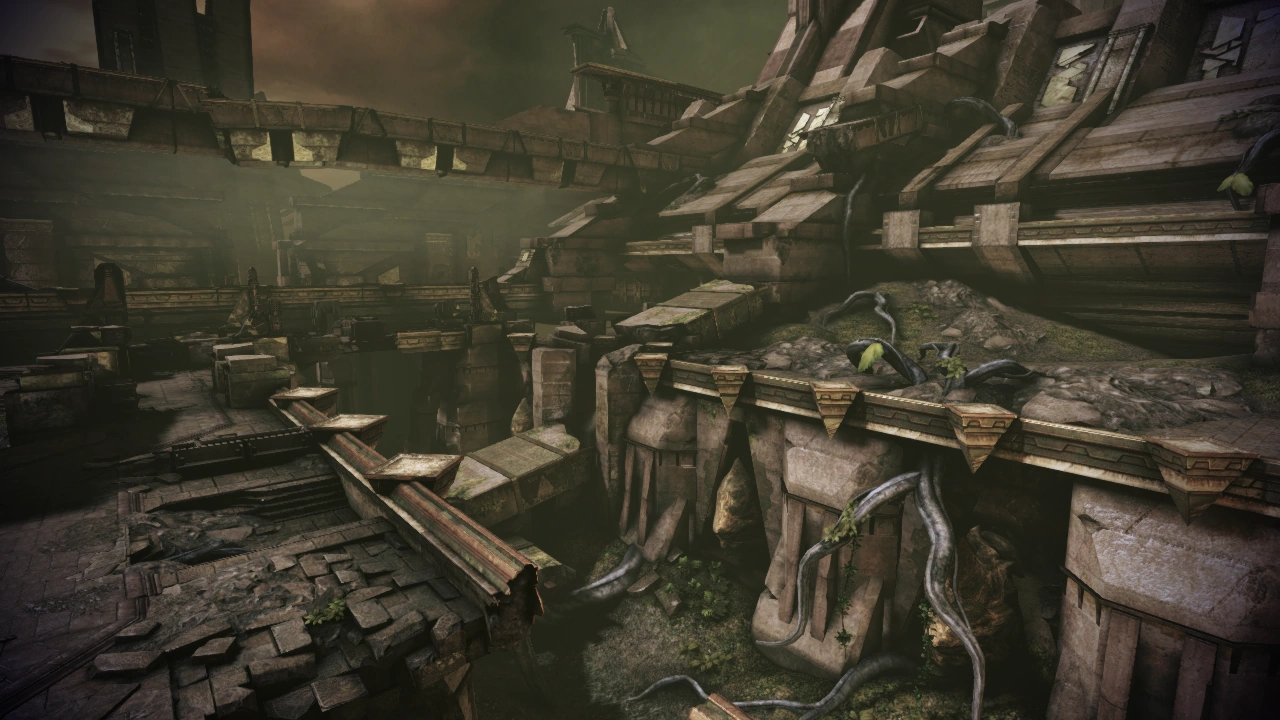
Escape the Catacombs
You're now in an ancient krogan city which has been abandoned for millennia. There are no enemy encounters here. Go down the stairs into the first room, and either jump through the gap off the ledge on your left, or go down the next set of stairs to your right. In the second room, there is a door to your right and to your left. Go through the door on the left, and on the right-hand wall of that room is an Ancient Krogan Artifact, a painting that can be salvaged for 8,500 credits.
Return to the door on the right, go down the stairs. Right before another jump down, Shepard and the team experience strong tremors. The Urdnot leader radios that they're not experiencing similar readings on the surface. Eve suggests that it could be something else, warning that Kalros, the mother of all thresher maws, is said to live in the region.
Your squadmates will make various comments upon investigating the artifacts and paintings in this area. These comments may interrupt your radio conversations with the Urdnot leader and Eve, but Shepard will apologize and request that they repeat themselves so the radio conversations aren't missed.
Jump down the ledge at the end of the path and turn to the left. In the far end of this area, you can salvage another Ancient Krogan Artifact on the wall for 8,250 credits – a striking depiction of a thresher maw. After retrieving it, go to the other side of the room and turn left into a tunnel, where you'll find the final Ancient Krogan Artifact, another painting, worth 8,250 credits on the right. Further along the path, you will examine an insect-like corpse – depending on whether you've gone to Utukku first or not, you may or may not immediately realize the importance of the find.
With the realization in mind, head up the stairs into the light. You will gain another 300 experience after exiting the catacombs. Take the time to enjoy the surroundings, a lot of brown mixed with a surprising amount of green, and you and your team will discuss amongst yourselves the lamentable destruction of old krogan civilization.
As you move forward, you will face a wave of Cannibals and Ravagers. Then when you move forward again, a second set will drop from the sky. The ruins provide lots of cover, but this can work both ways, so take care to park your squadmates behind cover to prevent their AI from stupidly charging forward and getting themselves killed. Ravagers here provide most of the heavy suppression fire; one tactic is for you to flank the enemy using the tunnel to the left while keeping your squadmates within the enemy's sight but safely covered.
Once the area is clear, move ahead and turn right to jump over the gap. A wave of Cannibals will appear followed by some more coming around the corner, and finally a Brute or two accompanied by some Husks. The second wave is triggered by leaping over the gap. None of the enemies can follow you if you retreat back over the gap after triggering the wave, allowing you to kill them without risking direct combat. A less cheesy way of killing them would be to hunker down on the two conveniently placed debris-for-cover and power- and/or weapon-spamming. After the battle, if you delay overlong the Urdnot leader and the scientist salarian will comically harangue you over comms.
After the second wave, go forward, around the U-turn, and up the ledges on the left. At the same time, the krogan will be talking over the radio about a plan to hunt Kalros, but Eve will say that the Commander has enough to worry about.
This is your cue to get into cover, as a third wave of Cannibals, Husks, and Ravagers will attack. You have an elevated and covered platform from which to dispense fire and steel, just be wary of Husks spawning from the left and running up your stairs. Alternately, a circular rock big enough for all of your team for crouching cover is also available.
Once they are dead, head for the right side of the open area and toward the krogan statues.
Upon reaching the second bridge, Kalros appears and chases the convoy, damaging the bridge in the process. Jump over the gap and go to a memorial area further up. Loitering in the promontory overlooking desolate wastelands after the gap before proceeding to the statues will elicit some remarks from your squad. As you approach the small bridge, a wave of Cannibals and Husks will attack. Remember that sending them off the edge of the platforms will result in instant deaths.
After some more dialogue with the convoy, more Husks will attack along with some Marauders. Once they are dead, you will find an SMG Scope upgrade on the left side of this area. Head down and back up the two short sets of stairs where the Marauders came from and find an Assault Rifle Extended Barrel upgrade on the left.
Turn right and drop down off the edge of a series of ledges toward the dunes to trigger a cutscene. Shepard and team board the Urdnot leader's ride, but the second truck carrying Wreav/Thurak is pulled into the ground by Kalros.
The Maw Hammers
Eve suggests using the ancient Maw Hammers to summon Kalros to the area and distract the Reaper away from the Shroud. Shepard agrees and heads out to activate the maw hammers, while your salarian scientist heads out in another direction to finalize a cure to the Genophage. The Urdnot leader stays behind to take care of the incoming rachni horde.
Clear out the two sets of Cannibals immediately following the cutscene. While you're busy, the Urdnot leader radios in to say he's taken care of things on his end, but since you're busy, he volunteers to raise the Hammers while you still must push onward to activate them yourself. When you're done go up the flight of stairs. At the top of the stairs, pick up the M-5 Phalanx Heavy Pistol.
When you attempt to cross the bridge nearby, the Reaper blasts the bridge and Shepard falls down below. As its most immediate threat, the Reaper targets you and begins firing its laser. Take cover frequently, and move up between the shots. Alternatively, because the blasts will be aimed at the structures covering you, it is easy to just sprint into the next area. Once you reach the cover spot in the middle, the turian fighters will thankfully appear again to draw the Reaper's fire.
To reach the Maw Hammer controls, Shepard must fight through a gauntlet of Brutes, while avoiding getting crushed by the Reaper. The Brutes spawn continuously until both Maw Hammers have been activated. It's possible to simply dash through the battlefield, activating the Maw Hammers using Shepard's superior speed, and this is certainly the favored approach for infiltrators who can cloak to evade Brute aggro.
The Reaper's legs are the biggest threat: one hit will drop your shields at the very least; if the Reaper lands a second hit before your shields regenerate, it's an instant kill. Thankfully, many of the leg stabs are focused on the two catwalks leading to the maw hammers. As such, the safest approach is to run across the arena and then walk down the catwalks.
Tips:
- You can see where the Reaper is going to hit roughly two seconds before it happens, by looking for the giant shadow cast by its leg. That's enough time to dash to the side and avoid being crushed.
- If you have Defense Matrix as your bonus ability and keep it active, it will make this section much easier: any time a leg (or a Brute) hits you and knocks your shield down, purge Defense Matrix immediately and your shield will be instantly restored. This will enable you to survive a second leg strike, thus making dashing through the battlefield to the Maw Hammers a far safer prospect. Obviously, put Defense Matrix back up as soon as it recharges.
When both hammers have been activated, their combined worth successfully attracts Kalros. In stunning fashion, Kalros bests the Reaper, dragging it beneath the surface of Tuchanka's wasteland.
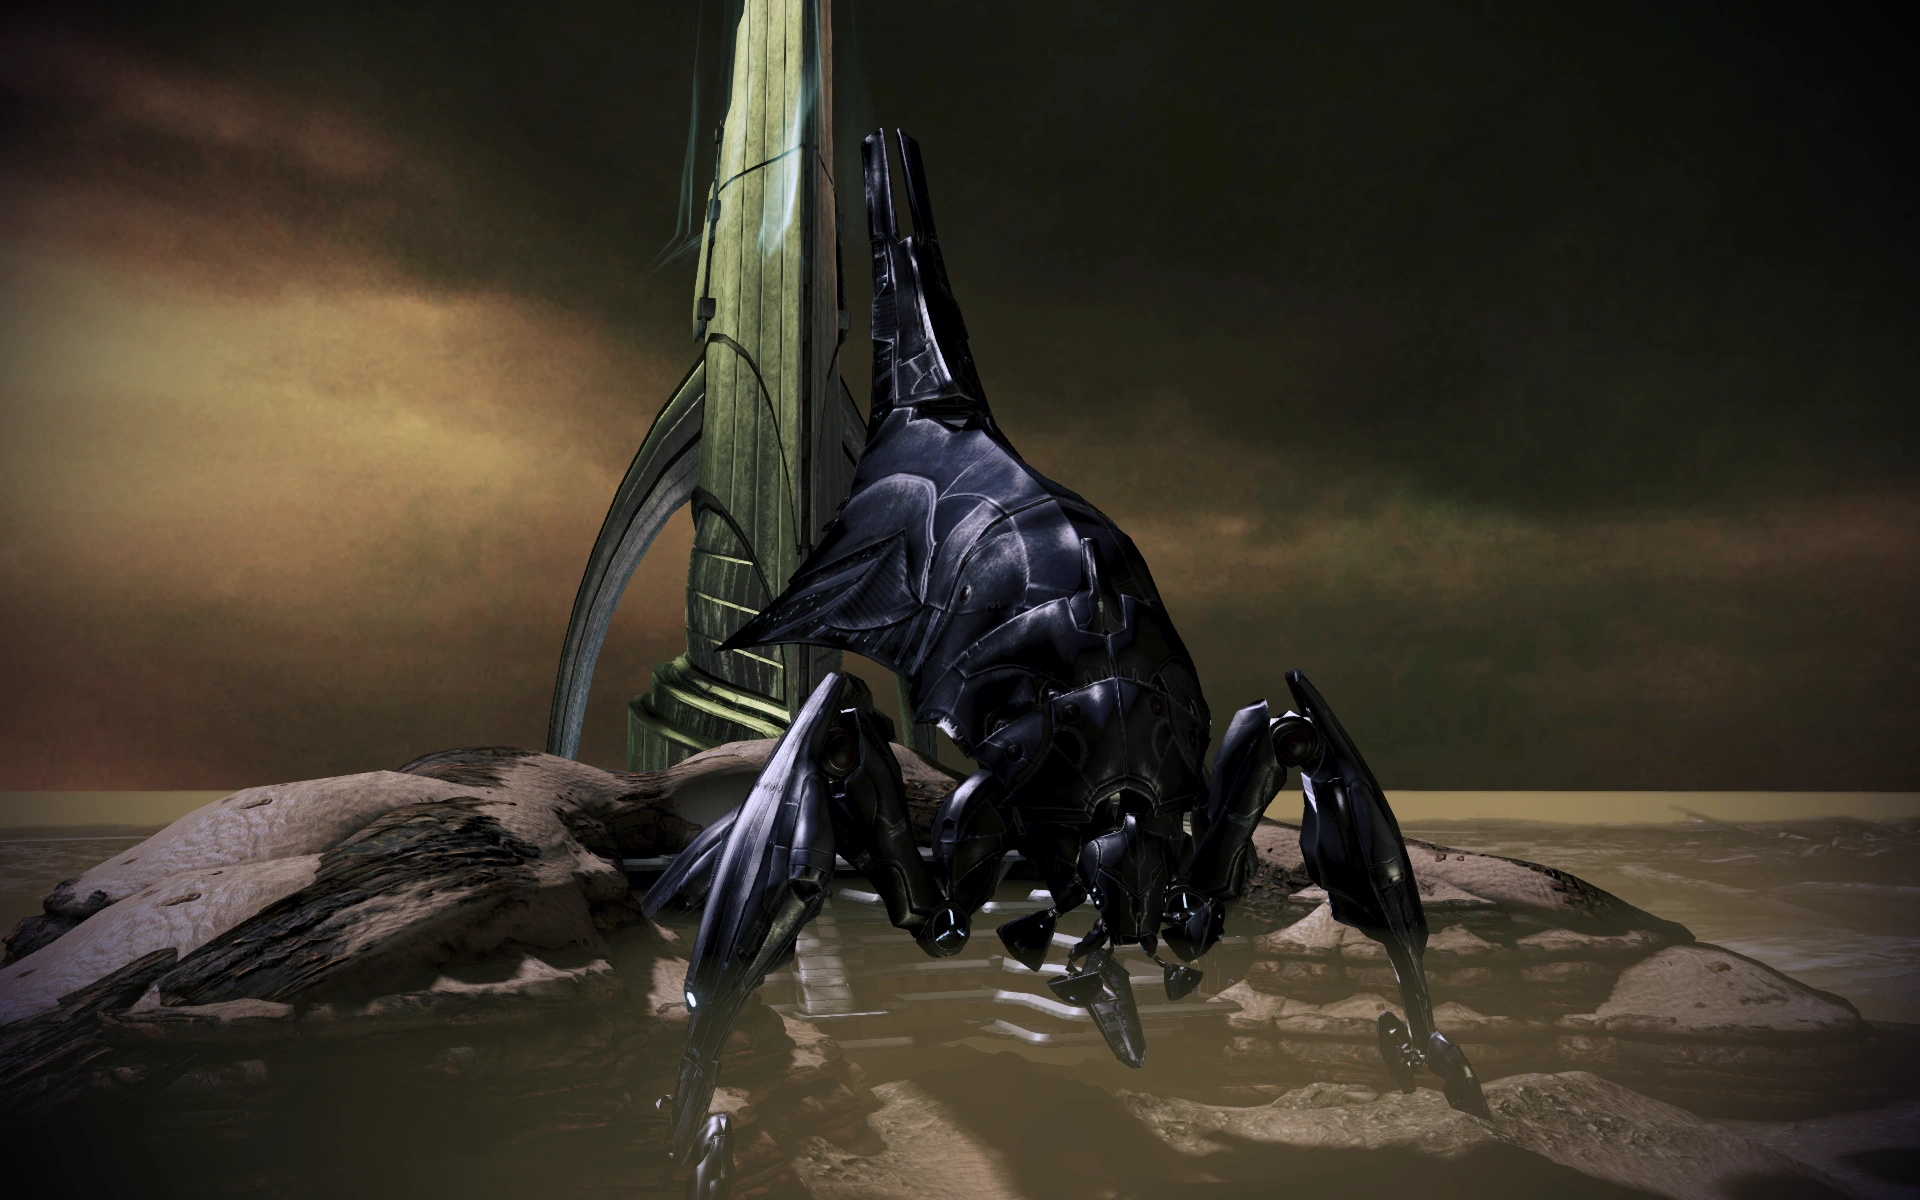
The Shroud
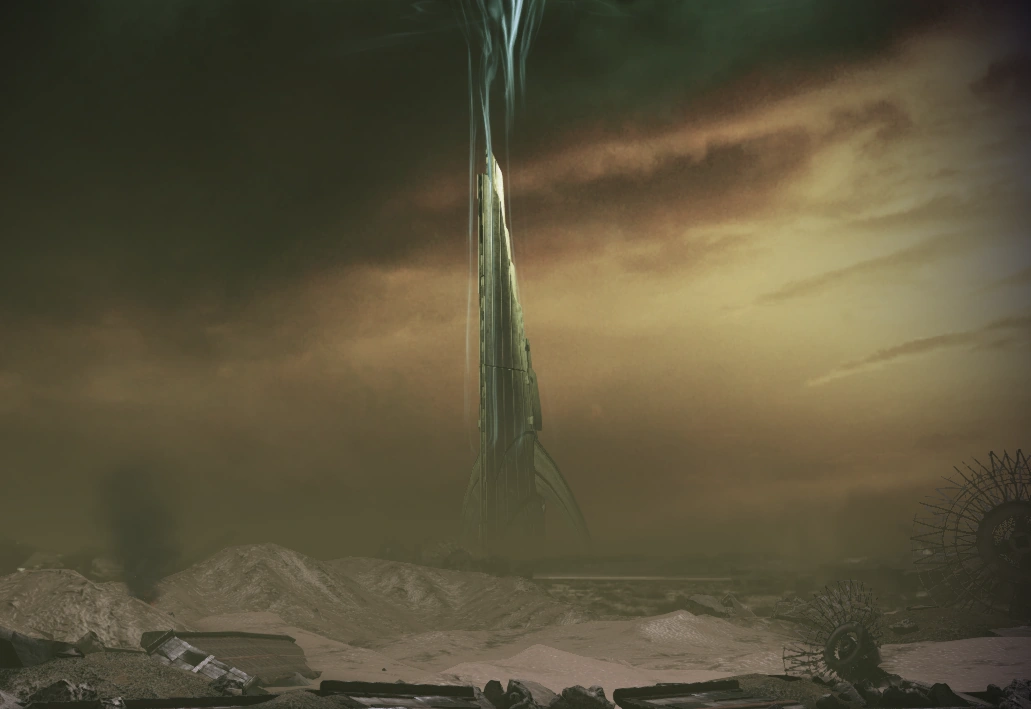
With all opposition from the Reapers destroyed, Shepard and the salarian doctor approach the Shroud, their associates having been told to retreat to safety. However, the Shroud sustained damage in the fight against the Reaper – it is falling to pieces as Shepard approaches. Within, Eve's STG caretaker – Mordin Solus or Padok Wiks – is attempting to stabilize the structure. He will also report on Eve's status; in the absence of Maelon's data, she will have died whilst Shepard handled the Reaper.
All outcomes are available regardless of whether Mordin or Wiks is present, so for convenience we will refer to the character as "Mordin".
At this point, Shepard may either let Mordin go or stop him to sabotage the cure per the Dalatrass's request. There are multiple outcomes to this conversation:
- If Shepard warned of the Dalatrass's deal in the convoy, Mordin deploys the counter-sabotage and deploys the cure, sacrificing his life in the process. This is the only outcome in this situation. You may use a Paragon interrupt just before Mordin steps into the elevator to get some morality points, but it won't change Mordin's fate.
- If Shepard did not reveal the sabotage while in the convoy to the Shroud, Mordin will realize something is wrong. Either Shepard tells Mordin about the Dalatrass's deal, or Mordin will correctly surmise it. If Shepard tries to sabotage the cure, and Wrex and/or Eve are alive, Mordin will refuse to listen. Shepard is offered a Renegade interrupt to gun him down. If Shepard does not take it, Mordin will deploy the counter-sabotage and successfully cure the Genophage; if not, the sabotage is left intact, and the cure fails.
- If Shepard has not revealed the sabotage and tries to make Mordin abandon the mission while Wrex and Eve are both dead, persuade options can be used on Mordin to convince him that it is for the best if the Shroud remain sabotaged and the krogan fooled into believing the genophage cured. This is the only scenario where Mordin lives. Both Mordin and Wiks agree to fake their own deaths, but Mordin becomes a War Asset at the Crucible project, whereas Wiks, according to an e-mail he sends you after the mission, instead seeks out a quiet colony world where he will work as a farmer and take his secret to the grave.
Enemies
Aftermath
This mission results in the following outcomes:
- As previously mentioned, Priority: The Citadel II begins immediately upon your next visit to the Citadel, though in the meantime, you can still access Citadel shops from the shuttle bay procurement interface.
- The turians provide the 43rd Marine Division, Seventh Fleet, and Engineering Corps. Primarch Victus can no longer be found on the Normandy.
- Whether or not you actually cured the genophage, the krogan provide the the Urdnot Leader, Krogan Clans, and Clan Urdnot. You will also earn Krogan Mercenaries if Wrex is leader. However, they may be diminished in strength if Eve died or Wreav is leader. Furthermore, if you did not cure the genophage, Wrex will eventually find out and confront you during Priority: The Citadel III, leading to his death and a diminishing of the krogan's military strength. If Wreav is the Urdnot leader, he never discovers the deception. Urdnot Wrex/Wreav will no longer be found on the Normandy.
- If you cured the genophage, you will receive no salarian assets at this time, leaving the STG force you gained from Sur'Kesh as their race's only representatives at this time. Sabotaging the cure grants you their First Fleet and Mordin Solus (if he was spared).
- If Shepard stops by, Diana Allers performs an interview which depending on the mission's outcome and morality choices can result in War Asset improvements e.g. to the Krogan Clans asset.
- Garrus will be found on Normandy's bridge following the mission, having a joke-telling contest with Joker. Talking to him will produce reflections on Mordin, the krogan situation, and the salarian plot.
- EDI will be found down in the AI core following the mission.
Given that the Salarian First Fleet's military strength is 150 points while the total combined military strength of Clan Urdnot and Wrex is 330 points, with another 75 from Krogan Mercenaries, a Renegade-minded player should be aware that not curing the genophage with Wrex as leader will actually weaken your force, whereas Wreav as leader will provide a total of 475 between the two races.
Emails
After this mission, regardless of whether the genophage was actually cured or not, Shepard receives an email from the Urdnot leader.
Shepard receives this message if Wreav is the Urdnot leader and Eve is dead:
Shepard receives this message if Wreav is the Urdnot leader and Eve is alive:
Shepard receives this message if Wrex is the Urdnot leader and Eve is alive:
Shepard receives this message if Wrex is the Urdnot leader and Eve is dead:
Bugs
- Several players have reported being unable to save Eve despite claiming to have saved Maelon's data in Mass Effect 2. The only known recourse besides playing the previous game again is through third-party save editors.
Trivia
- According to level designer Dave Feltham, the mission was originally not going to involve the turians, but that was changed because "the level felt too bleak and [people] needed hope."
| ← Previous Mission | Mission Index | Next Mission → |
|---|---|---|
| Priority: Sur'Kesh | Missions | Priority: The Citadel II |